Jump into Yuri Decastelli’s art as he molds a real-life piano through intricate steps.
INTRODUCTION
Hi! My name is Yuri Decastelli, and I’m an Italian graphic designer and 3D artist.
I first encountered Blender at 18, more out of pure curiosity than necessity. I opened the program, got lost in its interface, and ended up closing it after just five minutes, convinced I would never open it again. And yet…
During my final years at university, I had the chance to learn and use Blender, initially as a supplement to my graphic design work and eventually as the backbone of every project.
So, after graduating, and for the past six years now, I’ve been using Blender almost daily, creating renders, videos, and short films, always looking for something in each project to experiment with and learn from.
INSPIRATION
A few months ago, I opened an Instagram account (yuridecastelli_3d) to promote my new freelance business. I decided to follow a regular posting schedule to help the account grow. To make the most of this opportunity, I tried my hand at quick hard-surface modeling, allowing me to practice while keeping the time investment to a minimum.
While browsing for inspiration online and exploring the vast resources the web offers, I became convinced that there’s no subject as elegant, refined, and pleasing as a musical instrument. Be it a piano, guitar, or violin, each instrument undeniably has a complex, vibrant charm.
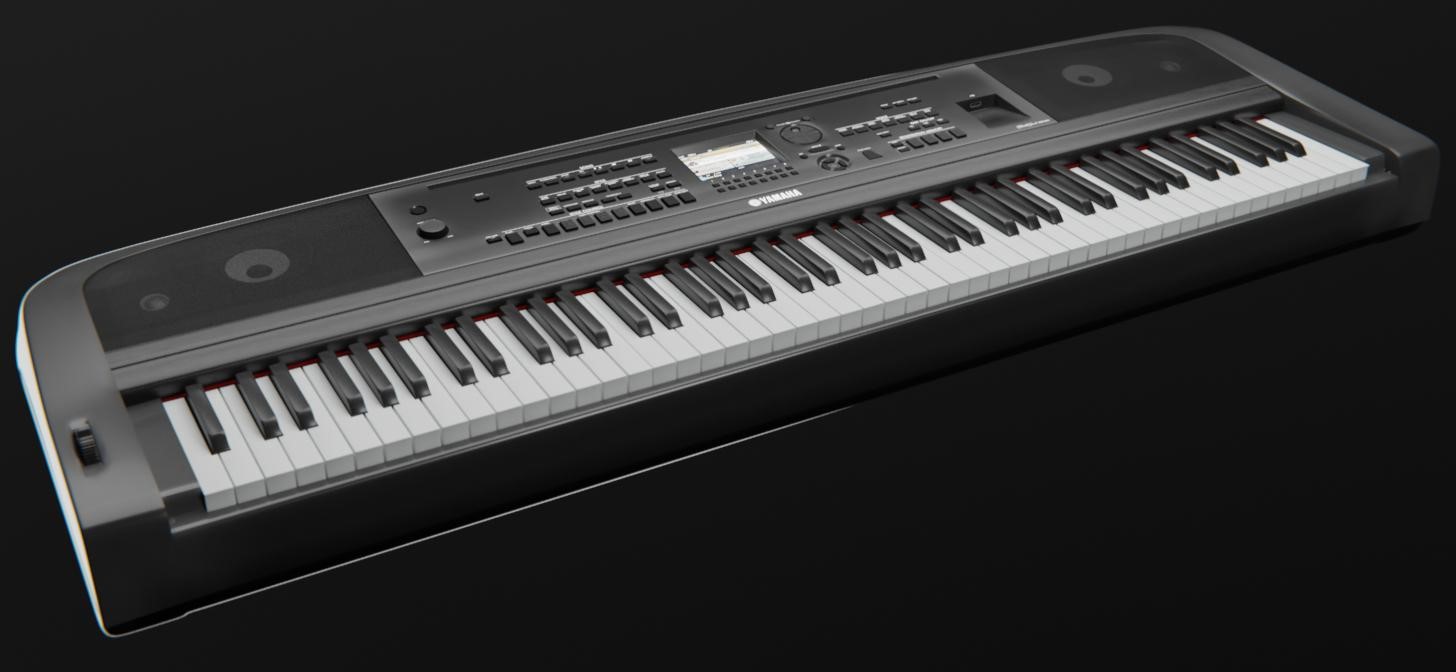
So, I decided to visit a well-known music warehouse near my home and take a stroll through its aisles. There, beyond the warm, rich, and majestic sound of a real piano, I was struck by the unique shape of this Yamaha keyboard. After trying it out (and thoroughly enjoying it) for a few minutes, I decided to snap a few photos to pair with some online references before diving headfirst into modeling it in Blender.
I returned to the music warehouse only a few days later. Now, I have my own DGX670 in my room.
PROCESS
The goal of this exercise was to achieve a photorealistic result in the shortest possible time (under 4 hours) and to maintain a clean wireframe by using only quads, avoiding triangles and ngons.
Modeling
To start, I began the exercise by creating the keyboard. Since I didn’t have full access to it at this stage, I used the actual length of the white keys—about 15 cm—as a reference for the overall scale. I created a single octave, from C to B (including the black keys), and then replicated it seven times. From there, I proceeded to create the control panel, speakers, and the rest of the casing.
Overall, the modeling wasn’t particularly challenging, except for two specific areas: the protective “grille” of the speakers and the inclined, curved back surface of the keyboard.
The speaker’s protective grille was created starting from a base mesh, to which I then applied the following series of modifiers:
The result, however, wasn’t the best it could have been. In my haste, I mistakenly modeled the base mesh, which also made the project heavier, especially during rendering. Applying a texture like this one probably would have been enough to improve and optimize rendering times and the final result:
Materials
For this project, I used very simple materials without getting too caught up in the details. The most complex node I created was for the satin black plastic, the material used for most of the keyboard’s surface.
For the roughness, I used a texture similar to brushed steel.
Texturing
At this point, I realized I had used most of the scheduled time for modeling. So, to speed up and complete the work quickly, I mostly used procedural textures (except for the faux wood, for which I used a texture downloaded from Poly Haven).
As for the text, logos, and labels, I chose to skip UV mapping and use this small trick:
Each text and logo was created by applying a “label,” placed on the surface using the “Shrinkwrap” modifier, and disabling the “shadow” option in Ray Visibility.
Perhaps not the most “conventional” or correct method, but it allowed me to save a lot of time while still achieving a satisfactory result:
Scene, Lighting & Animation
For the scene, I decided not to use an HDRI but instead to stick with a three-point lighting setup that rotated around the subject with a barely visible black background.
The animation of the light sources would follow the movement of the various cameras capturing the scene and the details of the keyboard, aiming to convey a sense of luxury and elegance.
In addition to this “non-environment,” I created some extra rough scenes that would showcase the three types of environments the keyboard offers in “Piano Room” mode:
- Stage
- Hall
- Cathedral
Finally, I created a short demonstration video of the model that highlights all the features of the DGX670. The video can be viewed on my Instagram account:
RENDER: Yamaha DGX670, What an instrument!
Thank you for reading! If you have any questions or feedback, please don’t hesitate to share your thoughts.
About the Artist
Yuri Decastelli is an Italian graphic designer and 3D artist, currently working as a 3D generalist at SicoService s.r.l. In March 2024, he started a parallel freelance business as a 3D artist.


