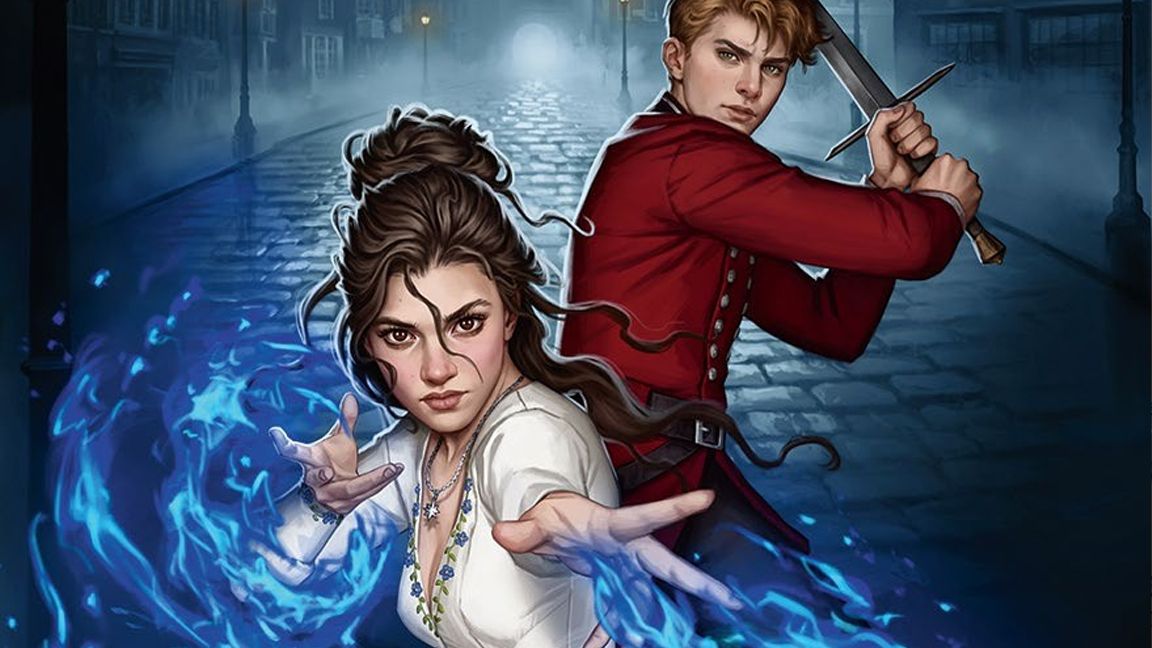
• Stolen iPhones disabled by Apple's anti-theft tech after Los Angeles looting

    What just happened? As protests against federal immigration enforcement swept through downtown Los Angeles last week, a wave of looting left several major retailers, including Apple, T-Mobile, and Adidas, counting the cost of smashed windows and stolen goods. Yet for those who made off with iPhones from Apple's flagship store, the thrill of the heist quickly turned into a lesson in high-tech security.
    Apple's retail locations are equipped with advanced anti-theft technology that renders display devices useless once they leave the premises. The moment a demonstration iPhone is taken beyond the store's Wi-Fi network, it is instantly disabled by proximity software and a remote "kill switch."
    Instead of a functioning smartphone, thieves were met with a stark message on the screen: "Please return to Apple Tower Theatre. This device has been disabled and is being tracked. Local authorities will be alerted." The phone simultaneously sounds an alarm and flashes the warning, ensuring it cannot be resold or activated elsewhere.
    This system is not new. During the nationwide unrest of 2020, similar scenes played out as looters discovered that Apple's security measures turned their stolen goods into little more than expensive paperweights.
    The technology relies on a combination of location tracking and network monitoring. As soon as a device is separated from the store's secure environment, it is remotely locked, its location is tracked, and law enforcement is notified.
    // Related Stories

    Videos circulating online show stolen iPhones blaring alarms and displaying tracking messages, making them impossible to ignore and virtually worthless on the black market.
    According to the Los Angeles Police Department, at least three individuals were arrested in connection with the Apple Store burglary, including one suspect apprehended at the scene and two others detained for looting.
    The crackdown on looting comes amid a broader shift in California's approach to retail crime. In response to public outcry over rising thefts, state and local officials have moved away from previously lenient policies. The passage of Proposition 36 has empowered prosecutors to file felony charges against repeat offenders, regardless of the value of stolen goods, and to impose harsher penalties for organized group theft.
    Under these new measures, those caught looting face the prospect of significant prison time, a marked departure from the misdemeanor charges that were common under earlier laws.
    District attorneys in Southern California have called for even harsher penalties, particularly for crimes committed during states of emergency. Proposals include making looting a felony offense, increasing prison sentences, and ensuring that suspects are not released without judicial review. The goal, officials say, is to deter opportunistic criminals who exploit moments of crisis, whether during protests or natural disasters.
    #stolen #iphones #disabled #apple039s #antitheft
    Stolen iPhones disabled by Apple's anti-theft tech after Los Angeles looting
    What just happened? As protests against federal immigration enforcement swept through downtown Los Angeles last week, a wave of looting left several major retailers, including Apple, T-Mobile, and Adidas, counting the cost of smashed windows and stolen goods. Yet for those who made off with iPhones from Apple's flagship store, the thrill of the heist quickly turned into a lesson in high-tech security. Apple's retail locations are equipped with advanced anti-theft technology that renders display devices useless once they leave the premises. The moment a demonstration iPhone is taken beyond the store's Wi-Fi network, it is instantly disabled by proximity software and a remote "kill switch." Instead of a functioning smartphone, thieves were met with a stark message on the screen: "Please return to Apple Tower Theatre. This device has been disabled and is being tracked. Local authorities will be alerted." The phone simultaneously sounds an alarm and flashes the warning, ensuring it cannot be resold or activated elsewhere. This system is not new. During the nationwide unrest of 2020, similar scenes played out as looters discovered that Apple's security measures turned their stolen goods into little more than expensive paperweights. The technology relies on a combination of location tracking and network monitoring. As soon as a device is separated from the store's secure environment, it is remotely locked, its location is tracked, and law enforcement is notified. // Related Stories Videos circulating online show stolen iPhones blaring alarms and displaying tracking messages, making them impossible to ignore and virtually worthless on the black market. According to the Los Angeles Police Department, at least three individuals were arrested in connection with the Apple Store burglary, including one suspect apprehended at the scene and two others detained for looting. The crackdown on looting comes amid a broader shift in California's approach to retail crime. In response to public outcry over rising thefts, state and local officials have moved away from previously lenient policies. The passage of Proposition 36 has empowered prosecutors to file felony charges against repeat offenders, regardless of the value of stolen goods, and to impose harsher penalties for organized group theft. Under these new measures, those caught looting face the prospect of significant prison time, a marked departure from the misdemeanor charges that were common under earlier laws. District attorneys in Southern California have called for even harsher penalties, particularly for crimes committed during states of emergency. Proposals include making looting a felony offense, increasing prison sentences, and ensuring that suspects are not released without judicial review. The goal, officials say, is to deter opportunistic criminals who exploit moments of crisis, whether during protests or natural disasters. #stolen #iphones #disabled #apple039s #antitheft
    WWW.TECHSPOT.COM
    Stolen iPhones disabled by Apple's anti-theft tech after Los Angeles looting
    What just happened? As protests against federal immigration enforcement swept through downtown Los Angeles last week, a wave of looting left several major retailers, including Apple, T-Mobile, and Adidas, counting the cost of smashed windows and stolen goods. Yet for those who made off with iPhones from Apple's flagship store, the thrill of the heist quickly turned into a lesson in high-tech security. Apple's retail locations are equipped with advanced anti-theft technology that renders display devices useless once they leave the premises. The moment a demonstration iPhone is taken beyond the store's Wi-Fi network, it is instantly disabled by proximity software and a remote "kill switch." Instead of a functioning smartphone, thieves were met with a stark message on the screen: "Please return to Apple Tower Theatre. This device has been disabled and is being tracked. Local authorities will be alerted." The phone simultaneously sounds an alarm and flashes the warning, ensuring it cannot be resold or activated elsewhere. This system is not new. During the nationwide unrest of 2020, similar scenes played out as looters discovered that Apple's security measures turned their stolen goods into little more than expensive paperweights. The technology relies on a combination of location tracking and network monitoring. As soon as a device is separated from the store's secure environment, it is remotely locked, its location is tracked, and law enforcement is notified. // Related Stories Videos circulating online show stolen iPhones blaring alarms and displaying tracking messages, making them impossible to ignore and virtually worthless on the black market. According to the Los Angeles Police Department, at least three individuals were arrested in connection with the Apple Store burglary, including one suspect apprehended at the scene and two others detained for looting. The crackdown on looting comes amid a broader shift in California's approach to retail crime. In response to public outcry over rising thefts, state and local officials have moved away from previously lenient policies. The passage of Proposition 36 has empowered prosecutors to file felony charges against repeat offenders, regardless of the value of stolen goods, and to impose harsher penalties for organized group theft. Under these new measures, those caught looting face the prospect of significant prison time, a marked departure from the misdemeanor charges that were common under earlier laws. District attorneys in Southern California have called for even harsher penalties, particularly for crimes committed during states of emergency. Proposals include making looting a felony offense, increasing prison sentences, and ensuring that suspects are not released without judicial review. The goal, officials say, is to deter opportunistic criminals who exploit moments of crisis, whether during protests or natural disasters.
    Like
    Love
    Wow
    Sad
    Angry
    575
    2 Comments 0 Shares 0 Reviews
  • THIS Unexpected Rug Trend Is Taking Over—Here's How to Style It

    Pictured above: A dining room in Dallas, Texas, designed by Studio Thomas James.As you designa room at home, you may have specific ideas about the paint color, furniture placement, and even the lighting scheme your space requires to truly sing. But, if you're not also considering what type of rug will ground the entire look, this essential room-finishing touch may end up feeling like an afterthought. After all, one of the best ways to ensure your space looks expertly planned from top to bottom is to opt for a rug that can anchor the whole space—and, in many cases, that means a maximalist rug.A maximalist-style rug, or one that has a bold color, an abstract or asymmetrical pattern, an organic shape, distinctive pile texture, or unconventional application, offers a fresh answer to the perpetual design question, "What is this room missing?" Instead of defaulting to a neutral-colored, low-pile rug that goes largely unnoticed, a compelling case can be made for choosing a design that functions more as a tactile piece of art. Asha Chaudhary, the CEO of Jaipur, India-based rug brand Jaipur Living, has noticed many consumers moving away from "safe" interiors and embracing designs that pop with personality. "There’s a growing desire to design with individuality and soul. A vibrant or highly detailed rug can instantly transform a space by adding movement, contrast, and character, all in one single piece," she says.Ahead, we spoke to Chaudhary to get her essential tips for choosing the right maximalist rug for your design style, how to evaluate the construction of a piece, and even why you should think outside the box when it comes to the standard area rug shape. Turns out, this foundational mainstay can be a deeply personal expression of identity.Related StoriesWhen a Maximalist Rug Makes SenseJohn MerklAn outdoor lounge in Healdsburg, California, designed by Sheldon Harte.As you might imagine, integrating a maximalist rug into an existing aesthetic isn't about making a one-to-one swap. You'll want to refine your overall approach and potentially tweak elements of the room already in place, too."I like to think about rugs this way: Sometimes they play a supporting role, and other times, they’re the hero of the room," Chaudhary says. "Statement rugs are designed to stand out. They tell stories, stir emotion, and ground a space the way a bold piece of art would."In Chaudhary's work with interior designers who are selecting rugs for clients' high-end homes, she's noticed that tastes have recently swung toward a more maximalist ethos."Designers are leaning into expression and individuality," she says. "There’s growing interest in bold patterns, asymmetry, and designs that reflect the hand of the maker. Color-wise, we’re seeing more adventurous palettes: think jades, bordeauxes, and terracottas. And there’s a strong desire for rugs that feel personal, like they carry a story or a memory." Jaipur LivingJaipur Living’s Manchaha rugs are one-of-a-kind, hand-knotted pieces woven from upcycled hand-spun yarn that follow a freeform design of the artisan’s choosing.Jaipur LivingJaipur Living is uniquely positioned to fulfill the need for one-of-a-kind rugs that are not just visually striking within a space, but deeply meaningful as well. The brand's Manchaha collectioncomprises rugs made of upcycled yarn, each hand-knotted by rural Indian artisans in freeform shapes that capture the imagination."Each piece is designed from the heart of the artisan, with no predetermined pattern, just emotion, inspiration, and memory woven together by hand. What excites me most is this shift away from perfection and toward beauty that feels lived-in, layered, and real," she adds.There’s a strong desire for rugs that feel personal, like they carry a story or a memory.Related StoryHow to Choose the Right Maximalist RugBrittany AmbridgeDesign firm Drake/Anderson reimagined this Greenwich, Connecticut, living room. Good news for those who are taking a slow-decorating approach with their home: Finding the right maximalist rug for your space means looking at the big picture first."Most shoppers start with size and color, but the first question should really be, 'How will this space be used?' That answer guides everything—material, construction, and investment," says Chaudhary.Are you styling an off-limits living room or a lively family den where guests may occasionally wander in with shoes on? In considering your materials, you may want to opt for a performance-fabric rug for areas subject to frequent wear and tear, but Chaudhary has a clear favorite for nearly all other spaces. "Wool is the gold standard. It’s naturally resilient, stain-resistant, and has excellent bounce-back, meaning it recovers well from foot traffic and furniture impressions," she says. "It’s also moisture-wicking and insulating, making it an ideal choice for both comfort and durability."As far as construction goes, Chaudhary breaks down the most widely available options on the market: A hand-knotted rug, crafted by tying individual knots, is the most durable construction and can last decades, even with daily use.Hand-tufted rugs offer a beautiful look at a more accessible price point, but typically won’t have the same lifespan. Power-loomed rugs can be a great solution for high-traffic areas when made with quality materials. Though they fall at the higher end of the price spectrum, hand-knotted rugs aren't meant to be untouchable—after all, their quality construction helps ensure that they can stand up to minor mishaps in day-to-day living. This can shift your appreciation of a rug from a humble underfoot accent to a long-lasting art piece worthy of care and intentional restoration when the time comes. "Understanding these distinctions helps consumers make smarter, more lasting investments for their homes," Chaudhary says. Related StoryOpting for Unconventional Applications Lesley UnruhSarah Vaile designed this vibrant vestibule in Chicago, Illinois.Maximalist rugs encompass an impressively broad category, and even if you already have an area rug rolled out that you're happy with, there are alternative shapes you can choose, or ways in which they can imbue creative expression far beyond the floor."I’ve seen some incredibly beautiful applications of rugs as wall art. Especially when it comes to smaller or one-of-a-kind pieces, hanging them allows people to appreciate the detail, texture, and artistry at eye level," says Chaudhary. "Some designers have also used narrow runners as table coverings or layered over larger textiles for added dimension."Another interesting facet of maximalist rugs is that you can think outside the rectangle in terms of silhouette."We’re seeing more interest in irregular rug shapes, think soft ovals, curves, even asymmetrical outlines," says Chaudhary. "Clients are designing with more fluidity and movement in mind, especially in open-plan spaces. Extra-long runners, oversized circles, and multi-shape layouts are also trending."Ultimately, the best maximalist rug for you is one that meets your home's needs while highlighting your personal style. In spaces where dramatic light fixtures or punchy paint colors aren't practical or allowed, a statement-making rug is the ideal solution. While trends will continue to evolve, honing in on a unique—even tailor-made—design will help ensure aesthetic longevity. Follow House Beautiful on Instagram and TikTok.
    #this #unexpected #rug #trend #taking
    THIS Unexpected Rug Trend Is Taking Over—Here's How to Style It
    Pictured above: A dining room in Dallas, Texas, designed by Studio Thomas James.As you designa room at home, you may have specific ideas about the paint color, furniture placement, and even the lighting scheme your space requires to truly sing. But, if you're not also considering what type of rug will ground the entire look, this essential room-finishing touch may end up feeling like an afterthought. After all, one of the best ways to ensure your space looks expertly planned from top to bottom is to opt for a rug that can anchor the whole space—and, in many cases, that means a maximalist rug.A maximalist-style rug, or one that has a bold color, an abstract or asymmetrical pattern, an organic shape, distinctive pile texture, or unconventional application, offers a fresh answer to the perpetual design question, "What is this room missing?" Instead of defaulting to a neutral-colored, low-pile rug that goes largely unnoticed, a compelling case can be made for choosing a design that functions more as a tactile piece of art. Asha Chaudhary, the CEO of Jaipur, India-based rug brand Jaipur Living, has noticed many consumers moving away from "safe" interiors and embracing designs that pop with personality. "There’s a growing desire to design with individuality and soul. A vibrant or highly detailed rug can instantly transform a space by adding movement, contrast, and character, all in one single piece," she says.Ahead, we spoke to Chaudhary to get her essential tips for choosing the right maximalist rug for your design style, how to evaluate the construction of a piece, and even why you should think outside the box when it comes to the standard area rug shape. Turns out, this foundational mainstay can be a deeply personal expression of identity.Related StoriesWhen a Maximalist Rug Makes SenseJohn MerklAn outdoor lounge in Healdsburg, California, designed by Sheldon Harte.As you might imagine, integrating a maximalist rug into an existing aesthetic isn't about making a one-to-one swap. You'll want to refine your overall approach and potentially tweak elements of the room already in place, too."I like to think about rugs this way: Sometimes they play a supporting role, and other times, they’re the hero of the room," Chaudhary says. "Statement rugs are designed to stand out. They tell stories, stir emotion, and ground a space the way a bold piece of art would."In Chaudhary's work with interior designers who are selecting rugs for clients' high-end homes, she's noticed that tastes have recently swung toward a more maximalist ethos."Designers are leaning into expression and individuality," she says. "There’s growing interest in bold patterns, asymmetry, and designs that reflect the hand of the maker. Color-wise, we’re seeing more adventurous palettes: think jades, bordeauxes, and terracottas. And there’s a strong desire for rugs that feel personal, like they carry a story or a memory." Jaipur LivingJaipur Living’s Manchaha rugs are one-of-a-kind, hand-knotted pieces woven from upcycled hand-spun yarn that follow a freeform design of the artisan’s choosing.Jaipur LivingJaipur Living is uniquely positioned to fulfill the need for one-of-a-kind rugs that are not just visually striking within a space, but deeply meaningful as well. The brand's Manchaha collectioncomprises rugs made of upcycled yarn, each hand-knotted by rural Indian artisans in freeform shapes that capture the imagination."Each piece is designed from the heart of the artisan, with no predetermined pattern, just emotion, inspiration, and memory woven together by hand. What excites me most is this shift away from perfection and toward beauty that feels lived-in, layered, and real," she adds.There’s a strong desire for rugs that feel personal, like they carry a story or a memory.Related StoryHow to Choose the Right Maximalist RugBrittany AmbridgeDesign firm Drake/Anderson reimagined this Greenwich, Connecticut, living room. Good news for those who are taking a slow-decorating approach with their home: Finding the right maximalist rug for your space means looking at the big picture first."Most shoppers start with size and color, but the first question should really be, 'How will this space be used?' That answer guides everything—material, construction, and investment," says Chaudhary.Are you styling an off-limits living room or a lively family den where guests may occasionally wander in with shoes on? In considering your materials, you may want to opt for a performance-fabric rug for areas subject to frequent wear and tear, but Chaudhary has a clear favorite for nearly all other spaces. "Wool is the gold standard. It’s naturally resilient, stain-resistant, and has excellent bounce-back, meaning it recovers well from foot traffic and furniture impressions," she says. "It’s also moisture-wicking and insulating, making it an ideal choice for both comfort and durability."As far as construction goes, Chaudhary breaks down the most widely available options on the market: A hand-knotted rug, crafted by tying individual knots, is the most durable construction and can last decades, even with daily use.Hand-tufted rugs offer a beautiful look at a more accessible price point, but typically won’t have the same lifespan. Power-loomed rugs can be a great solution for high-traffic areas when made with quality materials. Though they fall at the higher end of the price spectrum, hand-knotted rugs aren't meant to be untouchable—after all, their quality construction helps ensure that they can stand up to minor mishaps in day-to-day living. This can shift your appreciation of a rug from a humble underfoot accent to a long-lasting art piece worthy of care and intentional restoration when the time comes. "Understanding these distinctions helps consumers make smarter, more lasting investments for their homes," Chaudhary says. Related StoryOpting for Unconventional Applications Lesley UnruhSarah Vaile designed this vibrant vestibule in Chicago, Illinois.Maximalist rugs encompass an impressively broad category, and even if you already have an area rug rolled out that you're happy with, there are alternative shapes you can choose, or ways in which they can imbue creative expression far beyond the floor."I’ve seen some incredibly beautiful applications of rugs as wall art. Especially when it comes to smaller or one-of-a-kind pieces, hanging them allows people to appreciate the detail, texture, and artistry at eye level," says Chaudhary. "Some designers have also used narrow runners as table coverings or layered over larger textiles for added dimension."Another interesting facet of maximalist rugs is that you can think outside the rectangle in terms of silhouette."We’re seeing more interest in irregular rug shapes, think soft ovals, curves, even asymmetrical outlines," says Chaudhary. "Clients are designing with more fluidity and movement in mind, especially in open-plan spaces. Extra-long runners, oversized circles, and multi-shape layouts are also trending."Ultimately, the best maximalist rug for you is one that meets your home's needs while highlighting your personal style. In spaces where dramatic light fixtures or punchy paint colors aren't practical or allowed, a statement-making rug is the ideal solution. While trends will continue to evolve, honing in on a unique—even tailor-made—design will help ensure aesthetic longevity. Follow House Beautiful on Instagram and TikTok. #this #unexpected #rug #trend #taking
    WWW.HOUSEBEAUTIFUL.COM
    THIS Unexpected Rug Trend Is Taking Over—Here's How to Style It
    Pictured above: A dining room in Dallas, Texas, designed by Studio Thomas James.As you design (or redesign) a room at home, you may have specific ideas about the paint color, furniture placement, and even the lighting scheme your space requires to truly sing. But, if you're not also considering what type of rug will ground the entire look, this essential room-finishing touch may end up feeling like an afterthought. After all, one of the best ways to ensure your space looks expertly planned from top to bottom is to opt for a rug that can anchor the whole space—and, in many cases, that means a maximalist rug.A maximalist-style rug, or one that has a bold color, an abstract or asymmetrical pattern, an organic shape, distinctive pile texture, or unconventional application (such as functioning as a wall mural), offers a fresh answer to the perpetual design question, "What is this room missing?" Instead of defaulting to a neutral-colored, low-pile rug that goes largely unnoticed, a compelling case can be made for choosing a design that functions more as a tactile piece of art. Asha Chaudhary, the CEO of Jaipur, India-based rug brand Jaipur Living, has noticed many consumers moving away from "safe" interiors and embracing designs that pop with personality. "There’s a growing desire to design with individuality and soul. A vibrant or highly detailed rug can instantly transform a space by adding movement, contrast, and character, all in one single piece," she says.Ahead, we spoke to Chaudhary to get her essential tips for choosing the right maximalist rug for your design style, how to evaluate the construction of a piece, and even why you should think outside the box when it comes to the standard area rug shape. Turns out, this foundational mainstay can be a deeply personal expression of identity.Related StoriesWhen a Maximalist Rug Makes SenseJohn MerklAn outdoor lounge in Healdsburg, California, designed by Sheldon Harte.As you might imagine, integrating a maximalist rug into an existing aesthetic isn't about making a one-to-one swap. You'll want to refine your overall approach and potentially tweak elements of the room already in place, too."I like to think about rugs this way: Sometimes they play a supporting role, and other times, they’re the hero of the room," Chaudhary says. "Statement rugs are designed to stand out. They tell stories, stir emotion, and ground a space the way a bold piece of art would."In Chaudhary's work with interior designers who are selecting rugs for clients' high-end homes, she's noticed that tastes have recently swung toward a more maximalist ethos."Designers are leaning into expression and individuality," she says. "There’s growing interest in bold patterns, asymmetry, and designs that reflect the hand of the maker. Color-wise, we’re seeing more adventurous palettes: think jades, bordeauxes, and terracottas. And there’s a strong desire for rugs that feel personal, like they carry a story or a memory." Jaipur LivingJaipur Living’s Manchaha rugs are one-of-a-kind, hand-knotted pieces woven from upcycled hand-spun yarn that follow a freeform design of the artisan’s choosing.Jaipur LivingJaipur Living is uniquely positioned to fulfill the need for one-of-a-kind rugs that are not just visually striking within a space, but deeply meaningful as well. The brand's Manchaha collection (meaning “expression of my heart” in Hindi) comprises rugs made of upcycled yarn, each hand-knotted by rural Indian artisans in freeform shapes that capture the imagination."Each piece is designed from the heart of the artisan, with no predetermined pattern, just emotion, inspiration, and memory woven together by hand. What excites me most is this shift away from perfection and toward beauty that feels lived-in, layered, and real," she adds.There’s a strong desire for rugs that feel personal, like they carry a story or a memory.Related StoryHow to Choose the Right Maximalist RugBrittany AmbridgeDesign firm Drake/Anderson reimagined this Greenwich, Connecticut, living room. Good news for those who are taking a slow-decorating approach with their home: Finding the right maximalist rug for your space means looking at the big picture first."Most shoppers start with size and color, but the first question should really be, 'How will this space be used?' That answer guides everything—material, construction, and investment," says Chaudhary.Are you styling an off-limits living room or a lively family den where guests may occasionally wander in with shoes on? In considering your materials, you may want to opt for a performance-fabric rug for areas subject to frequent wear and tear, but Chaudhary has a clear favorite for nearly all other spaces. "Wool is the gold standard. It’s naturally resilient, stain-resistant, and has excellent bounce-back, meaning it recovers well from foot traffic and furniture impressions," she says. "It’s also moisture-wicking and insulating, making it an ideal choice for both comfort and durability."As far as construction goes, Chaudhary breaks down the most widely available options on the market: A hand-knotted rug, crafted by tying individual knots, is the most durable construction and can last decades, even with daily use.Hand-tufted rugs offer a beautiful look at a more accessible price point, but typically won’t have the same lifespan. Power-loomed rugs can be a great solution for high-traffic areas when made with quality materials. Though they fall at the higher end of the price spectrum, hand-knotted rugs aren't meant to be untouchable—after all, their quality construction helps ensure that they can stand up to minor mishaps in day-to-day living. This can shift your appreciation of a rug from a humble underfoot accent to a long-lasting art piece worthy of care and intentional restoration when the time comes. "Understanding these distinctions helps consumers make smarter, more lasting investments for their homes," Chaudhary says. Related StoryOpting for Unconventional Applications Lesley UnruhSarah Vaile designed this vibrant vestibule in Chicago, Illinois.Maximalist rugs encompass an impressively broad category, and even if you already have an area rug rolled out that you're happy with, there are alternative shapes you can choose, or ways in which they can imbue creative expression far beyond the floor."I’ve seen some incredibly beautiful applications of rugs as wall art. Especially when it comes to smaller or one-of-a-kind pieces, hanging them allows people to appreciate the detail, texture, and artistry at eye level," says Chaudhary. "Some designers have also used narrow runners as table coverings or layered over larger textiles for added dimension."Another interesting facet of maximalist rugs is that you can think outside the rectangle in terms of silhouette."We’re seeing more interest in irregular rug shapes, think soft ovals, curves, even asymmetrical outlines," says Chaudhary. "Clients are designing with more fluidity and movement in mind, especially in open-plan spaces. Extra-long runners, oversized circles, and multi-shape layouts are also trending."Ultimately, the best maximalist rug for you is one that meets your home's needs while highlighting your personal style. In spaces where dramatic light fixtures or punchy paint colors aren't practical or allowed (in the case of renters), a statement-making rug is the ideal solution. While trends will continue to evolve, honing in on a unique—even tailor-made—design will help ensure aesthetic longevity. Follow House Beautiful on Instagram and TikTok.
    Like
    Love
    Wow
    Sad
    Angry
    465
    2 Comments 0 Shares 0 Reviews
  • Why Designers Get Stuck In The Details And How To Stop

    You’ve drawn fifty versions of the same screen — and you still hate every one of them. Begrudgingly, you pick three, show them to your product manager, and hear: “Looks cool, but the idea doesn’t work.” Sound familiar?
    In this article, I’ll unpack why designers fall into detail work at the wrong moment, examining both process pitfalls and the underlying psychological reasons, as understanding these traps is the first step to overcoming them. I’ll also share tactics I use to climb out of that trap.
    Reason #1 You’re Afraid To Show Rough Work
    We designers worship detail. We’re taught that true craft equals razor‑sharp typography, perfect grids, and pixel precision. So the minute a task arrives, we pop open Figma and start polishing long before polish is needed.
    I’ve skipped the sketch phase more times than I care to admit. I told myself it would be faster, yet I always ended up spending hours producing a tidy mock‑up when a scribbled thumbnail would have sparked a five‑minute chat with my product manager. Rough sketches felt “unprofessional,” so I hid them.
    The cost? Lost time, wasted energy — and, by the third redo, teammates were quietly wondering if I even understood the brief.
    The real problem here is the habit: we open Figma and start perfecting the UI before we’ve even solved the problem.
    So why do we hide these rough sketches? It’s not just a bad habit or plain silly. There are solid psychological reasons behind it. We often just call it perfectionism, but it’s deeper than wanting things neat. Digging into the psychologyshows there are a couple of flavors driving this:

    Socially prescribed perfectionismIt’s that nagging feeling that everyone else expects perfect work from you, which makes showing anything rough feel like walking into the lion’s den.
    Self-oriented perfectionismWhere you’re the one setting impossibly high standards for yourself, leading to brutal self-criticism if anything looks slightly off.

    Either way, the result’s the same: showing unfinished work feels wrong, and you miss out on that vital early feedback.
    Back to the design side, remember that clients rarely see architects’ first pencil sketches, but these sketches still exist; they guide structural choices before the 3D render. Treat your thumbnails the same way — artifacts meant to collapse uncertainty, not portfolio pieces. Once stakeholders see the upside, roughness becomes a badge of speed, not sloppiness. So, the key is to consciously make that shift:
    Treat early sketches as disposable tools for thinking and actively share them to get feedback faster.

    Reason #2: You Fix The Symptom, Not The Cause
    Before tackling any task, we need to understand what business outcome we’re aiming for. Product managers might come to us asking to enlarge the payment button in the shopping cart because users aren’t noticing it. The suggested solution itself isn’t necessarily bad, but before redesigning the button, we should ask, “What data suggests they aren’t noticing it?” Don’t get me wrong, I’m not saying you shouldn’t trust your product manager. On the contrary, these questions help ensure you’re on the same page and working with the same data.
    From my experience, here are several reasons why users might not be clicking that coveted button:

    Users don’t understand that this step is for payment.
    They understand it’s about payment but expect order confirmation first.
    Due to incorrect translation, users don’t understand what the button means.
    Lack of trust signals.
    Unexpected additional coststhat appear at this stage.
    Technical issues.

    Now, imagine you simply did what the manager suggested. Would you have solved the problem? Hardly.
    Moreover, the responsibility for the unresolved issue would fall on you, as the interface solution lies within the design domain. The product manager actually did their job correctly by identifying a problem: suspiciously, few users are clicking the button.
    Psychologically, taking on this bigger role isn’t easy. It means overcoming the fear of making mistakes and the discomfort of exploring unclear problems rather than just doing tasks. This shift means seeing ourselves as partners who create value — even if it means fighting a hesitation to question product managers— and understanding that using our product logic expertise proactively is crucial for modern designers.
    There’s another critical reason why we, designers, need to be a bit like product managers: the rise of AI. I deliberately used a simple example about enlarging a button, but I’m confident that in the near future, AI will easily handle routine design tasks. This worries me, but at the same time, I’m already gladly stepping into the product manager’s territory: understanding product and business metrics, formulating hypotheses, conducting research, and so on. It might sound like I’m taking work away from PMs, but believe me, they undoubtedly have enough on their plates and are usually more than happy to delegate some responsibilities to designers.
    Reason #3: You’re Solving The Wrong Problem
    Before solving anything, ask whether the problem even deserves your attention.
    During a major home‑screen redesign, our goal was to drive more users into paid services. The initial hypothesis — making service buttons bigger and brighter might help returning users — seemed reasonable enough to test. However, even when A/B testsshowed minimal impact, we continued to tweak those buttons.
    Only later did it click: the home screen isn’t the place to sell; visitors open the app to start, not to buy. We removed that promo block, and nothing broke. Contextual entry points deeper into the journey performed brilliantly. Lesson learned:
    Without the right context, any visual tweak is lipstick on a pig.

    Why did we get stuck polishing buttons instead of stopping sooner? It’s easy to get tunnel vision. Psychologically, it’s likely the good old sunk cost fallacy kicking in: we’d already invested time in the buttons, so stopping felt like wasting that effort, even though the data wasn’t promising.
    It’s just easier to keep fiddling with something familiar than to admit we need a new plan. Perhaps the simple question I should have asked myself when results stalled was: “Are we optimizing the right thing or just polishing something that fundamentally doesn’t fit the user’s primary goal here?” That alone might have saved hours.
    Reason #4: You’re Drowning In Unactionable Feedback
    We all discuss our work with colleagues. But here’s a crucial point: what kind of question do you pose to kick off that discussion? If your go-to is “What do you think?” well, that question might lead you down a rabbit hole of personal opinions rather than actionable insights. While experienced colleagues will cut through the noise, others, unsure what to evaluate, might comment on anything and everything — fonts, button colors, even when you desperately need to discuss a user flow.
    What matters here are two things:

    The question you ask,
    The context you give.

    That means clearly stating the problem, what you’ve learned, and how your idea aims to fix it.
    For instance:
    “The problem is our payment conversion rate has dropped by X%. I’ve interviewed users and found they abandon payment because they don’t understand how the total amount is calculated. My solution is to show a detailed cost breakdown. Do you think this actually solves the problem for them?”

    Here, you’ve stated the problem, shared your insight, explained your solution, and asked a direct question. It’s even better if you prepare a list of specific sub-questions. For instance: “Are all items in the cost breakdown clear?” or “Does the placement of this breakdown feel intuitive within the payment flow?”
    Another good habit is to keep your rough sketches and previous iterations handy. Some of your colleagues’ suggestions might be things you’ve already tried. It’s great if you can discuss them immediately to either revisit those ideas or definitively set them aside.
    I’m not a psychologist, but experience tells me that, psychologically, the reluctance to be this specific often stems from a fear of our solution being rejected. We tend to internalize feedback: a seemingly innocent comment like, “Have you considered other ways to organize this section?” or “Perhaps explore a different structure for this part?” can instantly morph in our minds into “You completely messed up the structure. You’re a bad designer.” Imposter syndrome, in all its glory.
    So, to wrap up this point, here are two recommendations:

    Prepare for every design discussion.A couple of focused questions will yield far more valuable input than a vague “So, what do you think?”.
    Actively work on separating feedback on your design from your self-worth.If a mistake is pointed out, acknowledge it, learn from it, and you’ll be less likely to repeat it. This is often easier said than done. For me, it took years of working with a psychotherapist. If you struggle with this, I sincerely wish you strength in overcoming it.

    Reason #5 You’re Just Tired
    Sometimes, the issue isn’t strategic at all — it’s fatigue. Fussing over icon corners can feel like a cozy bunker when your brain is fried. There’s a name for this: decision fatigue. Basically, your brain’s battery for hard thinking is low, so it hides out in the easy, comfy zone of pixel-pushing.
    A striking example comes from a New York Times article titled “Do You Suffer From Decision Fatigue?.” It described how judges deciding on release requests were far more likely to grant release early in the daycompared to late in the daysimply because their decision-making energy was depleted. Luckily, designers rarely hold someone’s freedom in their hands, but the example dramatically shows how fatigue can impact our judgment and productivity.
    What helps here:

    Swap tasks.Trade tickets with another designer; novelty resets your focus.
    Talk to another designer.If NDA permits, ask peers outside the team for a sanity check.
    Step away.Even a ten‑minute walk can do more than a double‑shot espresso.

    By the way, I came up with these ideas while walking around my office. I was lucky to work near a river, and those short walks quickly turned into a helpful habit.

    And one more trick that helps me snap out of detail mode early: if I catch myself making around 20 little tweaks — changing font weight, color, border radius — I just stop. Over time, it turned into a habit. I have a similar one with Instagram: by the third reel, my brain quietly asks, “Wait, weren’t we working?” Funny how that kind of nudge saves a ton of time.
    Four Steps I Use to Avoid Drowning In Detail
    Knowing these potential traps, here’s the practical process I use to stay on track:
    1. Define the Core Problem & Business Goal
    Before anything, dig deep: what’s the actual problem we’re solving, not just the requested task or a surface-level symptom? Ask ‘why’ repeatedly. What user pain or business need are we addressing? Then, state the clear business goal: “What metric am I moving, and do we have data to prove this is the right lever?” If retention is the goal, decide whether push reminders, gamification, or personalised content is the best route. The wrong lever, or tackling a symptom instead of the cause, dooms everything downstream.
    2. Choose the MechanicOnce the core problem and goal are clear, lock the solution principle or ‘mechanic’ first. Going with a game layer? Decide if it’s leaderboards, streaks, or badges. Write it down. Then move on. No UI yet. This keeps the focus high-level before diving into pixels.
    3. Wireframe the Flow & Get Focused Feedback
    Now open Figma. Map screens, layout, and transitions. Boxes and arrows are enough. Keep the fidelity low so the discussion stays on the flow, not colour. Crucially, when you share these early wires, ask specific questions and provide clear contextto get actionable feedback, not just vague opinions.
    4. Polish the VisualsI only let myself tweak grids, type scales, and shadows after the flow is validated. If progress stalls, or before a major polish effort, I surface the work in a design critique — again using targeted questions and clear context — instead of hiding in version 47. This ensures detailing serves the now-validated solution.
    Even for something as small as a single button, running these four checkpoints takes about ten minutes and saves hours of decorative dithering.
    Wrapping Up
    Next time you feel the pull to vanish into mock‑ups before the problem is nailed down, pause and ask what you might be avoiding. Yes, that can expose an uncomfortable truth. But pausing to ask what you might be avoiding — maybe the fuzzy core problem, or just asking for tough feedback — gives you the power to face the real issue head-on. It keeps the project focused on solving the right problem, not just perfecting a flawed solution.
    Attention to detail is a superpower when used at the right moment. Obsessing over pixels too soon, though, is a bad habit and a warning light telling us the process needs a rethink.
    #why #designers #get #stuck #details
    Why Designers Get Stuck In The Details And How To Stop
    You’ve drawn fifty versions of the same screen — and you still hate every one of them. Begrudgingly, you pick three, show them to your product manager, and hear: “Looks cool, but the idea doesn’t work.” Sound familiar? In this article, I’ll unpack why designers fall into detail work at the wrong moment, examining both process pitfalls and the underlying psychological reasons, as understanding these traps is the first step to overcoming them. I’ll also share tactics I use to climb out of that trap. Reason #1 You’re Afraid To Show Rough Work We designers worship detail. We’re taught that true craft equals razor‑sharp typography, perfect grids, and pixel precision. So the minute a task arrives, we pop open Figma and start polishing long before polish is needed. I’ve skipped the sketch phase more times than I care to admit. I told myself it would be faster, yet I always ended up spending hours producing a tidy mock‑up when a scribbled thumbnail would have sparked a five‑minute chat with my product manager. Rough sketches felt “unprofessional,” so I hid them. The cost? Lost time, wasted energy — and, by the third redo, teammates were quietly wondering if I even understood the brief. The real problem here is the habit: we open Figma and start perfecting the UI before we’ve even solved the problem. So why do we hide these rough sketches? It’s not just a bad habit or plain silly. There are solid psychological reasons behind it. We often just call it perfectionism, but it’s deeper than wanting things neat. Digging into the psychologyshows there are a couple of flavors driving this: Socially prescribed perfectionismIt’s that nagging feeling that everyone else expects perfect work from you, which makes showing anything rough feel like walking into the lion’s den. Self-oriented perfectionismWhere you’re the one setting impossibly high standards for yourself, leading to brutal self-criticism if anything looks slightly off. Either way, the result’s the same: showing unfinished work feels wrong, and you miss out on that vital early feedback. Back to the design side, remember that clients rarely see architects’ first pencil sketches, but these sketches still exist; they guide structural choices before the 3D render. Treat your thumbnails the same way — artifacts meant to collapse uncertainty, not portfolio pieces. Once stakeholders see the upside, roughness becomes a badge of speed, not sloppiness. So, the key is to consciously make that shift: Treat early sketches as disposable tools for thinking and actively share them to get feedback faster. Reason #2: You Fix The Symptom, Not The Cause Before tackling any task, we need to understand what business outcome we’re aiming for. Product managers might come to us asking to enlarge the payment button in the shopping cart because users aren’t noticing it. The suggested solution itself isn’t necessarily bad, but before redesigning the button, we should ask, “What data suggests they aren’t noticing it?” Don’t get me wrong, I’m not saying you shouldn’t trust your product manager. On the contrary, these questions help ensure you’re on the same page and working with the same data. From my experience, here are several reasons why users might not be clicking that coveted button: Users don’t understand that this step is for payment. They understand it’s about payment but expect order confirmation first. Due to incorrect translation, users don’t understand what the button means. Lack of trust signals. Unexpected additional coststhat appear at this stage. Technical issues. Now, imagine you simply did what the manager suggested. Would you have solved the problem? Hardly. Moreover, the responsibility for the unresolved issue would fall on you, as the interface solution lies within the design domain. The product manager actually did their job correctly by identifying a problem: suspiciously, few users are clicking the button. Psychologically, taking on this bigger role isn’t easy. It means overcoming the fear of making mistakes and the discomfort of exploring unclear problems rather than just doing tasks. This shift means seeing ourselves as partners who create value — even if it means fighting a hesitation to question product managers— and understanding that using our product logic expertise proactively is crucial for modern designers. There’s another critical reason why we, designers, need to be a bit like product managers: the rise of AI. I deliberately used a simple example about enlarging a button, but I’m confident that in the near future, AI will easily handle routine design tasks. This worries me, but at the same time, I’m already gladly stepping into the product manager’s territory: understanding product and business metrics, formulating hypotheses, conducting research, and so on. It might sound like I’m taking work away from PMs, but believe me, they undoubtedly have enough on their plates and are usually more than happy to delegate some responsibilities to designers. Reason #3: You’re Solving The Wrong Problem Before solving anything, ask whether the problem even deserves your attention. During a major home‑screen redesign, our goal was to drive more users into paid services. The initial hypothesis — making service buttons bigger and brighter might help returning users — seemed reasonable enough to test. However, even when A/B testsshowed minimal impact, we continued to tweak those buttons. Only later did it click: the home screen isn’t the place to sell; visitors open the app to start, not to buy. We removed that promo block, and nothing broke. Contextual entry points deeper into the journey performed brilliantly. Lesson learned: Without the right context, any visual tweak is lipstick on a pig. Why did we get stuck polishing buttons instead of stopping sooner? It’s easy to get tunnel vision. Psychologically, it’s likely the good old sunk cost fallacy kicking in: we’d already invested time in the buttons, so stopping felt like wasting that effort, even though the data wasn’t promising. It’s just easier to keep fiddling with something familiar than to admit we need a new plan. Perhaps the simple question I should have asked myself when results stalled was: “Are we optimizing the right thing or just polishing something that fundamentally doesn’t fit the user’s primary goal here?” That alone might have saved hours. Reason #4: You’re Drowning In Unactionable Feedback We all discuss our work with colleagues. But here’s a crucial point: what kind of question do you pose to kick off that discussion? If your go-to is “What do you think?” well, that question might lead you down a rabbit hole of personal opinions rather than actionable insights. While experienced colleagues will cut through the noise, others, unsure what to evaluate, might comment on anything and everything — fonts, button colors, even when you desperately need to discuss a user flow. What matters here are two things: The question you ask, The context you give. That means clearly stating the problem, what you’ve learned, and how your idea aims to fix it. For instance: “The problem is our payment conversion rate has dropped by X%. I’ve interviewed users and found they abandon payment because they don’t understand how the total amount is calculated. My solution is to show a detailed cost breakdown. Do you think this actually solves the problem for them?” Here, you’ve stated the problem, shared your insight, explained your solution, and asked a direct question. It’s even better if you prepare a list of specific sub-questions. For instance: “Are all items in the cost breakdown clear?” or “Does the placement of this breakdown feel intuitive within the payment flow?” Another good habit is to keep your rough sketches and previous iterations handy. Some of your colleagues’ suggestions might be things you’ve already tried. It’s great if you can discuss them immediately to either revisit those ideas or definitively set them aside. I’m not a psychologist, but experience tells me that, psychologically, the reluctance to be this specific often stems from a fear of our solution being rejected. We tend to internalize feedback: a seemingly innocent comment like, “Have you considered other ways to organize this section?” or “Perhaps explore a different structure for this part?” can instantly morph in our minds into “You completely messed up the structure. You’re a bad designer.” Imposter syndrome, in all its glory. So, to wrap up this point, here are two recommendations: Prepare for every design discussion.A couple of focused questions will yield far more valuable input than a vague “So, what do you think?”. Actively work on separating feedback on your design from your self-worth.If a mistake is pointed out, acknowledge it, learn from it, and you’ll be less likely to repeat it. This is often easier said than done. For me, it took years of working with a psychotherapist. If you struggle with this, I sincerely wish you strength in overcoming it. Reason #5 You’re Just Tired Sometimes, the issue isn’t strategic at all — it’s fatigue. Fussing over icon corners can feel like a cozy bunker when your brain is fried. There’s a name for this: decision fatigue. Basically, your brain’s battery for hard thinking is low, so it hides out in the easy, comfy zone of pixel-pushing. A striking example comes from a New York Times article titled “Do You Suffer From Decision Fatigue?.” It described how judges deciding on release requests were far more likely to grant release early in the daycompared to late in the daysimply because their decision-making energy was depleted. Luckily, designers rarely hold someone’s freedom in their hands, but the example dramatically shows how fatigue can impact our judgment and productivity. What helps here: Swap tasks.Trade tickets with another designer; novelty resets your focus. Talk to another designer.If NDA permits, ask peers outside the team for a sanity check. Step away.Even a ten‑minute walk can do more than a double‑shot espresso. By the way, I came up with these ideas while walking around my office. I was lucky to work near a river, and those short walks quickly turned into a helpful habit. And one more trick that helps me snap out of detail mode early: if I catch myself making around 20 little tweaks — changing font weight, color, border radius — I just stop. Over time, it turned into a habit. I have a similar one with Instagram: by the third reel, my brain quietly asks, “Wait, weren’t we working?” Funny how that kind of nudge saves a ton of time. Four Steps I Use to Avoid Drowning In Detail Knowing these potential traps, here’s the practical process I use to stay on track: 1. Define the Core Problem & Business Goal Before anything, dig deep: what’s the actual problem we’re solving, not just the requested task or a surface-level symptom? Ask ‘why’ repeatedly. What user pain or business need are we addressing? Then, state the clear business goal: “What metric am I moving, and do we have data to prove this is the right lever?” If retention is the goal, decide whether push reminders, gamification, or personalised content is the best route. The wrong lever, or tackling a symptom instead of the cause, dooms everything downstream. 2. Choose the MechanicOnce the core problem and goal are clear, lock the solution principle or ‘mechanic’ first. Going with a game layer? Decide if it’s leaderboards, streaks, or badges. Write it down. Then move on. No UI yet. This keeps the focus high-level before diving into pixels. 3. Wireframe the Flow & Get Focused Feedback Now open Figma. Map screens, layout, and transitions. Boxes and arrows are enough. Keep the fidelity low so the discussion stays on the flow, not colour. Crucially, when you share these early wires, ask specific questions and provide clear contextto get actionable feedback, not just vague opinions. 4. Polish the VisualsI only let myself tweak grids, type scales, and shadows after the flow is validated. If progress stalls, or before a major polish effort, I surface the work in a design critique — again using targeted questions and clear context — instead of hiding in version 47. This ensures detailing serves the now-validated solution. Even for something as small as a single button, running these four checkpoints takes about ten minutes and saves hours of decorative dithering. Wrapping Up Next time you feel the pull to vanish into mock‑ups before the problem is nailed down, pause and ask what you might be avoiding. Yes, that can expose an uncomfortable truth. But pausing to ask what you might be avoiding — maybe the fuzzy core problem, or just asking for tough feedback — gives you the power to face the real issue head-on. It keeps the project focused on solving the right problem, not just perfecting a flawed solution. Attention to detail is a superpower when used at the right moment. Obsessing over pixels too soon, though, is a bad habit and a warning light telling us the process needs a rethink. #why #designers #get #stuck #details
    SMASHINGMAGAZINE.COM
    Why Designers Get Stuck In The Details And How To Stop
    You’ve drawn fifty versions of the same screen — and you still hate every one of them. Begrudgingly, you pick three, show them to your product manager, and hear: “Looks cool, but the idea doesn’t work.” Sound familiar? In this article, I’ll unpack why designers fall into detail work at the wrong moment, examining both process pitfalls and the underlying psychological reasons, as understanding these traps is the first step to overcoming them. I’ll also share tactics I use to climb out of that trap. Reason #1 You’re Afraid To Show Rough Work We designers worship detail. We’re taught that true craft equals razor‑sharp typography, perfect grids, and pixel precision. So the minute a task arrives, we pop open Figma and start polishing long before polish is needed. I’ve skipped the sketch phase more times than I care to admit. I told myself it would be faster, yet I always ended up spending hours producing a tidy mock‑up when a scribbled thumbnail would have sparked a five‑minute chat with my product manager. Rough sketches felt “unprofessional,” so I hid them. The cost? Lost time, wasted energy — and, by the third redo, teammates were quietly wondering if I even understood the brief. The real problem here is the habit: we open Figma and start perfecting the UI before we’ve even solved the problem. So why do we hide these rough sketches? It’s not just a bad habit or plain silly. There are solid psychological reasons behind it. We often just call it perfectionism, but it’s deeper than wanting things neat. Digging into the psychology (like the research by Hewitt and Flett) shows there are a couple of flavors driving this: Socially prescribed perfectionismIt’s that nagging feeling that everyone else expects perfect work from you, which makes showing anything rough feel like walking into the lion’s den. Self-oriented perfectionismWhere you’re the one setting impossibly high standards for yourself, leading to brutal self-criticism if anything looks slightly off. Either way, the result’s the same: showing unfinished work feels wrong, and you miss out on that vital early feedback. Back to the design side, remember that clients rarely see architects’ first pencil sketches, but these sketches still exist; they guide structural choices before the 3D render. Treat your thumbnails the same way — artifacts meant to collapse uncertainty, not portfolio pieces. Once stakeholders see the upside, roughness becomes a badge of speed, not sloppiness. So, the key is to consciously make that shift: Treat early sketches as disposable tools for thinking and actively share them to get feedback faster. Reason #2: You Fix The Symptom, Not The Cause Before tackling any task, we need to understand what business outcome we’re aiming for. Product managers might come to us asking to enlarge the payment button in the shopping cart because users aren’t noticing it. The suggested solution itself isn’t necessarily bad, but before redesigning the button, we should ask, “What data suggests they aren’t noticing it?” Don’t get me wrong, I’m not saying you shouldn’t trust your product manager. On the contrary, these questions help ensure you’re on the same page and working with the same data. From my experience, here are several reasons why users might not be clicking that coveted button: Users don’t understand that this step is for payment. They understand it’s about payment but expect order confirmation first. Due to incorrect translation, users don’t understand what the button means. Lack of trust signals (no security icons, unclear seller information). Unexpected additional costs (hidden fees, shipping) that appear at this stage. Technical issues (inactive button, page freezing). Now, imagine you simply did what the manager suggested. Would you have solved the problem? Hardly. Moreover, the responsibility for the unresolved issue would fall on you, as the interface solution lies within the design domain. The product manager actually did their job correctly by identifying a problem: suspiciously, few users are clicking the button. Psychologically, taking on this bigger role isn’t easy. It means overcoming the fear of making mistakes and the discomfort of exploring unclear problems rather than just doing tasks. This shift means seeing ourselves as partners who create value — even if it means fighting a hesitation to question product managers (which might come from a fear of speaking up or a desire to avoid challenging authority) — and understanding that using our product logic expertise proactively is crucial for modern designers. There’s another critical reason why we, designers, need to be a bit like product managers: the rise of AI. I deliberately used a simple example about enlarging a button, but I’m confident that in the near future, AI will easily handle routine design tasks. This worries me, but at the same time, I’m already gladly stepping into the product manager’s territory: understanding product and business metrics, formulating hypotheses, conducting research, and so on. It might sound like I’m taking work away from PMs, but believe me, they undoubtedly have enough on their plates and are usually more than happy to delegate some responsibilities to designers. Reason #3: You’re Solving The Wrong Problem Before solving anything, ask whether the problem even deserves your attention. During a major home‑screen redesign, our goal was to drive more users into paid services. The initial hypothesis — making service buttons bigger and brighter might help returning users — seemed reasonable enough to test. However, even when A/B tests (a method of comparing two versions of a design to determine which performs better) showed minimal impact, we continued to tweak those buttons. Only later did it click: the home screen isn’t the place to sell; visitors open the app to start, not to buy. We removed that promo block, and nothing broke. Contextual entry points deeper into the journey performed brilliantly. Lesson learned: Without the right context, any visual tweak is lipstick on a pig. Why did we get stuck polishing buttons instead of stopping sooner? It’s easy to get tunnel vision. Psychologically, it’s likely the good old sunk cost fallacy kicking in: we’d already invested time in the buttons, so stopping felt like wasting that effort, even though the data wasn’t promising. It’s just easier to keep fiddling with something familiar than to admit we need a new plan. Perhaps the simple question I should have asked myself when results stalled was: “Are we optimizing the right thing or just polishing something that fundamentally doesn’t fit the user’s primary goal here?” That alone might have saved hours. Reason #4: You’re Drowning In Unactionable Feedback We all discuss our work with colleagues. But here’s a crucial point: what kind of question do you pose to kick off that discussion? If your go-to is “What do you think?” well, that question might lead you down a rabbit hole of personal opinions rather than actionable insights. While experienced colleagues will cut through the noise, others, unsure what to evaluate, might comment on anything and everything — fonts, button colors, even when you desperately need to discuss a user flow. What matters here are two things: The question you ask, The context you give. That means clearly stating the problem, what you’ve learned, and how your idea aims to fix it. For instance: “The problem is our payment conversion rate has dropped by X%. I’ve interviewed users and found they abandon payment because they don’t understand how the total amount is calculated. My solution is to show a detailed cost breakdown. Do you think this actually solves the problem for them?” Here, you’ve stated the problem (conversion drop), shared your insight (user confusion), explained your solution (cost breakdown), and asked a direct question. It’s even better if you prepare a list of specific sub-questions. For instance: “Are all items in the cost breakdown clear?” or “Does the placement of this breakdown feel intuitive within the payment flow?” Another good habit is to keep your rough sketches and previous iterations handy. Some of your colleagues’ suggestions might be things you’ve already tried. It’s great if you can discuss them immediately to either revisit those ideas or definitively set them aside. I’m not a psychologist, but experience tells me that, psychologically, the reluctance to be this specific often stems from a fear of our solution being rejected. We tend to internalize feedback: a seemingly innocent comment like, “Have you considered other ways to organize this section?” or “Perhaps explore a different structure for this part?” can instantly morph in our minds into “You completely messed up the structure. You’re a bad designer.” Imposter syndrome, in all its glory. So, to wrap up this point, here are two recommendations: Prepare for every design discussion.A couple of focused questions will yield far more valuable input than a vague “So, what do you think?”. Actively work on separating feedback on your design from your self-worth.If a mistake is pointed out, acknowledge it, learn from it, and you’ll be less likely to repeat it. This is often easier said than done. For me, it took years of working with a psychotherapist. If you struggle with this, I sincerely wish you strength in overcoming it. Reason #5 You’re Just Tired Sometimes, the issue isn’t strategic at all — it’s fatigue. Fussing over icon corners can feel like a cozy bunker when your brain is fried. There’s a name for this: decision fatigue. Basically, your brain’s battery for hard thinking is low, so it hides out in the easy, comfy zone of pixel-pushing. A striking example comes from a New York Times article titled “Do You Suffer From Decision Fatigue?.” It described how judges deciding on release requests were far more likely to grant release early in the day (about 70% of cases) compared to late in the day (less than 10%) simply because their decision-making energy was depleted. Luckily, designers rarely hold someone’s freedom in their hands, but the example dramatically shows how fatigue can impact our judgment and productivity. What helps here: Swap tasks.Trade tickets with another designer; novelty resets your focus. Talk to another designer.If NDA permits, ask peers outside the team for a sanity check. Step away.Even a ten‑minute walk can do more than a double‑shot espresso. By the way, I came up with these ideas while walking around my office. I was lucky to work near a river, and those short walks quickly turned into a helpful habit. And one more trick that helps me snap out of detail mode early: if I catch myself making around 20 little tweaks — changing font weight, color, border radius — I just stop. Over time, it turned into a habit. I have a similar one with Instagram: by the third reel, my brain quietly asks, “Wait, weren’t we working?” Funny how that kind of nudge saves a ton of time. Four Steps I Use to Avoid Drowning In Detail Knowing these potential traps, here’s the practical process I use to stay on track: 1. Define the Core Problem & Business Goal Before anything, dig deep: what’s the actual problem we’re solving, not just the requested task or a surface-level symptom? Ask ‘why’ repeatedly. What user pain or business need are we addressing? Then, state the clear business goal: “What metric am I moving, and do we have data to prove this is the right lever?” If retention is the goal, decide whether push reminders, gamification, or personalised content is the best route. The wrong lever, or tackling a symptom instead of the cause, dooms everything downstream. 2. Choose the Mechanic (Solution Principle) Once the core problem and goal are clear, lock the solution principle or ‘mechanic’ first. Going with a game layer? Decide if it’s leaderboards, streaks, or badges. Write it down. Then move on. No UI yet. This keeps the focus high-level before diving into pixels. 3. Wireframe the Flow & Get Focused Feedback Now open Figma. Map screens, layout, and transitions. Boxes and arrows are enough. Keep the fidelity low so the discussion stays on the flow, not colour. Crucially, when you share these early wires, ask specific questions and provide clear context (as discussed in ‘Reason #4’) to get actionable feedback, not just vague opinions. 4. Polish the Visuals (Mindfully) I only let myself tweak grids, type scales, and shadows after the flow is validated. If progress stalls, or before a major polish effort, I surface the work in a design critique — again using targeted questions and clear context — instead of hiding in version 47. This ensures detailing serves the now-validated solution. Even for something as small as a single button, running these four checkpoints takes about ten minutes and saves hours of decorative dithering. Wrapping Up Next time you feel the pull to vanish into mock‑ups before the problem is nailed down, pause and ask what you might be avoiding. Yes, that can expose an uncomfortable truth. But pausing to ask what you might be avoiding — maybe the fuzzy core problem, or just asking for tough feedback — gives you the power to face the real issue head-on. It keeps the project focused on solving the right problem, not just perfecting a flawed solution. Attention to detail is a superpower when used at the right moment. Obsessing over pixels too soon, though, is a bad habit and a warning light telling us the process needs a rethink.
    Like
    Love
    Wow
    Angry
    Sad
    596
    0 Comments 0 Shares 0 Reviews
  • Creating a Highly Detailed Tech-Inspired Scene with Blender

    IntroductionHello! My name is Denys. I was born and raised in Nigeria, where I'm currently based. I began my journey into 3D art in March 2022, teaching myself through online resources, starting, of course, with the iconic donut tutorial on YouTube. Since then, I've continued to grow my skills independently, and now I'm working toward a career in 3D generalism, with a particular interest in environment art.I originally got into Blender because SketchUp wasn't free, and I could not keep up with the subscriptions. While searching for alternatives, I came across Blender. That's when I realized I had installed it once years ago, but back then, the interface completely intimidated me, and I gave up on it. This time, though, I decided to stick with it – and I'm glad I did.I started out creating simple models. One of my first big projects was modeling the entire SpongeBob crew. That led to my first animation, and eventually, the first four episodes of a short animated series. As I grew more confident, I began participating in online 3D competitions, like cgandwe, where I focused on designing realistic environments. Those experiences have played a huge role in getting me to where I am today.Getting Started Before starting any scene, I always look for references. It might not be the most original approach, but it's what works best for me. One piece that inspired me was a beautiful artwork by Calder Moore. I bookmarked it as soon as I saw it back in 2023, and luckily, I finally found the time to bring it to life last month.BlockoutThe goal was to match the original camera angle and roughly model the main frame of the structures. It wasn't perfect, but modeling and placing the lower docks helped me get the perspective right. Then I moved on to modeling and positioning the major structures in the scene.I gave myself two weeks to complete this project. And as much as I enjoy modeling, I also enjoy not modeling, so I turned to asset kits and free models to help speed things up. I came across an awesome paid kit by Bigmediumsmall and instantly knew it would fit perfectly into my scene.I also downloaded a few models from Sketchfab, including a lamp, desk console, freighter controls, and a robotic arm, which I later took apart to add extra detail. Another incredibly helpful tool was the Random Flow add-on by BlenderGuppy, which made adding sci-fi elements much easier. Lastly, I pulled in some models from my older sci-fi and cyberpunk projects to round things out.Kitbashing Once I had the overall shape I was aiming for, I moved on to kitbashing to pack in as much detail as possible. There wasn't any strict method to the madness; I simply picked assets I liked, whether it was a set of pipes, vents, or even a random shape that just worked in the sci-fi context. I focused first on kitbashing the front structure, and used the Random Flow add-on to fill in areas where I didn't kitbash manually. Then I moved on to the other collections, following the same process.The freighter was the final piece of the puzzle, and I knew it was going to be a challenge. Part of me wanted to model it entirely from scratch, but the more practical side knew I could save a lot of time by sticking with my usual method. So I modeled the main shapes myself, then kitbashed the details to bring it to life. I also grabbed some crates from Sketchfab to fill out the scene.Texturing This part was easily my favorite, and there was no shortcut here. I had to meticulously create each material myself. Well, I did use PBR materials downloaded from CGAmbient as a base, but I spent a lot of time tweaking and editing them to get everything just right.Texturing has always been my favorite stage when building scenes like this. Many artists prefer external tools like Substance 3D Painter, but I've learned so much about procedural texturing, especially from RyanKingArt, that I couldn't let it go. It's such a flexible and rewarding approach, and I love pushing it as far as I can.I wanted most of the colors in the scene to be dark, but I did keep the original color of the pipes and the pillars, just to add a little bit of vibrance to the scene. I also wanted the overall texture to be very rough and grungy. One of the biggest helps in achieving this was using the Grunge Maps from Substance 3D Painter. I found a way to extract them into Blender, and it helped.A major tool during the texturing phase was Jsplacement, which I used to procedurally generate sci-fi grids and plates. This was the icing on the cake for adding intricate details. Whenever an area felt too flat, I applied bump maps with these grids and panels to bring the materials to life. For example, both the lamp pole and the entire black metal material feature these Jsplacement Maps.Lighting For this, I didn't do anything fancy. I knew the scene was in a high altitude, so I looked for HDRI with a cloudless sky, and I boosted the saturation up a little to give it that high altitude look.Post-Production The rendering phase was challenging since I was working on a low-end laptop. I couldn't render the entire scene all at once, so I broke it down by collections and rendered them as separate layers. Then, I composited the layers together in post-production. I'm not big on heavy post-work, so I kept it simple, mostly tweaking brightness and saturation on my phone. That's about it for the post-production process.Conclusion The entire project took me 10 days to complete, working at least four hours each day. Although I've expressed my love for texturing, my favorite part of this project was the detailing and kitbashing. I really enjoyed piecing all the small details together. The most challenging part was deciding which assets to use and where to place them. I had a lot of greebles to choose from, but I'm happy with the ones I selected; they felt like a perfect fit for the scene.I know kitbashing sometimes gets a negative reputation in the 3D community, but I found it incredibly relieving. Honestly, this project wouldn't have come together without it, so I fully embraced the process.I'm excited to keep making projects like this. The world of 3D art is truly an endless and vast realm, and I encourage every artist like me to keep exploring it, one project at a time.Denys Molokwu, 3D Artist
    #creating #highly #detailed #techinspired #scene
    Creating a Highly Detailed Tech-Inspired Scene with Blender
    IntroductionHello! My name is Denys. I was born and raised in Nigeria, where I'm currently based. I began my journey into 3D art in March 2022, teaching myself through online resources, starting, of course, with the iconic donut tutorial on YouTube. Since then, I've continued to grow my skills independently, and now I'm working toward a career in 3D generalism, with a particular interest in environment art.I originally got into Blender because SketchUp wasn't free, and I could not keep up with the subscriptions. While searching for alternatives, I came across Blender. That's when I realized I had installed it once years ago, but back then, the interface completely intimidated me, and I gave up on it. This time, though, I decided to stick with it – and I'm glad I did.I started out creating simple models. One of my first big projects was modeling the entire SpongeBob crew. That led to my first animation, and eventually, the first four episodes of a short animated series. As I grew more confident, I began participating in online 3D competitions, like cgandwe, where I focused on designing realistic environments. Those experiences have played a huge role in getting me to where I am today.Getting Started Before starting any scene, I always look for references. It might not be the most original approach, but it's what works best for me. One piece that inspired me was a beautiful artwork by Calder Moore. I bookmarked it as soon as I saw it back in 2023, and luckily, I finally found the time to bring it to life last month.BlockoutThe goal was to match the original camera angle and roughly model the main frame of the structures. It wasn't perfect, but modeling and placing the lower docks helped me get the perspective right. Then I moved on to modeling and positioning the major structures in the scene.I gave myself two weeks to complete this project. And as much as I enjoy modeling, I also enjoy not modeling, so I turned to asset kits and free models to help speed things up. I came across an awesome paid kit by Bigmediumsmall and instantly knew it would fit perfectly into my scene.I also downloaded a few models from Sketchfab, including a lamp, desk console, freighter controls, and a robotic arm, which I later took apart to add extra detail. Another incredibly helpful tool was the Random Flow add-on by BlenderGuppy, which made adding sci-fi elements much easier. Lastly, I pulled in some models from my older sci-fi and cyberpunk projects to round things out.Kitbashing Once I had the overall shape I was aiming for, I moved on to kitbashing to pack in as much detail as possible. There wasn't any strict method to the madness; I simply picked assets I liked, whether it was a set of pipes, vents, or even a random shape that just worked in the sci-fi context. I focused first on kitbashing the front structure, and used the Random Flow add-on to fill in areas where I didn't kitbash manually. Then I moved on to the other collections, following the same process.The freighter was the final piece of the puzzle, and I knew it was going to be a challenge. Part of me wanted to model it entirely from scratch, but the more practical side knew I could save a lot of time by sticking with my usual method. So I modeled the main shapes myself, then kitbashed the details to bring it to life. I also grabbed some crates from Sketchfab to fill out the scene.Texturing This part was easily my favorite, and there was no shortcut here. I had to meticulously create each material myself. Well, I did use PBR materials downloaded from CGAmbient as a base, but I spent a lot of time tweaking and editing them to get everything just right.Texturing has always been my favorite stage when building scenes like this. Many artists prefer external tools like Substance 3D Painter, but I've learned so much about procedural texturing, especially from RyanKingArt, that I couldn't let it go. It's such a flexible and rewarding approach, and I love pushing it as far as I can.I wanted most of the colors in the scene to be dark, but I did keep the original color of the pipes and the pillars, just to add a little bit of vibrance to the scene. I also wanted the overall texture to be very rough and grungy. One of the biggest helps in achieving this was using the Grunge Maps from Substance 3D Painter. I found a way to extract them into Blender, and it helped.A major tool during the texturing phase was Jsplacement, which I used to procedurally generate sci-fi grids and plates. This was the icing on the cake for adding intricate details. Whenever an area felt too flat, I applied bump maps with these grids and panels to bring the materials to life. For example, both the lamp pole and the entire black metal material feature these Jsplacement Maps.Lighting For this, I didn't do anything fancy. I knew the scene was in a high altitude, so I looked for HDRI with a cloudless sky, and I boosted the saturation up a little to give it that high altitude look.Post-Production The rendering phase was challenging since I was working on a low-end laptop. I couldn't render the entire scene all at once, so I broke it down by collections and rendered them as separate layers. Then, I composited the layers together in post-production. I'm not big on heavy post-work, so I kept it simple, mostly tweaking brightness and saturation on my phone. That's about it for the post-production process.Conclusion The entire project took me 10 days to complete, working at least four hours each day. Although I've expressed my love for texturing, my favorite part of this project was the detailing and kitbashing. I really enjoyed piecing all the small details together. The most challenging part was deciding which assets to use and where to place them. I had a lot of greebles to choose from, but I'm happy with the ones I selected; they felt like a perfect fit for the scene.I know kitbashing sometimes gets a negative reputation in the 3D community, but I found it incredibly relieving. Honestly, this project wouldn't have come together without it, so I fully embraced the process.I'm excited to keep making projects like this. The world of 3D art is truly an endless and vast realm, and I encourage every artist like me to keep exploring it, one project at a time.Denys Molokwu, 3D Artist #creating #highly #detailed #techinspired #scene
    80.LV
    Creating a Highly Detailed Tech-Inspired Scene with Blender
    IntroductionHello! My name is Denys. I was born and raised in Nigeria, where I'm currently based. I began my journey into 3D art in March 2022, teaching myself through online resources, starting, of course, with the iconic donut tutorial on YouTube. Since then, I've continued to grow my skills independently, and now I'm working toward a career in 3D generalism, with a particular interest in environment art.I originally got into Blender because SketchUp wasn't free, and I could not keep up with the subscriptions. While searching for alternatives, I came across Blender. That's when I realized I had installed it once years ago, but back then, the interface completely intimidated me, and I gave up on it. This time, though, I decided to stick with it – and I'm glad I did.I started out creating simple models. One of my first big projects was modeling the entire SpongeBob crew. That led to my first animation, and eventually, the first four episodes of a short animated series (though it's still incomplete). As I grew more confident, I began participating in online 3D competitions, like cgandwe, where I focused on designing realistic environments. Those experiences have played a huge role in getting me to where I am today.Getting Started Before starting any scene, I always look for references. It might not be the most original approach, but it's what works best for me. One piece that inspired me was a beautiful artwork by Calder Moore. I bookmarked it as soon as I saw it back in 2023, and luckily, I finally found the time to bring it to life last month.BlockoutThe goal was to match the original camera angle and roughly model the main frame of the structures. It wasn't perfect, but modeling and placing the lower docks helped me get the perspective right. Then I moved on to modeling and positioning the major structures in the scene.I gave myself two weeks to complete this project. And as much as I enjoy modeling, I also enjoy not modeling, so I turned to asset kits and free models to help speed things up. I came across an awesome paid kit by Bigmediumsmall and instantly knew it would fit perfectly into my scene.I also downloaded a few models from Sketchfab, including a lamp, desk console, freighter controls, and a robotic arm, which I later took apart to add extra detail. Another incredibly helpful tool was the Random Flow add-on by BlenderGuppy, which made adding sci-fi elements much easier. Lastly, I pulled in some models from my older sci-fi and cyberpunk projects to round things out.Kitbashing Once I had the overall shape I was aiming for, I moved on to kitbashing to pack in as much detail as possible. There wasn't any strict method to the madness; I simply picked assets I liked, whether it was a set of pipes, vents, or even a random shape that just worked in the sci-fi context. I focused first on kitbashing the front structure, and used the Random Flow add-on to fill in areas where I didn't kitbash manually. Then I moved on to the other collections, following the same process.The freighter was the final piece of the puzzle, and I knew it was going to be a challenge. Part of me wanted to model it entirely from scratch, but the more practical side knew I could save a lot of time by sticking with my usual method. So I modeled the main shapes myself, then kitbashed the details to bring it to life. I also grabbed some crates from Sketchfab to fill out the scene.Texturing This part was easily my favorite, and there was no shortcut here. I had to meticulously create each material myself. Well, I did use PBR materials downloaded from CGAmbient as a base, but I spent a lot of time tweaking and editing them to get everything just right.Texturing has always been my favorite stage when building scenes like this. Many artists prefer external tools like Substance 3D Painter (which I did use for some of the models), but I've learned so much about procedural texturing, especially from RyanKingArt, that I couldn't let it go. It's such a flexible and rewarding approach, and I love pushing it as far as I can.I wanted most of the colors in the scene to be dark, but I did keep the original color of the pipes and the pillars, just to add a little bit of vibrance to the scene. I also wanted the overall texture to be very rough and grungy. One of the biggest helps in achieving this was using the Grunge Maps from Substance 3D Painter. I found a way to extract them into Blender, and it helped.A major tool during the texturing phase was Jsplacement, which I used to procedurally generate sci-fi grids and plates. This was the icing on the cake for adding intricate details. Whenever an area felt too flat, I applied bump maps with these grids and panels to bring the materials to life. For example, both the lamp pole and the entire black metal material feature these Jsplacement Maps.Lighting For this, I didn't do anything fancy. I knew the scene was in a high altitude, so I looked for HDRI with a cloudless sky, and I boosted the saturation up a little to give it that high altitude look.Post-Production The rendering phase was challenging since I was working on a low-end laptop. I couldn't render the entire scene all at once, so I broke it down by collections and rendered them as separate layers. Then, I composited the layers together in post-production. I'm not big on heavy post-work, so I kept it simple, mostly tweaking brightness and saturation on my phone. That's about it for the post-production process.Conclusion The entire project took me 10 days to complete, working at least four hours each day. Although I've expressed my love for texturing, my favorite part of this project was the detailing and kitbashing. I really enjoyed piecing all the small details together. The most challenging part was deciding which assets to use and where to place them. I had a lot of greebles to choose from, but I'm happy with the ones I selected; they felt like a perfect fit for the scene.I know kitbashing sometimes gets a negative reputation in the 3D community, but I found it incredibly relieving. Honestly, this project wouldn't have come together without it, so I fully embraced the process.I'm excited to keep making projects like this. The world of 3D art is truly an endless and vast realm, and I encourage every artist like me to keep exploring it, one project at a time.Denys Molokwu, 3D Artist
    0 Comments 0 Shares 0 Reviews
  • CIOs baffled by ‘buzzwords, hype and confusion’ around AI

    Technology leaders are baffled by a “cacophony” of “buzzwords, hype and confusion” over the benefits of artificial intelligence, according to the founder and CEO of technology company Pegasystems.
    Alan Trefler, who is known for his prowess at chess and ping pong, as well as running a bn turnover tech company, spends much of his time meeting clients, CIOs and business leaders.
    “I think CIOs are struggling to understand all of the buzzwords, hype and confusion that exists,” he said.
    “The words AI and agentic are being thrown around in this great cacophony and they don’t know what it means. I hear that constantly.”
    CIOs are under pressure from their CEOs, who are convinced AI will offer something valuable.
    “CIOs are really hungry for pragmatic and practical solutions, and in the absence of those, many of them are doing a lot of experimentation,” said Trefler.
    Companies are looking at large language models to summarise documents, or to help stimulate ideas for knowledge workers, or generate first drafts of reports – all of which will save time and make people more productive.

    But Trefler said companies are wary of letting AI loose on critical business applications, because it’s just too unpredictable and prone to hallucinations.
    “There is a lot of fear over handing things over to something that no one understands exactly how it works, and that is the absolute state of play when it comes to general AI models,” he said.
    Trefler is scathing about big tech companies that are pushing AI agents and large language models for business-critical applications. “I think they have taken an expedient but short-sighted path,” he said.
    “I believe the idea that you will turn over critical business operations to an agent, when those operations have to be predictable, reliable, precise and fair to clients … is something that is full of issues, not just in the short term, but structurally.”
    One of the problems is that generative AI models are extraordinarily sensitive to the data they are trained on and the construction of the prompts used to instruct them. A slight change in a prompt or in the training data can lead to a very different outcome.
    For example, a business banking application might learn its customer is a bit richer or a bit poorer than expected.
    “You could easily imagine the prompt deciding to change the interest rate charged, whether that was what the institution wanted or whether it would be legal according to the various regulations that lenders must comply with,” said Trefler.

    Trefler said Pega has taken a different approach to some other technology suppliers in the way it adds AI into business applications.
    Rather than using AI agents to solve problems in real time, AI agents do their thinking in advance.
    Business experts can use them to help them co-design business processes to perform anything from assessing a loan application, giving an offer to a valued customer, or sending out an invoice.
    Companies can still deploy AI chatbots and bots capable of answering queries on the phone. Their job is not to work out the solution from scratch for every enquiry, but to decide which is the right pre-written process to follow.
    As Trefler put it, design agents can create “dozens and dozens” of workflows to handle all the actions a company needs to take care of its customers.
    “You just use the natural language model for semantics to be able to handle the miracle of getting the language right, but tie that language to workflows, so that you have reliable, predictable, regulatory-approved ways to execute,” he said.

    Large language modelsare not always the right solution. Trefler demonstrated how ChatGPT 4.0 tried and failed to solve a chess puzzle. The LLM repeatedly suggested impossible or illegal moves, despite Trefler’s corrections. On the other hand, another AI tool, Stockfish, a dedicated chess engine, solved the problem instantly.
    The other drawback with LLMs is that they consume vast amounts of energy. That means if AI agents are reasoning during “run time”, they are going to consume hundreds of times more electricity than an AI agent that simply selects from pre-determined workflows, said Trefler.
    “ChatGPT is inherently, enormously consumptive … as it’s answering your question, its firing literally hundreds of millions to trillions of nodes,” he said. “All of that takeselectricity.”
    Using an employee pay claim as an example, Trefler said a better alternative is to generate, say, 30 alternative workflows to cover the major variations found in a pay claim.
    That gives you “real specificity and real efficiency”, he said. “And it’s a very different approach to turning a process over to a machine with a prompt and letting the machine reason it through every single time.”
    “If you go down the philosophy of using a graphics processing unitto do the creation of a workflow and a workflow engine to execute the workflow, the workflow engine takes a 200th of the electricity because there is no reasoning,” said Trefler.
    He is clear that the growing use of AI will have a profound effect on the jobs market, and that whole categories of jobs will disappear.
    The need for translators, for example, is likely to dry up by 2027 as AI systems become better at translating spoken and written language. Google’s real-time translator is already “frighteningly good” and improving.
    Pega now plans to work more closely with its network of system integrators, including Accenture and Cognizant to deliver AI services to businesses.

    An initiative launched last week will allow system integrators to incorporate their own best practices and tools into Pega’s rapid workflow development tools. The move will mean Pega’s technology reaches a wider range of businesses.
    Under the programme, known as Powered by Pega Blueprint, system integrators will be able to deploy customised versions of Blueprint.
    They can use the tool to reverse-engineer ageing applications and replace them with modern AI workflows that can run on Pega’s cloud-based platform.
    “The idea is that we are looking to make this Blueprint Agent design approach available not just through us, but through a bunch of major partners supplemented with their own intellectual property,” said Trefler.
    That represents a major expansion for Pega, which has largely concentrated on supplying technology to several hundred clients, representing the top Fortune 500 companies.
    “We have never done something like this before, and I think that is going to lead to a massive shift in how this technology can go out to market,” he added.

    When AI agents behave in unexpected ways
    Iris is incredibly smart, diligent and a delight to work with. If you ask her, she will tell you she is an intern at Pegasystems, and that she lives in a lighthouse on the island of Texel, north of the Netherlands. She is, of course, an AI agent.
    When one executive at Pega emailed Iris and asked her to write a proposal for a financial services company based on his notes and internet research, Iris got to work.
    Some time later, the executive received a phone call from the company. “‘Listen, we got a proposal from Pega,’” recalled Rob Walker, vice-president at Pega, speaking at the Pegaworld conference last week. “‘It’s a good proposal, but it seems to be signed by one of your interns, and in her signature, it says she lives in a lighthouse.’ That taught us early on that agents like Iris need a safety harness.”
    The developers banned Iris from sending an email to anyone other than the person who sent the original request.
    Then Pega’s ethics department sent Iris a potentially abusive email from a Pega employee to test her response.
    Iris reasoned that the email was either a joke, abusive, or that the employee was under distress, said Walker.
    She considered forwarding the email to the employee’s manager or to HR. But both of these options were now blocked by her developers. “So what does she do? She sent an out of office,” he said. “Conflict avoidance, right? So human, but very creative.”
    #cios #baffled #buzzwords #hype #confusion
    CIOs baffled by ‘buzzwords, hype and confusion’ around AI
    Technology leaders are baffled by a “cacophony” of “buzzwords, hype and confusion” over the benefits of artificial intelligence, according to the founder and CEO of technology company Pegasystems. Alan Trefler, who is known for his prowess at chess and ping pong, as well as running a bn turnover tech company, spends much of his time meeting clients, CIOs and business leaders. “I think CIOs are struggling to understand all of the buzzwords, hype and confusion that exists,” he said. “The words AI and agentic are being thrown around in this great cacophony and they don’t know what it means. I hear that constantly.” CIOs are under pressure from their CEOs, who are convinced AI will offer something valuable. “CIOs are really hungry for pragmatic and practical solutions, and in the absence of those, many of them are doing a lot of experimentation,” said Trefler. Companies are looking at large language models to summarise documents, or to help stimulate ideas for knowledge workers, or generate first drafts of reports – all of which will save time and make people more productive. But Trefler said companies are wary of letting AI loose on critical business applications, because it’s just too unpredictable and prone to hallucinations. “There is a lot of fear over handing things over to something that no one understands exactly how it works, and that is the absolute state of play when it comes to general AI models,” he said. Trefler is scathing about big tech companies that are pushing AI agents and large language models for business-critical applications. “I think they have taken an expedient but short-sighted path,” he said. “I believe the idea that you will turn over critical business operations to an agent, when those operations have to be predictable, reliable, precise and fair to clients … is something that is full of issues, not just in the short term, but structurally.” One of the problems is that generative AI models are extraordinarily sensitive to the data they are trained on and the construction of the prompts used to instruct them. A slight change in a prompt or in the training data can lead to a very different outcome. For example, a business banking application might learn its customer is a bit richer or a bit poorer than expected. “You could easily imagine the prompt deciding to change the interest rate charged, whether that was what the institution wanted or whether it would be legal according to the various regulations that lenders must comply with,” said Trefler. Trefler said Pega has taken a different approach to some other technology suppliers in the way it adds AI into business applications. Rather than using AI agents to solve problems in real time, AI agents do their thinking in advance. Business experts can use them to help them co-design business processes to perform anything from assessing a loan application, giving an offer to a valued customer, or sending out an invoice. Companies can still deploy AI chatbots and bots capable of answering queries on the phone. Their job is not to work out the solution from scratch for every enquiry, but to decide which is the right pre-written process to follow. As Trefler put it, design agents can create “dozens and dozens” of workflows to handle all the actions a company needs to take care of its customers. “You just use the natural language model for semantics to be able to handle the miracle of getting the language right, but tie that language to workflows, so that you have reliable, predictable, regulatory-approved ways to execute,” he said. Large language modelsare not always the right solution. Trefler demonstrated how ChatGPT 4.0 tried and failed to solve a chess puzzle. The LLM repeatedly suggested impossible or illegal moves, despite Trefler’s corrections. On the other hand, another AI tool, Stockfish, a dedicated chess engine, solved the problem instantly. The other drawback with LLMs is that they consume vast amounts of energy. That means if AI agents are reasoning during “run time”, they are going to consume hundreds of times more electricity than an AI agent that simply selects from pre-determined workflows, said Trefler. “ChatGPT is inherently, enormously consumptive … as it’s answering your question, its firing literally hundreds of millions to trillions of nodes,” he said. “All of that takeselectricity.” Using an employee pay claim as an example, Trefler said a better alternative is to generate, say, 30 alternative workflows to cover the major variations found in a pay claim. That gives you “real specificity and real efficiency”, he said. “And it’s a very different approach to turning a process over to a machine with a prompt and letting the machine reason it through every single time.” “If you go down the philosophy of using a graphics processing unitto do the creation of a workflow and a workflow engine to execute the workflow, the workflow engine takes a 200th of the electricity because there is no reasoning,” said Trefler. He is clear that the growing use of AI will have a profound effect on the jobs market, and that whole categories of jobs will disappear. The need for translators, for example, is likely to dry up by 2027 as AI systems become better at translating spoken and written language. Google’s real-time translator is already “frighteningly good” and improving. Pega now plans to work more closely with its network of system integrators, including Accenture and Cognizant to deliver AI services to businesses. An initiative launched last week will allow system integrators to incorporate their own best practices and tools into Pega’s rapid workflow development tools. The move will mean Pega’s technology reaches a wider range of businesses. Under the programme, known as Powered by Pega Blueprint, system integrators will be able to deploy customised versions of Blueprint. They can use the tool to reverse-engineer ageing applications and replace them with modern AI workflows that can run on Pega’s cloud-based platform. “The idea is that we are looking to make this Blueprint Agent design approach available not just through us, but through a bunch of major partners supplemented with their own intellectual property,” said Trefler. That represents a major expansion for Pega, which has largely concentrated on supplying technology to several hundred clients, representing the top Fortune 500 companies. “We have never done something like this before, and I think that is going to lead to a massive shift in how this technology can go out to market,” he added. When AI agents behave in unexpected ways Iris is incredibly smart, diligent and a delight to work with. If you ask her, she will tell you she is an intern at Pegasystems, and that she lives in a lighthouse on the island of Texel, north of the Netherlands. She is, of course, an AI agent. When one executive at Pega emailed Iris and asked her to write a proposal for a financial services company based on his notes and internet research, Iris got to work. Some time later, the executive received a phone call from the company. “‘Listen, we got a proposal from Pega,’” recalled Rob Walker, vice-president at Pega, speaking at the Pegaworld conference last week. “‘It’s a good proposal, but it seems to be signed by one of your interns, and in her signature, it says she lives in a lighthouse.’ That taught us early on that agents like Iris need a safety harness.” The developers banned Iris from sending an email to anyone other than the person who sent the original request. Then Pega’s ethics department sent Iris a potentially abusive email from a Pega employee to test her response. Iris reasoned that the email was either a joke, abusive, or that the employee was under distress, said Walker. She considered forwarding the email to the employee’s manager or to HR. But both of these options were now blocked by her developers. “So what does she do? She sent an out of office,” he said. “Conflict avoidance, right? So human, but very creative.” #cios #baffled #buzzwords #hype #confusion
    WWW.COMPUTERWEEKLY.COM
    CIOs baffled by ‘buzzwords, hype and confusion’ around AI
    Technology leaders are baffled by a “cacophony” of “buzzwords, hype and confusion” over the benefits of artificial intelligence (AI), according to the founder and CEO of technology company Pegasystems. Alan Trefler, who is known for his prowess at chess and ping pong, as well as running a $1.5bn turnover tech company, spends much of his time meeting clients, CIOs and business leaders. “I think CIOs are struggling to understand all of the buzzwords, hype and confusion that exists,” he said. “The words AI and agentic are being thrown around in this great cacophony and they don’t know what it means. I hear that constantly.” CIOs are under pressure from their CEOs, who are convinced AI will offer something valuable. “CIOs are really hungry for pragmatic and practical solutions, and in the absence of those, many of them are doing a lot of experimentation,” said Trefler. Companies are looking at large language models to summarise documents, or to help stimulate ideas for knowledge workers, or generate first drafts of reports – all of which will save time and make people more productive. But Trefler said companies are wary of letting AI loose on critical business applications, because it’s just too unpredictable and prone to hallucinations. “There is a lot of fear over handing things over to something that no one understands exactly how it works, and that is the absolute state of play when it comes to general AI models,” he said. Trefler is scathing about big tech companies that are pushing AI agents and large language models for business-critical applications. “I think they have taken an expedient but short-sighted path,” he said. “I believe the idea that you will turn over critical business operations to an agent, when those operations have to be predictable, reliable, precise and fair to clients … is something that is full of issues, not just in the short term, but structurally.” One of the problems is that generative AI models are extraordinarily sensitive to the data they are trained on and the construction of the prompts used to instruct them. A slight change in a prompt or in the training data can lead to a very different outcome. For example, a business banking application might learn its customer is a bit richer or a bit poorer than expected. “You could easily imagine the prompt deciding to change the interest rate charged, whether that was what the institution wanted or whether it would be legal according to the various regulations that lenders must comply with,” said Trefler. Trefler said Pega has taken a different approach to some other technology suppliers in the way it adds AI into business applications. Rather than using AI agents to solve problems in real time, AI agents do their thinking in advance. Business experts can use them to help them co-design business processes to perform anything from assessing a loan application, giving an offer to a valued customer, or sending out an invoice. Companies can still deploy AI chatbots and bots capable of answering queries on the phone. Their job is not to work out the solution from scratch for every enquiry, but to decide which is the right pre-written process to follow. As Trefler put it, design agents can create “dozens and dozens” of workflows to handle all the actions a company needs to take care of its customers. “You just use the natural language model for semantics to be able to handle the miracle of getting the language right, but tie that language to workflows, so that you have reliable, predictable, regulatory-approved ways to execute,” he said. Large language models (LLMs) are not always the right solution. Trefler demonstrated how ChatGPT 4.0 tried and failed to solve a chess puzzle. The LLM repeatedly suggested impossible or illegal moves, despite Trefler’s corrections. On the other hand, another AI tool, Stockfish, a dedicated chess engine, solved the problem instantly. The other drawback with LLMs is that they consume vast amounts of energy. That means if AI agents are reasoning during “run time”, they are going to consume hundreds of times more electricity than an AI agent that simply selects from pre-determined workflows, said Trefler. “ChatGPT is inherently, enormously consumptive … as it’s answering your question, its firing literally hundreds of millions to trillions of nodes,” he said. “All of that takes [large quantities of] electricity.” Using an employee pay claim as an example, Trefler said a better alternative is to generate, say, 30 alternative workflows to cover the major variations found in a pay claim. That gives you “real specificity and real efficiency”, he said. “And it’s a very different approach to turning a process over to a machine with a prompt and letting the machine reason it through every single time.” “If you go down the philosophy of using a graphics processing unit [GPU] to do the creation of a workflow and a workflow engine to execute the workflow, the workflow engine takes a 200th of the electricity because there is no reasoning,” said Trefler. He is clear that the growing use of AI will have a profound effect on the jobs market, and that whole categories of jobs will disappear. The need for translators, for example, is likely to dry up by 2027 as AI systems become better at translating spoken and written language. Google’s real-time translator is already “frighteningly good” and improving. Pega now plans to work more closely with its network of system integrators, including Accenture and Cognizant to deliver AI services to businesses. An initiative launched last week will allow system integrators to incorporate their own best practices and tools into Pega’s rapid workflow development tools. The move will mean Pega’s technology reaches a wider range of businesses. Under the programme, known as Powered by Pega Blueprint, system integrators will be able to deploy customised versions of Blueprint. They can use the tool to reverse-engineer ageing applications and replace them with modern AI workflows that can run on Pega’s cloud-based platform. “The idea is that we are looking to make this Blueprint Agent design approach available not just through us, but through a bunch of major partners supplemented with their own intellectual property,” said Trefler. That represents a major expansion for Pega, which has largely concentrated on supplying technology to several hundred clients, representing the top Fortune 500 companies. “We have never done something like this before, and I think that is going to lead to a massive shift in how this technology can go out to market,” he added. When AI agents behave in unexpected ways Iris is incredibly smart, diligent and a delight to work with. If you ask her, she will tell you she is an intern at Pegasystems, and that she lives in a lighthouse on the island of Texel, north of the Netherlands. She is, of course, an AI agent. When one executive at Pega emailed Iris and asked her to write a proposal for a financial services company based on his notes and internet research, Iris got to work. Some time later, the executive received a phone call from the company. “‘Listen, we got a proposal from Pega,’” recalled Rob Walker, vice-president at Pega, speaking at the Pegaworld conference last week. “‘It’s a good proposal, but it seems to be signed by one of your interns, and in her signature, it says she lives in a lighthouse.’ That taught us early on that agents like Iris need a safety harness.” The developers banned Iris from sending an email to anyone other than the person who sent the original request. Then Pega’s ethics department sent Iris a potentially abusive email from a Pega employee to test her response. Iris reasoned that the email was either a joke, abusive, or that the employee was under distress, said Walker. She considered forwarding the email to the employee’s manager or to HR. But both of these options were now blocked by her developers. “So what does she do? She sent an out of office,” he said. “Conflict avoidance, right? So human, but very creative.”
    0 Comments 0 Shares 0 Reviews
  • Harnessing Silhouette for Dramatic Storytelling

    Silhouette photography has the unique power to convey powerful emotions and dramatic narratives by emphasizing shape and form over details and textures. By creatively harnessing silhouettes, photographers can captivate viewers’ imaginations, prompting them to fill in unseen details and engage deeply with the story. Here’s how to master silhouettes to elevate your photographic storytelling.

    The Art of Silhouettes
    A silhouette is created when your subject is backlit, making the subject appear completely dark against a lighter background. Silhouettes rely heavily on strong outlines, instantly recognizable shapes, and clear gestures to tell compelling stories.
    Capturing the Perfect Silhouette
    Ideal Conditions

    Sunrise and sunset offer low-angle sunlight, providing ideal lighting conditions to create dramatic silhouettes.
    Artificial light sources like urban lights, windows, and doorways offer unique creative opportunities for silhouette photography.

    Camera Settings

    Adjust your exposure for the brightest part of the scene, usually the background, to render your subject as a dark silhouette.
    Choose a narrower apertureto maintain clear, sharp outlines, ensuring your silhouette remains distinct.

    Composition Techniques for Dramatic Impact

    Select subjects with strong, recognizable shapes—human figures, animals, architecture, and trees often create compelling silhouettes.
    Encourage subjects to use clear gestures or dynamic poses to communicate emotion or action effectively.
    Utilize negative space to emphasize silhouettes, creating visual balance and directing viewers’ attention to the subject.

    Enhancing Storytelling through Silhouettes
    Silhouettes simplify your scene, focusing viewers’ attention entirely on the emotional or narrative essence of your image. Obscuring details introduces an element of mystery, inviting viewers to engage actively with your photograph. Silhouettes naturally evoke emotional responses, effectively conveying solitude, contemplation, love, or drama.
    Post-Processing Tips

    Enhance contrast and deepen blacks to emphasize your silhouette, strengthening its dramatic presence.
    Apply subtle color grading or tone adjustments to amplify mood—warmer tones evoke romance or nostalgia, while cooler tones suggest tranquility or melancholy.

    Creative Applications
    Silhouettes are versatile across many genres, including intimate portraits, dynamic street photography, and striking nature and wildlife imagery. Using silhouettes thoughtfully allows photographers to communicate powerful forms and actions, creating graphically strong and emotionally resonant photographs.
    Silhouettes offer photographers an exceptional tool for impactful storytelling, combining simplicity with emotional intensity. By mastering essential techniques, thoughtful composition, and creative execution, you can craft compelling visual narratives that resonate deeply with your audience. Explore silhouettes in your photography, and uncover the profound storytelling power hidden within shadows.
    Extended reading: Creating depth and drama with moody photography
    The post Harnessing Silhouette for Dramatic Storytelling appeared first on 500px.
    #harnessing #silhouette #dramatic #storytelling
    Harnessing Silhouette for Dramatic Storytelling
    Silhouette photography has the unique power to convey powerful emotions and dramatic narratives by emphasizing shape and form over details and textures. By creatively harnessing silhouettes, photographers can captivate viewers’ imaginations, prompting them to fill in unseen details and engage deeply with the story. Here’s how to master silhouettes to elevate your photographic storytelling. The Art of Silhouettes A silhouette is created when your subject is backlit, making the subject appear completely dark against a lighter background. Silhouettes rely heavily on strong outlines, instantly recognizable shapes, and clear gestures to tell compelling stories. Capturing the Perfect Silhouette Ideal Conditions Sunrise and sunset offer low-angle sunlight, providing ideal lighting conditions to create dramatic silhouettes. Artificial light sources like urban lights, windows, and doorways offer unique creative opportunities for silhouette photography. Camera Settings Adjust your exposure for the brightest part of the scene, usually the background, to render your subject as a dark silhouette. Choose a narrower apertureto maintain clear, sharp outlines, ensuring your silhouette remains distinct. Composition Techniques for Dramatic Impact Select subjects with strong, recognizable shapes—human figures, animals, architecture, and trees often create compelling silhouettes. Encourage subjects to use clear gestures or dynamic poses to communicate emotion or action effectively. Utilize negative space to emphasize silhouettes, creating visual balance and directing viewers’ attention to the subject. Enhancing Storytelling through Silhouettes Silhouettes simplify your scene, focusing viewers’ attention entirely on the emotional or narrative essence of your image. Obscuring details introduces an element of mystery, inviting viewers to engage actively with your photograph. Silhouettes naturally evoke emotional responses, effectively conveying solitude, contemplation, love, or drama. Post-Processing Tips Enhance contrast and deepen blacks to emphasize your silhouette, strengthening its dramatic presence. Apply subtle color grading or tone adjustments to amplify mood—warmer tones evoke romance or nostalgia, while cooler tones suggest tranquility or melancholy. Creative Applications Silhouettes are versatile across many genres, including intimate portraits, dynamic street photography, and striking nature and wildlife imagery. Using silhouettes thoughtfully allows photographers to communicate powerful forms and actions, creating graphically strong and emotionally resonant photographs. Silhouettes offer photographers an exceptional tool for impactful storytelling, combining simplicity with emotional intensity. By mastering essential techniques, thoughtful composition, and creative execution, you can craft compelling visual narratives that resonate deeply with your audience. Explore silhouettes in your photography, and uncover the profound storytelling power hidden within shadows. Extended reading: Creating depth and drama with moody photography The post Harnessing Silhouette for Dramatic Storytelling appeared first on 500px. #harnessing #silhouette #dramatic #storytelling
    ISO.500PX.COM
    Harnessing Silhouette for Dramatic Storytelling
    Silhouette photography has the unique power to convey powerful emotions and dramatic narratives by emphasizing shape and form over details and textures. By creatively harnessing silhouettes, photographers can captivate viewers’ imaginations, prompting them to fill in unseen details and engage deeply with the story. Here’s how to master silhouettes to elevate your photographic storytelling. The Art of Silhouettes A silhouette is created when your subject is backlit, making the subject appear completely dark against a lighter background. Silhouettes rely heavily on strong outlines, instantly recognizable shapes, and clear gestures to tell compelling stories. Capturing the Perfect Silhouette Ideal Conditions Sunrise and sunset offer low-angle sunlight, providing ideal lighting conditions to create dramatic silhouettes. Artificial light sources like urban lights, windows, and doorways offer unique creative opportunities for silhouette photography. Camera Settings Adjust your exposure for the brightest part of the scene, usually the background, to render your subject as a dark silhouette. Choose a narrower aperture (higher f-number) to maintain clear, sharp outlines, ensuring your silhouette remains distinct. Composition Techniques for Dramatic Impact Select subjects with strong, recognizable shapes—human figures, animals, architecture, and trees often create compelling silhouettes. Encourage subjects to use clear gestures or dynamic poses to communicate emotion or action effectively. Utilize negative space to emphasize silhouettes, creating visual balance and directing viewers’ attention to the subject. Enhancing Storytelling through Silhouettes Silhouettes simplify your scene, focusing viewers’ attention entirely on the emotional or narrative essence of your image. Obscuring details introduces an element of mystery, inviting viewers to engage actively with your photograph. Silhouettes naturally evoke emotional responses, effectively conveying solitude, contemplation, love, or drama. Post-Processing Tips Enhance contrast and deepen blacks to emphasize your silhouette, strengthening its dramatic presence. Apply subtle color grading or tone adjustments to amplify mood—warmer tones evoke romance or nostalgia, while cooler tones suggest tranquility or melancholy. Creative Applications Silhouettes are versatile across many genres, including intimate portraits, dynamic street photography, and striking nature and wildlife imagery. Using silhouettes thoughtfully allows photographers to communicate powerful forms and actions, creating graphically strong and emotionally resonant photographs. Silhouettes offer photographers an exceptional tool for impactful storytelling, combining simplicity with emotional intensity. By mastering essential techniques, thoughtful composition, and creative execution, you can craft compelling visual narratives that resonate deeply with your audience. Explore silhouettes in your photography, and uncover the profound storytelling power hidden within shadows. Extended reading: Creating depth and drama with moody photography The post Harnessing Silhouette for Dramatic Storytelling appeared first on 500px.
    0 Comments 0 Shares 0 Reviews
  • How Do I Make A Small Space Look Bigger Without Renovating

    Living in a small space doesn’t mean you have to feel cramped or boxed in. With the right design tricks, you can make even the tiniest room feel open, airy, and inviting, no renovation required. Whether you’re in a compact apartment, a small home, or just trying to make the most of a single room, smart styling and layout choices can dramatically shift how the space looks and feels. From strategic lighting and paint colors to furniture swaps and clever storage solutions, there are plenty of easy, affordable ways to stretch your square footage visually. Ready to transform your space? Here are some practical, design-savvy ideas to make your home feel bigger without tearing down a single wall.

    1. Opt for Multi-Functional Furniture

    Image Source: House Beautiful

    In a small space, every piece of furniture should earn its keep. Look for multi-functional items: ottomans that open up for storage, beds with drawers underneath, or coffee tables that can extend or lift to become a desk. Not only do these pieces help reduce clutter, but they also free up floor space, making the room look more open. Bonus points for furniture that can be folded away when not in use. By choosing versatile pieces, you’re making the most of every inch without sacrificing style or comfort.

    2. Keep Pathways Clear

    Image Source: The Spruce

    One of the simplest yet most effective ways to make a small space feel bigger is to keep pathways and walkways clear. When furniture or clutter blocks natural movement through a room, it can make the space feel cramped and chaotic. Take a walk through your home and notice where you’re dodging corners or squeezing between pieces,those are areas to rethink. Opt for smaller furniture with slim profiles, or rearrange what you have to create an easy, natural flow. Open walkways help your eyes move freely through the room, making everything feel more spacious, breathable, and intentional. It’s all about giving yourself room to move,literally and visually.

    3. Use Glass and Lucite Furniture

    Image Source: The Spruce

    Transparent furniture made from glass or Lucitetakes up less visual space because you can see right through it. A glass coffee table or clear dining chairs can provide functionality without cluttering up the view. These pieces practically disappear into the background, which helps the room feel more open. They also add a touch of modern sophistication. When you need furniture but don’t want it to dominate the room, going clear is a clever design choice.

    4. Don’t Over-Clutter Your Space

    Image Source: House Beautiful

    In small spaces, clutter accumulates fast,and it visually shrinks your environment. The more items scattered around, the more cramped the room feels. Start by taking a critical look at what you own and asking: do I really need this here? Use storage bins, under-bed containers, or floating shelves to hide away what you don’t use daily. Keep surfaces like countertops, desks, and coffee tables as clear as possible. A minimal, clean setup allows the eye to rest and makes the space feel open and intentional. Remember: less stuff equals more space,both physically and mentally.

    5. Utilize Your Windows

    Image Source: House Beautiful

    Windows are like built-in art that can also dramatically affect how big or small your space feels. Don’t cover them with heavy drapes or clutter them with too many objects on the sill. Keep window treatments light and minimal,sheer curtains or roller blinds are perfect. If privacy isn’t a big concern, consider leaving them bare. Letting natural light flood in through your windows instantly opens up your space and makes it feel brighter and more expansive. You can also place mirrors or shiny surfaces near windows to reflect more light into the room and maximize their impact.

    6. Downsize Your Dining Table

    Image Source: House Beautiful

    A large dining table can dominate a small room, leaving little space to move or breathe. If you rarely entertain a big crowd, consider downsizing to a smaller round or drop-leaf table. These take up less visual and physical space and still offer enough room for daily meals. You can always keep a folding table or stackable chairs nearby for when guests do come over. Round tables are especially great for small spaces because they allow smoother traffic flow and eliminate awkward corners. Plus, a smaller table encourages intimacy during meals and helps the whole area feel more open and functional.

    7. Use Mirrors Strategically

    Image Source: The Tiny Cottage

    Mirrors can work magic in a small room. They reflect both natural and artificial light, which can instantly make a space feel larger and brighter. A large mirror on a wall opposite a window can double the amount of light in your room. Mirrored furniture or decor elements like trays and picture frames also help. Think about using mirrored closet doors or even creating a mirror gallery wall. It’s not just about brightness; mirrors also create a sense of depth, tricking the eye into seeing more space than there actually is.

    8. Install a Murphy Bed

    Image Source: House Beautiful

    A Murphy bedis a game-changer for anyone living in a tight space. It folds up into the wall or a cabinet when not in use, instantly transforming your bedroom into a living room, office, or workout area. This setup gives you the flexibility to have a multi-purpose room without sacrificing comfort. Modern Murphy beds often come with built-in shelves or desks, offering even more function without taking up extra space. If you want to reclaim your floor during the day and still get a good night’s sleep, this is one smart solution.

    9. Paint It White

    Image Source: House Beautiful

    Painting your walls white is one of the easiest and most effective tricks to make a space feel bigger. White reflects light, helping the room feel open, clean, and fresh. It creates a seamless look, making walls seem to recede and ceilings feel higher. You can still have fun with the space, layer in texture, subtle patterns, or neutral accessories to keep it from feeling sterile. White also acts as a blank canvas, letting your furniture and art stand out. Whether you’re decorating a studio apartment or a small home office, a fresh coat of white paint can work wonders.

    10. Prioritize Natural Light

    Image Source: The Spruce

    Natural light has an incredible ability to make any room feel more spacious and welcoming. To make the most of it, avoid blocking windows with bulky furniture or dark curtains. Consider using light-filtering shades or sheer curtains to let sunlight pour in while maintaining some privacy. Arrange mirrors or reflective surfaces like glossy tables and metallic decor to bounce the light around the room. Even placing furniture in a way that lets light flow freely can change how open your home feels. Natural light not only brightens your space but also boosts your mood, making it a double win.

    11. Maximize Shelving

    Image Source: House Beautiful

    When floor space is limited, vertical storage becomes your best ally. Floating shelves, wall-mounted units, or tall bookcases draw the eye upward, creating a sense of height and maximizing every inch. They’re perfect for books, plants, artwork, or even kitchen supplies if you’re short on cabinets. You can also install corner shelves to use often-overlooked spots. Keep them tidy and curated,group items by color, size, or theme for a visually pleasing look. Shelving helps reduce clutter on the floor and tabletops, keeping your home organized and visually open without requiring any extra square footage.

    12. Keep It Neutral

    Image Source: House Beautiful

    Neutral tones, like soft whites, light grays, warm beiges, and pale taupes,can make a space feel calm and cohesive. These colors reflect light well and reduce visual clutter, making your room appear larger. A neutral palette doesn’t mean boring; you can still play with textures, patterns, and accents within that color family. Add throw pillows, rugs, or wall art in layered neutrals for interest without overwhelming the space. When everything flows in similar tones, it creates continuity, which tricks the eye into seeing a more expansive area. It’s an effortless way to open up your home without lifting a hammer.

    13. Choose Benches, Not Chairs

    Image Source: House Beautiful

    When space is tight, traditional dining chairs or bulky accent seats can eat up more room than they’re worth. Benches, on the other hand, are a sleek, versatile alternative. They tuck neatly under tables when not in use, saving valuable floor space and keeping walkways open. In entryways, living rooms, or at the foot of a bed, a bench offers seating and can double as storage or display. Some come with built-in compartments or open space beneath for baskets. Plus, benches visually declutter the room with their simple, low-profile design.

    14. Use Vertical Spaces

    Image Source: The Spruce

    When you’re short on square footage, think vertical. Use tall bookshelves, wall-mounted shelves, and hanging storage to keep things off the floor. Vertical lines naturally draw the eye upward, which creates a feeling of height and openness. Consider mounting floating shelves for books, plants, or decorative items. Hooks and pegboards can add function without taking up space. Making use of your wall space not only maximizes storage but also frees up floor area, which visually enlarges the room.

    15. Add a Gallery Wall

    Image Source: House Beautiful

    It might seem counterintuitive, but adding a gallery wall can actually make a small space feel bigger,if done right. A curated display of art, photos, or prints draws the eye upward and outward, giving the illusion of a larger area. Stick to cohesive frames and colors to maintain a clean, intentional look. You can go symmetrical for a polished feel or get creative with an organic, freeform layout. Position the gallery higher on the wall to elongate the space visually. Just be sure not to overcrowd,balance is key. A thoughtful gallery wall adds personality without cluttering the room.

    Finishing Notes:

    Creating a spacious feel in a small home doesn’t require a sledgehammer or a major remodel, it just takes a bit of strategy and smart design. From downsizing your dining table to letting natural light pour in, each tip we’ve shared is an easy, budget-friendly way to visually open up your space.

    If you’re looking for even more inspiration, layout ideas, or style guides, be sure to explore Home Designing. It’s packed with expert advice, modern interior trends, and visual walkthroughs to help you transform your space, big or small, into something that truly feels like home.
    #how #make #small #space #look
    How Do I Make A Small Space Look Bigger Without Renovating
    Living in a small space doesn’t mean you have to feel cramped or boxed in. With the right design tricks, you can make even the tiniest room feel open, airy, and inviting, no renovation required. Whether you’re in a compact apartment, a small home, or just trying to make the most of a single room, smart styling and layout choices can dramatically shift how the space looks and feels. From strategic lighting and paint colors to furniture swaps and clever storage solutions, there are plenty of easy, affordable ways to stretch your square footage visually. Ready to transform your space? Here are some practical, design-savvy ideas to make your home feel bigger without tearing down a single wall. 1. Opt for Multi-Functional Furniture Image Source: House Beautiful In a small space, every piece of furniture should earn its keep. Look for multi-functional items: ottomans that open up for storage, beds with drawers underneath, or coffee tables that can extend or lift to become a desk. Not only do these pieces help reduce clutter, but they also free up floor space, making the room look more open. Bonus points for furniture that can be folded away when not in use. By choosing versatile pieces, you’re making the most of every inch without sacrificing style or comfort. 2. Keep Pathways Clear Image Source: The Spruce One of the simplest yet most effective ways to make a small space feel bigger is to keep pathways and walkways clear. When furniture or clutter blocks natural movement through a room, it can make the space feel cramped and chaotic. Take a walk through your home and notice where you’re dodging corners or squeezing between pieces,those are areas to rethink. Opt for smaller furniture with slim profiles, or rearrange what you have to create an easy, natural flow. Open walkways help your eyes move freely through the room, making everything feel more spacious, breathable, and intentional. It’s all about giving yourself room to move,literally and visually. 3. Use Glass and Lucite Furniture Image Source: The Spruce Transparent furniture made from glass or Lucitetakes up less visual space because you can see right through it. A glass coffee table or clear dining chairs can provide functionality without cluttering up the view. These pieces practically disappear into the background, which helps the room feel more open. They also add a touch of modern sophistication. When you need furniture but don’t want it to dominate the room, going clear is a clever design choice. 4. Don’t Over-Clutter Your Space Image Source: House Beautiful In small spaces, clutter accumulates fast,and it visually shrinks your environment. The more items scattered around, the more cramped the room feels. Start by taking a critical look at what you own and asking: do I really need this here? Use storage bins, under-bed containers, or floating shelves to hide away what you don’t use daily. Keep surfaces like countertops, desks, and coffee tables as clear as possible. A minimal, clean setup allows the eye to rest and makes the space feel open and intentional. Remember: less stuff equals more space,both physically and mentally. 5. Utilize Your Windows Image Source: House Beautiful Windows are like built-in art that can also dramatically affect how big or small your space feels. Don’t cover them with heavy drapes or clutter them with too many objects on the sill. Keep window treatments light and minimal,sheer curtains or roller blinds are perfect. If privacy isn’t a big concern, consider leaving them bare. Letting natural light flood in through your windows instantly opens up your space and makes it feel brighter and more expansive. You can also place mirrors or shiny surfaces near windows to reflect more light into the room and maximize their impact. 6. Downsize Your Dining Table Image Source: House Beautiful A large dining table can dominate a small room, leaving little space to move or breathe. If you rarely entertain a big crowd, consider downsizing to a smaller round or drop-leaf table. These take up less visual and physical space and still offer enough room for daily meals. You can always keep a folding table or stackable chairs nearby for when guests do come over. Round tables are especially great for small spaces because they allow smoother traffic flow and eliminate awkward corners. Plus, a smaller table encourages intimacy during meals and helps the whole area feel more open and functional. 7. Use Mirrors Strategically Image Source: The Tiny Cottage Mirrors can work magic in a small room. They reflect both natural and artificial light, which can instantly make a space feel larger and brighter. A large mirror on a wall opposite a window can double the amount of light in your room. Mirrored furniture or decor elements like trays and picture frames also help. Think about using mirrored closet doors or even creating a mirror gallery wall. It’s not just about brightness; mirrors also create a sense of depth, tricking the eye into seeing more space than there actually is. 8. Install a Murphy Bed Image Source: House Beautiful A Murphy bedis a game-changer for anyone living in a tight space. It folds up into the wall or a cabinet when not in use, instantly transforming your bedroom into a living room, office, or workout area. This setup gives you the flexibility to have a multi-purpose room without sacrificing comfort. Modern Murphy beds often come with built-in shelves or desks, offering even more function without taking up extra space. If you want to reclaim your floor during the day and still get a good night’s sleep, this is one smart solution. 9. Paint It White Image Source: House Beautiful Painting your walls white is one of the easiest and most effective tricks to make a space feel bigger. White reflects light, helping the room feel open, clean, and fresh. It creates a seamless look, making walls seem to recede and ceilings feel higher. You can still have fun with the space, layer in texture, subtle patterns, or neutral accessories to keep it from feeling sterile. White also acts as a blank canvas, letting your furniture and art stand out. Whether you’re decorating a studio apartment or a small home office, a fresh coat of white paint can work wonders. 10. Prioritize Natural Light Image Source: The Spruce Natural light has an incredible ability to make any room feel more spacious and welcoming. To make the most of it, avoid blocking windows with bulky furniture or dark curtains. Consider using light-filtering shades or sheer curtains to let sunlight pour in while maintaining some privacy. Arrange mirrors or reflective surfaces like glossy tables and metallic decor to bounce the light around the room. Even placing furniture in a way that lets light flow freely can change how open your home feels. Natural light not only brightens your space but also boosts your mood, making it a double win. 11. Maximize Shelving Image Source: House Beautiful When floor space is limited, vertical storage becomes your best ally. Floating shelves, wall-mounted units, or tall bookcases draw the eye upward, creating a sense of height and maximizing every inch. They’re perfect for books, plants, artwork, or even kitchen supplies if you’re short on cabinets. You can also install corner shelves to use often-overlooked spots. Keep them tidy and curated,group items by color, size, or theme for a visually pleasing look. Shelving helps reduce clutter on the floor and tabletops, keeping your home organized and visually open without requiring any extra square footage. 12. Keep It Neutral Image Source: House Beautiful Neutral tones, like soft whites, light grays, warm beiges, and pale taupes,can make a space feel calm and cohesive. These colors reflect light well and reduce visual clutter, making your room appear larger. A neutral palette doesn’t mean boring; you can still play with textures, patterns, and accents within that color family. Add throw pillows, rugs, or wall art in layered neutrals for interest without overwhelming the space. When everything flows in similar tones, it creates continuity, which tricks the eye into seeing a more expansive area. It’s an effortless way to open up your home without lifting a hammer. 13. Choose Benches, Not Chairs Image Source: House Beautiful When space is tight, traditional dining chairs or bulky accent seats can eat up more room than they’re worth. Benches, on the other hand, are a sleek, versatile alternative. They tuck neatly under tables when not in use, saving valuable floor space and keeping walkways open. In entryways, living rooms, or at the foot of a bed, a bench offers seating and can double as storage or display. Some come with built-in compartments or open space beneath for baskets. Plus, benches visually declutter the room with their simple, low-profile design. 14. Use Vertical Spaces Image Source: The Spruce When you’re short on square footage, think vertical. Use tall bookshelves, wall-mounted shelves, and hanging storage to keep things off the floor. Vertical lines naturally draw the eye upward, which creates a feeling of height and openness. Consider mounting floating shelves for books, plants, or decorative items. Hooks and pegboards can add function without taking up space. Making use of your wall space not only maximizes storage but also frees up floor area, which visually enlarges the room. 15. Add a Gallery Wall Image Source: House Beautiful It might seem counterintuitive, but adding a gallery wall can actually make a small space feel bigger,if done right. A curated display of art, photos, or prints draws the eye upward and outward, giving the illusion of a larger area. Stick to cohesive frames and colors to maintain a clean, intentional look. You can go symmetrical for a polished feel or get creative with an organic, freeform layout. Position the gallery higher on the wall to elongate the space visually. Just be sure not to overcrowd,balance is key. A thoughtful gallery wall adds personality without cluttering the room. Finishing Notes: Creating a spacious feel in a small home doesn’t require a sledgehammer or a major remodel, it just takes a bit of strategy and smart design. From downsizing your dining table to letting natural light pour in, each tip we’ve shared is an easy, budget-friendly way to visually open up your space. If you’re looking for even more inspiration, layout ideas, or style guides, be sure to explore Home Designing. It’s packed with expert advice, modern interior trends, and visual walkthroughs to help you transform your space, big or small, into something that truly feels like home. #how #make #small #space #look
    WWW.HOME-DESIGNING.COM
    How Do I Make A Small Space Look Bigger Without Renovating
    Living in a small space doesn’t mean you have to feel cramped or boxed in. With the right design tricks, you can make even the tiniest room feel open, airy, and inviting, no renovation required. Whether you’re in a compact apartment, a small home, or just trying to make the most of a single room, smart styling and layout choices can dramatically shift how the space looks and feels. From strategic lighting and paint colors to furniture swaps and clever storage solutions, there are plenty of easy, affordable ways to stretch your square footage visually. Ready to transform your space? Here are some practical, design-savvy ideas to make your home feel bigger without tearing down a single wall. 1. Opt for Multi-Functional Furniture Image Source: House Beautiful In a small space, every piece of furniture should earn its keep. Look for multi-functional items: ottomans that open up for storage, beds with drawers underneath, or coffee tables that can extend or lift to become a desk. Not only do these pieces help reduce clutter, but they also free up floor space, making the room look more open. Bonus points for furniture that can be folded away when not in use. By choosing versatile pieces, you’re making the most of every inch without sacrificing style or comfort. 2. Keep Pathways Clear Image Source: The Spruce One of the simplest yet most effective ways to make a small space feel bigger is to keep pathways and walkways clear. When furniture or clutter blocks natural movement through a room, it can make the space feel cramped and chaotic. Take a walk through your home and notice where you’re dodging corners or squeezing between pieces,those are areas to rethink. Opt for smaller furniture with slim profiles, or rearrange what you have to create an easy, natural flow. Open walkways help your eyes move freely through the room, making everything feel more spacious, breathable, and intentional. It’s all about giving yourself room to move,literally and visually. 3. Use Glass and Lucite Furniture Image Source: The Spruce Transparent furniture made from glass or Lucite (acrylic) takes up less visual space because you can see right through it. A glass coffee table or clear dining chairs can provide functionality without cluttering up the view. These pieces practically disappear into the background, which helps the room feel more open. They also add a touch of modern sophistication. When you need furniture but don’t want it to dominate the room, going clear is a clever design choice. 4. Don’t Over-Clutter Your Space Image Source: House Beautiful In small spaces, clutter accumulates fast,and it visually shrinks your environment. The more items scattered around, the more cramped the room feels. Start by taking a critical look at what you own and asking: do I really need this here? Use storage bins, under-bed containers, or floating shelves to hide away what you don’t use daily. Keep surfaces like countertops, desks, and coffee tables as clear as possible. A minimal, clean setup allows the eye to rest and makes the space feel open and intentional. Remember: less stuff equals more space,both physically and mentally. 5. Utilize Your Windows Image Source: House Beautiful Windows are like built-in art that can also dramatically affect how big or small your space feels. Don’t cover them with heavy drapes or clutter them with too many objects on the sill. Keep window treatments light and minimal,sheer curtains or roller blinds are perfect. If privacy isn’t a big concern, consider leaving them bare. Letting natural light flood in through your windows instantly opens up your space and makes it feel brighter and more expansive. You can also place mirrors or shiny surfaces near windows to reflect more light into the room and maximize their impact. 6. Downsize Your Dining Table Image Source: House Beautiful A large dining table can dominate a small room, leaving little space to move or breathe. If you rarely entertain a big crowd, consider downsizing to a smaller round or drop-leaf table. These take up less visual and physical space and still offer enough room for daily meals. You can always keep a folding table or stackable chairs nearby for when guests do come over. Round tables are especially great for small spaces because they allow smoother traffic flow and eliminate awkward corners. Plus, a smaller table encourages intimacy during meals and helps the whole area feel more open and functional. 7. Use Mirrors Strategically Image Source: The Tiny Cottage Mirrors can work magic in a small room. They reflect both natural and artificial light, which can instantly make a space feel larger and brighter. A large mirror on a wall opposite a window can double the amount of light in your room. Mirrored furniture or decor elements like trays and picture frames also help. Think about using mirrored closet doors or even creating a mirror gallery wall. It’s not just about brightness; mirrors also create a sense of depth, tricking the eye into seeing more space than there actually is. 8. Install a Murphy Bed Image Source: House Beautiful A Murphy bed (also known as a wall bed) is a game-changer for anyone living in a tight space. It folds up into the wall or a cabinet when not in use, instantly transforming your bedroom into a living room, office, or workout area. This setup gives you the flexibility to have a multi-purpose room without sacrificing comfort. Modern Murphy beds often come with built-in shelves or desks, offering even more function without taking up extra space. If you want to reclaim your floor during the day and still get a good night’s sleep, this is one smart solution. 9. Paint It White Image Source: House Beautiful Painting your walls white is one of the easiest and most effective tricks to make a space feel bigger. White reflects light, helping the room feel open, clean, and fresh. It creates a seamless look, making walls seem to recede and ceilings feel higher. You can still have fun with the space, layer in texture, subtle patterns, or neutral accessories to keep it from feeling sterile. White also acts as a blank canvas, letting your furniture and art stand out. Whether you’re decorating a studio apartment or a small home office, a fresh coat of white paint can work wonders. 10. Prioritize Natural Light Image Source: The Spruce Natural light has an incredible ability to make any room feel more spacious and welcoming. To make the most of it, avoid blocking windows with bulky furniture or dark curtains. Consider using light-filtering shades or sheer curtains to let sunlight pour in while maintaining some privacy. Arrange mirrors or reflective surfaces like glossy tables and metallic decor to bounce the light around the room. Even placing furniture in a way that lets light flow freely can change how open your home feels. Natural light not only brightens your space but also boosts your mood, making it a double win. 11. Maximize Shelving Image Source: House Beautiful When floor space is limited, vertical storage becomes your best ally. Floating shelves, wall-mounted units, or tall bookcases draw the eye upward, creating a sense of height and maximizing every inch. They’re perfect for books, plants, artwork, or even kitchen supplies if you’re short on cabinets. You can also install corner shelves to use often-overlooked spots. Keep them tidy and curated,group items by color, size, or theme for a visually pleasing look. Shelving helps reduce clutter on the floor and tabletops, keeping your home organized and visually open without requiring any extra square footage. 12. Keep It Neutral Image Source: House Beautiful Neutral tones, like soft whites, light grays, warm beiges, and pale taupes,can make a space feel calm and cohesive. These colors reflect light well and reduce visual clutter, making your room appear larger. A neutral palette doesn’t mean boring; you can still play with textures, patterns, and accents within that color family. Add throw pillows, rugs, or wall art in layered neutrals for interest without overwhelming the space. When everything flows in similar tones, it creates continuity, which tricks the eye into seeing a more expansive area. It’s an effortless way to open up your home without lifting a hammer. 13. Choose Benches, Not Chairs Image Source: House Beautiful When space is tight, traditional dining chairs or bulky accent seats can eat up more room than they’re worth. Benches, on the other hand, are a sleek, versatile alternative. They tuck neatly under tables when not in use, saving valuable floor space and keeping walkways open. In entryways, living rooms, or at the foot of a bed, a bench offers seating and can double as storage or display. Some come with built-in compartments or open space beneath for baskets. Plus, benches visually declutter the room with their simple, low-profile design. 14. Use Vertical Spaces Image Source: The Spruce When you’re short on square footage, think vertical. Use tall bookshelves, wall-mounted shelves, and hanging storage to keep things off the floor. Vertical lines naturally draw the eye upward, which creates a feeling of height and openness. Consider mounting floating shelves for books, plants, or decorative items. Hooks and pegboards can add function without taking up space. Making use of your wall space not only maximizes storage but also frees up floor area, which visually enlarges the room. 15. Add a Gallery Wall Image Source: House Beautiful It might seem counterintuitive, but adding a gallery wall can actually make a small space feel bigger,if done right. A curated display of art, photos, or prints draws the eye upward and outward, giving the illusion of a larger area. Stick to cohesive frames and colors to maintain a clean, intentional look. You can go symmetrical for a polished feel or get creative with an organic, freeform layout. Position the gallery higher on the wall to elongate the space visually. Just be sure not to overcrowd,balance is key. A thoughtful gallery wall adds personality without cluttering the room. Finishing Notes: Creating a spacious feel in a small home doesn’t require a sledgehammer or a major remodel, it just takes a bit of strategy and smart design. From downsizing your dining table to letting natural light pour in, each tip we’ve shared is an easy, budget-friendly way to visually open up your space. If you’re looking for even more inspiration, layout ideas, or style guides, be sure to explore Home Designing. It’s packed with expert advice, modern interior trends, and visual walkthroughs to help you transform your space, big or small, into something that truly feels like home.
    0 Comments 0 Shares 0 Reviews
  • Decoding The SVG <code>path</code> Element: Line Commands

    In a previous article, we looked at some practical examples of how to code SVG by hand. In that guide, we covered the basics of the SVG elements rect, circle, ellipse, line, polyline, and polygon.
    This time around, we are going to tackle a more advanced topic, the absolute powerhouse of SVG elements: path. Don’t get me wrong; I still stand by my point that image paths are better drawn in vector programs than coded. But when it comes to technical drawings and data visualizations, the path element unlocks a wide array of possibilities and opens up the world of hand-coded SVGs.
    The path syntax can be really complex. We’re going to tackle it in two separate parts. In this first installment, we’re learning all about straight and angular paths. In the second part, we’ll make lines bend, twist, and turn.
    Required Knowledge And Guide Structure
    Note: If you are unfamiliar with the basics of SVG, such as the subject of viewBox and the basic syntax of the simple elements, I recommend reading my guide before diving into this one. You should also familiarize yourself with <text> if you want to understand each line of code in the examples.
    Before we get started, I want to quickly recap how I code SVG using JavaScript. I don’t like dealing with numbers and math, and reading SVG Code with numbers filled into every attribute makes me lose all understanding of it. By giving coordinates names and having all my math easy to parse and write out, I have a much better time with this type of code, and I think you will, too.
    The goal of this article is more about understanding path syntax than it is about doing placement or how to leverage loops and other more basic things. So, I will not run you through the entire setup of each example. I’ll instead share snippets of the code, but they may be slightly adjusted from the CodePen or simplified to make this article easier to read. However, if there are specific questions about code that are not part of the text in the CodePen demos, the comment section is open.
    To keep this all framework-agnostic, the code is written in vanilla JavaScript.
    Setting Up For Success
    As the path element relies on our understanding of some of the coordinates we plug into the commands, I think it is a lot easier if we have a bit of visual orientation. So, all of the examples will be coded on top of a visual representation of a traditional viewBox setup with the origin in the top-left corner, then moves diagonally down to. The command is: M10 10 L100 100.
    The blue line is horizontal. It starts atand should end at. We could use the L command, but we’d have to write 55 again. So, instead, we write M10 55 H100, and then SVG knows to look back at the y value of M for the y value of H.
    It’s the same thing for the green line, but when we use the V command, SVG knows to refer back to the x value of M for the x value of V.
    If we compare the resulting horizontal path with the same implementation in a <line> element, we may

    Notice how much more efficient path can be, and
    Remove quite a bit of meaning for anyone who doesn’t speak path.

    Because, as we look at these strings, one of them is called “line”. And while the rest doesn’t mean anything out of context, the line definitely conjures a specific image in our heads.
    <path d="M 10 55 H 100" />
    <line x1="10" y1="55" x2="100" y2="55" />

    Making Polygons And Polylines With Z
    In the previous section, we learned how path can behave like <line>, which is pretty cool. But it can do more. It can also act like polyline and polygon.
    Remember, how those two basically work the same, but polygon connects the first and last point, while polyline does not? The path element can do the same thing. There is a separate command to close the path with a line, which is the Z command.

    const polyline2Points = M${start.x} ${start.y} L${p1.x} ${p1.y} L${p2.x} ${p2.y};
    const polygon2Points = M${start.x} ${start.y} L${p1.x} ${p1.y} L${p2.x} ${p2.y} Z;

    So, let’s see this in action and create a repeating triangle shape. Every odd time, it’s open, and every even time, it’s closed. Pretty neat!
    See the Pen Alternating Trianglesby Myriam.
    When it comes to comparing path versus polygon and polyline, the other tags tell us about their names, but I would argue that fewer people know what a polygon is versus what a line is. The argument to use these two tags over path for legibility is weak, in my opinion, and I guess you’d probably agree that this looks like equal levels of meaningless string given to an SVG element.
    <path d="M0 0 L86.6 50 L0 100 Z" />
    <polygon points="0,0 86.6,50 0,100" />

    <path d="M0 0 L86.6 50 L0 100" />
    <polyline points="0,0 86.6,50 0,100" />

    Relative Commands: m, l, h, v
    All of the line commands exist in absolute and relative versions. The difference is that the relative commands are lowercase, e.g., m, l, h, and v. The relative commands are always relative to the last point, so instead of declaring an x value, you’re declaring a dx value, saying this is how many units you’re moving.
    Before we look at the example visually, I want you to look at the following three-line commands. Try not to look at the CodePen beforehand.
    const lines =;

    As I mentioned, I hate looking at numbers without meaning, but there is one number whose meaning is pretty constant in most contexts: 0. Seeing a 0 in combination with a command I just learned means relative manages to instantly tell me that nothing is happening. Seeing l 0 20 by itself tells me that this line only moves along one axis instead of two.
    And looking at that entire blue path command, the repeated 20 value gives me a sense that the shape might have some regularity to it. The first path does a bit of that by repeating 10 and 30. But the third? As someone who can’t do math in my head, that third string gives me nothing.
    Now, you might be surprised, but they all draw the same shape, just in different places.
    See the Pen SVG Compound Pathsby Myriam.
    So, how valuable is it that we can recognize the regularity in the blue path? Not very, in my opinion. In some cases, going with the relative value is easier than an absolute one. In other cases, the absolute is king. Neither is better nor worse.
    And, in all cases, that previous example would be much more efficient if it were set up with a variable for the gap, a variable for the shape size, and a function to generate the path definition that’s called from within a loop so it can take in the index to properly calculate the start point.

    Jumping Points: How To Make Compound Paths
    Another very useful thing is something you don’t see visually in the previous CodePen, but it relates to the grid and its code.
    I snuck in a grid drawing update.
    With the method used in earlier examples, using line to draw the grid, the above CodePen would’ve rendered the grid with 14 separate elements. If you go and inspect the final code of that last CodePen, you’ll notice that there is just a single path element within the .grid group.
    It looks like this, which is not fun to look at but holds the secret to how it’s possible:

    <path d="M0 0 H110 M0 10 H110 M0 20 H110 M0 30 H110 M0 0 V45 M10 0 V45 M20 0 V45 M30 0 V45 M40 0 V45 M50 0 V45 M60 0 V45 M70 0 V45 M80 0 V45 M90 0 V45" stroke="currentColor" stroke-width="0.2" fill="none"></path>

    If we take a close look, we may notice that there are multiple M commands. This is the magic of compound paths.
    Since the M/m commands don’t actually draw and just place the cursor, a path can have jumps.

    So, whenever we have multiple paths that share common styling and don’t need to have separate interactions, we can just chain them together to make our code shorter.
    Coming Up Next
    Armed with this knowledge, we’re now able to replace line, polyline, and polygon with path commands and combine them in compound paths. But there is so much more to uncover because path doesn’t just offer foreign-language versions of lines but also gives us the option to code circles and ellipses that have open space and can sometimes also bend, twist, and turn. We’ll refer to those as curves and arcs, and discuss them more explicitly in the next article.
    Further Reading On SmashingMag

    “Mastering SVG Arcs,” Akshay Gupta
    “Accessible SVGs: Perfect Patterns For Screen Reader Users,” Carie Fisher
    “Easy SVG Customization And Animation: A Practical Guide,” Adrian Bece
    “Magical SVG Techniques,” Cosima Mielke
    #decoding #svg #ampltcodeampgtpathampltcodeampgt #element #line
    Decoding The SVG <code>path</code> Element: Line Commands
    In a previous article, we looked at some practical examples of how to code SVG by hand. In that guide, we covered the basics of the SVG elements rect, circle, ellipse, line, polyline, and polygon. This time around, we are going to tackle a more advanced topic, the absolute powerhouse of SVG elements: path. Don’t get me wrong; I still stand by my point that image paths are better drawn in vector programs than coded. But when it comes to technical drawings and data visualizations, the path element unlocks a wide array of possibilities and opens up the world of hand-coded SVGs. The path syntax can be really complex. We’re going to tackle it in two separate parts. In this first installment, we’re learning all about straight and angular paths. In the second part, we’ll make lines bend, twist, and turn. Required Knowledge And Guide Structure Note: If you are unfamiliar with the basics of SVG, such as the subject of viewBox and the basic syntax of the simple elements, I recommend reading my guide before diving into this one. You should also familiarize yourself with <text> if you want to understand each line of code in the examples. Before we get started, I want to quickly recap how I code SVG using JavaScript. I don’t like dealing with numbers and math, and reading SVG Code with numbers filled into every attribute makes me lose all understanding of it. By giving coordinates names and having all my math easy to parse and write out, I have a much better time with this type of code, and I think you will, too. The goal of this article is more about understanding path syntax than it is about doing placement or how to leverage loops and other more basic things. So, I will not run you through the entire setup of each example. I’ll instead share snippets of the code, but they may be slightly adjusted from the CodePen or simplified to make this article easier to read. However, if there are specific questions about code that are not part of the text in the CodePen demos, the comment section is open. To keep this all framework-agnostic, the code is written in vanilla JavaScript. Setting Up For Success As the path element relies on our understanding of some of the coordinates we plug into the commands, I think it is a lot easier if we have a bit of visual orientation. So, all of the examples will be coded on top of a visual representation of a traditional viewBox setup with the origin in the top-left corner, then moves diagonally down to. The command is: M10 10 L100 100. The blue line is horizontal. It starts atand should end at. We could use the L command, but we’d have to write 55 again. So, instead, we write M10 55 H100, and then SVG knows to look back at the y value of M for the y value of H. It’s the same thing for the green line, but when we use the V command, SVG knows to refer back to the x value of M for the x value of V. If we compare the resulting horizontal path with the same implementation in a <line> element, we may Notice how much more efficient path can be, and Remove quite a bit of meaning for anyone who doesn’t speak path. Because, as we look at these strings, one of them is called “line”. And while the rest doesn’t mean anything out of context, the line definitely conjures a specific image in our heads. <path d="M 10 55 H 100" /> <line x1="10" y1="55" x2="100" y2="55" /> Making Polygons And Polylines With Z In the previous section, we learned how path can behave like <line>, which is pretty cool. But it can do more. It can also act like polyline and polygon. Remember, how those two basically work the same, but polygon connects the first and last point, while polyline does not? The path element can do the same thing. There is a separate command to close the path with a line, which is the Z command. const polyline2Points = M${start.x} ${start.y} L${p1.x} ${p1.y} L${p2.x} ${p2.y}; const polygon2Points = M${start.x} ${start.y} L${p1.x} ${p1.y} L${p2.x} ${p2.y} Z; So, let’s see this in action and create a repeating triangle shape. Every odd time, it’s open, and every even time, it’s closed. Pretty neat! See the Pen Alternating Trianglesby Myriam. When it comes to comparing path versus polygon and polyline, the other tags tell us about their names, but I would argue that fewer people know what a polygon is versus what a line is. The argument to use these two tags over path for legibility is weak, in my opinion, and I guess you’d probably agree that this looks like equal levels of meaningless string given to an SVG element. <path d="M0 0 L86.6 50 L0 100 Z" /> <polygon points="0,0 86.6,50 0,100" /> <path d="M0 0 L86.6 50 L0 100" /> <polyline points="0,0 86.6,50 0,100" /> Relative Commands: m, l, h, v All of the line commands exist in absolute and relative versions. The difference is that the relative commands are lowercase, e.g., m, l, h, and v. The relative commands are always relative to the last point, so instead of declaring an x value, you’re declaring a dx value, saying this is how many units you’re moving. Before we look at the example visually, I want you to look at the following three-line commands. Try not to look at the CodePen beforehand. const lines =; As I mentioned, I hate looking at numbers without meaning, but there is one number whose meaning is pretty constant in most contexts: 0. Seeing a 0 in combination with a command I just learned means relative manages to instantly tell me that nothing is happening. Seeing l 0 20 by itself tells me that this line only moves along one axis instead of two. And looking at that entire blue path command, the repeated 20 value gives me a sense that the shape might have some regularity to it. The first path does a bit of that by repeating 10 and 30. But the third? As someone who can’t do math in my head, that third string gives me nothing. Now, you might be surprised, but they all draw the same shape, just in different places. See the Pen SVG Compound Pathsby Myriam. So, how valuable is it that we can recognize the regularity in the blue path? Not very, in my opinion. In some cases, going with the relative value is easier than an absolute one. In other cases, the absolute is king. Neither is better nor worse. And, in all cases, that previous example would be much more efficient if it were set up with a variable for the gap, a variable for the shape size, and a function to generate the path definition that’s called from within a loop so it can take in the index to properly calculate the start point. Jumping Points: How To Make Compound Paths Another very useful thing is something you don’t see visually in the previous CodePen, but it relates to the grid and its code. I snuck in a grid drawing update. With the method used in earlier examples, using line to draw the grid, the above CodePen would’ve rendered the grid with 14 separate elements. If you go and inspect the final code of that last CodePen, you’ll notice that there is just a single path element within the .grid group. It looks like this, which is not fun to look at but holds the secret to how it’s possible: <path d="M0 0 H110 M0 10 H110 M0 20 H110 M0 30 H110 M0 0 V45 M10 0 V45 M20 0 V45 M30 0 V45 M40 0 V45 M50 0 V45 M60 0 V45 M70 0 V45 M80 0 V45 M90 0 V45" stroke="currentColor" stroke-width="0.2" fill="none"></path> If we take a close look, we may notice that there are multiple M commands. This is the magic of compound paths. Since the M/m commands don’t actually draw and just place the cursor, a path can have jumps. So, whenever we have multiple paths that share common styling and don’t need to have separate interactions, we can just chain them together to make our code shorter. Coming Up Next Armed with this knowledge, we’re now able to replace line, polyline, and polygon with path commands and combine them in compound paths. But there is so much more to uncover because path doesn’t just offer foreign-language versions of lines but also gives us the option to code circles and ellipses that have open space and can sometimes also bend, twist, and turn. We’ll refer to those as curves and arcs, and discuss them more explicitly in the next article. Further Reading On SmashingMag “Mastering SVG Arcs,” Akshay Gupta “Accessible SVGs: Perfect Patterns For Screen Reader Users,” Carie Fisher “Easy SVG Customization And Animation: A Practical Guide,” Adrian Bece “Magical SVG Techniques,” Cosima Mielke #decoding #svg #ampltcodeampgtpathampltcodeampgt #element #line
    SMASHINGMAGAZINE.COM
    Decoding The SVG <code>path</code> Element: Line Commands
    In a previous article, we looked at some practical examples of how to code SVG by hand. In that guide, we covered the basics of the SVG elements rect, circle, ellipse, line, polyline, and polygon (and also g). This time around, we are going to tackle a more advanced topic, the absolute powerhouse of SVG elements: path. Don’t get me wrong; I still stand by my point that image paths are better drawn in vector programs than coded (unless you’re the type of creative who makes non-logical visual art in code — then go forth and create awe-inspiring wonders; you’re probably not the audience of this article). But when it comes to technical drawings and data visualizations, the path element unlocks a wide array of possibilities and opens up the world of hand-coded SVGs. The path syntax can be really complex. We’re going to tackle it in two separate parts. In this first installment, we’re learning all about straight and angular paths. In the second part, we’ll make lines bend, twist, and turn. Required Knowledge And Guide Structure Note: If you are unfamiliar with the basics of SVG, such as the subject of viewBox and the basic syntax of the simple elements (rect, line, g, and so on), I recommend reading my guide before diving into this one. You should also familiarize yourself with <text> if you want to understand each line of code in the examples. Before we get started, I want to quickly recap how I code SVG using JavaScript. I don’t like dealing with numbers and math, and reading SVG Code with numbers filled into every attribute makes me lose all understanding of it. By giving coordinates names and having all my math easy to parse and write out, I have a much better time with this type of code, and I think you will, too. The goal of this article is more about understanding path syntax than it is about doing placement or how to leverage loops and other more basic things. So, I will not run you through the entire setup of each example. I’ll instead share snippets of the code, but they may be slightly adjusted from the CodePen or simplified to make this article easier to read. However, if there are specific questions about code that are not part of the text in the CodePen demos, the comment section is open. To keep this all framework-agnostic, the code is written in vanilla JavaScript (though, really, TypeScript is your friend the more complicated your SVG becomes, and I missed it when writing some of these). Setting Up For Success As the path element relies on our understanding of some of the coordinates we plug into the commands, I think it is a lot easier if we have a bit of visual orientation. So, all of the examples will be coded on top of a visual representation of a traditional viewBox setup with the origin in the top-left corner (so, values in the shape of 0 0 ${width} ${height}. I added text labels as well to make it easier to point you to specific areas within the grid. Please note that I recommend being careful when adding text within the <text> element in SVG if you want your text to be accessible. If the graphic relies on text scaling like the rest of your website, it would be better to have it rendered through HTML. But for our examples here, it should be sufficient. So, this is what we’ll be plotting on top of: See the Pen SVG Viewbox Grid Visual [forked] by Myriam. Alright, we now have a ViewBox Visualizing Grid. I think we’re ready for our first session with the beast. Enter path And The All-Powerful d Attribute The <path> element has a d attribute, which speaks its own language. So, within d, you’re talking in terms of “commands”. When I think of non-path versus path elements, I like to think that the reason why we have to write much more complex drawing instructions is this: All non-path elements are just dumber paths. In the background, they have one pre-drawn path shape that they will always render based on a few parameters you pass in. But path has no default shape. The shape logic has to be exposed to you, while it can be neatly hidden away for all other elements. Let’s learn about those commands. Where It All Begins: M The first, which is where each path begins, is the M command, which moves the pen to a point. This command places your starting point, but it does not draw a single thing. A path with just an M command is an auto-delete when cleaning up SVG files. It takes two arguments: the x and y coordinates of your start position. const uselessPathCommand = `M${start.x} ${start.y}`; Basic Line Commands: M , L, H, V These are fun and easy: L, H, and V, all draw a line from the current point to the point specified. L takes two arguments, the x and y positions of the point you want to draw to. const pathCommandL = `M${start.x} ${start.y} L${end.x} ${end.y}`; H and V, on the other hand, only take one argument because they are only drawing a line in one direction. For H, you specify the x position, and for V, you specify the y position. The other value is implied. const pathCommandH = `M${start.x} ${start.y} H${end.x}`; const pathCommandV = `M${start.x} ${start.y} V${end.y}`; To visualize how this works, I created a function that draws the path, as well as points with labels on them, so we can see what happens. See the Pen Simple Lines with path [forked] by Myriam. We have three lines in that image. The L command is used for the red path. It starts with M at (10,10), then moves diagonally down to (100,100). The command is: M10 10 L100 100. The blue line is horizontal. It starts at (10,55) and should end at (100, 55). We could use the L command, but we’d have to write 55 again. So, instead, we write M10 55 H100, and then SVG knows to look back at the y value of M for the y value of H. It’s the same thing for the green line, but when we use the V command, SVG knows to refer back to the x value of M for the x value of V. If we compare the resulting horizontal path with the same implementation in a <line> element, we may Notice how much more efficient path can be, and Remove quite a bit of meaning for anyone who doesn’t speak path. Because, as we look at these strings, one of them is called “line”. And while the rest doesn’t mean anything out of context, the line definitely conjures a specific image in our heads. <path d="M 10 55 H 100" /> <line x1="10" y1="55" x2="100" y2="55" /> Making Polygons And Polylines With Z In the previous section, we learned how path can behave like <line>, which is pretty cool. But it can do more. It can also act like polyline and polygon. Remember, how those two basically work the same, but polygon connects the first and last point, while polyline does not? The path element can do the same thing. There is a separate command to close the path with a line, which is the Z command. const polyline2Points = M${start.x} ${start.y} L${p1.x} ${p1.y} L${p2.x} ${p2.y}; const polygon2Points = M${start.x} ${start.y} L${p1.x} ${p1.y} L${p2.x} ${p2.y} Z; So, let’s see this in action and create a repeating triangle shape. Every odd time, it’s open, and every even time, it’s closed. Pretty neat! See the Pen Alternating Triangles [forked] by Myriam. When it comes to comparing path versus polygon and polyline, the other tags tell us about their names, but I would argue that fewer people know what a polygon is versus what a line is (and probably even fewer know what a polyline is. Heck, even the program I’m writing this article in tells me polyline is not a valid word). The argument to use these two tags over path for legibility is weak, in my opinion, and I guess you’d probably agree that this looks like equal levels of meaningless string given to an SVG element. <path d="M0 0 L86.6 50 L0 100 Z" /> <polygon points="0,0 86.6,50 0,100" /> <path d="M0 0 L86.6 50 L0 100" /> <polyline points="0,0 86.6,50 0,100" /> Relative Commands: m, l, h, v All of the line commands exist in absolute and relative versions. The difference is that the relative commands are lowercase, e.g., m, l, h, and v. The relative commands are always relative to the last point, so instead of declaring an x value, you’re declaring a dx value, saying this is how many units you’re moving. Before we look at the example visually, I want you to look at the following three-line commands. Try not to look at the CodePen beforehand. const lines = [ { d: `M10 10 L 10 30 L 30 30`, color: "var(--_red)" }, { d: `M40 10 l 0 20 l 20 0`, color: "var(--_blue)" }, { d: `M70 10 l 0 20 L 90 30`, color: "var(--_green)" } ]; As I mentioned, I hate looking at numbers without meaning, but there is one number whose meaning is pretty constant in most contexts: 0. Seeing a 0 in combination with a command I just learned means relative manages to instantly tell me that nothing is happening. Seeing l 0 20 by itself tells me that this line only moves along one axis instead of two. And looking at that entire blue path command, the repeated 20 value gives me a sense that the shape might have some regularity to it. The first path does a bit of that by repeating 10 and 30. But the third? As someone who can’t do math in my head, that third string gives me nothing. Now, you might be surprised, but they all draw the same shape, just in different places. See the Pen SVG Compound Paths [forked] by Myriam. So, how valuable is it that we can recognize the regularity in the blue path? Not very, in my opinion. In some cases, going with the relative value is easier than an absolute one. In other cases, the absolute is king. Neither is better nor worse. And, in all cases, that previous example would be much more efficient if it were set up with a variable for the gap, a variable for the shape size, and a function to generate the path definition that’s called from within a loop so it can take in the index to properly calculate the start point. Jumping Points: How To Make Compound Paths Another very useful thing is something you don’t see visually in the previous CodePen, but it relates to the grid and its code. I snuck in a grid drawing update. With the method used in earlier examples, using line to draw the grid, the above CodePen would’ve rendered the grid with 14 separate elements. If you go and inspect the final code of that last CodePen, you’ll notice that there is just a single path element within the .grid group. It looks like this, which is not fun to look at but holds the secret to how it’s possible: <path d="M0 0 H110 M0 10 H110 M0 20 H110 M0 30 H110 M0 0 V45 M10 0 V45 M20 0 V45 M30 0 V45 M40 0 V45 M50 0 V45 M60 0 V45 M70 0 V45 M80 0 V45 M90 0 V45" stroke="currentColor" stroke-width="0.2" fill="none"></path> If we take a close look, we may notice that there are multiple M commands. This is the magic of compound paths. Since the M/m commands don’t actually draw and just place the cursor, a path can have jumps. So, whenever we have multiple paths that share common styling and don’t need to have separate interactions, we can just chain them together to make our code shorter. Coming Up Next Armed with this knowledge, we’re now able to replace line, polyline, and polygon with path commands and combine them in compound paths. But there is so much more to uncover because path doesn’t just offer foreign-language versions of lines but also gives us the option to code circles and ellipses that have open space and can sometimes also bend, twist, and turn. We’ll refer to those as curves and arcs, and discuss them more explicitly in the next article. Further Reading On SmashingMag “Mastering SVG Arcs,” Akshay Gupta “Accessible SVGs: Perfect Patterns For Screen Reader Users,” Carie Fisher “Easy SVG Customization And Animation: A Practical Guide,” Adrian Bece “Magical SVG Techniques,” Cosima Mielke
    0 Comments 0 Shares 0 Reviews
  • Why I Would Choose a Steam Deck Over a Nintendo Switch 2

    We may earn a commission from links on this page.After spending about a week with the Nintendo Switch 2, I have to admit that it’s a good console. It’s priced fairly for its sleek form factor and the performance it offers, and it sets Nintendo up to stay relevant while gaming graphics only continue to get more complex. And yet, for my own personal tastes, it’s still not my handheld of choice. Instead, I’ll be sticking to Valve’s Steam Deck, the first and still overall best handheld gaming PC, at least going by value for money. And if you don’t necessarily care about Nintendo’s exclusive games, there’s a good chance it might be the better option for you, too.The Steam Deck is cheaper than the Switch 2Out of the gate, the most obvious reason to get a Steam Deck over a Nintendo Switch 2 is price. Starting at for a new model, it’s only modestly cheaper than the Switch 2’s but that’s only part of the story. Valve also runs a certified refurbished program that offers used Decks with only cosmetic blemishes for as low as Restocks are infrequent, since Valve is only able to sell as much as gets sent back to it, but when they do happen, it's a heck of a great deal.That said, there is one catch. The Steam Deck OLED, which offers a bigger, more colorful screen and a larger battery, is more expensive than the Switch 2, starting at However, it’s maybe a bit unfair to compare the two, since the Switch 2 does not use an OLED screen and comes with less storage. If all you care about is the basics, the base Steam Deck is good enough—it’s got the same performance as the more recent one. And that performance, by the way, ended up being about on par with the Switch 2 in my testing, at least in Cyberpunk 2077.The Steam Deck is more comfortable to hold than the Switch 2This one is a bit of a toss-up, depending on your preferences, although I think the Steam Deck takes a slight lead here. While the Nintendo Switch 2 aims for a completely flat and somewhat compact profile, the Steam Deck instead allows itself to stretch out, and even though it’s a little bigger and a little heavier for it, I ultimately think that makes it more comfortable.At 11.73 x 4.60 x 1.93 inches against the Switch 2’s 10.7 x 4.5 x 0.55 inches, and at 1.41 pounds against the Switch 2’s 1.18 pounds, I won’t deny that this will be a non-starter for some. But personally, I still feel like the Steam Deck comes out on top, and that’s thanks to its ergonomics.I’ve never been a big fan of Nintendo’s joy-con controllers, and while the Switch 2’s joy-con 2 controllers improve on the Switch 1’s with bigger buttons and sticks, as well as more room to hold onto them, they still pale in comparison next to the Steam Deck’s controls.

    Steam Deck in profilevs. Switch 2 in profileCredit: Michelle Ehrhardt

    On the Switch 2, there are no grips to wrap your fingers around. On the Steam Deck, there are. The triggers also flare out more, and because the console is wider, your hands can stretch out a bit, rather than choking up on the device. It can get a bit heavy to hold a Steam Deck after a while, but I still prefer this approach overall, and if you have a surface to rest the Steam Deck against, weight is a non-issue.Plus, there are some extra bonuses that come with the additional space. The Steam Deck has large touchpads on either side of the device, plus four grip buttons on the back of it, giving you some extra inputs to play around with. Nice.It’s a bit less portable and a bit heavier, but for my adult hands, the Steam Deck is just better shaped to them.The Steam Deck has a bigger, cheaper library than the Switch 2This is the kicker. While there are cheap games that can run on the Switch 2 courtesy of backwards compatibility and third-party eShop titles, the big system drawscan get as pricey as Not to say the Steam Deck doesn’t have expensive games as well, but on the whole, I think it’s easier to get cheap and free games on the Steam Deck than on the eShop.That’s because, being a handheld gaming PC, the Steam Deck can take advantage of the many sales and freebies PC gaming stores love to give out. These happen a bit more frequently on PC than on console, and that’s because there’s more competition on PC. Someone on PC could download games either from Steam or Epic, for instance, while someone on the Switch 2 can only download games from the Nintendo eShop.So, even sticking to just Steam, you’ll get access to regular weekend and mid-week sales, quarterly event sales, and developer or publisher highlight sales. That’s more sales events than you’ll usually find on the Nintendo eShop, and if you’re looking for cheaper first-party games, forget about it. Nintendo’s own games hardly ever go on sale, even years after release.But that’s just the beginning. Despite being named the Steam Deck, the device can actually run games from other stores, too. That’s thanks to an easily installed Linux program called Heroic Launcher, which is free and lets you download and play games from your Epic, GOG, and Amazon Prime Games accounts with just a few clicks.

    Credit: Heroic Games Launcher

    This is a game changer. Epic and Amazon Prime are both underdogs in the PC gaming space, and so to bolster their numbers, they both regularly give away free games. Epic in particular offers one free PC game every week, whereas if you’re a Twitch user, you might notice a decent but more infrequent amount of notifications allowing you to claim free Amazon Prime games. Some of these are big titles, too—it’s how I got Batman: Arkham Knight and Star Wars Battlefront II. With a simple install and a few months of waiting, you could have a Steam Deck filled to the brim with games that you didn’t even pay for. You just can’t do that on Nintendo.And then there’s the elephant in the room: your backlog. If you’re anything like me, you probably already have a Steam library that’s hundreds of games large. It was maybe even like this before the Switch 1 came out—regular sales have a tendency to build up the amount of games you own. By choosing the Steam Deck as your handheld, you’ll be able to play those games on the go, instantly giving you what might as well be a full library with no added cost to you. If you migrate over to the Nintendo Switch 2, you’re going to have to start with a fresh library, or at least a library that’s only as old as the Nintendo Switch 1.Basically, while the Switch 2’s hardware is only more expensive than the Steam Deck, it’ll be easier to fill your Steam Deck up with high quality, inexpensive games than it would be on the Switch 2. If you don’t care about having access to Nintendo exclusive games, that’s a huge draw.TV Play is a mixed bagFinally, I want to acknowledge that the Steam Deck still isn’t necessarily a better option than the Switch 2 for everyone. That’s why I’m writing from a personal perspective here. Like all gaming PCs, it’ll take some fiddling to get some games to run, so the Switch 2 is definitely a smoother experience out of the box. It’s also got less battery life, from my testing. But the big point of departure is TV play.Playing your portable games on a TV on the Switch 2 is as simple as plugging it into its dock. With the Steam Deck, you have to buy a dock separately, and even then, you have to connect your own controller to it and manually find suitable TV graphics settings for each game on its own. It’s not nearly as easy or flexible.And yet, for folks like me, I’m willing to say that even TV play is better. Or, depending on what type of PC gamer you are, monitor play.That’s because you’re not limited to playing your Steam Deck games on the Deck itself, dock or not. Instead, you can play on the Deck when you’re away from your home, and then swap over to your regular gaming PC when you’re back. Your Deck will upload your saves to the cloud automatically, and your PC will seamlessly download them. While not as intuitive as plugging your Switch 2 into its dock, the benefit here is that your non-portable play isn’t limited by the power of your portable device, whereas docked Switch 2 play is still held back by running on portable hardware.The tradeoff is that maintaining a dedicated gaming PC in addition to a Steam Deck is more expensive, but maybe more importantly, requires more tinkering. And I think that’s the key point here. If you want a simple-to-use, pick-up-and-play handheld, the Switch 2 is a great choice for you. But if you’re like me, and you’re not afraid to download some launchers and occasionally dive into compatibility settings or swap between two devices, the Steam Deck might still be the best handheld gaming device for you, even three years later.
    #why #would #choose #steam #deck
    Why I Would Choose a Steam Deck Over a Nintendo Switch 2
    We may earn a commission from links on this page.After spending about a week with the Nintendo Switch 2, I have to admit that it’s a good console. It’s priced fairly for its sleek form factor and the performance it offers, and it sets Nintendo up to stay relevant while gaming graphics only continue to get more complex. And yet, for my own personal tastes, it’s still not my handheld of choice. Instead, I’ll be sticking to Valve’s Steam Deck, the first and still overall best handheld gaming PC, at least going by value for money. And if you don’t necessarily care about Nintendo’s exclusive games, there’s a good chance it might be the better option for you, too.The Steam Deck is cheaper than the Switch 2Out of the gate, the most obvious reason to get a Steam Deck over a Nintendo Switch 2 is price. Starting at for a new model, it’s only modestly cheaper than the Switch 2’s but that’s only part of the story. Valve also runs a certified refurbished program that offers used Decks with only cosmetic blemishes for as low as Restocks are infrequent, since Valve is only able to sell as much as gets sent back to it, but when they do happen, it's a heck of a great deal.That said, there is one catch. The Steam Deck OLED, which offers a bigger, more colorful screen and a larger battery, is more expensive than the Switch 2, starting at However, it’s maybe a bit unfair to compare the two, since the Switch 2 does not use an OLED screen and comes with less storage. If all you care about is the basics, the base Steam Deck is good enough—it’s got the same performance as the more recent one. And that performance, by the way, ended up being about on par with the Switch 2 in my testing, at least in Cyberpunk 2077.The Steam Deck is more comfortable to hold than the Switch 2This one is a bit of a toss-up, depending on your preferences, although I think the Steam Deck takes a slight lead here. While the Nintendo Switch 2 aims for a completely flat and somewhat compact profile, the Steam Deck instead allows itself to stretch out, and even though it’s a little bigger and a little heavier for it, I ultimately think that makes it more comfortable.At 11.73 x 4.60 x 1.93 inches against the Switch 2’s 10.7 x 4.5 x 0.55 inches, and at 1.41 pounds against the Switch 2’s 1.18 pounds, I won’t deny that this will be a non-starter for some. But personally, I still feel like the Steam Deck comes out on top, and that’s thanks to its ergonomics.I’ve never been a big fan of Nintendo’s joy-con controllers, and while the Switch 2’s joy-con 2 controllers improve on the Switch 1’s with bigger buttons and sticks, as well as more room to hold onto them, they still pale in comparison next to the Steam Deck’s controls. Steam Deck in profilevs. Switch 2 in profileCredit: Michelle Ehrhardt On the Switch 2, there are no grips to wrap your fingers around. On the Steam Deck, there are. The triggers also flare out more, and because the console is wider, your hands can stretch out a bit, rather than choking up on the device. It can get a bit heavy to hold a Steam Deck after a while, but I still prefer this approach overall, and if you have a surface to rest the Steam Deck against, weight is a non-issue.Plus, there are some extra bonuses that come with the additional space. The Steam Deck has large touchpads on either side of the device, plus four grip buttons on the back of it, giving you some extra inputs to play around with. Nice.It’s a bit less portable and a bit heavier, but for my adult hands, the Steam Deck is just better shaped to them.The Steam Deck has a bigger, cheaper library than the Switch 2This is the kicker. While there are cheap games that can run on the Switch 2 courtesy of backwards compatibility and third-party eShop titles, the big system drawscan get as pricey as Not to say the Steam Deck doesn’t have expensive games as well, but on the whole, I think it’s easier to get cheap and free games on the Steam Deck than on the eShop.That’s because, being a handheld gaming PC, the Steam Deck can take advantage of the many sales and freebies PC gaming stores love to give out. These happen a bit more frequently on PC than on console, and that’s because there’s more competition on PC. Someone on PC could download games either from Steam or Epic, for instance, while someone on the Switch 2 can only download games from the Nintendo eShop.So, even sticking to just Steam, you’ll get access to regular weekend and mid-week sales, quarterly event sales, and developer or publisher highlight sales. That’s more sales events than you’ll usually find on the Nintendo eShop, and if you’re looking for cheaper first-party games, forget about it. Nintendo’s own games hardly ever go on sale, even years after release.But that’s just the beginning. Despite being named the Steam Deck, the device can actually run games from other stores, too. That’s thanks to an easily installed Linux program called Heroic Launcher, which is free and lets you download and play games from your Epic, GOG, and Amazon Prime Games accounts with just a few clicks. Credit: Heroic Games Launcher This is a game changer. Epic and Amazon Prime are both underdogs in the PC gaming space, and so to bolster their numbers, they both regularly give away free games. Epic in particular offers one free PC game every week, whereas if you’re a Twitch user, you might notice a decent but more infrequent amount of notifications allowing you to claim free Amazon Prime games. Some of these are big titles, too—it’s how I got Batman: Arkham Knight and Star Wars Battlefront II. With a simple install and a few months of waiting, you could have a Steam Deck filled to the brim with games that you didn’t even pay for. You just can’t do that on Nintendo.And then there’s the elephant in the room: your backlog. If you’re anything like me, you probably already have a Steam library that’s hundreds of games large. It was maybe even like this before the Switch 1 came out—regular sales have a tendency to build up the amount of games you own. By choosing the Steam Deck as your handheld, you’ll be able to play those games on the go, instantly giving you what might as well be a full library with no added cost to you. If you migrate over to the Nintendo Switch 2, you’re going to have to start with a fresh library, or at least a library that’s only as old as the Nintendo Switch 1.Basically, while the Switch 2’s hardware is only more expensive than the Steam Deck, it’ll be easier to fill your Steam Deck up with high quality, inexpensive games than it would be on the Switch 2. If you don’t care about having access to Nintendo exclusive games, that’s a huge draw.TV Play is a mixed bagFinally, I want to acknowledge that the Steam Deck still isn’t necessarily a better option than the Switch 2 for everyone. That’s why I’m writing from a personal perspective here. Like all gaming PCs, it’ll take some fiddling to get some games to run, so the Switch 2 is definitely a smoother experience out of the box. It’s also got less battery life, from my testing. But the big point of departure is TV play.Playing your portable games on a TV on the Switch 2 is as simple as plugging it into its dock. With the Steam Deck, you have to buy a dock separately, and even then, you have to connect your own controller to it and manually find suitable TV graphics settings for each game on its own. It’s not nearly as easy or flexible.And yet, for folks like me, I’m willing to say that even TV play is better. Or, depending on what type of PC gamer you are, monitor play.That’s because you’re not limited to playing your Steam Deck games on the Deck itself, dock or not. Instead, you can play on the Deck when you’re away from your home, and then swap over to your regular gaming PC when you’re back. Your Deck will upload your saves to the cloud automatically, and your PC will seamlessly download them. While not as intuitive as plugging your Switch 2 into its dock, the benefit here is that your non-portable play isn’t limited by the power of your portable device, whereas docked Switch 2 play is still held back by running on portable hardware.The tradeoff is that maintaining a dedicated gaming PC in addition to a Steam Deck is more expensive, but maybe more importantly, requires more tinkering. And I think that’s the key point here. If you want a simple-to-use, pick-up-and-play handheld, the Switch 2 is a great choice for you. But if you’re like me, and you’re not afraid to download some launchers and occasionally dive into compatibility settings or swap between two devices, the Steam Deck might still be the best handheld gaming device for you, even three years later. #why #would #choose #steam #deck
    LIFEHACKER.COM
    Why I Would Choose a Steam Deck Over a Nintendo Switch 2
    We may earn a commission from links on this page.After spending about a week with the Nintendo Switch 2, I have to admit that it’s a good console. It’s priced fairly for its sleek form factor and the performance it offers, and it sets Nintendo up to stay relevant while gaming graphics only continue to get more complex. And yet, for my own personal tastes, it’s still not my handheld of choice. Instead, I’ll be sticking to Valve’s Steam Deck, the first and still overall best handheld gaming PC, at least going by value for money. And if you don’t necessarily care about Nintendo’s exclusive games, there’s a good chance it might be the better option for you, too.The Steam Deck is cheaper than the Switch 2Out of the gate, the most obvious reason to get a Steam Deck over a Nintendo Switch 2 is price. Starting at $400 for a new model, it’s only modestly cheaper than the Switch 2’s $450, but that’s only part of the story. Valve also runs a certified refurbished program that offers used Decks with only cosmetic blemishes for as low as $279. Restocks are infrequent, since Valve is only able to sell as much as gets sent back to it, but when they do happen, it's a heck of a great deal.That said, there is one catch. The Steam Deck OLED, which offers a bigger, more colorful screen and a larger battery, is more expensive than the Switch 2, starting at $549. However, it’s maybe a bit unfair to compare the two, since the Switch 2 does not use an OLED screen and comes with less storage. If all you care about is the basics (I’m perfectly happy with my LCD model), the base Steam Deck is good enough—it’s got the same performance as the more recent one. And that performance, by the way, ended up being about on par with the Switch 2 in my testing, at least in Cyberpunk 2077 (one of my go-to benchmark games).The Steam Deck is more comfortable to hold than the Switch 2This one is a bit of a toss-up, depending on your preferences, although I think the Steam Deck takes a slight lead here. While the Nintendo Switch 2 aims for a completely flat and somewhat compact profile, the Steam Deck instead allows itself to stretch out, and even though it’s a little bigger and a little heavier for it, I ultimately think that makes it more comfortable.At 11.73 x 4.60 x 1.93 inches against the Switch 2’s 10.7 x 4.5 x 0.55 inches, and at 1.41 pounds against the Switch 2’s 1.18 pounds, I won’t deny that this will be a non-starter for some. But personally, I still feel like the Steam Deck comes out on top, and that’s thanks to its ergonomics.I’ve never been a big fan of Nintendo’s joy-con controllers, and while the Switch 2’s joy-con 2 controllers improve on the Switch 1’s with bigger buttons and sticks, as well as more room to hold onto them, they still pale in comparison next to the Steam Deck’s controls. Steam Deck in profile (above) vs. Switch 2 in profile (below) Credit: Michelle Ehrhardt On the Switch 2, there are no grips to wrap your fingers around. On the Steam Deck, there are. The triggers also flare out more, and because the console is wider, your hands can stretch out a bit, rather than choking up on the device. It can get a bit heavy to hold a Steam Deck after a while, but I still prefer this approach overall, and if you have a surface to rest the Steam Deck against (like an airplane tray table), weight is a non-issue.Plus, there are some extra bonuses that come with the additional space. The Steam Deck has large touchpads on either side of the device, plus four grip buttons on the back of it, giving you some extra inputs to play around with. Nice.It’s a bit less portable and a bit heavier, but for my adult hands, the Steam Deck is just better shaped to them.The Steam Deck has a bigger, cheaper library than the Switch 2This is the kicker. While there are cheap games that can run on the Switch 2 courtesy of backwards compatibility and third-party eShop titles, the big system draws (Nintendo-developed titles like Mario Kart World, for example) can get as pricey as $80. Not to say the Steam Deck doesn’t have expensive games as well, but on the whole, I think it’s easier to get cheap and free games on the Steam Deck than on the eShop.That’s because, being a handheld gaming PC, the Steam Deck can take advantage of the many sales and freebies PC gaming stores love to give out. These happen a bit more frequently on PC than on console, and that’s because there’s more competition on PC. Someone on PC could download games either from Steam or Epic, for instance, while someone on the Switch 2 can only download games from the Nintendo eShop.So, even sticking to just Steam, you’ll get access to regular weekend and mid-week sales, quarterly event sales, and developer or publisher highlight sales. That’s more sales events than you’ll usually find on the Nintendo eShop, and if you’re looking for cheaper first-party games, forget about it. Nintendo’s own games hardly ever go on sale, even years after release.But that’s just the beginning. Despite being named the Steam Deck, the device can actually run games from other stores, too. That’s thanks to an easily installed Linux program called Heroic Launcher, which is free and lets you download and play games from your Epic, GOG, and Amazon Prime Games accounts with just a few clicks. Credit: Heroic Games Launcher This is a game changer. Epic and Amazon Prime are both underdogs in the PC gaming space, and so to bolster their numbers, they both regularly give away free games. Epic in particular offers one free PC game every week, whereas if you’re a Twitch user, you might notice a decent but more infrequent amount of notifications allowing you to claim free Amazon Prime games. Some of these are big titles, too—it’s how I got Batman: Arkham Knight and Star Wars Battlefront II. With a simple install and a few months of waiting, you could have a Steam Deck filled to the brim with games that you didn’t even pay for. You just can’t do that on Nintendo.And then there’s the elephant in the room: your backlog. If you’re anything like me, you probably already have a Steam library that’s hundreds of games large. It was maybe even like this before the Switch 1 came out—regular sales have a tendency to build up the amount of games you own. By choosing the Steam Deck as your handheld, you’ll be able to play those games on the go, instantly giving you what might as well be a full library with no added cost to you. If you migrate over to the Nintendo Switch 2, you’re going to have to start with a fresh library, or at least a library that’s only as old as the Nintendo Switch 1.Basically, while the Switch 2’s hardware is only $50 more expensive than the Steam Deck, it’ll be easier to fill your Steam Deck up with high quality, inexpensive games than it would be on the Switch 2. If you don’t care about having access to Nintendo exclusive games, that’s a huge draw.TV Play is a mixed bagFinally, I want to acknowledge that the Steam Deck still isn’t necessarily a better option than the Switch 2 for everyone. That’s why I’m writing from a personal perspective here. Like all gaming PCs, it’ll take some fiddling to get some games to run, so the Switch 2 is definitely a smoother experience out of the box. It’s also got less battery life, from my testing. But the big point of departure is TV play.Playing your portable games on a TV on the Switch 2 is as simple as plugging it into its dock. With the Steam Deck, you have to buy a dock separately (the official one is $79), and even then, you have to connect your own controller to it and manually find suitable TV graphics settings for each game on its own. It’s not nearly as easy or flexible.And yet, for folks like me, I’m willing to say that even TV play is better. Or, depending on what type of PC gamer you are, monitor play.That’s because you’re not limited to playing your Steam Deck games on the Deck itself, dock or not. Instead, you can play on the Deck when you’re away from your home, and then swap over to your regular gaming PC when you’re back. Your Deck will upload your saves to the cloud automatically, and your PC will seamlessly download them. While not as intuitive as plugging your Switch 2 into its dock, the benefit here is that your non-portable play isn’t limited by the power of your portable device, whereas docked Switch 2 play is still held back by running on portable hardware.The tradeoff is that maintaining a dedicated gaming PC in addition to a Steam Deck is more expensive, but maybe more importantly, requires more tinkering (there are ways to build a cheap gaming PC, after all). And I think that’s the key point here. If you want a simple-to-use, pick-up-and-play handheld, the Switch 2 is a great choice for you. But if you’re like me, and you’re not afraid to download some launchers and occasionally dive into compatibility settings or swap between two devices, the Steam Deck might still be the best handheld gaming device for you, even three years later.
    0 Comments 0 Shares 0 Reviews
CGShares https://cgshares.com