Fame Focus
Fame Focus
206 persone piace questo elemento
12 Articoli
0 Foto
0 Video
Aggiornamenti recenti
  • Ant Man and the Wasp Without VFX [Cinesite VFX Breakdown]
    www.famefocus.com
    The 2018 Ant-Man and the Wasp was certainly full of all sorts of VFX challenges, what with our heroes shifting from big to tiny to huge, and being transported to the quantum realm, as well as creating a load of realistic life-size ants. No, to achieve all of this back in the day before VFX got so good would have been too much of a challenge. Forced perspective and other camera trickery can only get you so far. But what if you want to go quantum? Responsible for 200 shots, Cinesites Montreal team spent 8 months on delivering six key VFX sequences for the movie. One of which being the sequence where 20 huge trap-jaw ants are working on the quantum tunnel, using power tools and carrying props around Dr Hank Pyms laboratory.Cinesite were mainly responsible for bringing those massive ants to life.To do this, they did extensive research in order to create a library of various realistic walk cycles, in various poses so that they could move and interact with their environment at a larger scale in a more natural and believable way. Now, due to the natural smooth texture trap-jaw ants have, the CG ants easily ran the risk of looking too pristine and plasticy. So, to better define roughness, subsurface scattering and light transmissions were added by the look development team.Different thorax proportions and head shapes were given for the audience to better distinguish between the ants. But it doesnt just stop there.The realistic translucency of the ants bodies was designed to vary from ant to ant depending on their age. This was done by including internal shapes in order to simulate the thickness of a real ants skin, which is otherwise known as chitin, and help the shading work. Many shots of the set featuring the ants on the upper and lower floors inside Hanks lab were actually expanded further with CGVarious props were also added to the scenes, like these AA batteries, for exampleAnd, in some cases, removed and replaced with animated CG versions to allow for better interaction between the CG ants. For the Scott under house arrest shot outside Hanks lab, Cuinesite used a CG environment of a San Francisco suburb created using lidar scans and 360-degree reference photos to create a 2.5D set extension. Like the music in this video?Music By: Monkey MediaAlbum Title: MonkeySong Name: Monkey JacketLinks:Get it on Google Play:https://play.google.com/store/music/album/Monkey_Media_Monkey?id=Bowcdm4d3e27oxtldklnn7ynwju&hl=en_USGet it on itunes:Listen on Spotify:Buy it on Amazon:Follow us on Twitter: https://twitter.com/focusfameThe post Ant Man and the Wasp Without VFX [Cinesite VFX Breakdown] appeared first on Fame Focus.
    0 Commenti ·0 condivisioni
  • John Wick: Chapter 3 Parabellum Without VFX [Image Engine VFX Breakdown]
    www.famefocus.com
    From incredible hand to hand combat with knives and guns to fighting with horses and guns, John Wick Chapter: 3 featured all sorts of creative and unbelievable, places to have a bit of a scrap.Yes, modern-day VFX allow storytelling (and fight scenes) to get crazier and crazier, while at the same time still looking, somehow, believable.One good example of those incredible VFX sequences is the infamous bike chase over the Verrazzano-Narrows Bridge. Image Engine delivered only 8 VFX shots for this scene. But that didnt mean that there wasnt much work involved. With shots as long as 1000 frames, full of extensive and complicated CG, plate stitching and comp integration, Image Engine certainly had their work cut out.Creating assets that had to be photoreal while also matching practical ones. Creating seamless camera transitions between the Verrazano bridge footage and greenscreen shots while, at the same time, matching the animation style to the live-action stunt shot. As well as adding extra realistic-looking VFX elements and executing perfect 2D integration.The sequence was made by combining on-location shots of professional stunt drivers riding at 100km/h, as well as some rigged crash stunts with dummies, on the Verrazano Narrows Bridge and some less impressive-looking shots of Keanu and the guys sat on bikes in front of a green screen while being pushed around by some other guys in green zentai suits, for the close-up shots.In order to allow for seamless transitions between shots, they paid careful attention to both action and camera movement choreography. To get a seamless transition between the riders and bikes, they took cues from the shots of the Verrazano Bridge stuntmen. Of course, Keanus face also needed to be added in some shots. But, unfortunately, only one take of Keanu riding on the real Verrazano bridge was filmed so that take was inevitably the one that was used for the base of the 2.5D face replacements as it had the correct lighting on it.They also created a 3D face replacement of Keanu using cyberscan and some texture photography while creating his hair in Houdini.Stitching together the real shots with the greenscreen ones required a mix of cutting out bikes frame by frame and tracking CG objects and backgrounds all to the live-action footage.Getting the animated CG background to perfectly match the real moving one is really where the magic of this shot lies and Image Engine have absolutely nailed this! Like the music in this video?Music By: Monkey MediaAlbum Title: MonkeyLinks:Get it on Google PlayGet it on iTunesBuy it on AmazonListen on Spotify:Follow us on TwitterThe post John Wick: Chapter 3 Parabellum Without VFX [Image Engine VFX Breakdown] appeared first on Fame Focus.
    0 Commenti ·0 condivisioni
  • Spider-Man: Far From Home Without CGI Part 2 [RSP VFX Breakdown]
    www.famefocus.com
    With the power of CGI, there is no longer such a dependency on fancy camera trickery like filming a scene on its side and rotating it in post-production, in order to make an actor in blue and red spandex look like Spider-Man hanging off the side of a London building. No, nowadays, we can just make a computer-generated Spidy and slap him on top of another computer-generated background.But, before you go hating on the artificialness of computer graphics; saying things like soon all the actors will be replaced with CG ones, and they probably will, but there is actually a crazy amount of human creativity that goes into making these VFX. The concept artwork, look development, animation choices and a ton of other genius ideas that you wouldnt even have noticed until people like us point it out to you.So, in this video, were going to review some of the work Rising Sun Pictures did to show you just how much creativity actually goes into CGI in this VFX breakdown of Spider-Man Far From Home Part 2. Spiderman Far From Home was so jam-packed full of huge and impressive monsters, stunts and overall action that seeing a smaller 3D hologram of the monsters and their origins may have slipped by almost unnoticed and, therefore, definitely unappreciated. Its just some fancy pictures of the baddies, right? Skip to the action, cmon But no, these holograms were actually quite involved and some of Rising Sun Pictures most complex work in Spider-Man: Far From Home. As, aside from fixing a few things at the beginning of this scene Urgh, wrinkles hmm, much betterResearch into the latest scientific hypotheses on the behaviour of black holes was needed just to get an idea of what hell theyd even look like close up AND in 3D.Then they combined all of those latest theories as well as theories on how they distort time and light; along with the audiences expectations of what they look like, based on other movies; to then put it all together in a way that was in keeping with the style of the Marvel Cinematic Universe.For the earth water wind and fire Elemenalts and their origins, VFX artists had to study up on ancient statuary and totems, doing extensive research on deities related to each element.The CG department used artefacts from different countries to base the elements on. While the studios 2D department took on the role of putting together the live-action and CG elements and finalizing the whole thing.Everything also had to be further processed in order to give the style of holographic look that we see in the movie.In order to light the actors on set with the light that would be coming off the holograms before theyd even made the holograms, they used a table with a lighting panel on the surface. Unfortunately, RSP was tasked with having to dim it; add layers so that it would follow any changes in light of the holograms and, in some instances, completely remove it! And, as if that wasnt enough, the hologram also had to follow a similar style to the other holographic elements throughout the Marvel movies while, at the same time, adding something new and exciting to keep it fresh.Finally, RSP also worked on the scene where Nick Fury tranquis Peter Parkers best friend Ned.They added the tranquillizer dart and also some more holograms that shine out of the tiny device Fury pops on the table.The holograms for this scene were also full of an extensive amount of work involving split-screens and clean-up. Please give us a like if you enjoyed this video and be sure to check out some of our other videos; if you liked the music in this video, the links are in the video description and, as always, you can catch us in the next one Like the music in this video?Music By: Monkey MediaAlbum Title: MonkeyLinks:Get it on Google PlayGet it on iTunesBuy it on AmazonOr listen on SpotifyFollow us on TwitterThe post Spider-Man: Far From Home Without CGI Part 2 [RSP VFX Breakdown] appeared first on Fame Focus.
    0 Commenti ·0 condivisioni
  • Home Alone Without CGI [Special Effects Breakdown]
    www.famefocus.com
    Home Alone may not really stand out as a movie that would require many, if at all any, special FX but there were actually quite a few dotted about in places you wouldnt have expected them to be.As, aside from using potato flakes and a fan to simulate snow, most of the special effects were for safety reasons like, for example, using this rubber chair to softly squash Fullers face up against the wall.The special effects in Home Alone also helped to protect actor Daniel Sterns feet. Whaa? You ask?Well, for the scene where he loses his shoes and socks and ends up standing on a nail, this was luckily only a soft rubber nail that didnt hurt a bit. Or when you see him running barefoot outside in the snow outside, thankfully he had a cosy pair of fake rubber feet to wear as you can see here.And when he comes in through the window and plonks his feet down on a bunch of glass ornaments, they were made out of special sugar glass that is designed to break easily and not cut. It still must have hurt though However, it wasnt just Sterns feet that were protected by effects, they also protected his face. I mean, shooting a BB gun point-blank at someones face is kinda crazy dangerous.So instead they paid a guy called Kevin Nordine who had a studio in his parents basement, to some VFX, like all of the VFX; for the entire movie!Yep, this one guy, charging up to around 600 dollars depending on the shot, working out of his parents basement in Chicago was responsible for all the VFX in Home Alone. From superimposing Kevins family members onto this shot to making Harrys tooth shine and, of course, adding this ball bearing that allowed Daniel Stern to do this shot without actually getting shot.This was done by hand painting the ball bearing right onto the film, frame by frame. Which actually looks pretty awesome! But, perhaps, the only scene where Sterns face wasnt quite protected by SFX, other than standing under a 300-pound camera falling toward his face, was where the tarantula gets put on his face. That sucker was 100% real! And, while special effects mostly kept Stern from getting injured, many of actor Joe Pescis booby-trap scenes relied on stunt doubles to keep him safe.However, forgetting about those shots for a moment, there is one memorable scene where Pesci was, thankfully, protected by some clever camera trickery as, for this scene, they needed to blowtorch his head.They achieved this by using a technique called Peppers Ghost which is actually quite an old camera trick.To do this they set up a sheet of glass in front of the camera, angled at 45 degrees. Then they set up a dark booth with a black mannequin head and a blowtorch with a black nozzle, off shot and perpendicular to the sheet of glass. Its similar to a green screen in the way that its essentially creating a mask. But this mask is black instead and works because the camera will only see a reflection when there is enough light bouncing off the glass. So anything that is black isnt giving off enough light and thus invisible to the camera. Therefore, when the blowtorch fires, the flame is the only source of light hitting the glass, reflecting off it into the camera lens. So, when Joe Pesci stands in just the right spot, the reflection of the flame lines up and even looks like its moulding around his head thanks to the shape of the black mannequins head.All you need then is to add some additional flickering light to Pesci to simulate the light coming off the fire and youve got a pretty convincing special FX shot. The only problem is, if you look carefully you can see some additional spill of light on the curtains behind the blowtorch being reflected onto the glass. You can also see the edges of the mannequins head outline where Pescis face isnt quite lined up. But, despite all that, it still looks pretty convincing. Like the music in this video?Links:Get it on Google PlayGet it on iTunesBuy it on AmazonFollow us on TwitterOr listen on Spotify:The post Home Alone Without CGI [Special Effects Breakdown] appeared first on Fame Focus.
    0 Commenti ·0 condivisioni
  • This Is What The Matrix Really Looks Like Without CGI!!! Special Effects Breakdown
    www.famefocus.com
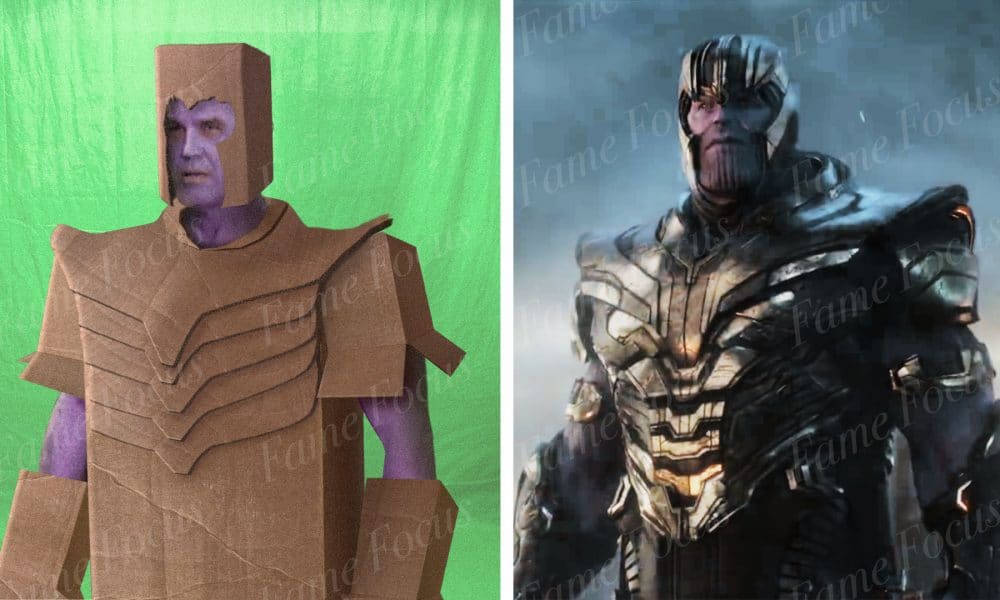
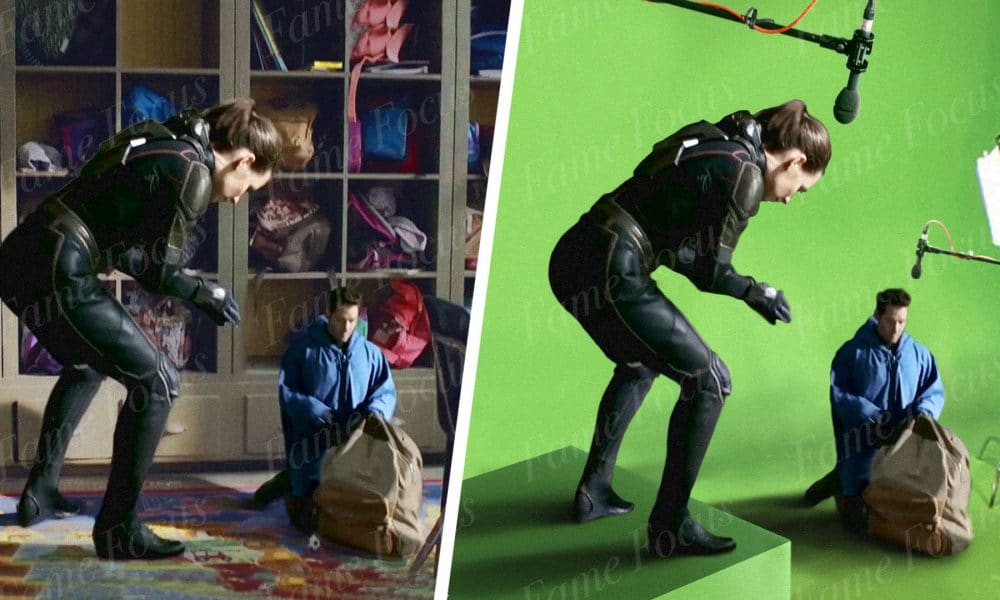
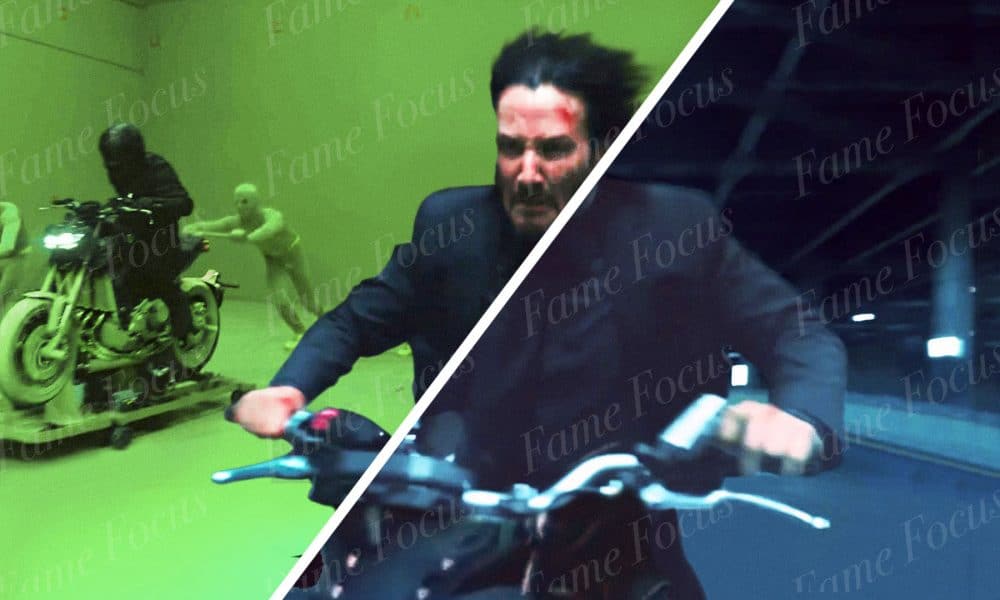
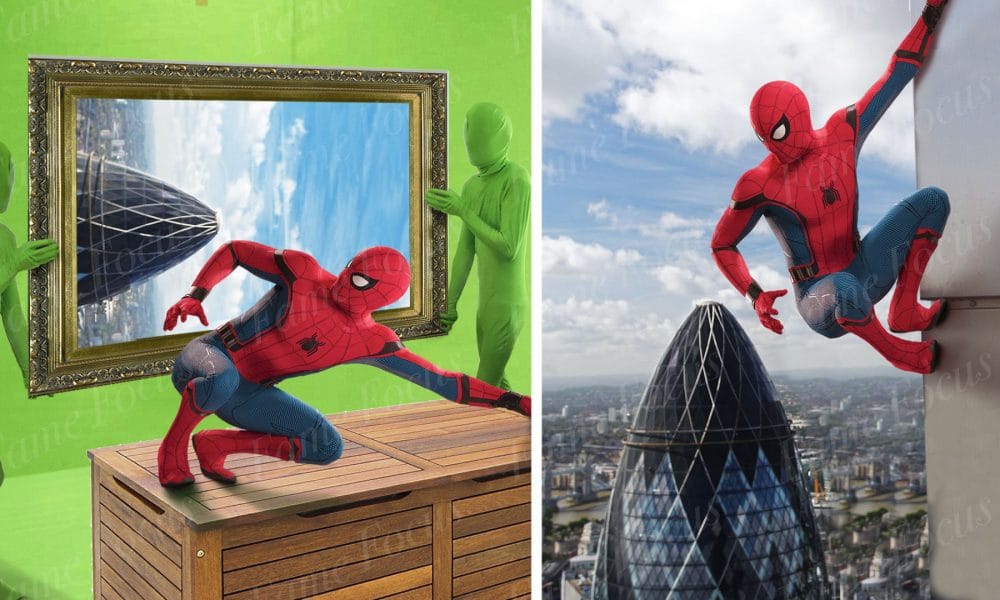
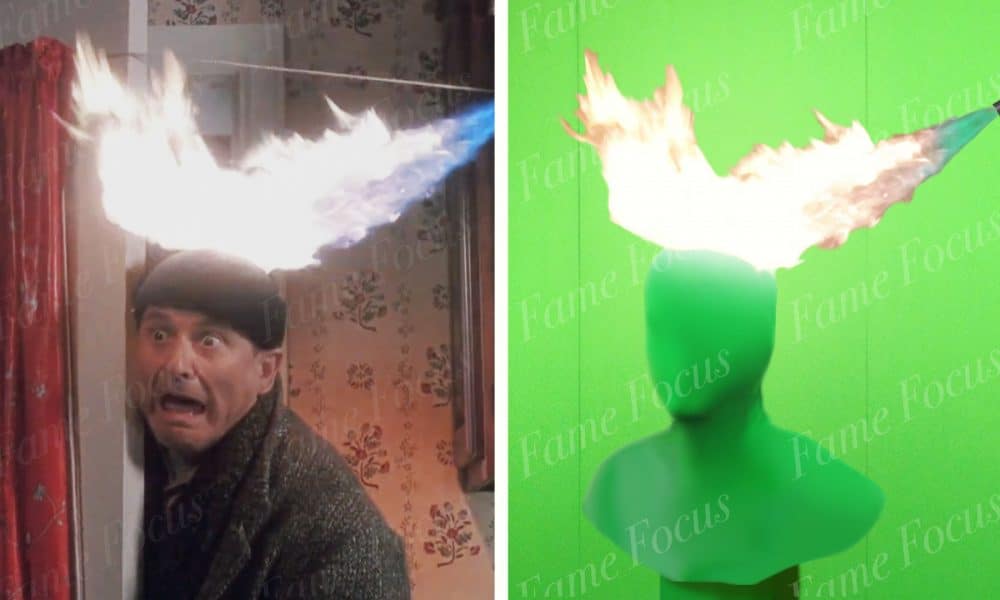
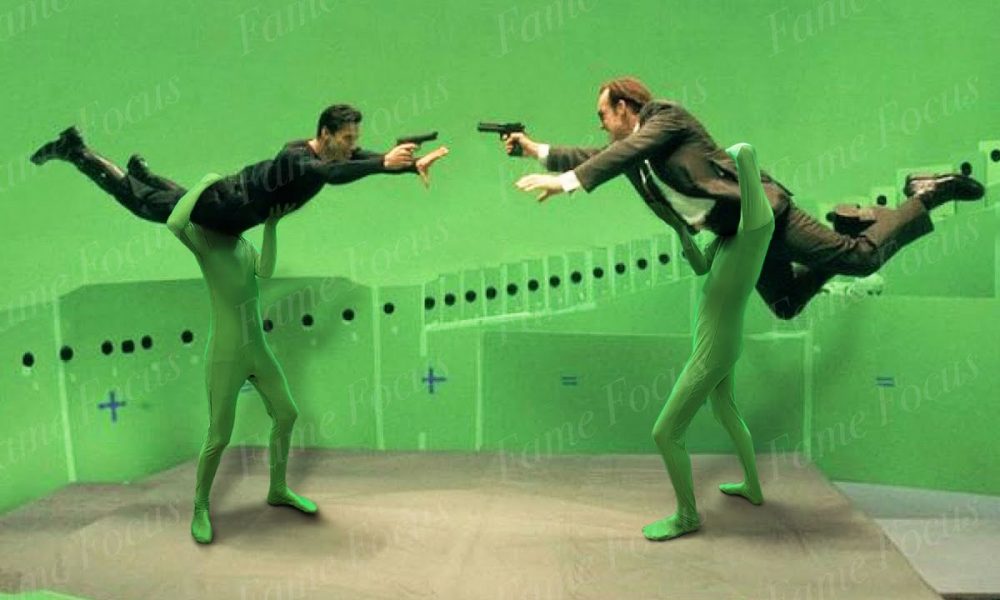
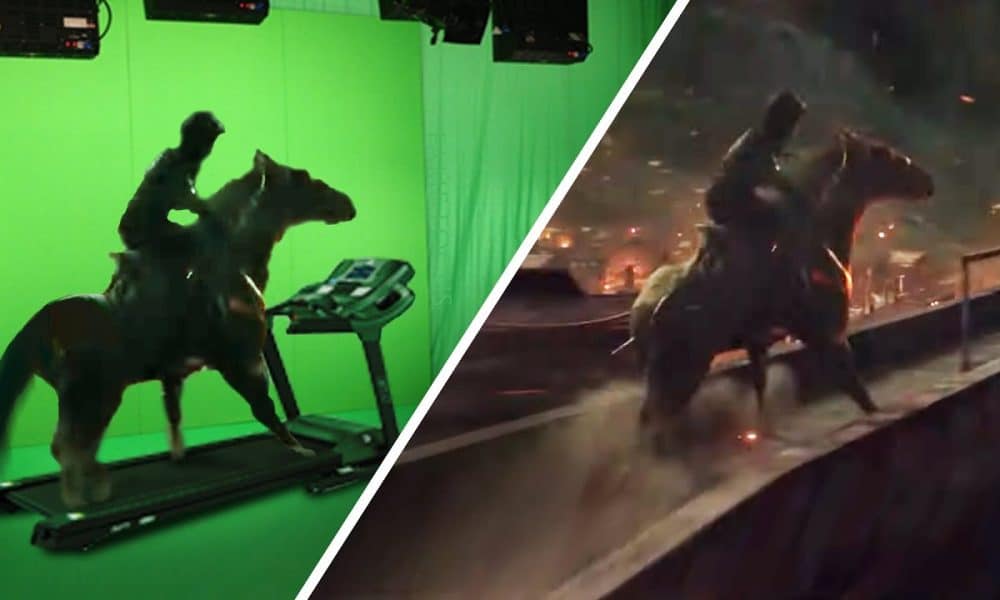
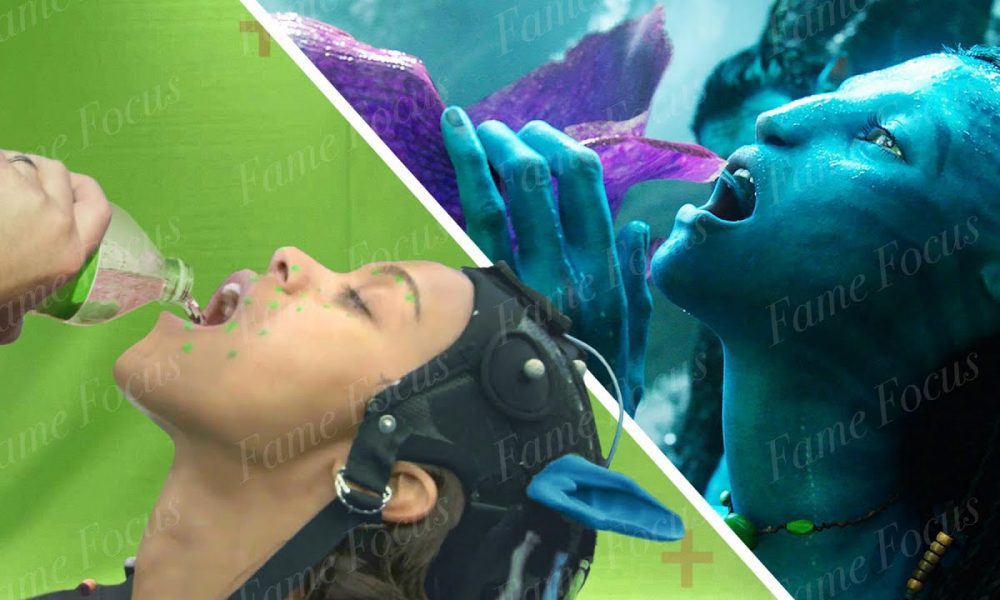
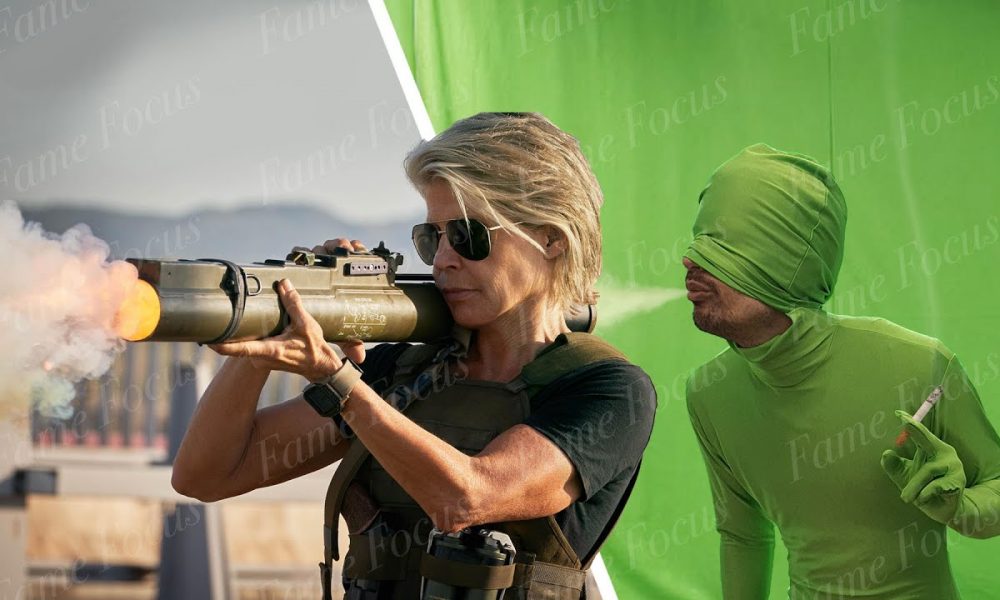
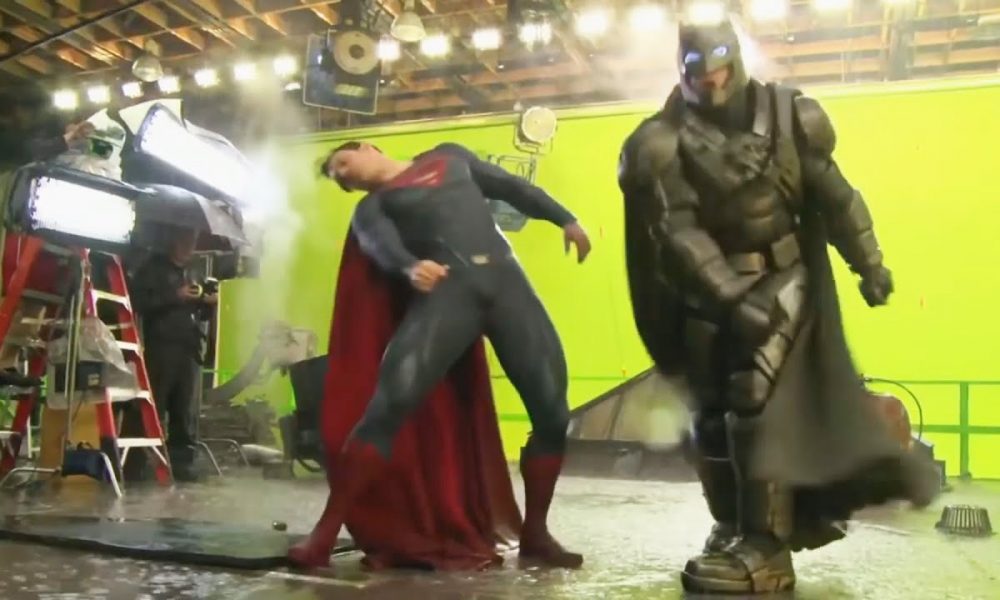
    What with being responsible for the highest-grossing R-rated movie of the 1999s, when it comes to action movies, the Wachowskis certainly know how to dream up a masterpiece. But with great imagination comes great need to figure out how the heck youre gonna make something that isnt really physically possible look real. Nowadays, for most FX youd just boot up a PC and hey presto a fully digital photo-real Spiderman double! Ok, its a little more involved than that and were not saying that VFX dont require a huge amount of very talented people who are ever expanding the possibilities of what can be done on a computer.However, back in the late 90s when directors Lily and Lana Wachowski were making their first instalment of The Matrix, computers werent so powerful. But, despite that, they still managed to push the boundaries of what could be done at the time. And thats what were going to talk about right now in this SFX breakdown of The Matrix.For those of you who prefer to read, rather than watch videos, heres the transcriptIts no surprise that the first effect were going to be talking about is the one known as bullet time. Not only is it the most famous one, used 4 times in the movie, but its also one that happens right at the beginning of the movie.And before you go skipping this part because youve already seen how it was done using a bunch of cameras lined up in a circle behind a green screenLet me just say that what may seem obvious at first glance, is often more involved than what you may have imagined.Ok, they were definitely suspended on wires for this shot but you get the idea; the bullet time effect was way more involved than just the obvious ring of cameras.Just look at the difference between the fast and jerky footage picked up by the cameras and the slower, much smoother, final edit! This shot, in particular, has 120 still cameras taking photos in succession.Now, seeing as the standard playback rate for a film is usually 24 frames per second, the 120 photos captured by the cameras would only last 5 seconds. However, in the final version, its a lot slower, lasts about 10 seconds, seems to speed up and slow down in places AND looks way smoother! So, how did they do this? Well, before they even began setting up cameras they needed to first create a 3-dimensional computer-generated simulation of the scene. This then gave them all the information they needed in order to then set up the shot.Information such as; where to put the cameras, how far to space them apart, what frame rate to shoot atBut even with all of that, getting all the cameras set up with the correct focus adjustments that would have needed to gradually change as the camera comes closer to the subject and getting them to all point exactly in the right place must have been quite tricky, hence the wobbliness.So they had to adjust frames and slightly warp other ones in post-production to smooth things out a bit. Next question; how did they control the speed of the camera movement?Well, seeing as the sensation of the camera moving around Neo is actually an illusion created by placing one camera after another in a ring and then having them take photos in succession at a constant interval, increasing the space between the cameras would allow it to travel further in the same amount of photos. So, to speed sections up, they set them further apart and to slow them down they bunched them closer together. And, finally, to make the shot even smoother, and slower, they used a process that digitally created additional artificial frames based on an approximation between each existing real frame. This process is called interpolation and is what they used to add that buttery smoothness and extra slow motion, making the shot last twice as long.After that, they tracked the whole shot to a 360 computer-generated environment, using the actual on-location photographs for the texture. The only problem with this shot is, while dodging the bullets, Neo manages to make his guns disappear too Here he is throwing them on the floor and then theyre gone and theyre back again! Maybe they momentarily disappeared due to some kind of glitch in the Matrix from him moving too fast, or something Yeh, thats what it was. That makes me feel better Not a mistake at allIf anyone can come up with a better explanation for this, please let us know in the comments, wed love to hearFor the scene in which the agents plant a tracking bug inside Neo, a combination of CGI and animatronics were used. The shots where the bug is being placed on Neos stomach were CG while this animatronic torso was used for the shots where we see the bug wiggling its tail just before entering and later on for the bug moving under the skin before being removed. One of the reasons why most of the effects in this movie still look convincing today is down to the well made decisions on when to use CGI or other post-production techniques and when to use practical effects.A nice example of this is when Neos on his way to see the Oracle and looks through the car window. Rather than use a green screen and edit in the moving footage in post-production, they used some good old fashioned rear projection, projecting pre-recorded footage of the moving background on a canvas outside of the stationary car. This was done deliberately to give the Matrix a sense of fakeness to complement Neo now seeing the Matrix as something that is not real. The shootout scene in the lobby was another masterpiece of practical effects, pyrotechnics, wirework and well-choreographed gun-fu. And as if the place wasnt quite destroyed enough, they top it off by blowing it all up. The shot, that is, as it was actually a scale model of the set, only, scaled-down and upside down, in order to get the flames to appear as though theyre spreading along the lobby floor. And, for the elevator door, well that; they created digitally.And even though the pillars all appear to look brand new again, it still makes for a nice blend of Practical FX and CGI.Another example of a nice blend between CGI and practical effects was the helicopter crash scene.This was comprised of several plates, or layers, all tied together with the help of some CGI.Lets walk through this sequence and see how it was put togetherFirst, we have a stunt guy being pulled along the rooftop on location. Next, Trinity in the chopper with CG background. Then a shot of a hollow rope with a squib going off inside. You can also see how the gun fires before the squib explodes, here.Next Trinity in front of a green screen and now we start to get more layered.We have Trinity on a rope, the model chopper, Neo on a green screen and the CGI building.Then the model chopper and CG background. Back to the multi-layered shot and then we have an awesome mix of CGI and practical pyrotechnics with a nice camera wobble/rumble effect on the final composite. Now a practical FX explosion plate on top the GC building with more rumble and a plate of Trinity swinging in front of a sheet of glass on top. And, finally, back to the previous multi-layered shot with post-production rumble, finishing with Trinity facing the other way in front of the glass and green screen.Like the music in this video?Get it on itunes:Get it on Google Play:https://play.google.com/store/music/album/Monkey_Media_Monkey_Business?id=B2odocy62qrgppq5tdqojciuvweFind it on Spotify:Buy it on Amazon:The post This Is What The Matrix Really Looks Like Without CGI!!! Special Effects Breakdown appeared first on Fame Focus.
    0 Commenti ·0 condivisioni
  • Amazing Before & After Hollywood VFX Robin Hood
    www.famefocus.com
    Ever wonder just how they composite some of the amazing scenes in Hollywood movies? We show you how in our series Amazing Before & After Hollywood VFX. Visual effects breakdowns where you get to see exactly what elements were original background plates, and the extent of CGI that was added to the final shot.Todays movie is Robin Hood (2018), starring Taron Egerton.LIONSGATE FILMS (2018)Director Otto BathurstTaron Egerton Robin of LoxleyJamie Foxx Yahya / JohnBen Mendelsohn Sheriff of NottinghamEve Hewson MarianJamie Dornan Will TillmanThe post Amazing Before & After Hollywood VFX Robin Hood appeared first on Fame Focus.
    0 Commenti ·0 condivisioni
  • Amazing Before & After Hollywood VFX Avatar
    www.famefocus.com
    Wait, in Avatar there were real actors? CGI artists are never just left to blindly animate characters and in most cases use reference material or even use motion-captured tracking points to move the characters precisely as the reference actor moved. In this case Zoe Saldanas performance was so good it went unnoticed, completely meshing in to the virtual world in the skilled hands of the CG artists.Like the music?Consider helping us out and downloading it on itunes, Google Play, Spotify and Amazon! The post Amazing Before & After Hollywood VFX Avatar appeared first on Fame Focus.
    0 Commenti ·0 condivisioni
  • Amazing Before & After Hollywood VFX Terminator Dark Fate
    www.famefocus.com
    The Terminator saga continues with Dark Fate and now we take a look at some of the complex CGI behind the screens in this vfx breakdown. Like the music?Consider helping us out and downloading it on itunes, Google Play, Spotify and Amazon!TERMINATOR: DARK FATEPARAMOUNT PICTURES (2019)Director: Tim MillerWriters: James Cameron (story by), Charles H. Eglee Linda Hamilton Sarah ConnorArnold Schwarzenegger T-800 / CarlMackenzie Davis GraceThe post Amazing Before & After Hollywood VFX Terminator Dark Fate appeared first on Fame Focus.
    0 Commenti ·0 condivisioni
  • Amazing Before & After Hollywood VFX 2
    www.famefocus.com
    According to Atomic Fictions VFX supervisor Ryan Tudhope, there wasnt a huge budget for making the first Deadpool movie so they had to get creative with the resources available. Like the music?Consider helping us out and downloading it on itunes, Google Play, Spotify and Amazon!Every decision mattered and they had to carefully choose where to add CGI and where to use practical effects.In the freeway sequence they replicated a huge stretch of the Georgia Viaduct in Vancouver, to mesh in with the real-life scenes at the end of the car-chase. Once all the CG shots were finished, it then took 8 weeks of straight rendering.Bryan Hirota, vfx supervisor for scanline vfx commented on how most of the heroes action shots were filmed without capes. In fact they treated Superman and Batmans capes as actual characters in post production, having them move almost as characteristically as the iconic super heroes. This was also very important for continuity between shots, where a real-life cape would move differently each take.During the production of gravity, Alfonso Cuarns team quickly ran into trouble. Zero gravity is already complicated to shoot, but floating in outer space is harder still. In order to have various actors weightlessly spinning and colliding with virtual objects they invented the Light Box. A rig with a moving camera, moving actor rig and 196 LED panels, to give the actors a point of reference and for light reflections. The logistics of having a boy and a large tiger on a small boat were technically impossible, so for obvious reasons Richard Parker was 100% CGI. However they did film a real tiger on some shots, especially one where he swims, which then set the benchmark for the CGI; for the real footage to not look out of place, the CG tiger had to be spot on.To play us out are some scenes from TV series Missing and Pan Am. So if you liked this breakdown give us a like and well seen you behind the next one.Breakdowns featured:Deadpool Atomic FictionBatman V Superman scanline vfxGravity FramestoreLife of Pi Rhythm & Hues StudiosThe post Amazing Before & After Hollywood VFX 2 appeared first on Fame Focus.
    0 Commenti ·0 condivisioni
  • Amazing Before & After Hollywood VFX The Fate of the Furious
    www.famefocus.com
    The Fate of the Furious marks the first instalment in the franchise since The Fast and the Furious: Tokyo Drift (2006) not to feature Paul Walker. Here is a VFX breakdown of some of the amazing effects used in this movie!The post Amazing Before & After Hollywood VFX The Fate of the Furious appeared first on Fame Focus.
    0 Commenti ·0 condivisioni
  • All You Need to Know About VFX Software and How to Get Started Right Now
    www.famefocus.com
    ActionVFX is running a sale! Get your industry-leading VFX stock footage at 25% off, and get the AVFX Drive for 50% off!A factory is generally made up of different departments, all working together to produce the final product. The VFX industry is similar, with many different departments, each with its own area of expertise, all working together to produce the final product. As youd find in a factory, each department requires a different set of tools and machinery to complete their task. In the VFX industry, each department requires a different set of software tools to complete theirs!Weve created different categories based on areas of expertise to show you, what software options are most commonly used by the big VFX Houses.Meantime, you can grab some amazing drag and drop VFX for your next project directly from ActionFX.RotoscopingThis skill is when the VFX artist basically traces around an object to create a mask that can then be used to remove the object from the shot to use on a different background. This process is quicker and easier when the background is a green or blue screen because you can then create this mask using color hues or Chroma range, a process known as Chroma Keying.The majority of Big VFX houses outsource their Grunt work (Matchmoving and Rotoscoping) to India or Asia but when they do do it, they tend to use either, Silhouette or Mochapro, and some rotoscoping will be done in Nuke by Foundry.MatchmovingMatchmoving uses a variety of different techniques to track the movement of that camera that is filming a certain shot, this enables them to create a virtual camera that mimics these movements so that when they composite any 3D elements theyve created back into the original plate, the scale, orientation, are perspective are perfectly matched.This process (much like rotoscoping) is laborious and time-consuming and is generally Outsourced but the most popular software in use is 3D Equalizer, SynthEyes, and PFTrack. 3D Equalizer is the most popular and has been in use since 1996.FXThis department is mainly responsible for creating natural effects, water, wind, fire, smoke, magical effects, and explosions. Unlike CG objects, characters, and animals, these effects are all too big, and too complicated to be animated by hand, so VFX Artists simulate them using Procedural Simulation Software. The two that are most widely used are Houdini by SideFX and Maya by Autodesk. Houdini is however very much the most widely used, so much so, that it has become the industrys standard.Weve left an insanely quicker and cheaper alternative in the description. ActionFX has tons of drag and drop VFX that you can just pop into your timeline, scale and adjust and get cinema quality results in minutes! Be sure to check out our special discount in the description!ModelingModeling artists create 3D models of characters, animals, plants and objects. Working from concept artwork, photographs, and other reference material, they begin by creating a wireframe, commonly referred to as a Mesh and then use digital tools to sculpt it. When ready, the 3D models can then be passed on to be animated, textured, and lit. There are a lot of software options out there but the main ones used are, Maya by Autodesk, 3D Studio Max by Autodesk, ZBrush by Pixologic, Mudbox by Autodesk, and MODO by Foundry. Maya and 3D Studio Max have become industry standards for building 3D characters, creating particles, rigging, and animating, whereas ZBrush has become the industry standard for 3D sculpting, and Mudbox, is its main competitor.AnimationAnimators use CG rigs to animate the objects previously created by the modelers. These rigs can be set up to control where the joints or pivot points of an object are, or how far an object can move or rotate. The animators must then use these controls not only to control movement but to convey emotion. whereas a puppet may just drop its head, an animated character will make you feel its sadness.As far as software is concerned there is only one way to go, Maya by Autodesk, very much the industry standard, and its use is so widespread that its really become the only option.Texture and ShadingThe Texture artist is responsible for creating photorealistic textures to be placed on the gray 3D models that were made by the modeling department.Maya by Autodesk and 3D Studio Max by Autodesk are generally used for shading because both feature a Node-based shading system. Textures, however, are usually created with either Mari by Foundry, Substance Painter by Adobe, or Photoshop, also by Adobe.RenderingThis is the engine that is responsible for the final 3D image generation and is generally connected to the modeling and shading software. The most widely used are Renderman by Pixar, Arnold by Autodesk, and V-ray by Chaos.CompositingCompositors take all the CG components from each department and combine them with matte paintings and live-action footage to create the final shot.Nuke by Foundry is the most popular and the most widely used, a similar software is Fusion by Black Magic Design but it is far less popular. After Effects by Adobe is also used but mainly for TV advertisement compositing or motion graphics because its layered-based system is too limited for major movie productions.Save big on industry-leading VFX stock footage products at ActionVFX! Get 25% off everything in their library, and get 50% off the AVFX Drive!The post All You Need to Know About VFX Software and How to Get Started Right Now appeared first on Fame Focus.
    0 Commenti ·0 condivisioni
  • Amazing Free Guy VFX Breakdown
    www.famefocus.com
    Whilst putting together our latest Breakdown of the VFX used in 20 Century Studios Free Guy, we interviewed Digital Domains VFX Supervisor Nikos Kalaitzidis to get a feel of exactly how much work was involvedQ: How did you design the look for the game version of Free City, do you all play video games or did you have to research?A: We actually did a bit of both. Charlie Lemur, who worked on the client-side VFX team for Free Guy, is a huge gamer, and director Shawn Levy used him as a consultant and expert for the look and feel we wanted for the gameplay portions of the film. On the Digital Domain side, our in-house VFX editor for the film was a gaming fanatic, and he provided input. After work, he would record his gaming sessions to share with us the next day as reference for different styles of games. Our initial design focused on photo-realistic gameplay, but director Shawn Levy and the filmmakers thought that if the audience saw photo-real gameplay on a players monitor in the film, they may mistake it for a live action shot. At that point, we had to come up with a more traditional style of gameplay for the movie with two things in mind 1. It could not be mistaken for anything but gameplay and 2. the audience needed to feel empathetic with the emoting and action of the characters. The end result was a stylized look between Grand Theft Auto and Fortnite.Q: Free Guy is packed full of video game references, gags, and little details. Are these part of the spec given to you by the director and film makers or is there a certain amount of freedom when it comes to adding Easter Eggs and extra details?A: Most of the cameos and Easter eggs we included werent planned. They came about when we were creating gameplay, and both Shawn Levy and Ryan Reynolds wanted to add more comedic elements into the mix. One example is that both Ryans wife, Blake Lively, and his 4-year-old daughter appear in the film as game characters. Blake even kicks Guy right in the family jewels. Another funny moment was when Shawn appeared in the game world as the character Hot Nuts as a burning blimp came crashing down behind him in the middle of the street of FreeCity. We did have some creative freedom, but it was really a collaboration. We worked closely with the filmmakers to make sure each shot included all the elements they wanted.Q: When collaborating with different VFX houses on the same project, how does the work get shared out? Do you get to Cherry pick the scenes you want to work on? (If so, which scene did you really want to be involved in?) A: Its different for every project. We typically bid on the entire project, but ultimately its up to the VFX Supervisor on the studio side. In the case of Free Guy, Swen Gillberg divvied up the work between VFX houses, and delegated individual sequences mostly based on the vendors strengths. The opening Oner known as the BadAss Oner, for instance, was something that played to our strengths. We spoke to Swen about it from the very start, and we were working out the creative and logistics before the show was even awarded. We actually have a great relationship with the other teams on Free Guy. There was even a moment on set when Bryan Grill from Scanline and I decided to arm wrestle for a particular sequence as a joke, but Swen convinced us that theres plenty of work to go around. Fun fact, Ive known those guys for 25 years. Theyre like family. We really had a blast working together.Q: Can you explain a little of the process that went into translating Ryan Reynolds facial performance onto the face of the bodybuilder for the Guy fighting Dude?A: This handsome work was delegated to and executed by LOLA VFX. They did an amazing job on it. For the gameplay portions of the film, we were able to record Motion Capture and Facial Capture on our stages at Digital Domain of Ryan Reynolds to help us with key comedic moments. Q: We understand you used your proprietary tool Charlatan to overcome a problem with being unable to do a reshoot with Channing Tatum for a Badass Scene. Did you use any other proprietary tools in the movie? For Free Guy, the proprietary tools we used included Charlatan, and only in that one scene, and Masquerade for facial capture. When we choose what tools to use, it really just comes down to what tool is best for the job. Sometimes we experiment with different ways of creating a sequence, but only when it makes sense for that sequence. For the scene with BadAss, Charlatan was the best way to accomplish the goals and we were amazed at the outcome.Q: The final question has nothing to do with the film, wed just like to know your professional opinion. As we understand it, the Charlatan tool uses a library of learning data for machine learning, other VFX houses also have proprietary tools that have similar A.I Learning abilities. Do you think A.I. tools are the future of VFX? and if so, would a shared centralized machine learning database be a possibility?A: After having conversations with Matt Smith, the head of the Charlatan team at Digital Domain, we believe AI will continue to creep into the visual effects workflow, and even replace parts of it. Research in this area is advancing quickly, and Digital Domain is invested in its future. Large datasets are often one of the primary keys to this research. VFX houses could collaborate in this via Federated Learning, where datasets are shared without exchanging them. Were already doing this to a degree with our machine-learning software Charlatan, and with our proprietary Masquerade tool, facial capture with our real-time LiveDrive system and in the real-time cloth simulation tool, Elbor. Paint/Roto via Nuke 13 does this, and it has incredible potential. In the future, I see AI used in large scale environment generations and texture shading, possibly with mocap cycles and blending of cycles too. Hopefully, it may be leveraged to reduce facial shot modeling timeframes. As the demand in our industry grows, and we have a finite labor pool, the help of AI technologies is definitely welcomed!Special thanks to Digital Domain and Nikos Kalaitzidis for answering our questions!The post Amazing Free Guy VFX Breakdown appeared first on Fame Focus.
    0 Commenti ·0 condivisioni
Altre storie
CGShares https://cgshares.com