

How To Beat Monster Hunter Wilds’ Craziest Hunt
Jump ToThe general gameplay loop of Monster Hunter Wilds is using cool weapons to fight strong monsters—and then using their parts to make even cooler weapons to fight even stronger monsters. That cycle likely doesn’t have many hitches until you have to wrestle with Zoh Shia. While their debut hunt can be a strong wall, the High-Rank version is an absolute gauntlet. Whether it’s your first time or your tenth time, here’s how to farm and beat Zoh Shia.Suggested ReadingThe 3 Best And 3 Worst Korok Challenges In Tears Of The Kingdom
Share SubtitlesOffEnglishview videoSuggested ReadingThe 3 Best And 3 Worst Korok Challenges In Tears Of The Kingdom
Share SubtitlesOffEnglishScreenshot: Capcom / Samuel Moreno / KotakuYour first fight against this constructed creature takes place at the end of chapter three, effectively acting as your last Low Rank hunt. The opportunity to fight Zoh Shia a second time comes once you’ve reached Hunter Rank 50. Talking to Werner will start a new story quest called “An Unexpected Summons” that revolves around it returning. However, unlike other monsters, there isn’t any related optional quest added afterward for you to easily replay.That doesn’t mean you can’t farm the monster and gather more of its parts to make cool-looking armor and weapons. Here are your options for how to hunt Zoh Shia again:Wait until it randomly appears in Wyveria during an Inclemency season. You can keep resting to increase the chances of it appearingSave it as an investigation to fight it up to three times. This will require it to show up in Wyveria firstFilter for it through SOS Quests and help other hunters take one downI do want to point out that Zoh Shia won’t physically appear in Wyveria like other monsters. Just like Jin Dahaad, you’ll have to wait until a notification pops up in the Environment Overview to challenge them. The ensuing hunt takes place on a separate map, which is the Dragontorch Shrine in this case.Screenshot: Zoh Shia’s suggested strategy screen, showing which body parts are breakable.You’re always in for a challenging endeavor with Zoh Shia. It uses multiple elements and has some of the biggest attacks in the game. Thankfully, you can give yourself an edge by exploiting the following weaknesses:Elemental Weaknesses – DragonWeapon Type Weaknesses – Cut, BluntBreakable Parts – Head, Foreleg x2, Tail, Wings x2Susceptible Status Ailments – Blastblight, Paralysis, Poison, Sleep, StunScreenshot: Capcom / Samuel Moreno / KotakuThis hunt has a distinct mechanic that you might recognize from a few spots on the Wyveria map. Some of Zoh Shia’s attacks will create crystals, which it can then charge with Fire or Thunder attacks. They explode soon after, dealing the associated elemental damage to any nearby hunters and possibly causing a chain reaction with nearby crystals.The good news is that you can make them work in your favor. Using your slinger to shoot the crystals with Dragon and Thunder pods will cause them to explode and inflict the corresponding elemental damage to Zoh Shia. Considering how often its attacks generate crystals, you can quickly create your own elemental chain reaction and dish out some big hits to the monster. Fortunately, both of these slinger ammo types are easily crafted with the Wyrmsbane and Thundercryst that spawn in the arena.Screenshot: Capcom / Samuel Moreno / KotakuBring gear with high resistance to Fire and Thunder. Blight Resistance is an especially helpful skill if you have pieces of the Guardian Arkveld armor set or the Blight Charm talisman. Staying underneath this behemoth and near its back legs is one of the safest spots for the entire hunt, although your damage output will be limited. Their evolving set of attacks will eventually start flushing you out from that position as well, so don’t rely on it too often.Zoh Shia cycles through multiple phases as it takes more damage. The monster is completely covered in white crystal armor during its first phase. Your attacks will be more effective if you manage to break the armor, but it will eventually regenerate. Time your dodges well and try mounting if you can. I’ve always been able to open four wounds along its back with plenty of time to spare.The second phase begins with the armor on its head breaking off to reveal a black head that can now use fire attacks. You’ll need to watch out for deceptively quick fireballs and an attack that sets everything underneath it ablaze. From this point on, it can trigger crystals to create some large explosions. Trigger them first to destroy the armor quicker!You’ll know the third phase starts when Zoh Shia flies to the front of the arena and lands with a huge tremor. Gigantic crystals will rise out of the ground as it sheds its wing armor. Your experiences against Jin Dahaad might convince you to hide behind one of them, but these won’t offer you protection. The heated creature will set them all on fire, which then spreads out to nearly the whole arena. You can easily avoid this attack by making them prematurely explode with your slinger. Each destroyed crystal leaves behind an area safe from the fire.Not only are there more burning attacks in the third phase, but fiery pieces of debris will also begin falling. Don’t be surprised if you’re dodging more exploding crystals than triggering them. You might have to contend with a slightly smaller version of the attack that started this phase as well. The best ways to avoid that are to move as far away as possible, or to get right behind the monster.All of this leads to the final phase, with Zoh Shia’s entire black body being revealed. On top of the relentless fire attacks and fiery debris, you’ll also have to deal with a sideways lightning blast and random lightning bolts. Any one of these can set off crystals and potentially ruin the hunt. Do your best to trigger them first and avoid every intended or random attack that comes your way. This is a particularly great time to bring down the two hanging shrine fragment pieces on the sides of the arena. Since this is the last and most dangerous phase, you want to end it as quickly as possible.Tackling this with a coordinated link party of friends will make the hunt far less difficult. I’ve been able to win plenty of times with random hunters, although I’ve typically felt like the only person aware of the crystal mechanic.Screenshot: Capcom / Samuel Moreno / KotakuBeating this tough monster is plenty worth it for the awesome armor and weapons you can make from its parts. I highly recommend leafing through Zoh Shia’s monster information tabs to determine how to best earn any needed parts. If you want a simplified list of each Zoh Shia drop, I’ve included one below that’s sorted by most to least frequent.Zoh Shia StakeclawBlackember MassZoh Shia CrystalhornZoh Shia CrystaltailGuardian Blood +Zoh Shia CrystalscaleZoh Shia LayershellZoh Shia Certificate SFaux Whitegleam OrbDefeating Zoh Shia is a huge accomplishment that you should be proud of. The Tempered Mizutsune fight can admittedly be just as intense, but nothing so far feels as epic as a Zoh Shia hunt. .
#how #beat #monster #hunter #wilds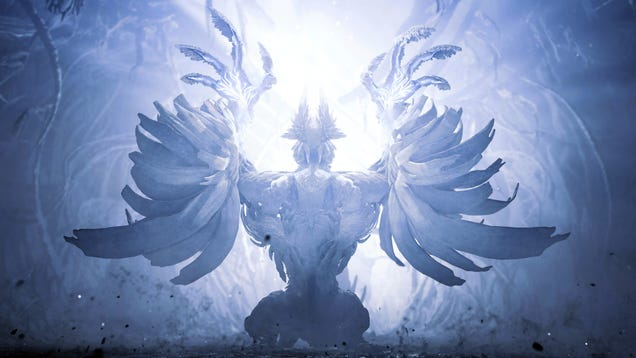
0 Comments
0 Shares
0 Reviews
