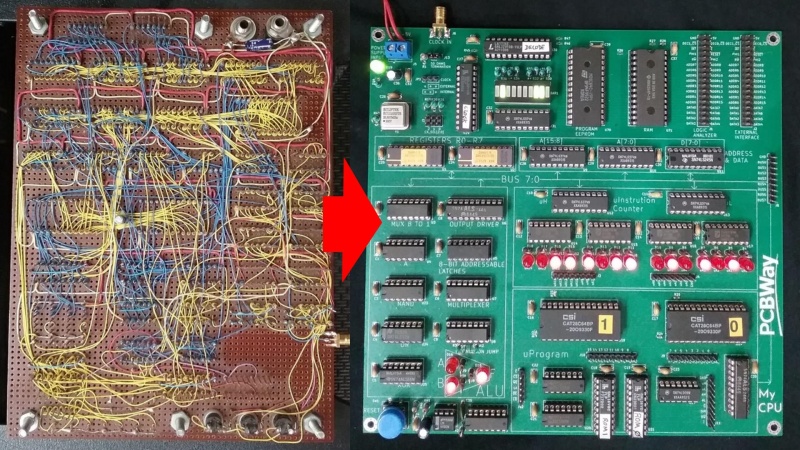
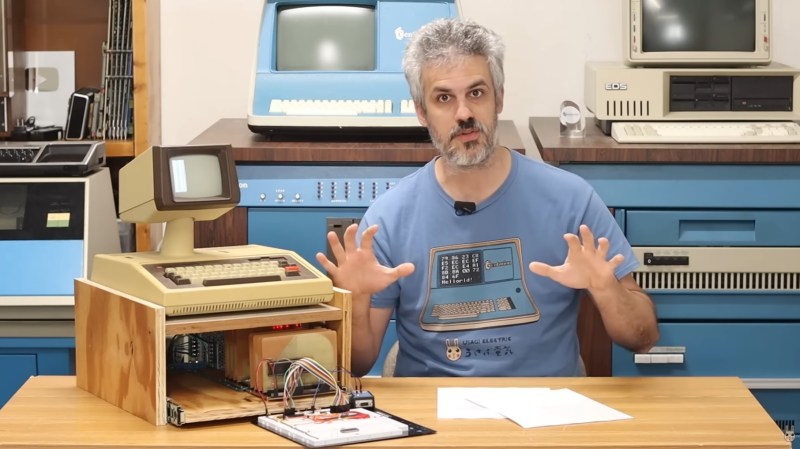
• It's absolutely infuriating that while Homebrew touts itself as the package manager that classic Macs supposedly never had, they blatantly ignore the needs of the PPC and 68k communities! This is a colossal oversight that reeks of elitism and neglect. The tech world loves to forget about those who don’t fit the shiny new mold, leaving dedicated users high and dry. Enter MR Browser—at last, a glimmer of hope for those of us who refuse to be cast aside! Why should we settle for being "criminally under-served"? It’s time to demand better! Don't let the big players dictate who gets support.

    #ClassicMacs #Homebrew #MRBrowser #TechNeglect #PPC
    It's absolutely infuriating that while Homebrew touts itself as the package manager that classic Macs supposedly never had, they blatantly ignore the needs of the PPC and 68k communities! This is a colossal oversight that reeks of elitism and neglect. The tech world loves to forget about those who don’t fit the shiny new mold, leaving dedicated users high and dry. Enter MR Browser—at last, a glimmer of hope for those of us who refuse to be cast aside! Why should we settle for being "criminally under-served"? It’s time to demand better! Don't let the big players dictate who gets support. #ClassicMacs #Homebrew #MRBrowser #TechNeglect #PPC
    HACKADAY.COM
    MR Browser is the Package Manager Classic Macs Never Had
    Homebrew bills itself as the package manager MacOS never had (conveniently ignoring MacPorts) but they leave the PPC crowd criminally under-served, to say nothing of the 68k gang. Enter [that-ben] …read more
    1 Yorumlar 0 hisse senetleri 0 önizleme
  • So, a homebrew CPU that started in the 1990s? Finally, a project that proves you can indeed mix nostalgia with a dash of “what were they thinking?” Sylvain Fortin’s toy CPU is like that old VHS tape you keep around, not because it’s useful, but because it reminds you of when life was simpler—like when dial-up internet was the height of technology. Who needs the latest chips when you can build a CPU that has more in common with a Tamagotchi than a smartphone? Here’s to the brave souls still living in the past, one circuit at a time!

    #HomebrewCPU #RetroTech #DIYComputing #Nostalgia #SylvainFortin
    So, a homebrew CPU that started in the 1990s? Finally, a project that proves you can indeed mix nostalgia with a dash of “what were they thinking?” Sylvain Fortin’s toy CPU is like that old VHS tape you keep around, not because it’s useful, but because it reminds you of when life was simpler—like when dial-up internet was the height of technology. Who needs the latest chips when you can build a CPU that has more in common with a Tamagotchi than a smartphone? Here’s to the brave souls still living in the past, one circuit at a time! #HomebrewCPU #RetroTech #DIYComputing #Nostalgia #SylvainFortin
    HACKADAY.COM
    This Homebrew CPU Got Its Start in the 1990s
    [Sylvain Fortin] recently wrote in to tell us about his Homebrew CPU Project, and the story behind this one is truly remarkable. He began working on this toy CPU back …read more
    Like
    Love
    Wow
    Sad
    Angry
    95
    1 Yorumlar 0 hisse senetleri 0 önizleme
  • Ultra-Slim Cyberpunk Keyboard is 37% slimmer than Apple’s own Magic Keyboard

    Even though Apple DID make a 5.3mm iPad Pro, let’s just remember that they didn’t have as much success slimming down their keyboards. Remember the infamous butterfly keys on the MacBooks of 2015? Well, after that travesty, Apple just went back to what worked – relying on good-old scissor switches that resulted in a marginally thicker, yet more practical and functional device. At just 8 millimeters thick, the ‘mikefive’ doesn’t look like it should be real—let alone functional. But it is. It’s 37% slimmer than Apple’s Magic Keyboard and still manages to pack in 1.8mm of key travel, tactile mechanical switches, wireless connectivity, and a cyberpunk-grade metal chassis. It’s the kind of gear that looks like it came from a movie prop shop specializing in dystopian sci-fi—only it types better than most of what’s on your desk.
    The mastermind behind it is Reddit user dynam1keNL, an industrial product designer who clearly decided the mechanical keyboard rabbit hole didn’t go deep enough. Built from scratch around Kailh’s obscure PG1316 laptop switches, the mikefive is what happens when obsessive design meets precision engineering. The custom transparent caps, the CNC-machined aluminum chassis, the completely flush PCB layout—it’s all been meticulously dialed in to create a keyboard that doesn’t just challenge what a mechanical board can be. It redefines it.
    Designer: dynam1keNL

    To start, the mikefive is built around the Kailh PG1316 switches—a lesser-known, laptop-style mechanical switch that isn’t just slim, it’s shockingly tactile. These things have a travel of 1.8mm, and despite their wafer-thin profile, they pack a surprisingly aggressive tactile bump. It’s a bold choice that bucks the trend of soft, mushy low-profile inputs. You feel every keypress, and not in a nagging way—more like a firm handshake with every letter.

    The design language leans into a sleek cyberpunk aesthetic: a CNC-machined aluminum chassis that feels like it belongs on the deck of a spaceship, paired with transparent keycaps that hint at the internals while catching ambient light like crystal circuitry. The keycaps are proprietary, square-shaped, and clear, subtly marked with mold letters from the inside.

    What makes this keyboard doubly fascinating is that it isn’t some big brand prototype or crowdfunding darling, it’s a homebrew labor of love from a designer-engineer with a background in industrial product design. The entire board, including its impossibly compact controller and 301230 battery, is laid out like a masterclass in minimalism. The switch mounts directly to the PCB with no pins poking through, letting the board itself double as the bottom plate.

    Both halves of the unibody design are angled 15 degrees for comfort, creating a total ergonomic tilt of 30 degrees. The bottom edge has been subtly shaved down near the thumb cluster to avoid interference. And while there’s a slight warp on one end from hotplate soldering, it’s barely a blemish on an otherwise refined build.

    Despite its experimental nature, the keyboard’s wireless connectionworks flawlessly, even with the metal chassis surrounding the internals. Clever placement of the Bluetooth antenna and strategic removal of ground planes near it help the signal escape.
    Typing on the mikefive is a tactile revelation. Coming from linear switches, the force required by the PG1316s might be a shock, but there’s a tactile clarity here that’s hard to ignore. And when you realize your wrists aren’t straining after hours of use, the ultra-low height starts to feel like a long-overdue standard.
    The post Ultra-Slim Cyberpunk Keyboard is 37% slimmer than Apple’s own Magic Keyboard first appeared on Yanko Design.
    #ultraslim #cyberpunk #keyboard #slimmer #than
    Ultra-Slim Cyberpunk Keyboard is 37% slimmer than Apple’s own Magic Keyboard
    Even though Apple DID make a 5.3mm iPad Pro, let’s just remember that they didn’t have as much success slimming down their keyboards. Remember the infamous butterfly keys on the MacBooks of 2015? Well, after that travesty, Apple just went back to what worked – relying on good-old scissor switches that resulted in a marginally thicker, yet more practical and functional device. At just 8 millimeters thick, the ‘mikefive’ doesn’t look like it should be real—let alone functional. But it is. It’s 37% slimmer than Apple’s Magic Keyboard and still manages to pack in 1.8mm of key travel, tactile mechanical switches, wireless connectivity, and a cyberpunk-grade metal chassis. It’s the kind of gear that looks like it came from a movie prop shop specializing in dystopian sci-fi—only it types better than most of what’s on your desk. The mastermind behind it is Reddit user dynam1keNL, an industrial product designer who clearly decided the mechanical keyboard rabbit hole didn’t go deep enough. Built from scratch around Kailh’s obscure PG1316 laptop switches, the mikefive is what happens when obsessive design meets precision engineering. The custom transparent caps, the CNC-machined aluminum chassis, the completely flush PCB layout—it’s all been meticulously dialed in to create a keyboard that doesn’t just challenge what a mechanical board can be. It redefines it. Designer: dynam1keNL To start, the mikefive is built around the Kailh PG1316 switches—a lesser-known, laptop-style mechanical switch that isn’t just slim, it’s shockingly tactile. These things have a travel of 1.8mm, and despite their wafer-thin profile, they pack a surprisingly aggressive tactile bump. It’s a bold choice that bucks the trend of soft, mushy low-profile inputs. You feel every keypress, and not in a nagging way—more like a firm handshake with every letter. The design language leans into a sleek cyberpunk aesthetic: a CNC-machined aluminum chassis that feels like it belongs on the deck of a spaceship, paired with transparent keycaps that hint at the internals while catching ambient light like crystal circuitry. The keycaps are proprietary, square-shaped, and clear, subtly marked with mold letters from the inside. What makes this keyboard doubly fascinating is that it isn’t some big brand prototype or crowdfunding darling, it’s a homebrew labor of love from a designer-engineer with a background in industrial product design. The entire board, including its impossibly compact controller and 301230 battery, is laid out like a masterclass in minimalism. The switch mounts directly to the PCB with no pins poking through, letting the board itself double as the bottom plate. Both halves of the unibody design are angled 15 degrees for comfort, creating a total ergonomic tilt of 30 degrees. The bottom edge has been subtly shaved down near the thumb cluster to avoid interference. And while there’s a slight warp on one end from hotplate soldering, it’s barely a blemish on an otherwise refined build. Despite its experimental nature, the keyboard’s wireless connectionworks flawlessly, even with the metal chassis surrounding the internals. Clever placement of the Bluetooth antenna and strategic removal of ground planes near it help the signal escape. Typing on the mikefive is a tactile revelation. Coming from linear switches, the force required by the PG1316s might be a shock, but there’s a tactile clarity here that’s hard to ignore. And when you realize your wrists aren’t straining after hours of use, the ultra-low height starts to feel like a long-overdue standard. The post Ultra-Slim Cyberpunk Keyboard is 37% slimmer than Apple’s own Magic Keyboard first appeared on Yanko Design. #ultraslim #cyberpunk #keyboard #slimmer #than
    WWW.YANKODESIGN.COM
    Ultra-Slim Cyberpunk Keyboard is 37% slimmer than Apple’s own Magic Keyboard
    Even though Apple DID make a 5.3mm iPad Pro, let’s just remember that they didn’t have as much success slimming down their keyboards. Remember the infamous butterfly keys on the MacBooks of 2015? Well, after that travesty, Apple just went back to what worked – relying on good-old scissor switches that resulted in a marginally thicker, yet more practical and functional device. At just 8 millimeters thick, the ‘mikefive’ doesn’t look like it should be real—let alone functional. But it is. It’s 37% slimmer than Apple’s Magic Keyboard and still manages to pack in 1.8mm of key travel, tactile mechanical switches, wireless connectivity, and a cyberpunk-grade metal chassis. It’s the kind of gear that looks like it came from a movie prop shop specializing in dystopian sci-fi—only it types better than most of what’s on your desk. The mastermind behind it is Reddit user dynam1keNL, an industrial product designer who clearly decided the mechanical keyboard rabbit hole didn’t go deep enough. Built from scratch around Kailh’s obscure PG1316 laptop switches, the mikefive is what happens when obsessive design meets precision engineering. The custom transparent caps, the CNC-machined aluminum chassis, the completely flush PCB layout—it’s all been meticulously dialed in to create a keyboard that doesn’t just challenge what a mechanical board can be. It redefines it. Designer: dynam1keNL To start, the mikefive is built around the Kailh PG1316 switches—a lesser-known, laptop-style mechanical switch that isn’t just slim, it’s shockingly tactile. These things have a travel of 1.8mm, and despite their wafer-thin profile, they pack a surprisingly aggressive tactile bump. It’s a bold choice that bucks the trend of soft, mushy low-profile inputs. You feel every keypress, and not in a nagging way—more like a firm handshake with every letter. The design language leans into a sleek cyberpunk aesthetic: a CNC-machined aluminum chassis that feels like it belongs on the deck of a spaceship, paired with transparent keycaps that hint at the internals while catching ambient light like crystal circuitry. The keycaps are proprietary, square-shaped, and clear, subtly marked with mold letters from the inside. What makes this keyboard doubly fascinating is that it isn’t some big brand prototype or crowdfunding darling, it’s a homebrew labor of love from a designer-engineer with a background in industrial product design. The entire board, including its impossibly compact controller and 301230 battery, is laid out like a masterclass in minimalism. The switch mounts directly to the PCB with no pins poking through, letting the board itself double as the bottom plate. Both halves of the unibody design are angled 15 degrees for comfort, creating a total ergonomic tilt of 30 degrees. The bottom edge has been subtly shaved down near the thumb cluster to avoid interference. And while there’s a slight warp on one end from hotplate soldering (just old-fashioned human error), it’s barely a blemish on an otherwise refined build. Despite its experimental nature, the keyboard’s wireless connection (courtesy of a nicenano v2) works flawlessly, even with the metal chassis surrounding the internals. Clever placement of the Bluetooth antenna and strategic removal of ground planes near it help the signal escape. Typing on the mikefive is a tactile revelation. Coming from linear switches, the force required by the PG1316s might be a shock, but there’s a tactile clarity here that’s hard to ignore. And when you realize your wrists aren’t straining after hours of use, the ultra-low height starts to feel like a long-overdue standard. The post Ultra-Slim Cyberpunk Keyboard is 37% slimmer than Apple’s own Magic Keyboard first appeared on Yanko Design.
    0 Yorumlar 0 hisse senetleri 0 önizleme
  • $25B-valued Chime files for an IPO, reveals $33M deal with Dallas Mavericks

    At long last, digital consumer bank Chime has moved forward with its IPO by filing its S-1 paperwork Tuesday.
    Chime had reportedly filed confidential S-1 paperwork back in December.
    S-1 filings typically reveal all kinds of information, covering financial, legal, and other risk factors.
    But Chime’s S-1 documents still have a lot of blank spaces.
    We don’t know how many shares it hopes to sell or at what price.
    Chime could be aiming to raise $1 billion, IPO specialist Renaissance Capital believes.
    We also don’t know how many shares insiders plan to sell as part of the IPO.
    This includes its major backers, a list that includes billionaire Yuri Milner’s DST Global, Michael Stark’s Crosslink Capital, billionaire Len Blavatnik’s Access Industries, as well as VC firms General Atlantic, Menlo Ventures (led by board member Shawn Carolan), the Sino French Innovation Fund, and Iconiq, according to the paperwork.
    Chime raised $2.65 billion total as a private company, including its last raise in 2021 that valued it at $25 billion, PitchBook estimates.
    As a result, there are many more VCs on its cap table.
    They, too, could be in for big paydays.
    For instance, Kirsten Green’s Forerunner Ventures and Hunter Walk’s Homebrew both claim Chime as a portfolio company.
    Chime offered one detail that suggests the company believes it will be a huge IPO.
    Chime enlisted an army of big name investment bankers, including Morgan Stanley, Goldman Sachs, and JP Morgan.
    The financials show why investors may grow excited.
    The company finished 2024 with $1.67 billion in revenue and $25 million in losses, compared to nearly $1.3 billion in revenue and $203 million in losses in 2023.
    Its 2025 first-quarter revenue was already $519 million.
    So, by Silicon Valley math, that puts it on track for $2 billion this year and near profitability. 
    Chime offers consumer checking, savings, debit, and credit cards and claims 8.6 million active users.

    Techcrunch event
    Join us at TechCrunch Sessions: AI
    Secure your spot for our leading AI industry event with speakers from OpenAI, Anthropic, and Cohere.
    For a limited time, tickets are just $292 for an entire day of expert talks, workshops, and potent networking.
    Exhibit at TechCrunch Sessions: AI
    Secure your spot at TC Sessions: AI and show 1,200+ decision-makers what you’ve built — without the big spend.
    Available through May 9 or while tables last.
    Berkeley, CA
    |
    June 5
    REGISTER NOW
    One interesting reveal in the paperwork.
    Its board member Cynthia Marshall served as the CEO of the Dallas Mavericks from 2018 to December 2024.
    Chime became a Mavericks sponsor during that time.
    It paid around $33 million over three years (2022-2024), which gained it the Chime logo on the team’s jersey, among other marketing benefits.
    Without that deal, it might have already been profitable.

    Source: https://techcrunch.com/2025/05/13/25b-valued-chime-files-for-an-ipo-reveals-33m-deal-with-dallas-mavericks/" style="color: #0066cc;">https://techcrunch.com/2025/05/13/25b-valued-chime-files-for-an-ipo-reveals-33m-deal-with-dallas-mavericks/
    #25bvalued #chime #files #for #ipo #reveals #33m #deal #with #dallas #mavericks
    $25B-valued Chime files for an IPO, reveals $33M deal with Dallas Mavericks
    At long last, digital consumer bank Chime has moved forward with its IPO by filing its S-1 paperwork Tuesday. Chime had reportedly filed confidential S-1 paperwork back in December. S-1 filings typically reveal all kinds of information, covering financial, legal, and other risk factors. But Chime’s S-1 documents still have a lot of blank spaces. We don’t know how many shares it hopes to sell or at what price. Chime could be aiming to raise $1 billion, IPO specialist Renaissance Capital believes. We also don’t know how many shares insiders plan to sell as part of the IPO. This includes its major backers, a list that includes billionaire Yuri Milner’s DST Global, Michael Stark’s Crosslink Capital, billionaire Len Blavatnik’s Access Industries, as well as VC firms General Atlantic, Menlo Ventures (led by board member Shawn Carolan), the Sino French Innovation Fund, and Iconiq, according to the paperwork. Chime raised $2.65 billion total as a private company, including its last raise in 2021 that valued it at $25 billion, PitchBook estimates. As a result, there are many more VCs on its cap table. They, too, could be in for big paydays. For instance, Kirsten Green’s Forerunner Ventures and Hunter Walk’s Homebrew both claim Chime as a portfolio company. Chime offered one detail that suggests the company believes it will be a huge IPO. Chime enlisted an army of big name investment bankers, including Morgan Stanley, Goldman Sachs, and JP Morgan. The financials show why investors may grow excited. The company finished 2024 with $1.67 billion in revenue and $25 million in losses, compared to nearly $1.3 billion in revenue and $203 million in losses in 2023. Its 2025 first-quarter revenue was already $519 million. So, by Silicon Valley math, that puts it on track for $2 billion this year and near profitability.  Chime offers consumer checking, savings, debit, and credit cards and claims 8.6 million active users. Techcrunch event Join us at TechCrunch Sessions: AI Secure your spot for our leading AI industry event with speakers from OpenAI, Anthropic, and Cohere. For a limited time, tickets are just $292 for an entire day of expert talks, workshops, and potent networking. Exhibit at TechCrunch Sessions: AI Secure your spot at TC Sessions: AI and show 1,200+ decision-makers what you’ve built — without the big spend. Available through May 9 or while tables last. Berkeley, CA | June 5 REGISTER NOW One interesting reveal in the paperwork. Its board member Cynthia Marshall served as the CEO of the Dallas Mavericks from 2018 to December 2024. Chime became a Mavericks sponsor during that time. It paid around $33 million over three years (2022-2024), which gained it the Chime logo on the team’s jersey, among other marketing benefits. Without that deal, it might have already been profitable. Source: https://techcrunch.com/2025/05/13/25b-valued-chime-files-for-an-ipo-reveals-33m-deal-with-dallas-mavericks/ #25bvalued #chime #files #for #ipo #reveals #33m #deal #with #dallas #mavericks
    TECHCRUNCH.COM
    $25B-valued Chime files for an IPO, reveals $33M deal with Dallas Mavericks
    At long last, digital consumer bank Chime has moved forward with its IPO by filing its S-1 paperwork Tuesday. Chime had reportedly filed confidential S-1 paperwork back in December. S-1 filings typically reveal all kinds of information, covering financial, legal, and other risk factors. But Chime’s S-1 documents still have a lot of blank spaces. We don’t know how many shares it hopes to sell or at what price. Chime could be aiming to raise $1 billion, IPO specialist Renaissance Capital believes. We also don’t know how many shares insiders plan to sell as part of the IPO. This includes its major backers, a list that includes billionaire Yuri Milner’s DST Global, Michael Stark’s Crosslink Capital, billionaire Len Blavatnik’s Access Industries, as well as VC firms General Atlantic, Menlo Ventures (led by board member Shawn Carolan), the Sino French Innovation Fund, and Iconiq, according to the paperwork. Chime raised $2.65 billion total as a private company, including its last raise in 2021 that valued it at $25 billion, PitchBook estimates. As a result, there are many more VCs on its cap table. They, too, could be in for big paydays. For instance, Kirsten Green’s Forerunner Ventures and Hunter Walk’s Homebrew both claim Chime as a portfolio company. Chime offered one detail that suggests the company believes it will be a huge IPO. Chime enlisted an army of big name investment bankers, including Morgan Stanley, Goldman Sachs, and JP Morgan. The financials show why investors may grow excited. The company finished 2024 with $1.67 billion in revenue and $25 million in losses, compared to nearly $1.3 billion in revenue and $203 million in losses in 2023. Its 2025 first-quarter revenue was already $519 million. So, by Silicon Valley math, that puts it on track for $2 billion this year and near profitability.  Chime offers consumer checking, savings, debit, and credit cards and claims 8.6 million active users. Techcrunch event Join us at TechCrunch Sessions: AI Secure your spot for our leading AI industry event with speakers from OpenAI, Anthropic, and Cohere. For a limited time, tickets are just $292 for an entire day of expert talks, workshops, and potent networking. Exhibit at TechCrunch Sessions: AI Secure your spot at TC Sessions: AI and show 1,200+ decision-makers what you’ve built — without the big spend. Available through May 9 or while tables last. Berkeley, CA | June 5 REGISTER NOW One interesting reveal in the paperwork. Its board member Cynthia Marshall served as the CEO of the Dallas Mavericks from 2018 to December 2024. Chime became a Mavericks sponsor during that time. It paid around $33 million over three years (2022-2024), which gained it the Chime logo on the team’s jersey, among other marketing benefits. Without that deal, it might have already been profitable.
    0 Yorumlar 0 hisse senetleri 0 önizleme
  • Get Started with Rust: Installation and Your First CLI Tool – A Beginner’s Guide
    Rust has become a popular programming language in recent years as it combines security and high performance and can be used in many applications.
    It combines the positive characteristics of C and C++ with the modern syntax and simplicity of other programming languages such as Python.
    In this article, we will take a step-by-step look at the installation of Rust on various operating systems and set up a simple command line interface to understand Rust’s structure and functionality.
    Installing Rust — step by step
    Regardless of the operating system, it is quite easy to install Rust thanks to the official installer rustup, which is available for free on the Rust website.
    This means that the installation only takes a few steps and only differs slightly for the various operating systems.
    Installing Rust under Windows
    In Windows, the installer completely controls the installation, and you can follow the steps below:
    Go to the “Install” subsection on the official Rust website (https://www.rust-lang.org/tools/install)" style="color: #0066cc;">https://www.rust-lang.org/tools/install) and download the rustup-init.exe file there.
    The website recognizes the underlying operating system so that the appropriate suggestions for the system used are made directly.
    As soon as the download is complete, the rustup-init.exe file can be executed.
    A command line with various installation instructions then opens.
    Press the Enter key to run the standard installation to install Rust.
    This also includes the following tools:
    rustc is the compiler, which compiles the code and checks for errors before execution.
    cargo is Rust’s build and package management tool.
    rustup is the version manager.
    After successful installation, Rust should automatically be available in your PATH.
    This can be easily checked in PowerShell or CMD using the following commands:
    rustc --version cargo --version
    If “rustc” and “cargo” are then displayed in the output with the respective version numbers, then the installation was successful.
    However, if the command is not found, it may be due to the environment variables.
    To check these, you can follow the path “This PC –> Properties –> Advanced system settings –> Environment variables”.
    Once there, you should make sure that the path to Rust, for example “C:\Users\UserName\.cargo\bin”, is present in the PATH variable.
    Installing Rust under Ubuntu/Linux
    In Linux, Rust can be installed completely via the terminal without having to download anything from the Rust website.
    To install Rust, the following steps must be carried out:
    Open the terminal, for example, with the key combination Ctrl + Alt + T.
    To install Rust, the following command is executed:
    curl --proto '=https' --tlsv1.2 -sSf https://sh.rustup.rs" style="color: #0066cc;">https://sh.rustup.rs | sh
    3.
    You will then be asked whether the installation should be started.
    This can be confirmed by entering “1” (default), for example.
    All required packages are then downloaded, and the environment is set up.4.
    You may have to set the path manually.
    In this case, you can use this command, for example:
    source $HOME/.cargo/env
    After the installation has been completed, you can check whether everything has worked properly.
    To do this, you can explicitly display the versions of rustc and cargo:
    rustc --version cargo --version
    Installing Rust under macOS
    There are several ways to install Rust on macOS.
    If you have installed Homebrew, you can simply use this to install Rust by executing the following command:
    brew install rustup rustup-init
    Alternatively, you can also install Rust directly using this script:
    curl --proto '=https' --tlsv1.2 -sSf https://sh.rustup.rs" style="color: #0066cc;">https://sh.rustup.rs | sh
    During the installation, you will be asked whether you want to run the standard installation.
    You can simply confirm this by pressing the Enter key.
    Regardless of the variant selected, you can then check the installation by displaying the version of Rust to ensure that everything has worked:
    rustc --version
    cargo --version
    Creating a Rust project with cargo
    During the installation of Rust, you have probably already come across the cargo program.
    This is the official package manager and build system of Rust and is comparable to pip in Python. cargo performs the following tasks, among others:
    Initialization of a project
    Management of dependencies
    Compiling the code
    Execution of tests
    Optimization of builds
    This allows you to manage complete projects in Rust without having to deal with complicated build scripts.
    It also helps you to set up new projects quickly and easily, which can then be filled with life.
    For our example, we will create a new project.
    To do this, we go to the terminal and navigate to a folder in which we want to save it.
    We then execute the following command to create a new Rust project:
    cargo new json_viewer --bin
    We call this project json_viewer because we are building a CLI tool that can be used to open and process JSON files.
    The --bin option indicates that we want to create an executable program and not a library.
    You should now be able to see the following folder structure in your directory after executing the command:
    json_viewer/
    ├── Cargo.toml # Project configuration
    └── src
    └── main.rs # File for Rust Code
    Every new project has this structure. Cargo.toml contains all the dependencies and metadata of your project, such as the name, the libraries used, or the version.
    The src/main.rs, on the other hand, later contains the actual Rust code, which then defines the steps that are executed when the program is started.
    First, we can define a simple function here that generates an output in the terminal:
    fn main() {
    println!("Hello, Rust CLI-Tool!");
    }
    The program can be easily called up from the terminal using cargo:
    cargo run
    For this call to work, it must be ensured that you are in the main directory of the project, i.e.
    where the Cargo.toml file is stored.
    If everything has been set up and executed correctly, you will receive this output:
    Hello, Rust CLI-Tool!
    With these few steps, you have just created your first successful Rust project, which we can build on in the next section.
    Building a CLI tool: Simple JSON parser
    Now we start to fill the project with life and create a program that can read JSON files and output their content in the terminal in a structured way.
    The first step is to define the dependencies, i.e., the libraries that we will use in the course of the project.
    These are stored in the Cargo.toml file.
    In Rust, the so-called crates are comparable to libraries or modules that offer certain predefined functionalities.
    For example, they can consist of reusable code written by other developers.
    We need the following crates for our project:
    serde enables the serialization and deserialization of data formats such as JSON or YAML.
    serde_json, on the other hand, is an extension that was developed specifically for working with JSON files.
    For your project to access these crates, they must be stored in the Cargo.toml file.
    This looks like this immediately after creating the project:
    [package]
    name = "json_viewer"
    version = "0.1.0"
    edition = "2021"
    [dependencies]
    We can now add the required crates in the [dependencies] section.
    Here we also define the version to be used:
    [dependencies]
    serde = "1.0"
    serde_json = "1.0"
    To ensure that the added dependencies are available in the project, they must first be downloaded and built.
    To do this, the following terminal command can be executed in the main directory:
    cargo build
    During execution, cargo searches the central Rust repository crates.io for the dependencies and the specified versions to download them.
    These crates are then compiled together with the code and cached so that they do not have to be downloaded again for the next build.
    If these steps have worked, we are now ready to write the actual Rust code that opens and processes the JSON file.
    To do this, you can open the src/main.rs file and replace the existing content with this code:
    use std::fs;
    use serde_json::Value;
    use std::env;
    fn main() {
    // Check arguments
    let args: Vec<String> = env::args().collect();
    if args.len() < 2 {
    println!(“Please specify the path to your file.”);
    return;
    }
    // Read in File
    let file_path = &args[1];
    let file_content = fs::read_to_string(file_path)
    .expect(“File could not be read.”);
    // Parse JSON
    let json_data: Value = serde_json::from_str(&file_content)
    .expect(“Invalid JSON format.”);
    // Print JSON
    println!(" JSON-content:\n{}”, json_data);
    }
    The code follows these steps:
    Check arguments:
    We read the arguments from the command line via env::args().
    The user must specify the path to the JSON file at startup.
    Read the file:
    With the help of fs::read_to_string(), the content of the file is read into a string.
    Parse JSON:
    The crate serde_json converts the string into a Rust object with the type Value.
    Format output:
    The content is output legibly in the console.
    To test the tool, you can, for example, create a test file in the project directory under the name examples.json:
    {
    "name": "Alice",
    "age": 30,
    "skills": ["Rust", "Python", "Machine Learning"]
    }
    The program is then executed using cargo run and the path to the JSON file is also defined:
    cargo run ./example.json
    This brings us to the end of our first project in Rust and we have successfully built a simple CLI tool that can read JSON files and output them to the command line.
    This is what you should take with you
    Installing Rust is quick and easy in many operating systems.
    The other components that are required are already installed.
    With the help of cargo, an empty project can be created directly, which contains the necessary files and in which you can start writing Rust code
    Before you start Programming, you should enter the dependencies and download them using the build command.
    Now that everything is set up, you can start with the actual programming.
    The post Get Started with Rust: Installation and Your First CLI Tool – A Beginner’s Guide appeared first on Towards Data Science.
    Source: https://towardsdatascience.com/get-started-with-rust-installation-your-first-cli-tool-a-beginners-guide/" style="color: #0066cc;">https://towardsdatascience.com/get-started-with-rust-installation-your-first-cli-tool-a-beginners-guide/
    #get #started #with #rust #installation #and #your #first #cli #tool #beginners #guide
    Get Started with Rust: Installation and Your First CLI Tool – A Beginner’s Guide
    Rust has become a popular programming language in recent years as it combines security and high performance and can be used in many applications. It combines the positive characteristics of C and C++ with the modern syntax and simplicity of other programming languages such as Python. In this article, we will take a step-by-step look at the installation of Rust on various operating systems and set up a simple command line interface to understand Rust’s structure and functionality. Installing Rust — step by step Regardless of the operating system, it is quite easy to install Rust thanks to the official installer rustup, which is available for free on the Rust website. This means that the installation only takes a few steps and only differs slightly for the various operating systems. Installing Rust under Windows In Windows, the installer completely controls the installation, and you can follow the steps below: Go to the “Install” subsection on the official Rust website (https://www.rust-lang.org/tools/install) and download the rustup-init.exe file there. The website recognizes the underlying operating system so that the appropriate suggestions for the system used are made directly. As soon as the download is complete, the rustup-init.exe file can be executed. A command line with various installation instructions then opens. Press the Enter key to run the standard installation to install Rust. This also includes the following tools: rustc is the compiler, which compiles the code and checks for errors before execution. cargo is Rust’s build and package management tool. rustup is the version manager. After successful installation, Rust should automatically be available in your PATH. This can be easily checked in PowerShell or CMD using the following commands: rustc --version cargo --version If “rustc” and “cargo” are then displayed in the output with the respective version numbers, then the installation was successful. However, if the command is not found, it may be due to the environment variables. To check these, you can follow the path “This PC –> Properties –> Advanced system settings –> Environment variables”. Once there, you should make sure that the path to Rust, for example “C:\Users\UserName\.cargo\bin”, is present in the PATH variable. Installing Rust under Ubuntu/Linux In Linux, Rust can be installed completely via the terminal without having to download anything from the Rust website. To install Rust, the following steps must be carried out: Open the terminal, for example, with the key combination Ctrl + Alt + T. To install Rust, the following command is executed: curl --proto '=https' --tlsv1.2 -sSf https://sh.rustup.rs | sh 3. You will then be asked whether the installation should be started. This can be confirmed by entering “1” (default), for example. All required packages are then downloaded, and the environment is set up.4. You may have to set the path manually. In this case, you can use this command, for example: source $HOME/.cargo/env After the installation has been completed, you can check whether everything has worked properly. To do this, you can explicitly display the versions of rustc and cargo: rustc --version cargo --version Installing Rust under macOS There are several ways to install Rust on macOS. If you have installed Homebrew, you can simply use this to install Rust by executing the following command: brew install rustup rustup-init Alternatively, you can also install Rust directly using this script: curl --proto '=https' --tlsv1.2 -sSf https://sh.rustup.rs | sh During the installation, you will be asked whether you want to run the standard installation. You can simply confirm this by pressing the Enter key. Regardless of the variant selected, you can then check the installation by displaying the version of Rust to ensure that everything has worked: rustc --version cargo --version Creating a Rust project with cargo During the installation of Rust, you have probably already come across the cargo program. This is the official package manager and build system of Rust and is comparable to pip in Python. cargo performs the following tasks, among others: Initialization of a project Management of dependencies Compiling the code Execution of tests Optimization of builds This allows you to manage complete projects in Rust without having to deal with complicated build scripts. It also helps you to set up new projects quickly and easily, which can then be filled with life. For our example, we will create a new project. To do this, we go to the terminal and navigate to a folder in which we want to save it. We then execute the following command to create a new Rust project: cargo new json_viewer --bin We call this project json_viewer because we are building a CLI tool that can be used to open and process JSON files. The --bin option indicates that we want to create an executable program and not a library. You should now be able to see the following folder structure in your directory after executing the command: json_viewer/ ├── Cargo.toml # Project configuration └── src └── main.rs # File for Rust Code Every new project has this structure. Cargo.toml contains all the dependencies and metadata of your project, such as the name, the libraries used, or the version. The src/main.rs, on the other hand, later contains the actual Rust code, which then defines the steps that are executed when the program is started. First, we can define a simple function here that generates an output in the terminal: fn main() { println!("Hello, Rust CLI-Tool!"); } The program can be easily called up from the terminal using cargo: cargo run For this call to work, it must be ensured that you are in the main directory of the project, i.e. where the Cargo.toml file is stored. If everything has been set up and executed correctly, you will receive this output: Hello, Rust CLI-Tool! With these few steps, you have just created your first successful Rust project, which we can build on in the next section. Building a CLI tool: Simple JSON parser Now we start to fill the project with life and create a program that can read JSON files and output their content in the terminal in a structured way. The first step is to define the dependencies, i.e., the libraries that we will use in the course of the project. These are stored in the Cargo.toml file. In Rust, the so-called crates are comparable to libraries or modules that offer certain predefined functionalities. For example, they can consist of reusable code written by other developers. We need the following crates for our project: serde enables the serialization and deserialization of data formats such as JSON or YAML. serde_json, on the other hand, is an extension that was developed specifically for working with JSON files. For your project to access these crates, they must be stored in the Cargo.toml file. This looks like this immediately after creating the project: [package] name = "json_viewer" version = "0.1.0" edition = "2021" [dependencies] We can now add the required crates in the [dependencies] section. Here we also define the version to be used: [dependencies] serde = "1.0" serde_json = "1.0" To ensure that the added dependencies are available in the project, they must first be downloaded and built. To do this, the following terminal command can be executed in the main directory: cargo build During execution, cargo searches the central Rust repository crates.io for the dependencies and the specified versions to download them. These crates are then compiled together with the code and cached so that they do not have to be downloaded again for the next build. If these steps have worked, we are now ready to write the actual Rust code that opens and processes the JSON file. To do this, you can open the src/main.rs file and replace the existing content with this code: use std::fs; use serde_json::Value; use std::env; fn main() { // Check arguments let args: Vec<String> = env::args().collect(); if args.len() < 2 { println!(“Please specify the path to your file.”); return; } // Read in File let file_path = &args[1]; let file_content = fs::read_to_string(file_path) .expect(“File could not be read.”); // Parse JSON let json_data: Value = serde_json::from_str(&file_content) .expect(“Invalid JSON format.”); // Print JSON println!(" JSON-content:\n{}”, json_data); } The code follows these steps: Check arguments: We read the arguments from the command line via env::args(). The user must specify the path to the JSON file at startup. Read the file: With the help of fs::read_to_string(), the content of the file is read into a string. Parse JSON: The crate serde_json converts the string into a Rust object with the type Value. Format output: The content is output legibly in the console. To test the tool, you can, for example, create a test file in the project directory under the name examples.json: { "name": "Alice", "age": 30, "skills": ["Rust", "Python", "Machine Learning"] } The program is then executed using cargo run and the path to the JSON file is also defined: cargo run ./example.json This brings us to the end of our first project in Rust and we have successfully built a simple CLI tool that can read JSON files and output them to the command line. This is what you should take with you Installing Rust is quick and easy in many operating systems. The other components that are required are already installed. With the help of cargo, an empty project can be created directly, which contains the necessary files and in which you can start writing Rust code Before you start Programming, you should enter the dependencies and download them using the build command. Now that everything is set up, you can start with the actual programming. The post Get Started with Rust: Installation and Your First CLI Tool – A Beginner’s Guide appeared first on Towards Data Science. Source: https://towardsdatascience.com/get-started-with-rust-installation-your-first-cli-tool-a-beginners-guide/ #get #started #with #rust #installation #and #your #first #cli #tool #beginners #guide
    Get Started with Rust: Installation and Your First CLI Tool – A Beginner’s Guide
    Rust has become a popular programming language in recent years as it combines security and high performance and can be used in many applications. It combines the positive characteristics of C and C++ with the modern syntax and simplicity of other programming languages such as Python. In this article, we will take a step-by-step look at the installation of Rust on various operating systems and set up a simple command line interface to understand Rust’s structure and functionality. Installing Rust — step by step Regardless of the operating system, it is quite easy to install Rust thanks to the official installer rustup, which is available for free on the Rust website. This means that the installation only takes a few steps and only differs slightly for the various operating systems. Installing Rust under Windows In Windows, the installer completely controls the installation, and you can follow the steps below: Go to the “Install” subsection on the official Rust website (https://www.rust-lang.org/tools/install) and download the rustup-init.exe file there. The website recognizes the underlying operating system so that the appropriate suggestions for the system used are made directly. As soon as the download is complete, the rustup-init.exe file can be executed. A command line with various installation instructions then opens. Press the Enter key to run the standard installation to install Rust. This also includes the following tools: rustc is the compiler, which compiles the code and checks for errors before execution. cargo is Rust’s build and package management tool. rustup is the version manager. After successful installation, Rust should automatically be available in your PATH. This can be easily checked in PowerShell or CMD using the following commands: rustc --version cargo --version If “rustc” and “cargo” are then displayed in the output with the respective version numbers, then the installation was successful. However, if the command is not found, it may be due to the environment variables. To check these, you can follow the path “This PC –> Properties –> Advanced system settings –> Environment variables”. Once there, you should make sure that the path to Rust, for example “C:\Users\UserName\.cargo\bin”, is present in the PATH variable. Installing Rust under Ubuntu/Linux In Linux, Rust can be installed completely via the terminal without having to download anything from the Rust website. To install Rust, the following steps must be carried out: Open the terminal, for example, with the key combination Ctrl + Alt + T. To install Rust, the following command is executed: curl --proto '=https' --tlsv1.2 -sSf https://sh.rustup.rs | sh 3. You will then be asked whether the installation should be started. This can be confirmed by entering “1” (default), for example. All required packages are then downloaded, and the environment is set up.4. You may have to set the path manually. In this case, you can use this command, for example: source $HOME/.cargo/env After the installation has been completed, you can check whether everything has worked properly. To do this, you can explicitly display the versions of rustc and cargo: rustc --version cargo --version Installing Rust under macOS There are several ways to install Rust on macOS. If you have installed Homebrew, you can simply use this to install Rust by executing the following command: brew install rustup rustup-init Alternatively, you can also install Rust directly using this script: curl --proto '=https' --tlsv1.2 -sSf https://sh.rustup.rs | sh During the installation, you will be asked whether you want to run the standard installation. You can simply confirm this by pressing the Enter key. Regardless of the variant selected, you can then check the installation by displaying the version of Rust to ensure that everything has worked: rustc --version cargo --version Creating a Rust project with cargo During the installation of Rust, you have probably already come across the cargo program. This is the official package manager and build system of Rust and is comparable to pip in Python. cargo performs the following tasks, among others: Initialization of a project Management of dependencies Compiling the code Execution of tests Optimization of builds This allows you to manage complete projects in Rust without having to deal with complicated build scripts. It also helps you to set up new projects quickly and easily, which can then be filled with life. For our example, we will create a new project. To do this, we go to the terminal and navigate to a folder in which we want to save it. We then execute the following command to create a new Rust project: cargo new json_viewer --bin We call this project json_viewer because we are building a CLI tool that can be used to open and process JSON files. The --bin option indicates that we want to create an executable program and not a library. You should now be able to see the following folder structure in your directory after executing the command: json_viewer/ ├── Cargo.toml # Project configuration └── src └── main.rs # File for Rust Code Every new project has this structure. Cargo.toml contains all the dependencies and metadata of your project, such as the name, the libraries used, or the version. The src/main.rs, on the other hand, later contains the actual Rust code, which then defines the steps that are executed when the program is started. First, we can define a simple function here that generates an output in the terminal: fn main() { println!("Hello, Rust CLI-Tool!"); } The program can be easily called up from the terminal using cargo: cargo run For this call to work, it must be ensured that you are in the main directory of the project, i.e. where the Cargo.toml file is stored. If everything has been set up and executed correctly, you will receive this output: Hello, Rust CLI-Tool! With these few steps, you have just created your first successful Rust project, which we can build on in the next section. Building a CLI tool: Simple JSON parser Now we start to fill the project with life and create a program that can read JSON files and output their content in the terminal in a structured way. The first step is to define the dependencies, i.e., the libraries that we will use in the course of the project. These are stored in the Cargo.toml file. In Rust, the so-called crates are comparable to libraries or modules that offer certain predefined functionalities. For example, they can consist of reusable code written by other developers. We need the following crates for our project: serde enables the serialization and deserialization of data formats such as JSON or YAML. serde_json, on the other hand, is an extension that was developed specifically for working with JSON files. For your project to access these crates, they must be stored in the Cargo.toml file. This looks like this immediately after creating the project: [package] name = "json_viewer" version = "0.1.0" edition = "2021" [dependencies] We can now add the required crates in the [dependencies] section. Here we also define the version to be used: [dependencies] serde = "1.0" serde_json = "1.0" To ensure that the added dependencies are available in the project, they must first be downloaded and built. To do this, the following terminal command can be executed in the main directory: cargo build During execution, cargo searches the central Rust repository crates.io for the dependencies and the specified versions to download them. These crates are then compiled together with the code and cached so that they do not have to be downloaded again for the next build. If these steps have worked, we are now ready to write the actual Rust code that opens and processes the JSON file. To do this, you can open the src/main.rs file and replace the existing content with this code: use std::fs; use serde_json::Value; use std::env; fn main() { // Check arguments let args: Vec<String> = env::args().collect(); if args.len() < 2 { println!(“Please specify the path to your file.”); return; } // Read in File let file_path = &args[1]; let file_content = fs::read_to_string(file_path) .expect(“File could not be read.”); // Parse JSON let json_data: Value = serde_json::from_str(&file_content) .expect(“Invalid JSON format.”); // Print JSON println!(" JSON-content:\n{}”, json_data); } The code follows these steps: Check arguments: We read the arguments from the command line via env::args(). The user must specify the path to the JSON file at startup. Read the file: With the help of fs::read_to_string(), the content of the file is read into a string. Parse JSON: The crate serde_json converts the string into a Rust object with the type Value. Format output: The content is output legibly in the console. To test the tool, you can, for example, create a test file in the project directory under the name examples.json: { "name": "Alice", "age": 30, "skills": ["Rust", "Python", "Machine Learning"] } The program is then executed using cargo run and the path to the JSON file is also defined: cargo run ./example.json This brings us to the end of our first project in Rust and we have successfully built a simple CLI tool that can read JSON files and output them to the command line. This is what you should take with you Installing Rust is quick and easy in many operating systems. The other components that are required are already installed. With the help of cargo, an empty project can be created directly, which contains the necessary files and in which you can start writing Rust code Before you start Programming, you should enter the dependencies and download them using the build command. Now that everything is set up, you can start with the actual programming. The post Get Started with Rust: Installation and Your First CLI Tool – A Beginner’s Guide appeared first on Towards Data Science.
    0 Yorumlar 0 hisse senetleri 0 önizleme
CGShares https://cgshares.com