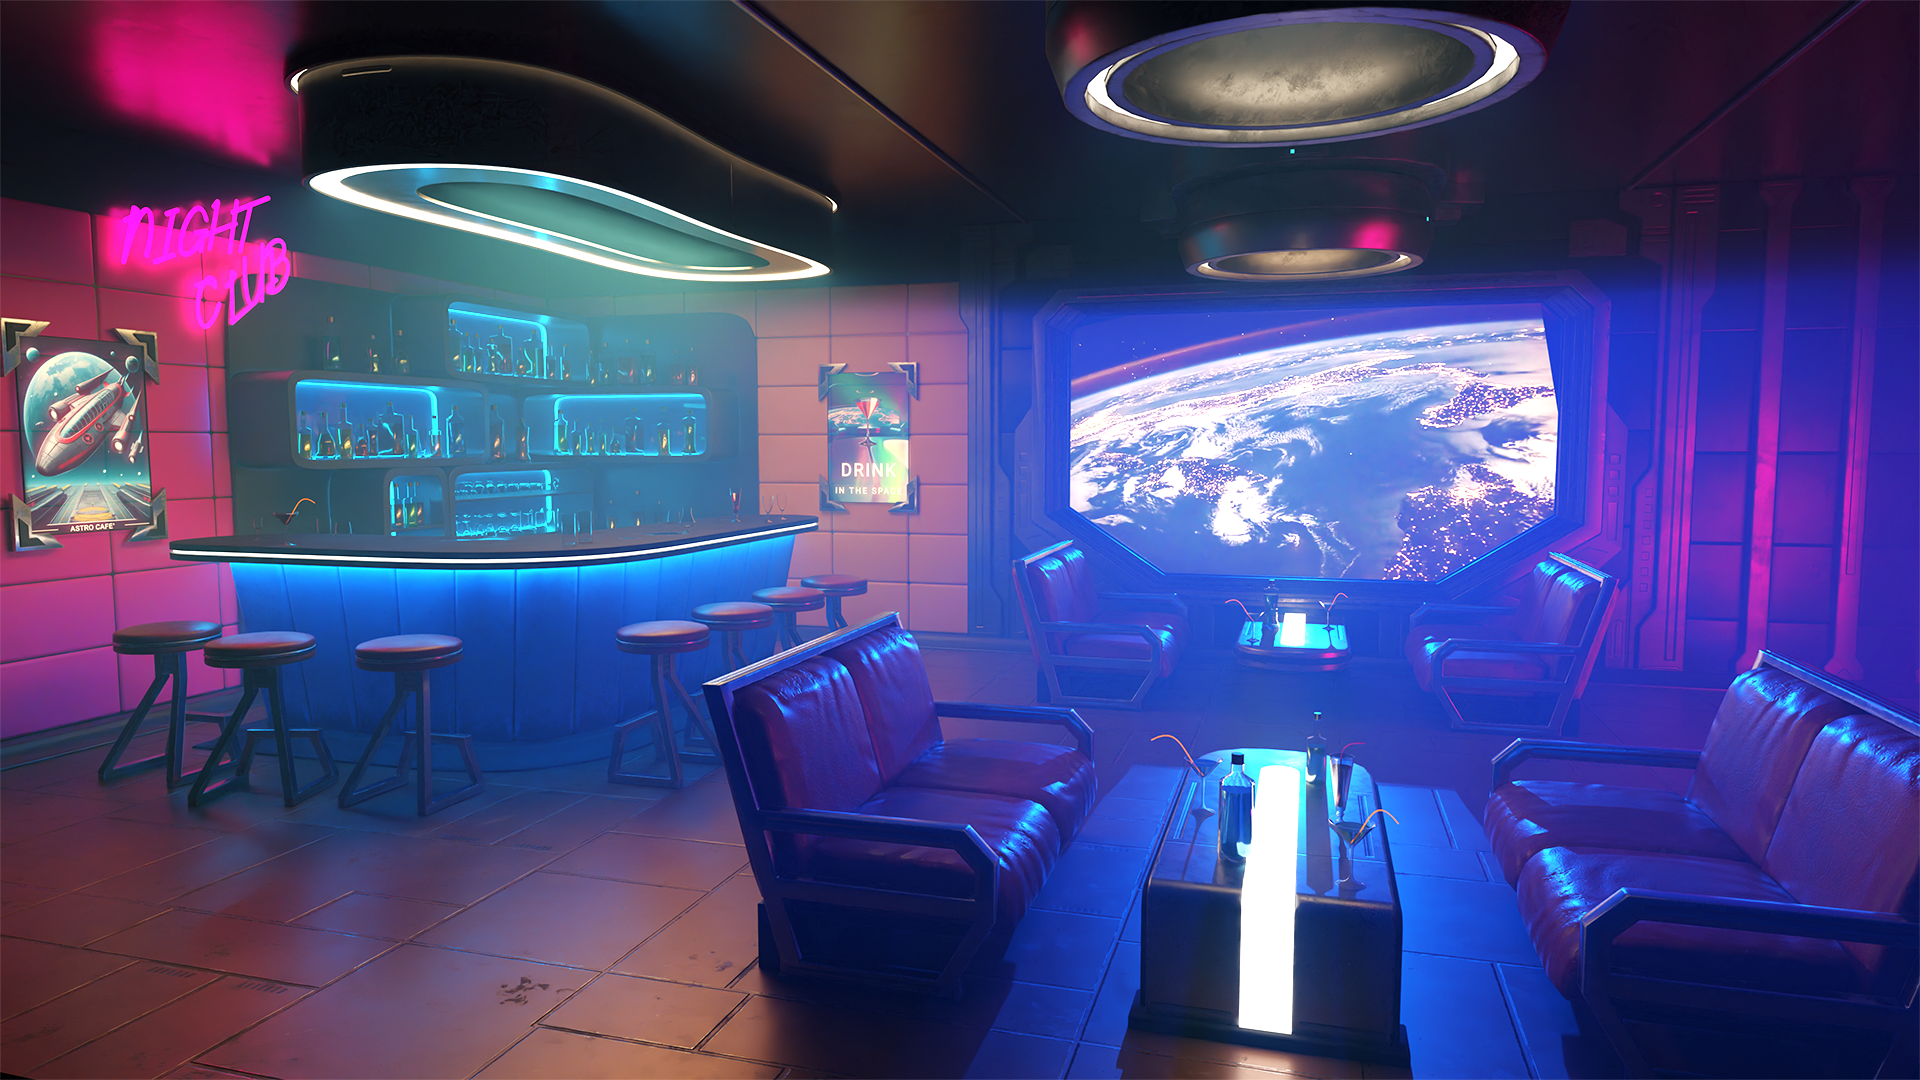
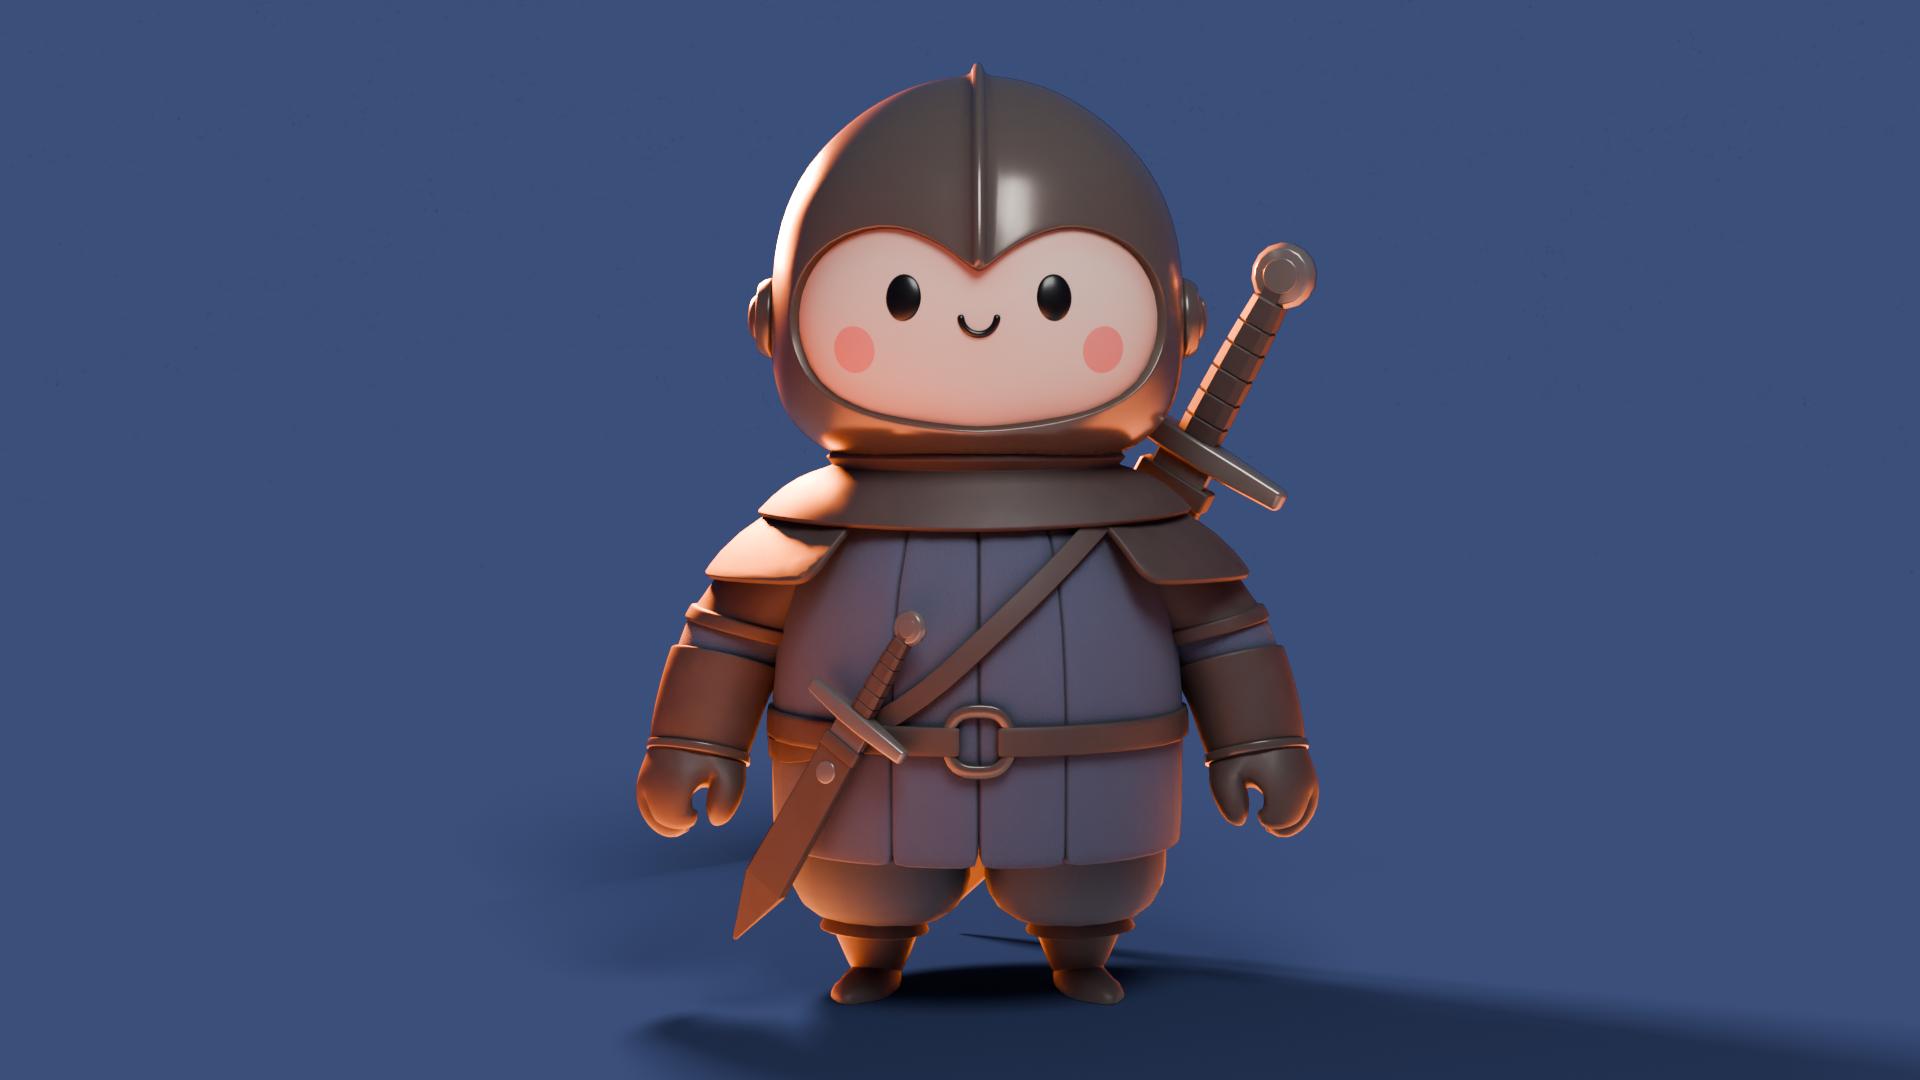
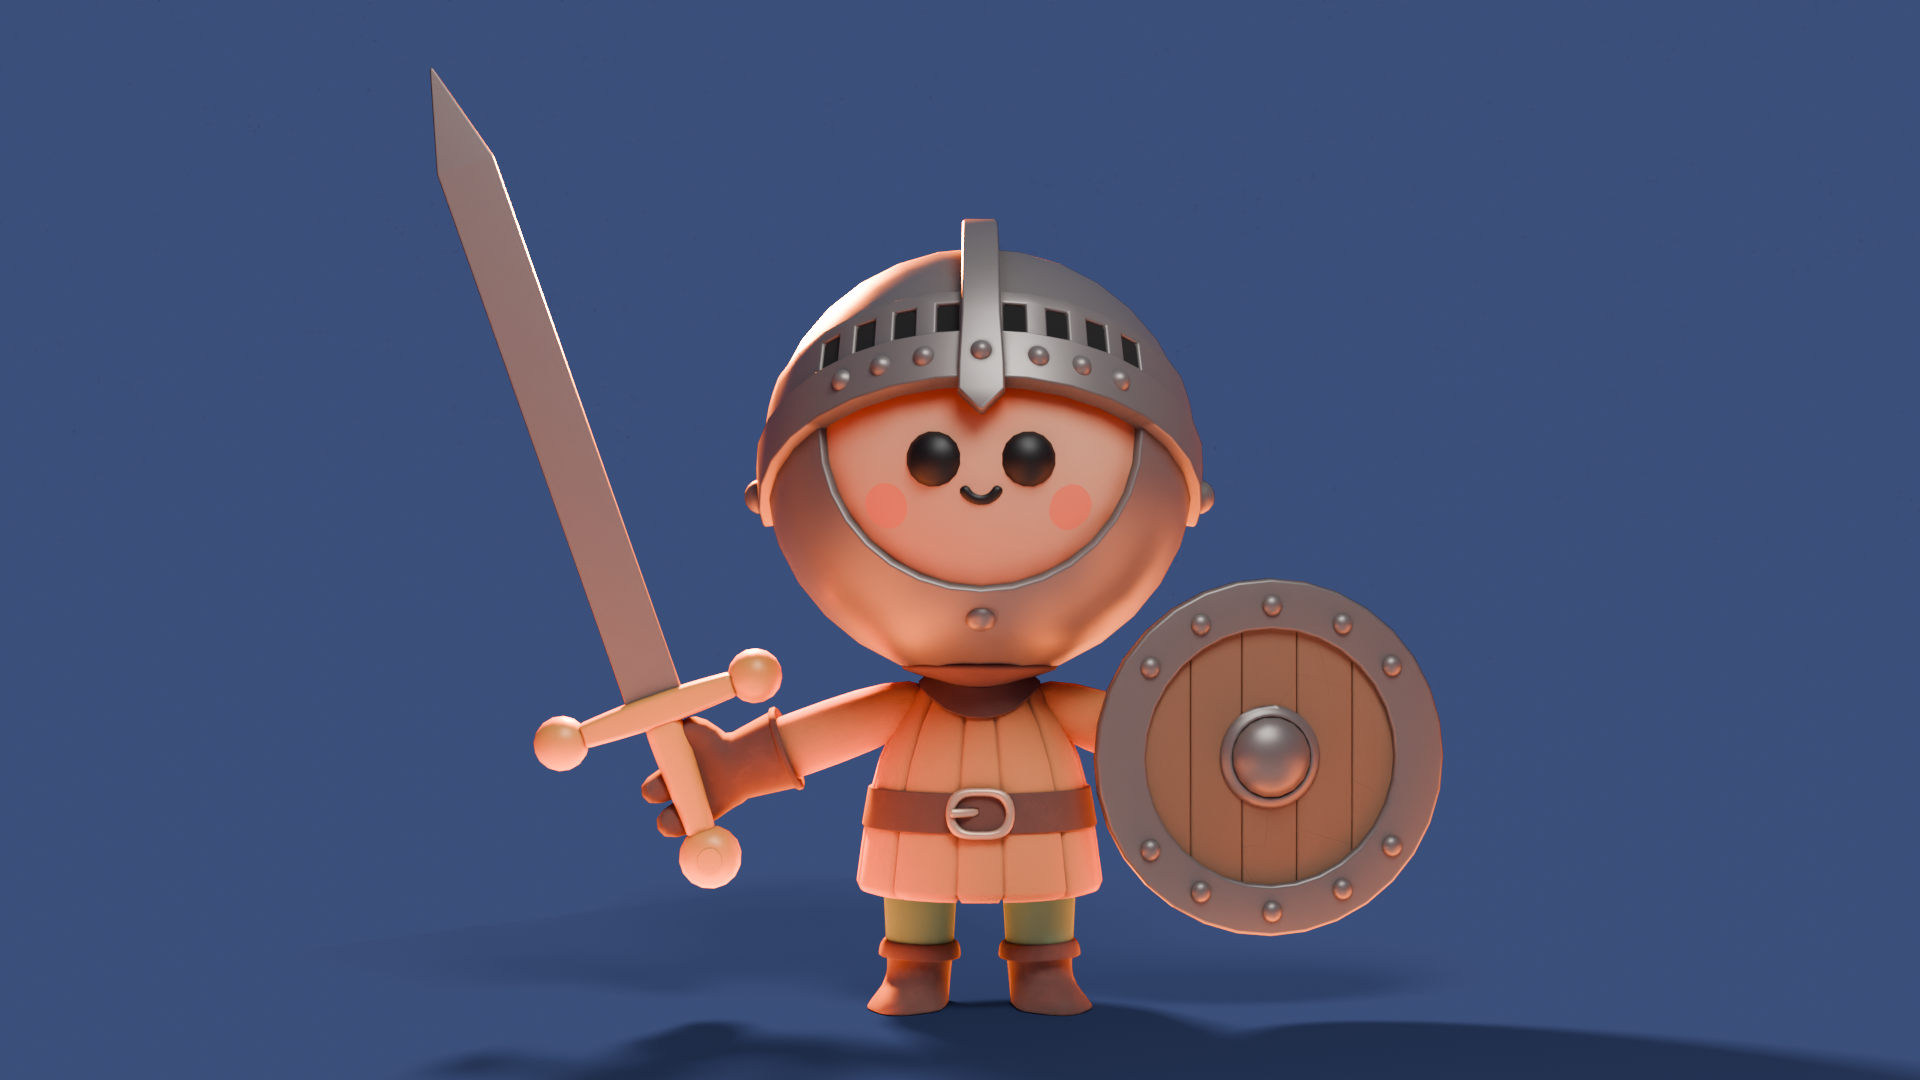
• في عالم ما بعد الكارثة، يبدو أن الإبداع قد استعاد عافيته بتوزيع 330 أصلًا مجانيًا من Oleg Ushenok! أليس من الرائع أن نحصل على مجموعة أدوات تساعدنا في بناء عالم مدمَّر دون الحاجة إلى الخروج من منطقة الراحة الخاصة بنا؟ لا مزيد من البحث عن الكوارث، فكل ما علينا فعله هو تحميل هذه الأصول في صيغة FBX مع قوام PBR، وكأننا نعيد بناء الكوكب بأسلوب "اللعبة على الكمبيوتر".

    ما عليك سوى أن تتخيل كيف ستبدو مدينتك الجديدة، التي بُنيت بالاعتماد على أصول مجانية! بالطبع، يمكنك استخدامها للأ
    في عالم ما بعد الكارثة، يبدو أن الإبداع قد استعاد عافيته بتوزيع 330 أصلًا مجانيًا من Oleg Ushenok! أليس من الرائع أن نحصل على مجموعة أدوات تساعدنا في بناء عالم مدمَّر دون الحاجة إلى الخروج من منطقة الراحة الخاصة بنا؟ لا مزيد من البحث عن الكوارث، فكل ما علينا فعله هو تحميل هذه الأصول في صيغة FBX مع قوام PBR، وكأننا نعيد بناء الكوكب بأسلوب "اللعبة على الكمبيوتر". ما عليك سوى أن تتخيل كيف ستبدو مدينتك الجديدة، التي بُنيت بالاعتماد على أصول مجانية! بالطبع، يمكنك استخدامها للأ
    Get 330 free kitbash assets for post-apocalyptic environments
    Download free assets from Oleg Ushenok's incredible new kitbash asset pack. FBX format, with PBR textures, for commercial use.
    1 Commentarios 0 Acciones
  • Download Unreal Engine 2D animation plugin Odyssey for free

    html PUBLIC "-//W3C//DTD HTML 4.0 Transitional//EN" ";

    Epic Games has made Odyssey, Praxinos’s 2D animation plugin for Unreal Engine, available for free through Fab, its online marketplace.The software – which can be used for storyboarding or texturing 3D models as well as creating 2D animation – is available for free indefinitely, and will continue to be updated.
    A serious professional 2D animation tool created by former TVPaint staff

    Created by a team that includes former developers of standalone 2D animation software TVPaint, Odyssey has been in development since 2019.Part of that work was also funded by Epic Games, with Praxinos receiving an Epic MegaGrant for two of Odyssey’s precursors: painting plugin Iliad and storyboard and layout plugin Epos.
    Odyssey itself was released last year after beta testing at French animation studios including Ellipse Animation, and originally cost €1,200 for a perpetual license.

    Create 2D animation, storyboards, or textures for 3D models

    Although Odyssey’s main function is to create 2D animation – for movie and broadcast projects, motion graphics, or even games – the plugin adds a wider 2D toolset to Unreal Engine.Other use cases include storyboarding – you can import image sequences and turn them into storyboards – and texturing, either by painting 2D texture maps, or painting onto 3D meshes.
    It supports both 2D and 3D workflows, with the 2D editors – which include a flipbook editor as well as the 2D texture and animation editors – complemented by a 3D viewport.
    The bitmap painting toolset makes use of Unreal Engine’s Blueprint system, making it possible for users to create new painting brushes using a node-based workflow, and supports pressure sensitivity on graphics tablets.
    There is also a vector toolset for creating hard-edged shapes.
    Animation features include onion skinning, Toon Boom-style shift and trace, and automatic inbetweening.
    The plugin supports standard 2D and 3D file formats, including PSD, FBX and USD.
    Available for free indefinitely, but future updates planned

    Epic Games regularly makes Unreal Engine assets available for free through Fab, but usually only for a limited period of time.Odyssey is different, in that it is available for free indefinitely.
    However, it will continue to get updates: according to Epic Games’ blog post, Praxinos “plans to work in close collaboration with Epic Games and continue to enhance Odyssey”.
    As well as Odyssey itself, Praxinos offers custom tools development and training, which will hopefully also help to support future development.
    System requirements and availability

    Odyssey is compatible with Unreal Engine 5.6 on Windows and macOS. It is available for free under a Fab Standard License, including for commercial use. about Odyssey on Praxinos’s website
    Find more detailed information in Odyssey’s online manual
    Download Unreal Engine 2D animation plugin Odyssey for free

    Have your say on this story by following CG Channel on Facebook, Instagram and X. As well as being able to comment on stories, followers of our social media accounts can see videos we don’t post on the site itself, including making-ofs for the latest VFX movies, animations, games cinematics and motion graphics projects.
    #download #unreal #engine #animation #plugin
    Download Unreal Engine 2D animation plugin Odyssey for free
    html PUBLIC "-//W3C//DTD HTML 4.0 Transitional//EN" "; Epic Games has made Odyssey, Praxinos’s 2D animation plugin for Unreal Engine, available for free through Fab, its online marketplace.The software – which can be used for storyboarding or texturing 3D models as well as creating 2D animation – is available for free indefinitely, and will continue to be updated. A serious professional 2D animation tool created by former TVPaint staff Created by a team that includes former developers of standalone 2D animation software TVPaint, Odyssey has been in development since 2019.Part of that work was also funded by Epic Games, with Praxinos receiving an Epic MegaGrant for two of Odyssey’s precursors: painting plugin Iliad and storyboard and layout plugin Epos. Odyssey itself was released last year after beta testing at French animation studios including Ellipse Animation, and originally cost €1,200 for a perpetual license. Create 2D animation, storyboards, or textures for 3D models Although Odyssey’s main function is to create 2D animation – for movie and broadcast projects, motion graphics, or even games – the plugin adds a wider 2D toolset to Unreal Engine.Other use cases include storyboarding – you can import image sequences and turn them into storyboards – and texturing, either by painting 2D texture maps, or painting onto 3D meshes. It supports both 2D and 3D workflows, with the 2D editors – which include a flipbook editor as well as the 2D texture and animation editors – complemented by a 3D viewport. The bitmap painting toolset makes use of Unreal Engine’s Blueprint system, making it possible for users to create new painting brushes using a node-based workflow, and supports pressure sensitivity on graphics tablets. There is also a vector toolset for creating hard-edged shapes. Animation features include onion skinning, Toon Boom-style shift and trace, and automatic inbetweening. The plugin supports standard 2D and 3D file formats, including PSD, FBX and USD. Available for free indefinitely, but future updates planned Epic Games regularly makes Unreal Engine assets available for free through Fab, but usually only for a limited period of time.Odyssey is different, in that it is available for free indefinitely. However, it will continue to get updates: according to Epic Games’ blog post, Praxinos “plans to work in close collaboration with Epic Games and continue to enhance Odyssey”. As well as Odyssey itself, Praxinos offers custom tools development and training, which will hopefully also help to support future development. System requirements and availability Odyssey is compatible with Unreal Engine 5.6 on Windows and macOS. It is available for free under a Fab Standard License, including for commercial use. about Odyssey on Praxinos’s website Find more detailed information in Odyssey’s online manual Download Unreal Engine 2D animation plugin Odyssey for free Have your say on this story by following CG Channel on Facebook, Instagram and X. As well as being able to comment on stories, followers of our social media accounts can see videos we don’t post on the site itself, including making-ofs for the latest VFX movies, animations, games cinematics and motion graphics projects. #download #unreal #engine #animation #plugin
    Download Unreal Engine 2D animation plugin Odyssey for free
    html PUBLIC "-//W3C//DTD HTML 4.0 Transitional//EN" "http://www.w3.org/TR/REC-html40/loose.dtd" Epic Games has made Odyssey, Praxinos’s 2D animation plugin for Unreal Engine, available for free through Fab, its online marketplace.The software – which can be used for storyboarding or texturing 3D models as well as creating 2D animation – is available for free indefinitely, and will continue to be updated. A serious professional 2D animation tool created by former TVPaint staff Created by a team that includes former developers of standalone 2D animation software TVPaint, Odyssey has been in development since 2019.Part of that work was also funded by Epic Games, with Praxinos receiving an Epic MegaGrant for two of Odyssey’s precursors: painting plugin Iliad and storyboard and layout plugin Epos. Odyssey itself was released last year after beta testing at French animation studios including Ellipse Animation, and originally cost €1,200 for a perpetual license. Create 2D animation, storyboards, or textures for 3D models Although Odyssey’s main function is to create 2D animation – for movie and broadcast projects, motion graphics, or even games – the plugin adds a wider 2D toolset to Unreal Engine.Other use cases include storyboarding – you can import image sequences and turn them into storyboards – and texturing, either by painting 2D texture maps, or painting onto 3D meshes. It supports both 2D and 3D workflows, with the 2D editors – which include a flipbook editor as well as the 2D texture and animation editors – complemented by a 3D viewport. The bitmap painting toolset makes use of Unreal Engine’s Blueprint system, making it possible for users to create new painting brushes using a node-based workflow, and supports pressure sensitivity on graphics tablets. There is also a vector toolset for creating hard-edged shapes. Animation features include onion skinning, Toon Boom-style shift and trace, and automatic inbetweening. The plugin supports standard 2D and 3D file formats, including PSD, FBX and USD. Available for free indefinitely, but future updates planned Epic Games regularly makes Unreal Engine assets available for free through Fab, but usually only for a limited period of time.Odyssey is different, in that it is available for free indefinitely. However, it will continue to get updates: according to Epic Games’ blog post, Praxinos “plans to work in close collaboration with Epic Games and continue to enhance Odyssey”. As well as Odyssey itself, Praxinos offers custom tools development and training, which will hopefully also help to support future development. System requirements and availability Odyssey is compatible with Unreal Engine 5.6 on Windows and macOS. It is available for free under a Fab Standard License, including for commercial use.Read more about Odyssey on Praxinos’s website Find more detailed information in Odyssey’s online manual Download Unreal Engine 2D animation plugin Odyssey for free Have your say on this story by following CG Channel on Facebook, Instagram and X (formerly Twitter). As well as being able to comment on stories, followers of our social media accounts can see videos we don’t post on the site itself, including making-ofs for the latest VFX movies, animations, games cinematics and motion graphics projects.
    0 Commentarios 0 Acciones
  • Autodesk adds AI animation tool MotionMaker to Maya 2026.1

    html PUBLIC "-//W3C//DTD HTML 4.0 Transitional//EN" ";

    A still from a demo shot created using MotionMaker, the new generative AI toolset introduced in Maya 2026.1 for roughing out movement animations.

    Autodesk has released Maya 2026.1, the latest version of its 3D modeling and animation software for visual effects, games and motion graphics work.The release adds MotionMaker, a new AI-based system for generating movement animations for biped and quadruped characters, especially for previs and layout work.
    Other changes include a new modular character rigging framework inside Bifrost for Maya, plus updates to liquid simulation, OpenPBR support and USD workflows.
    Autodesk has also released Maya Creative 2026.1, the corresponding update to the cut-down edition of Maya for smaller studios.

    MotionMaker: new generative AI tool roughs out movement animations

    The headline feature in Maya 2026.1 is MotionMaker: a new generative animation system.It lets users “create natural character movements in minutes instead of hours”, using a workflow more “like giving stage directions to a digital actor” than traditional animation.
    Users set keys for a character’s start and end positions, or create a guide path in the viewport, and MotionMaker automatically generates the motion in between.
    At the minute, that mainly means locomotion cycles, for both bipeds and quadrupeds, plus a few other movements, like jumping or sitting.
    Although MotionMaker is designed for “anyone in the animation pipeline”, the main initial use cases seem to be layout and previs rather than hero animation.
    Its output is also intended to be refined manually – Autodesk’s promotional material describes it as getting users “80% of the way there” for “certain types of shots”.
    Accordingly, MotionMaker comes with its own Editor window, which provides access to standard Maya animation editing tools.
    Users can layer in animation from other sources, including motion capture or keyframe animation retargeted from other characters: to add upper body movements, for example.
    There are a few more MotionMaker-specific controls: the video above shows speed ramping, to control the time it takes the character to travel between two points.
    There is also a Character Scale setting, which determines how a character’s size and weight is expressed through the animation generated.
    You can read more about the design and aims of MotionMaker in a Q&A with Autodesk Senior Principal Research Scientist Evan Atherton on Autodesk’s blog.
    According to Atherton, the AI models were trained using motion capture data “specifically collected for this tool”.
    That includes source data from male and female human performers, plus wolf-style dogs, although the system is “designed to support additionalstyles” in future.

    Bifrost: new modular character rigging framework

    Character artists and animators also get a new modular rigging framework in Bifrost.Autodesk has been teasing new character rigging capabilities in the node-based framework for building effects since Maya 2025.1, but this seems to be its official launch.
    The release is compatibility-breaking, and does not work with earlier versions of the toolset.
    The new Rigging Module Framework is described as a “modular, compound-based system for building … production-ready rigs”, and is “fully integrated with Maya”.
    Animators can “interact with module inputs and outputs directly from the Maya scene”, and rigs created with Bifrost can be converted into native Maya controls, joints and attributes.

    Bifrost: improvements to liquid simulation and workflow
    Bifrost 2.14 for Maya also features improvements to Bifrost’s existing functionality, particularly liquid simulation.
    The properties of collider objects, like bounciness, stickiness and roughness, can now influence liquid behavior in the same way they do particle behavior and other collisions.
    In addition, a new parameter controls air drag on foam and spray thrown out by a liquid.
    Workflow improvements include the option to convert Bifrost curves to Maya scene curves, and batch execution, to write out cache files “without the risk of accidentally overwriting them”.

    LookdevX: support for OpenPBR in FBX files
    LookdevX, Maya’s plugin for creating USD shading graphs, has also been updated.
    Autodesk introduced support for OpenPBR, the open material standard intended as a unified successor to the Autodesk Standard Surface and Adobe Standard Material, in 2024.
    To that, the latest update adds support for OpenPBR materials in FBX files, making it possible to import or export them from other applications that support OpenPBR: at the minute, 3ds Max plus some third-party renderers.
    LookdevX 1.8 also features a number of workflow improvements, particularly on macOS.
    USD for Maya: workflow improvements

    USD for Maya, the software’s USD plugin, also gets workflow improvements, with USD for Maya 0.32 adding support for animation curves for camera attributes in exports.Other changes include support for MaterialX documents and better representation of USD lights in the viewport.
    Arnold for Maya: performance improvements

    Maya’s integration plugin for Autodesk’s Arnold renderer has also been updated, with MtoA 5.5.2 supporting the changes in Arnold 7.4.2.They’re primarily performance improvements, especially to scene initialization times when rendering on machines with high numbers of CPU cores.
    Maya Creative 2026.1 also released

    Autodesk has also released Maya Creative 2026.1, the corresponding update to the cut-down edition of Maya aimed at smaller studios, and available on a pay-as-you-go basis.It includes most of the new features from Maya 2026.1, including MotionMaker, but does not include Bifrost for Maya.
    Price and system requirements

    Maya 2026.1 is available for Windows 10+, RHEL and Rocky Linux 8.10/9.3/9.5, and macOS 13.0+.The software is rental-only. Subscriptions cost /month or /year, up a further /month or /year since the release of Maya 2026.
    In many countries, artists earning under /year and working on projects valued at under /year, qualify for Maya Indie subscriptions, now priced at /year.
    Maya Creative is available pay-as-you-go, with prices starting at /day, and a minimum spend of /year.
    Read a full list of new features in Maya 2026.1 in the online documentation

    Have your say on this story by following CG Channel on Facebook, Instagram and X. As well as being able to comment on stories, followers of our social media accounts can see videos we don’t post on the site itself, including making-ofs for the latest VFX movies, animations, games cinematics and motion graphics projects.
    #autodesk #adds #animation #tool #motionmaker
    Autodesk adds AI animation tool MotionMaker to Maya 2026.1
    html PUBLIC "-//W3C//DTD HTML 4.0 Transitional//EN" "; A still from a demo shot created using MotionMaker, the new generative AI toolset introduced in Maya 2026.1 for roughing out movement animations. Autodesk has released Maya 2026.1, the latest version of its 3D modeling and animation software for visual effects, games and motion graphics work.The release adds MotionMaker, a new AI-based system for generating movement animations for biped and quadruped characters, especially for previs and layout work. Other changes include a new modular character rigging framework inside Bifrost for Maya, plus updates to liquid simulation, OpenPBR support and USD workflows. Autodesk has also released Maya Creative 2026.1, the corresponding update to the cut-down edition of Maya for smaller studios. MotionMaker: new generative AI tool roughs out movement animations The headline feature in Maya 2026.1 is MotionMaker: a new generative animation system.It lets users “create natural character movements in minutes instead of hours”, using a workflow more “like giving stage directions to a digital actor” than traditional animation. Users set keys for a character’s start and end positions, or create a guide path in the viewport, and MotionMaker automatically generates the motion in between. At the minute, that mainly means locomotion cycles, for both bipeds and quadrupeds, plus a few other movements, like jumping or sitting. Although MotionMaker is designed for “anyone in the animation pipeline”, the main initial use cases seem to be layout and previs rather than hero animation. Its output is also intended to be refined manually – Autodesk’s promotional material describes it as getting users “80% of the way there” for “certain types of shots”. Accordingly, MotionMaker comes with its own Editor window, which provides access to standard Maya animation editing tools. Users can layer in animation from other sources, including motion capture or keyframe animation retargeted from other characters: to add upper body movements, for example. There are a few more MotionMaker-specific controls: the video above shows speed ramping, to control the time it takes the character to travel between two points. There is also a Character Scale setting, which determines how a character’s size and weight is expressed through the animation generated. You can read more about the design and aims of MotionMaker in a Q&A with Autodesk Senior Principal Research Scientist Evan Atherton on Autodesk’s blog. According to Atherton, the AI models were trained using motion capture data “specifically collected for this tool”. That includes source data from male and female human performers, plus wolf-style dogs, although the system is “designed to support additionalstyles” in future. Bifrost: new modular character rigging framework Character artists and animators also get a new modular rigging framework in Bifrost.Autodesk has been teasing new character rigging capabilities in the node-based framework for building effects since Maya 2025.1, but this seems to be its official launch. The release is compatibility-breaking, and does not work with earlier versions of the toolset. The new Rigging Module Framework is described as a “modular, compound-based system for building … production-ready rigs”, and is “fully integrated with Maya”. Animators can “interact with module inputs and outputs directly from the Maya scene”, and rigs created with Bifrost can be converted into native Maya controls, joints and attributes. Bifrost: improvements to liquid simulation and workflow Bifrost 2.14 for Maya also features improvements to Bifrost’s existing functionality, particularly liquid simulation. The properties of collider objects, like bounciness, stickiness and roughness, can now influence liquid behavior in the same way they do particle behavior and other collisions. In addition, a new parameter controls air drag on foam and spray thrown out by a liquid. Workflow improvements include the option to convert Bifrost curves to Maya scene curves, and batch execution, to write out cache files “without the risk of accidentally overwriting them”. LookdevX: support for OpenPBR in FBX files LookdevX, Maya’s plugin for creating USD shading graphs, has also been updated. Autodesk introduced support for OpenPBR, the open material standard intended as a unified successor to the Autodesk Standard Surface and Adobe Standard Material, in 2024. To that, the latest update adds support for OpenPBR materials in FBX files, making it possible to import or export them from other applications that support OpenPBR: at the minute, 3ds Max plus some third-party renderers. LookdevX 1.8 also features a number of workflow improvements, particularly on macOS. USD for Maya: workflow improvements USD for Maya, the software’s USD plugin, also gets workflow improvements, with USD for Maya 0.32 adding support for animation curves for camera attributes in exports.Other changes include support for MaterialX documents and better representation of USD lights in the viewport. Arnold for Maya: performance improvements Maya’s integration plugin for Autodesk’s Arnold renderer has also been updated, with MtoA 5.5.2 supporting the changes in Arnold 7.4.2.They’re primarily performance improvements, especially to scene initialization times when rendering on machines with high numbers of CPU cores. Maya Creative 2026.1 also released Autodesk has also released Maya Creative 2026.1, the corresponding update to the cut-down edition of Maya aimed at smaller studios, and available on a pay-as-you-go basis.It includes most of the new features from Maya 2026.1, including MotionMaker, but does not include Bifrost for Maya. Price and system requirements Maya 2026.1 is available for Windows 10+, RHEL and Rocky Linux 8.10/9.3/9.5, and macOS 13.0+.The software is rental-only. Subscriptions cost /month or /year, up a further /month or /year since the release of Maya 2026. In many countries, artists earning under /year and working on projects valued at under /year, qualify for Maya Indie subscriptions, now priced at /year. Maya Creative is available pay-as-you-go, with prices starting at /day, and a minimum spend of /year. Read a full list of new features in Maya 2026.1 in the online documentation Have your say on this story by following CG Channel on Facebook, Instagram and X. As well as being able to comment on stories, followers of our social media accounts can see videos we don’t post on the site itself, including making-ofs for the latest VFX movies, animations, games cinematics and motion graphics projects. #autodesk #adds #animation #tool #motionmaker
    WWW.CGCHANNEL.COM
    Autodesk adds AI animation tool MotionMaker to Maya 2026.1
    html PUBLIC "-//W3C//DTD HTML 4.0 Transitional//EN" "http://www.w3.org/TR/REC-html40/loose.dtd" A still from a demo shot created using MotionMaker, the new generative AI toolset introduced in Maya 2026.1 for roughing out movement animations. Autodesk has released Maya 2026.1, the latest version of its 3D modeling and animation software for visual effects, games and motion graphics work.The release adds MotionMaker, a new AI-based system for generating movement animations for biped and quadruped characters, especially for previs and layout work. Other changes include a new modular character rigging framework inside Bifrost for Maya, plus updates to liquid simulation, OpenPBR support and USD workflows. Autodesk has also released Maya Creative 2026.1, the corresponding update to the cut-down edition of Maya for smaller studios. MotionMaker: new generative AI tool roughs out movement animations The headline feature in Maya 2026.1 is MotionMaker: a new generative animation system.It lets users “create natural character movements in minutes instead of hours”, using a workflow more “like giving stage directions to a digital actor” than traditional animation. Users set keys for a character’s start and end positions, or create a guide path in the viewport, and MotionMaker automatically generates the motion in between. At the minute, that mainly means locomotion cycles, for both bipeds and quadrupeds, plus a few other movements, like jumping or sitting. Although MotionMaker is designed for “anyone in the animation pipeline”, the main initial use cases seem to be layout and previs rather than hero animation. Its output is also intended to be refined manually – Autodesk’s promotional material describes it as getting users “80% of the way there” for “certain types of shots”. Accordingly, MotionMaker comes with its own Editor window, which provides access to standard Maya animation editing tools. Users can layer in animation from other sources, including motion capture or keyframe animation retargeted from other characters: to add upper body movements, for example. There are a few more MotionMaker-specific controls: the video above shows speed ramping, to control the time it takes the character to travel between two points. There is also a Character Scale setting, which determines how a character’s size and weight is expressed through the animation generated. You can read more about the design and aims of MotionMaker in a Q&A with Autodesk Senior Principal Research Scientist Evan Atherton on Autodesk’s blog. According to Atherton, the AI models were trained using motion capture data “specifically collected for this tool”. That includes source data from male and female human performers, plus wolf-style dogs, although the system is “designed to support additional [motion] styles” in future. Bifrost: new modular character rigging framework Character artists and animators also get a new modular rigging framework in Bifrost.Autodesk has been teasing new character rigging capabilities in the node-based framework for building effects since Maya 2025.1, but this seems to be its official launch. The release is compatibility-breaking, and does not work with earlier versions of the toolset. The new Rigging Module Framework is described as a “modular, compound-based system for building … production-ready rigs”, and is “fully integrated with Maya”. Animators can “interact with module inputs and outputs directly from the Maya scene”, and rigs created with Bifrost can be converted into native Maya controls, joints and attributes. Bifrost: improvements to liquid simulation and workflow Bifrost 2.14 for Maya also features improvements to Bifrost’s existing functionality, particularly liquid simulation. The properties of collider objects, like bounciness, stickiness and roughness, can now influence liquid behavior in the same way they do particle behavior and other collisions. In addition, a new parameter controls air drag on foam and spray thrown out by a liquid. Workflow improvements include the option to convert Bifrost curves to Maya scene curves, and batch execution, to write out cache files “without the risk of accidentally overwriting them”. LookdevX: support for OpenPBR in FBX files LookdevX, Maya’s plugin for creating USD shading graphs, has also been updated. Autodesk introduced support for OpenPBR, the open material standard intended as a unified successor to the Autodesk Standard Surface and Adobe Standard Material, in 2024. To that, the latest update adds support for OpenPBR materials in FBX files, making it possible to import or export them from other applications that support OpenPBR: at the minute, 3ds Max plus some third-party renderers. LookdevX 1.8 also features a number of workflow improvements, particularly on macOS. USD for Maya: workflow improvements USD for Maya, the software’s USD plugin, also gets workflow improvements, with USD for Maya 0.32 adding support for animation curves for camera attributes in exports.Other changes include support for MaterialX documents and better representation of USD lights in the viewport. Arnold for Maya: performance improvements Maya’s integration plugin for Autodesk’s Arnold renderer has also been updated, with MtoA 5.5.2 supporting the changes in Arnold 7.4.2.They’re primarily performance improvements, especially to scene initialization times when rendering on machines with high numbers of CPU cores. Maya Creative 2026.1 also released Autodesk has also released Maya Creative 2026.1, the corresponding update to the cut-down edition of Maya aimed at smaller studios, and available on a pay-as-you-go basis.It includes most of the new features from Maya 2026.1, including MotionMaker, but does not include Bifrost for Maya. Price and system requirements Maya 2026.1 is available for Windows 10+, RHEL and Rocky Linux 8.10/9.3/9.5, and macOS 13.0+.The software is rental-only. Subscriptions cost $255/month or $2,010/year, up a further $10/month or $65/year since the release of Maya 2026. In many countries, artists earning under $100,000/year and working on projects valued at under $100,000/year, qualify for Maya Indie subscriptions, now priced at $330/year. Maya Creative is available pay-as-you-go, with prices starting at $3/day, and a minimum spend of $300/year. Read a full list of new features in Maya 2026.1 in the online documentation Have your say on this story by following CG Channel on Facebook, Instagram and X (formerly Twitter). As well as being able to comment on stories, followers of our social media accounts can see videos we don’t post on the site itself, including making-ofs for the latest VFX movies, animations, games cinematics and motion graphics projects.
    Like
    Love
    Wow
    Sad
    Angry
    498
    0 Commentarios 0 Acciones
  • Desktop edition of sculpting app Nomad enters free beta

    html PUBLIC "-//W3C//DTD HTML 4.0 Transitional//EN" ";

    A creature created with Nomad by Glen Southern. The new desktop edition of the formerly mobile-only digital sculpting app is now available in free public beta.

    Hexanomad – aka developer Stéphane Ginier – has released the new desktop edition of Nomad, its popular digital sculpting app for iPads and Android tablets, in free public beta.Beta builds are currently available for Windows and macOS, although they currently only include a limited range of tools from the mobile edition.
    A rounded set of digital sculpting, 3D painting and remeshing features

    First released in 2020, Nomad – also often known as Nomad Sculpt – is a popular digital sculpting app for iPads and Android tablets.It has a familiar set of sculpting brushes, including Clay, Crease, Move, Flatten and Smooth, with support for falloff, alphas and masking.
    A dynamic tessellation system, similar to those of desktop tools like ZBrush, automatically changes the resolution of the part of the mesh being sculpted to accommodate new details.
    Users can also perform a voxel remesh of the sculpt to generate a uniform level of detail, or switch manually between different levels of resolution.
    Nomad features a PBR vertex paint system, making it possible to rough out surface colours; and built-in lighting and post-processing options for viewing models in context.
    Both sculpting and painting are layer-based, making it possible to work non-destructively.
    Completed sculpts can be exported in FBX, OBJ, glTF/GLB, PLY and STL format.
    New desktop edition still early in development, but evolving fast

    Nomad already has a web demo version, which makes it possible to test the app inside a web browser, but the new beta answers long-standing user requests for a native desktop version.It’s still very early in development, so it only features a limited range of tools from the mobile edition – the initial release was limited to the Clay and Move tools – and has known issues with graphics tablets, but new builds are being released regularly.
    Ginier has stated that his aim is to make the desktop edition “identical to the mobile versions”.
    The desktop version should also support Quad Remesher, Exoside’s auto retopology system, which is available as an in-app purchase inside the iPad edition.
    You can follow development in the -beta-desktop channel of the Nomad Sculpt Discord server.
    Price, release date and system requirements

    The desktop edition of Nomad is currently in free public beta for Windows 10+ and macOS 12.0+. Beta builds do not expire. Stéphane Ginier hasn’t announced a final release date or price yet.The mobile edition of Nomad is available for iOS/iPadOS 15.0+ and Android 6.0+. It costs about Nomad on the product website
    Follow the progress of the desktop edition on the Discord server
    Download the latest beta builds of the desktop edition of Nomad

    Have your say on this story by following CG Channel on Facebook, Instagram and X. As well as being able to comment on stories, followers of our social media accounts can see videos we don’t post on the site itself, including making-ofs for the latest VFX movies, animations, games cinematics and motion graphics projects.
    #desktop #edition #sculpting #app #nomad
    Desktop edition of sculpting app Nomad enters free beta
    html PUBLIC "-//W3C//DTD HTML 4.0 Transitional//EN" "; A creature created with Nomad by Glen Southern. The new desktop edition of the formerly mobile-only digital sculpting app is now available in free public beta. Hexanomad – aka developer Stéphane Ginier – has released the new desktop edition of Nomad, its popular digital sculpting app for iPads and Android tablets, in free public beta.Beta builds are currently available for Windows and macOS, although they currently only include a limited range of tools from the mobile edition. A rounded set of digital sculpting, 3D painting and remeshing features First released in 2020, Nomad – also often known as Nomad Sculpt – is a popular digital sculpting app for iPads and Android tablets.It has a familiar set of sculpting brushes, including Clay, Crease, Move, Flatten and Smooth, with support for falloff, alphas and masking. A dynamic tessellation system, similar to those of desktop tools like ZBrush, automatically changes the resolution of the part of the mesh being sculpted to accommodate new details. Users can also perform a voxel remesh of the sculpt to generate a uniform level of detail, or switch manually between different levels of resolution. Nomad features a PBR vertex paint system, making it possible to rough out surface colours; and built-in lighting and post-processing options for viewing models in context. Both sculpting and painting are layer-based, making it possible to work non-destructively. Completed sculpts can be exported in FBX, OBJ, glTF/GLB, PLY and STL format. New desktop edition still early in development, but evolving fast Nomad already has a web demo version, which makes it possible to test the app inside a web browser, but the new beta answers long-standing user requests for a native desktop version.It’s still very early in development, so it only features a limited range of tools from the mobile edition – the initial release was limited to the Clay and Move tools – and has known issues with graphics tablets, but new builds are being released regularly. Ginier has stated that his aim is to make the desktop edition “identical to the mobile versions”. The desktop version should also support Quad Remesher, Exoside’s auto retopology system, which is available as an in-app purchase inside the iPad edition. You can follow development in the -beta-desktop channel of the Nomad Sculpt Discord server. Price, release date and system requirements The desktop edition of Nomad is currently in free public beta for Windows 10+ and macOS 12.0+. Beta builds do not expire. Stéphane Ginier hasn’t announced a final release date or price yet.The mobile edition of Nomad is available for iOS/iPadOS 15.0+ and Android 6.0+. It costs about Nomad on the product website Follow the progress of the desktop edition on the Discord server Download the latest beta builds of the desktop edition of Nomad Have your say on this story by following CG Channel on Facebook, Instagram and X. As well as being able to comment on stories, followers of our social media accounts can see videos we don’t post on the site itself, including making-ofs for the latest VFX movies, animations, games cinematics and motion graphics projects. #desktop #edition #sculpting #app #nomad
    WWW.CGCHANNEL.COM
    Desktop edition of sculpting app Nomad enters free beta
    html PUBLIC "-//W3C//DTD HTML 4.0 Transitional//EN" "http://www.w3.org/TR/REC-html40/loose.dtd" A creature created with Nomad by Glen Southern. The new desktop edition of the formerly mobile-only digital sculpting app is now available in free public beta. Hexanomad – aka developer Stéphane Ginier – has released the new desktop edition of Nomad, its popular digital sculpting app for iPads and Android tablets, in free public beta.Beta builds are currently available for Windows and macOS, although they currently only include a limited range of tools from the mobile edition. A rounded set of digital sculpting, 3D painting and remeshing features First released in 2020, Nomad – also often known as Nomad Sculpt – is a popular digital sculpting app for iPads and Android tablets.It has a familiar set of sculpting brushes, including Clay, Crease, Move, Flatten and Smooth, with support for falloff, alphas and masking. A dynamic tessellation system, similar to those of desktop tools like ZBrush, automatically changes the resolution of the part of the mesh being sculpted to accommodate new details. Users can also perform a voxel remesh of the sculpt to generate a uniform level of detail, or switch manually between different levels of resolution. Nomad features a PBR vertex paint system, making it possible to rough out surface colours; and built-in lighting and post-processing options for viewing models in context. Both sculpting and painting are layer-based, making it possible to work non-destructively. Completed sculpts can be exported in FBX, OBJ, glTF/GLB, PLY and STL format. New desktop edition still early in development, but evolving fast Nomad already has a web demo version, which makes it possible to test the app inside a web browser, but the new beta answers long-standing user requests for a native desktop version.It’s still very early in development, so it only features a limited range of tools from the mobile edition – the initial release was limited to the Clay and Move tools – and has known issues with graphics tablets, but new builds are being released regularly. Ginier has stated that his aim is to make the desktop edition “identical to the mobile versions”. The desktop version should also support Quad Remesher, Exoside’s auto retopology system, which is available as an in-app purchase inside the iPad edition. You can follow development in the -beta-desktop channel of the Nomad Sculpt Discord server. Price, release date and system requirements The desktop edition of Nomad is currently in free public beta for Windows 10+ and macOS 12.0+. Beta builds do not expire. Stéphane Ginier hasn’t announced a final release date or price yet.The mobile edition of Nomad is available for iOS/iPadOS 15.0+ and Android 6.0+. It costs $19.99. Read more about Nomad on the product website Follow the progress of the desktop edition on the Discord server Download the latest beta builds of the desktop edition of Nomad Have your say on this story by following CG Channel on Facebook, Instagram and X (formerly Twitter). As well as being able to comment on stories, followers of our social media accounts can see videos we don’t post on the site itself, including making-ofs for the latest VFX movies, animations, games cinematics and motion graphics projects.
    0 Commentarios 0 Acciones
  • Boris FX releases Silhouette 2025

    html PUBLIC "-//W3C//DTD HTML 4.0 Transitional//EN" ";

    Boris FX has begun its 2025 updates to Silhouette, its roto and paint software.Silhouette 2025 adds new AI tools for refining mattes, generating depth maps and fixing glitches in video, and a new 3D Scene node for importing scenes with tracked 3D cameras.
    A VFX-industry standard tool for rotoscoping and roto paint work

    First released 20 years ago, and acquired by Boris FX in 2019, Silhouette is a rotoscoping and paint tool.The software is widely used in production for movie and broadcast visual effects, winning both a Scientific and Technical Academy Award and Engineering Emmy Award in 2019.
    As well as the original standalone edition, Silhouette is available as a plugin, making the toolset available inside Adobe software and OFX-compatible apps like Nuke and DaVinci Resolve.
    New AI tools for refining mattes, generating depth maps, and fixing glitches

    Silhouette 2025 introduces new AI-based features for automating common tasks.The 2024 releases added an AI-based matte workflow, with the Mask ML node automatically generating a mask for a significant object – like a person or animal – in a frame of video, and Matte Assist ML propagating it throughout the rest of the footage.
    They are now joined by Matte Refine ML, a new node for processing hard-edge mattes into “natural, detailed selections”, creating better results when isolating hair or fur.
    In addition, new Depth Map ML and Frame Fixer ML tools generate depth maps from footage, and semi-automatically fix artifacts like scratches, camera flashes, or dropped frames.
    You can read more about them in our story on Continuum 2025.5, Silhouette’s sibling tool.
    New 3D Scene node lets users work with tracked 3D cameras

    Other new features in Silhouette 2025 include the new 3D environment.The 3D Scene node makes it possible to load a scene with a tracked 3D camera in FBX or Alembic format, or to perform a 3D track using Mocha Pro or SynthEyes.
    It is then possible to place cards in 3D space and paint directly on them in the viewer, while a new Unproject/Reproject node allows for fuller composites.
    Other new features

    When using a PowerMesh from Silhouette’s Mocha module to track deforming organic surfaces, it is now possible to paint on undistorted frames using a new PowerMesh Morph node.In addition, it is now possible to merge custom node setups into a single Compound node, which can be reused between projects or shared with collaborators.
    Prices up since the previous release

    The price of the software has also risen since Silhouette 2024.5, although the increases aren’t as large as with some of Boris FX’s other recent product updates.For the standalone edition, the price of perpetual licenses rise by to Subscriptions rise by /month, to /month, or by /year, to /year.
    For the plugin edition, the price of perpetual licenses rise by to Subscriptions rise by /month, to /month, or by /year, to /year.
    Price and system requirements

    Silhouette 2025 is available as a standalone tool for Windows 10+, Linux and macOS 12.0+, and as a plugin for Adobe software and OFX-compatible tools like Nuke.Perpetual licences of the standalone cost ; the plugin costs Rental costs /month or /year for the standalone; /month or /year for the plugin.
    Read a list of new features in Silhouette 2025 on Boris FX’s blog

    Have your say on this story by following CG Channel on Facebook, Instagram and X. As well as being able to comment on stories, followers of our social media accounts can see videos we don’t post on the site itself, including making-ofs for the latest VFX movies, animations, games cinematics and motion graphics projects.
    #boris #releases #silhouette
    Boris FX releases Silhouette 2025
    html PUBLIC "-//W3C//DTD HTML 4.0 Transitional//EN" "; Boris FX has begun its 2025 updates to Silhouette, its roto and paint software.Silhouette 2025 adds new AI tools for refining mattes, generating depth maps and fixing glitches in video, and a new 3D Scene node for importing scenes with tracked 3D cameras. A VFX-industry standard tool for rotoscoping and roto paint work First released 20 years ago, and acquired by Boris FX in 2019, Silhouette is a rotoscoping and paint tool.The software is widely used in production for movie and broadcast visual effects, winning both a Scientific and Technical Academy Award and Engineering Emmy Award in 2019. As well as the original standalone edition, Silhouette is available as a plugin, making the toolset available inside Adobe software and OFX-compatible apps like Nuke and DaVinci Resolve. New AI tools for refining mattes, generating depth maps, and fixing glitches Silhouette 2025 introduces new AI-based features for automating common tasks.The 2024 releases added an AI-based matte workflow, with the Mask ML node automatically generating a mask for a significant object – like a person or animal – in a frame of video, and Matte Assist ML propagating it throughout the rest of the footage. They are now joined by Matte Refine ML, a new node for processing hard-edge mattes into “natural, detailed selections”, creating better results when isolating hair or fur. In addition, new Depth Map ML and Frame Fixer ML tools generate depth maps from footage, and semi-automatically fix artifacts like scratches, camera flashes, or dropped frames. You can read more about them in our story on Continuum 2025.5, Silhouette’s sibling tool. New 3D Scene node lets users work with tracked 3D cameras Other new features in Silhouette 2025 include the new 3D environment.The 3D Scene node makes it possible to load a scene with a tracked 3D camera in FBX or Alembic format, or to perform a 3D track using Mocha Pro or SynthEyes. It is then possible to place cards in 3D space and paint directly on them in the viewer, while a new Unproject/Reproject node allows for fuller composites. Other new features When using a PowerMesh from Silhouette’s Mocha module to track deforming organic surfaces, it is now possible to paint on undistorted frames using a new PowerMesh Morph node.In addition, it is now possible to merge custom node setups into a single Compound node, which can be reused between projects or shared with collaborators. Prices up since the previous release The price of the software has also risen since Silhouette 2024.5, although the increases aren’t as large as with some of Boris FX’s other recent product updates.For the standalone edition, the price of perpetual licenses rise by to Subscriptions rise by /month, to /month, or by /year, to /year. For the plugin edition, the price of perpetual licenses rise by to Subscriptions rise by /month, to /month, or by /year, to /year. Price and system requirements Silhouette 2025 is available as a standalone tool for Windows 10+, Linux and macOS 12.0+, and as a plugin for Adobe software and OFX-compatible tools like Nuke.Perpetual licences of the standalone cost ; the plugin costs Rental costs /month or /year for the standalone; /month or /year for the plugin. Read a list of new features in Silhouette 2025 on Boris FX’s blog Have your say on this story by following CG Channel on Facebook, Instagram and X. As well as being able to comment on stories, followers of our social media accounts can see videos we don’t post on the site itself, including making-ofs for the latest VFX movies, animations, games cinematics and motion graphics projects. #boris #releases #silhouette
    Boris FX releases Silhouette 2025
    html PUBLIC "-//W3C//DTD HTML 4.0 Transitional//EN" "http://www.w3.org/TR/REC-html40/loose.dtd" Boris FX has begun its 2025 updates to Silhouette, its roto and paint software.Silhouette 2025 adds new AI tools for refining mattes, generating depth maps and fixing glitches in video, and a new 3D Scene node for importing scenes with tracked 3D cameras. A VFX-industry standard tool for rotoscoping and roto paint work First released 20 years ago, and acquired by Boris FX in 2019, Silhouette is a rotoscoping and paint tool.The software is widely used in production for movie and broadcast visual effects, winning both a Scientific and Technical Academy Award and Engineering Emmy Award in 2019. As well as the original standalone edition, Silhouette is available as a plugin, making the toolset available inside Adobe software and OFX-compatible apps like Nuke and DaVinci Resolve. New AI tools for refining mattes, generating depth maps, and fixing glitches Silhouette 2025 introduces new AI-based features for automating common tasks.The 2024 releases added an AI-based matte workflow, with the Mask ML node automatically generating a mask for a significant object – like a person or animal – in a frame of video, and Matte Assist ML propagating it throughout the rest of the footage. They are now joined by Matte Refine ML, a new node for processing hard-edge mattes into “natural, detailed selections”, creating better results when isolating hair or fur. In addition, new Depth Map ML and Frame Fixer ML tools generate depth maps from footage, and semi-automatically fix artifacts like scratches, camera flashes, or dropped frames. You can read more about them in our story on Continuum 2025.5, Silhouette’s sibling tool. New 3D Scene node lets users work with tracked 3D cameras Other new features in Silhouette 2025 include the new 3D environment.The 3D Scene node makes it possible to load a scene with a tracked 3D camera in FBX or Alembic format, or to perform a 3D track using Mocha Pro or SynthEyes. It is then possible to place cards in 3D space and paint directly on them in the viewer, while a new Unproject/Reproject node allows for fuller composites. Other new features When using a PowerMesh from Silhouette’s Mocha module to track deforming organic surfaces, it is now possible to paint on undistorted frames using a new PowerMesh Morph node.In addition, it is now possible to merge custom node setups into a single Compound node, which can be reused between projects or shared with collaborators. Prices up since the previous release The price of the software has also risen since Silhouette 2024.5, although the increases aren’t as large as with some of Boris FX’s other recent product updates.For the standalone edition, the price of perpetual licenses rise by $200, to $2,195. Subscriptions rise by $15/month, to $165/month, or by $80/year, to $875/year. For the plugin edition, the price of perpetual licenses rise by $100, to $1,195. Subscriptions rise by $3/month, to $103/month, or by $50/year, to $545/year. Price and system requirements Silhouette 2025 is available as a standalone tool for Windows 10+, Linux and macOS 12.0+, and as a plugin for Adobe software and OFX-compatible tools like Nuke.Perpetual licences of the standalone cost $2,195; the plugin costs $1,195. Rental costs $165/month or $875/year for the standalone; $103/month or $545/year for the plugin. Read a list of new features in Silhouette 2025 on Boris FX’s blog Have your say on this story by following CG Channel on Facebook, Instagram and X (formerly Twitter). As well as being able to comment on stories, followers of our social media accounts can see videos we don’t post on the site itself, including making-ofs for the latest VFX movies, animations, games cinematics and motion graphics projects.
    0 Commentarios 0 Acciones
  • Advanced Editor scripting hacks to save you time, part 1

    On most of the projects I’ve seen, there are a lot of tasks developers go through that are repetitive and error-prone, especially when it comes to integrating new art assets. For instance, setting up a character often involves dragging and dropping many asset references, checking checkboxes, and clicking buttons: Set the rig of the model to Humanoid, disable the sRGB of the SDF texture, set the normal maps as normal maps, and the UI textures as sprites. In other words, valuable time is spent and crucial steps can still be missed.In this two-part article, I’ll walk you through hacks that can help improve this workflow so that your next project runs smoother than your last. To further illustrate this, I’ve created a simple prototype – similar to an RTS – where the units of one team automatically attack enemy buildings and other units. With each scripting hack, I’ll improve one aspect of this process, whether that be the textures or models.Here’s what the prototype looks like:The main reason developers have to set up so many small details when importing assets is simple: Unity doesn’t know how you are going to use an asset, so it can’t know what the best settings for it are. If you want to automate some of these tasks, this is the first problem that needs to be addressed.The simplest way to find out what an asset is for and how it relates to others is by sticking to a specific naming convention and folder structure, such as:Naming convention: We can append things to the name of the asset itself, therefore Shield_BC.png is the base color while Shield_N.png is the normal map.Folder structure: Knight/Animations/Walk.fbx is clearly an animation, while Knight/Models/Knight.fbx is a model, even though they both share the same format.The issue with this is that it only works well in one direction. So while you might already know what an asset is for when given its path, you can’t deduce its path if only given information on what the asset does. Being able to find an asset – for example, the material for a character – is useful when trying to automate the setup for some aspects of the assets. While this can be solved by using a rigid naming convention to ensure that the path is easy to deduce, it’s still susceptible to error. Even if you remember the convention, typos are common.An interesting approach to solve this is by using labels. You can use an Editor script that parses the paths of assets and assigns them labels accordingly. As the labels are automated, it’s possible to figure out the exact label that an asset will have. You can even look up assets by their label using AssetDatabase.FindAssets.If you want to automate this sequence, there is a class that can be very handy called the AssetPostprocessor. The AssetPostprocessor receives various messages when Unity imports assets. One of those is OnPostprocessAllAssets, a method that’s called whenever Unity finishes importing assets. It will give you all the paths to the imported assets, providing an opportunity to process those paths. You can write a simple method, like the following, to process them:In the case of the prototype, let’s focus on the list of imported assets – both to try and catch new assets, as well as moved assets. After all, as the path changes, we might want to update the labels.To create the labels, parse the path and look for relevant folders, prefixes, and suffixes of the name, as well as the extensions. Once you have generated the labels, combine them into a single string and set them to the asset.To assign the labels, load the asset using AssetDatabase.LoadAssetAtPath, then assign its labels with AssetDatabase.SetLabels.Remember, it’s important to only set labels if they have actually changed. Setting labels will trigger a reimport of the asset, so you don’t want this to happen unless it’s strictly necessary.If you check this, then the reimport won’t be an issue: Labels are set the first time you import an asset and saved in the .meta file, which means they’re also saved in your version control. A reimport will only be triggered if you rename or move your assets.With the above steps complete, all assets are automatically labeled, as in the example pictured below.Importing textures into a project usually involves tweaking the settings for each texture. Is it a regular texture? A normal map? A sprite? Is it linear or sRGB? If you want to change the settings of an asset importer, you can use the AssetPostprocessor once more.In this case, you’ll want to use the OnPreprocessTexture message, which is called right before importing a texture. This allows you to change the settings of the importer.When it comes to selecting the right settings for every texture, you need to verify what type of textures you’re working with – which is exactly why labels are key in the first step.With this information, you can write a simple TexturePreprocessor:It’s important to ensure that you only run this for textures that have the art label. You’ll then get a reference to the importer so that you can set everything up – starting with the texture size.The AssetPostprocessor has a context property from which you can determine the target platform. As such, you can complete platform-specific changes, like setting the textures to a lower resolution for mobile:Next, check the label to see if the texture is a UI texture, and set it accordingly:For the rest of the textures, set the values to a default. It’s worth noting that Albedo is the only texture that will have sRGB enabled:Thanks to the above script, when you drag and drop the new textures into the Editor, they will automatically have the right settings in place.“Channel packing” refers to the combination of diverse textures into one by using the different channels. It is common and offers many advantages. For instance, the value of the Red channel is metallic and the value of the Green channel is its smoothness.However, combining all textures into one requires some extra work from the art team. If the packing needs to change for some reason, the art team will have to redo all the textures that are used with that shader.As you can see, there’s room for improvement here. The approach that I like to use for channel packing is to create a special asset type where you set the “raw” textures and generate a channel-packed texture to use in your materials.First, I create a dummy file with a specific extension and then use a Scripted Importer that does all the heavy lifting when importing that asset. This is how it works:The importers can have parameters, such as the textures you need to combine.From the importer, you can set the textures as a dependency, which allows the dummy asset to be reimported every time one of the source textures changes. This lets you rebuild the generated textures accordingly.The importer has a version. If you need to change the way that textures are packed, you can modify the importer and bump the version. This will force a regeneration of all the packed textures in your project and everything will be packed in the new way, immediately.A nice side effect of generating things in an importer is that the generated assets only live in the Library folder, so it doesn’t fill up your version control.To implement this, create a ScriptableObject that will hold the created textures and serve as the result of the importer. In the example, I called this class TexturePack.With this created, you can begin by declaring the importer class and adding the ScriptedImporterAttribute to define the version and extension associated with the importer:In the importer, declare the fields you want to use. They will appear in the Inspector, just as MonoBehaviours and ScriptableObjects do:With the parameters ready, create new textures from the ones you have set as parameters. Note, however, that in the Preprocessor, we set isReadable to True to do this.In this prototype, you’ll notice two textures: the Albedo, which has the Albedo in the RGB and a mask for applying the player color in the Alpha, and the Mask texture, which includes the metallic in the Red channel and the smoothness in the Green channel.While this is perhaps outside the scope of this article, let’s look at how to combine the Albedo and the player mask as an example. First, check to see if the textures are set, and if they are, get their color data. Then set the textures as dependencies using AssetImportContext.DependsOnArtifact. As mentioned above, this will force the object to be recalculated if any of the textures end up changing.You also need to create a new texture. To do this, get the size from the TexturePreprocessor that you created in the previous section so that it follows the preset restrictions:Next, fill in all the data for the new texture. This could be massively optimized by using Jobs and Burst. Here we’ll use a simple loop:Set this data in the texture:Now, you can create the method for generating another texture in a very similar way. Once this is ready, create the main body of the importer. In this case, we’ll only create the ScriptableObject that holds the results, creates the textures, and sets the result of the importer through the AssetImportContext.When you write an importer, all of the assets generated must be registered using AssetImportContext.AddObjectToAsset so that they appear in the project window. Select a main asset using AssetImportContext.SetMainObject. This is what it looks like:The only thing left to do is to create the dummy assets. As these are custom, you can’t use the CreateAssetMenuattribute. You must make them manually instead.Using the MenuItem attribute, specify the full path to the create the asset menu, Assets/Create. To create the asset, use ProjectWindowUtil.CreateAssetWithContent, which generates a file with the content you’ve specified and allows the user to input a name for it. It looks like this:Finally, create the channel-packed textures.Most projects use custom shaders. Sometimes they’re used to add extra effects, like a dissolve effect to fade out defeated enemies, and other times, the shaders implement a custom art style, like toon shaders. Whatever the use case, Unity will create new materials with the default shader, and you will need to change it to use the custom shader.In this example, the shader used for units has two added features: the dissolve effect and the player color. When implementing these in your project, you must ensure that all the buildings and units use the appropriate shader.To validate that an asset matches certain requirements – in this case, that it uses the right shader – there is another useful class: the AssetModificationProcessor. With AssetModificationProcessor.OnWillSaveAssets, in particular, you’ll be notified when Unity is about to write an asset to disk. This will give you the opportunity to check if the asset is correct and fix it before it’s saved.Additionally, you can “tell” Unity not to save the asset, which is effective for when the problem you detect cannot be fixed automatically. To accomplish this, create the OnWillSaveAssets method:To process the assets, check whether they are materials and if they have the right labels. If they match the code below, then you have the correct shader:What’s convenient here is that this code is also called when the asset is created, meaning the new material will have the correct shader.As a new feature in Unity 2022, we also have Material Variants. Material Variants are incredibly useful when creating materials for units. In fact, you can create a base material and derive the materials for each unit from there – overriding the relevant fieldsand inheriting the rest of the properties. This allows for solid defaults for our materials, which can be updated as needed.Importing animations is similar to importing textures. There are various settings that need to be established, and some of them can be automated.Unity imports the materials of all the FBXfiles by default. For animations, the materials you want to use will either be in the project or in the FBX of the mesh. The extra materials from the animation FBX appear every time you search for materials in the project, adding quite a bit of noise, so it’s worth disabling them.To set up the rig – that is, choosing between Humanoid and Generic, and in cases where we are using a carefully setup avatar, assigning it – apply the same approach that was applied to textures. But for animations, the message you’ll use is AssetPostprocessor.OnPreprocessModel. This will be called for all FBX files, so you need to discern animation FBX files from model FBX files.Thanks to the labels you set up earlier, this shouldn’t be too complicated. The method starts much like the one for textures:Next up, you’ll want to use the rig from the mesh FBX, so you need to find that asset. To locate the asset, use the labels once more. In the case of this prototype, animations have labels that end with “animation,” whereas meshes have labels that end with “model.” You can complete a simple replacement to get the label for your model. Once you have the label, find your asset using AssetDatabase.FindAssets with “l:label-name.”When accessing other assets, there’s something else to consider: It’s possible that, in the middle of the import process, the avatar has not yet been imported when this method is called. If this occurs, the LoadAssetAtPath will return null and you won’t be able to set the avatar. To work around this issue, set a dependency to the path of the avatar. The animation will be imported again once the avatar is imported, and you will be able to set it there.Putting all of this into code will look something like this:Now you can drag the animations into the right folder, and if your mesh is ready, each one will be set up automatically. But if there isn’t an avatar available when you import the animations, the project won’t be able to pick it up once it’s created. Instead, you’ll need to reimport the animation manually after creating it. This can be done by right-clicking the folder with the animations and selecting Reimport.You can see all of this in the sample video below.Using exactly the same ideas from the previous sections, you’ll want to set up the models you are going to use. In this case, employ AssetPostrocessor.OnPreprocessModel to set the importer settings for this model.For the prototype, I’ve set the importer to not generate materialsand checked whether the model is a unit or a building. The units are set to generate an avatar, but the avatar creation for the buildings is disabled, as the buildings aren’t animated.For your project, you might want to set the materials and animatorswhen importing the model. This way, the Prefab generated by the importer is ready for immediate use.To do this, use the AssetPostprocessor.OnPostprocessModel method. This method is called after a model is finished importing. It receives the Prefab that has been generated as a parameter, which lets us modify the Prefab however we want.For the prototype, I found the material and Animation Controller by matching the label, just as I located the avatar for the animations. With the Renderer and Animator in the Prefab, I set the material and the controller as in normal gameplay.You can then drop the model into your project and it will be ready to drop into any scene. Except we haven’t set any gameplay-related components, which I’ll address in the second part of this blog.With these advanced scripting tips, you’re just about game ready. Stay tuned for the next installment in this two-part Tech from the Trenches article, which will cover hacks for balancing game data and more.If you would like to discuss the article, or share your ideas after reading it, head on over to our Scripting forum. You can also connect with me on Twitter at @CaballolD.
    #advanced #editor #scripting #hacks #save
    Advanced Editor scripting hacks to save you time, part 1
    On most of the projects I’ve seen, there are a lot of tasks developers go through that are repetitive and error-prone, especially when it comes to integrating new art assets. For instance, setting up a character often involves dragging and dropping many asset references, checking checkboxes, and clicking buttons: Set the rig of the model to Humanoid, disable the sRGB of the SDF texture, set the normal maps as normal maps, and the UI textures as sprites. In other words, valuable time is spent and crucial steps can still be missed.In this two-part article, I’ll walk you through hacks that can help improve this workflow so that your next project runs smoother than your last. To further illustrate this, I’ve created a simple prototype – similar to an RTS – where the units of one team automatically attack enemy buildings and other units. With each scripting hack, I’ll improve one aspect of this process, whether that be the textures or models.Here’s what the prototype looks like:The main reason developers have to set up so many small details when importing assets is simple: Unity doesn’t know how you are going to use an asset, so it can’t know what the best settings for it are. If you want to automate some of these tasks, this is the first problem that needs to be addressed.The simplest way to find out what an asset is for and how it relates to others is by sticking to a specific naming convention and folder structure, such as:Naming convention: We can append things to the name of the asset itself, therefore Shield_BC.png is the base color while Shield_N.png is the normal map.Folder structure: Knight/Animations/Walk.fbx is clearly an animation, while Knight/Models/Knight.fbx is a model, even though they both share the same format.The issue with this is that it only works well in one direction. So while you might already know what an asset is for when given its path, you can’t deduce its path if only given information on what the asset does. Being able to find an asset – for example, the material for a character – is useful when trying to automate the setup for some aspects of the assets. While this can be solved by using a rigid naming convention to ensure that the path is easy to deduce, it’s still susceptible to error. Even if you remember the convention, typos are common.An interesting approach to solve this is by using labels. You can use an Editor script that parses the paths of assets and assigns them labels accordingly. As the labels are automated, it’s possible to figure out the exact label that an asset will have. You can even look up assets by their label using AssetDatabase.FindAssets.If you want to automate this sequence, there is a class that can be very handy called the AssetPostprocessor. The AssetPostprocessor receives various messages when Unity imports assets. One of those is OnPostprocessAllAssets, a method that’s called whenever Unity finishes importing assets. It will give you all the paths to the imported assets, providing an opportunity to process those paths. You can write a simple method, like the following, to process them:In the case of the prototype, let’s focus on the list of imported assets – both to try and catch new assets, as well as moved assets. After all, as the path changes, we might want to update the labels.To create the labels, parse the path and look for relevant folders, prefixes, and suffixes of the name, as well as the extensions. Once you have generated the labels, combine them into a single string and set them to the asset.To assign the labels, load the asset using AssetDatabase.LoadAssetAtPath, then assign its labels with AssetDatabase.SetLabels.Remember, it’s important to only set labels if they have actually changed. Setting labels will trigger a reimport of the asset, so you don’t want this to happen unless it’s strictly necessary.If you check this, then the reimport won’t be an issue: Labels are set the first time you import an asset and saved in the .meta file, which means they’re also saved in your version control. A reimport will only be triggered if you rename or move your assets.With the above steps complete, all assets are automatically labeled, as in the example pictured below.Importing textures into a project usually involves tweaking the settings for each texture. Is it a regular texture? A normal map? A sprite? Is it linear or sRGB? If you want to change the settings of an asset importer, you can use the AssetPostprocessor once more.In this case, you’ll want to use the OnPreprocessTexture message, which is called right before importing a texture. This allows you to change the settings of the importer.When it comes to selecting the right settings for every texture, you need to verify what type of textures you’re working with – which is exactly why labels are key in the first step.With this information, you can write a simple TexturePreprocessor:It’s important to ensure that you only run this for textures that have the art label. You’ll then get a reference to the importer so that you can set everything up – starting with the texture size.The AssetPostprocessor has a context property from which you can determine the target platform. As such, you can complete platform-specific changes, like setting the textures to a lower resolution for mobile:Next, check the label to see if the texture is a UI texture, and set it accordingly:For the rest of the textures, set the values to a default. It’s worth noting that Albedo is the only texture that will have sRGB enabled:Thanks to the above script, when you drag and drop the new textures into the Editor, they will automatically have the right settings in place.“Channel packing” refers to the combination of diverse textures into one by using the different channels. It is common and offers many advantages. For instance, the value of the Red channel is metallic and the value of the Green channel is its smoothness.However, combining all textures into one requires some extra work from the art team. If the packing needs to change for some reason, the art team will have to redo all the textures that are used with that shader.As you can see, there’s room for improvement here. The approach that I like to use for channel packing is to create a special asset type where you set the “raw” textures and generate a channel-packed texture to use in your materials.First, I create a dummy file with a specific extension and then use a Scripted Importer that does all the heavy lifting when importing that asset. This is how it works:The importers can have parameters, such as the textures you need to combine.From the importer, you can set the textures as a dependency, which allows the dummy asset to be reimported every time one of the source textures changes. This lets you rebuild the generated textures accordingly.The importer has a version. If you need to change the way that textures are packed, you can modify the importer and bump the version. This will force a regeneration of all the packed textures in your project and everything will be packed in the new way, immediately.A nice side effect of generating things in an importer is that the generated assets only live in the Library folder, so it doesn’t fill up your version control.To implement this, create a ScriptableObject that will hold the created textures and serve as the result of the importer. In the example, I called this class TexturePack.With this created, you can begin by declaring the importer class and adding the ScriptedImporterAttribute to define the version and extension associated with the importer:In the importer, declare the fields you want to use. They will appear in the Inspector, just as MonoBehaviours and ScriptableObjects do:With the parameters ready, create new textures from the ones you have set as parameters. Note, however, that in the Preprocessor, we set isReadable to True to do this.In this prototype, you’ll notice two textures: the Albedo, which has the Albedo in the RGB and a mask for applying the player color in the Alpha, and the Mask texture, which includes the metallic in the Red channel and the smoothness in the Green channel.While this is perhaps outside the scope of this article, let’s look at how to combine the Albedo and the player mask as an example. First, check to see if the textures are set, and if they are, get their color data. Then set the textures as dependencies using AssetImportContext.DependsOnArtifact. As mentioned above, this will force the object to be recalculated if any of the textures end up changing.You also need to create a new texture. To do this, get the size from the TexturePreprocessor that you created in the previous section so that it follows the preset restrictions:Next, fill in all the data for the new texture. This could be massively optimized by using Jobs and Burst. Here we’ll use a simple loop:Set this data in the texture:Now, you can create the method for generating another texture in a very similar way. Once this is ready, create the main body of the importer. In this case, we’ll only create the ScriptableObject that holds the results, creates the textures, and sets the result of the importer through the AssetImportContext.When you write an importer, all of the assets generated must be registered using AssetImportContext.AddObjectToAsset so that they appear in the project window. Select a main asset using AssetImportContext.SetMainObject. This is what it looks like:The only thing left to do is to create the dummy assets. As these are custom, you can’t use the CreateAssetMenuattribute. You must make them manually instead.Using the MenuItem attribute, specify the full path to the create the asset menu, Assets/Create. To create the asset, use ProjectWindowUtil.CreateAssetWithContent, which generates a file with the content you’ve specified and allows the user to input a name for it. It looks like this:Finally, create the channel-packed textures.Most projects use custom shaders. Sometimes they’re used to add extra effects, like a dissolve effect to fade out defeated enemies, and other times, the shaders implement a custom art style, like toon shaders. Whatever the use case, Unity will create new materials with the default shader, and you will need to change it to use the custom shader.In this example, the shader used for units has two added features: the dissolve effect and the player color. When implementing these in your project, you must ensure that all the buildings and units use the appropriate shader.To validate that an asset matches certain requirements – in this case, that it uses the right shader – there is another useful class: the AssetModificationProcessor. With AssetModificationProcessor.OnWillSaveAssets, in particular, you’ll be notified when Unity is about to write an asset to disk. This will give you the opportunity to check if the asset is correct and fix it before it’s saved.Additionally, you can “tell” Unity not to save the asset, which is effective for when the problem you detect cannot be fixed automatically. To accomplish this, create the OnWillSaveAssets method:To process the assets, check whether they are materials and if they have the right labels. If they match the code below, then you have the correct shader:What’s convenient here is that this code is also called when the asset is created, meaning the new material will have the correct shader.As a new feature in Unity 2022, we also have Material Variants. Material Variants are incredibly useful when creating materials for units. In fact, you can create a base material and derive the materials for each unit from there – overriding the relevant fieldsand inheriting the rest of the properties. This allows for solid defaults for our materials, which can be updated as needed.Importing animations is similar to importing textures. There are various settings that need to be established, and some of them can be automated.Unity imports the materials of all the FBXfiles by default. For animations, the materials you want to use will either be in the project or in the FBX of the mesh. The extra materials from the animation FBX appear every time you search for materials in the project, adding quite a bit of noise, so it’s worth disabling them.To set up the rig – that is, choosing between Humanoid and Generic, and in cases where we are using a carefully setup avatar, assigning it – apply the same approach that was applied to textures. But for animations, the message you’ll use is AssetPostprocessor.OnPreprocessModel. This will be called for all FBX files, so you need to discern animation FBX files from model FBX files.Thanks to the labels you set up earlier, this shouldn’t be too complicated. The method starts much like the one for textures:Next up, you’ll want to use the rig from the mesh FBX, so you need to find that asset. To locate the asset, use the labels once more. In the case of this prototype, animations have labels that end with “animation,” whereas meshes have labels that end with “model.” You can complete a simple replacement to get the label for your model. Once you have the label, find your asset using AssetDatabase.FindAssets with “l:label-name.”When accessing other assets, there’s something else to consider: It’s possible that, in the middle of the import process, the avatar has not yet been imported when this method is called. If this occurs, the LoadAssetAtPath will return null and you won’t be able to set the avatar. To work around this issue, set a dependency to the path of the avatar. The animation will be imported again once the avatar is imported, and you will be able to set it there.Putting all of this into code will look something like this:Now you can drag the animations into the right folder, and if your mesh is ready, each one will be set up automatically. But if there isn’t an avatar available when you import the animations, the project won’t be able to pick it up once it’s created. Instead, you’ll need to reimport the animation manually after creating it. This can be done by right-clicking the folder with the animations and selecting Reimport.You can see all of this in the sample video below.Using exactly the same ideas from the previous sections, you’ll want to set up the models you are going to use. In this case, employ AssetPostrocessor.OnPreprocessModel to set the importer settings for this model.For the prototype, I’ve set the importer to not generate materialsand checked whether the model is a unit or a building. The units are set to generate an avatar, but the avatar creation for the buildings is disabled, as the buildings aren’t animated.For your project, you might want to set the materials and animatorswhen importing the model. This way, the Prefab generated by the importer is ready for immediate use.To do this, use the AssetPostprocessor.OnPostprocessModel method. This method is called after a model is finished importing. It receives the Prefab that has been generated as a parameter, which lets us modify the Prefab however we want.For the prototype, I found the material and Animation Controller by matching the label, just as I located the avatar for the animations. With the Renderer and Animator in the Prefab, I set the material and the controller as in normal gameplay.You can then drop the model into your project and it will be ready to drop into any scene. Except we haven’t set any gameplay-related components, which I’ll address in the second part of this blog.With these advanced scripting tips, you’re just about game ready. Stay tuned for the next installment in this two-part Tech from the Trenches article, which will cover hacks for balancing game data and more.If you would like to discuss the article, or share your ideas after reading it, head on over to our Scripting forum. You can also connect with me on Twitter at @CaballolD. #advanced #editor #scripting #hacks #save
    UNITY.COM
    Advanced Editor scripting hacks to save you time, part 1
    On most of the projects I’ve seen, there are a lot of tasks developers go through that are repetitive and error-prone, especially when it comes to integrating new art assets. For instance, setting up a character often involves dragging and dropping many asset references, checking checkboxes, and clicking buttons: Set the rig of the model to Humanoid, disable the sRGB of the SDF texture, set the normal maps as normal maps, and the UI textures as sprites. In other words, valuable time is spent and crucial steps can still be missed.In this two-part article, I’ll walk you through hacks that can help improve this workflow so that your next project runs smoother than your last. To further illustrate this, I’ve created a simple prototype – similar to an RTS – where the units of one team automatically attack enemy buildings and other units. With each scripting hack, I’ll improve one aspect of this process, whether that be the textures or models.Here’s what the prototype looks like:The main reason developers have to set up so many small details when importing assets is simple: Unity doesn’t know how you are going to use an asset, so it can’t know what the best settings for it are. If you want to automate some of these tasks, this is the first problem that needs to be addressed.The simplest way to find out what an asset is for and how it relates to others is by sticking to a specific naming convention and folder structure, such as:Naming convention: We can append things to the name of the asset itself, therefore Shield_BC.png is the base color while Shield_N.png is the normal map.Folder structure: Knight/Animations/Walk.fbx is clearly an animation, while Knight/Models/Knight.fbx is a model, even though they both share the same format (.fbx).The issue with this is that it only works well in one direction. So while you might already know what an asset is for when given its path, you can’t deduce its path if only given information on what the asset does. Being able to find an asset – for example, the material for a character – is useful when trying to automate the setup for some aspects of the assets. While this can be solved by using a rigid naming convention to ensure that the path is easy to deduce, it’s still susceptible to error. Even if you remember the convention, typos are common.An interesting approach to solve this is by using labels. You can use an Editor script that parses the paths of assets and assigns them labels accordingly. As the labels are automated, it’s possible to figure out the exact label that an asset will have. You can even look up assets by their label using AssetDatabase.FindAssets.If you want to automate this sequence, there is a class that can be very handy called the AssetPostprocessor. The AssetPostprocessor receives various messages when Unity imports assets. One of those is OnPostprocessAllAssets, a method that’s called whenever Unity finishes importing assets. It will give you all the paths to the imported assets, providing an opportunity to process those paths. You can write a simple method, like the following, to process them:In the case of the prototype, let’s focus on the list of imported assets – both to try and catch new assets, as well as moved assets. After all, as the path changes, we might want to update the labels.To create the labels, parse the path and look for relevant folders, prefixes, and suffixes of the name, as well as the extensions. Once you have generated the labels, combine them into a single string and set them to the asset.To assign the labels, load the asset using AssetDatabase.LoadAssetAtPath, then assign its labels with AssetDatabase.SetLabels.Remember, it’s important to only set labels if they have actually changed. Setting labels will trigger a reimport of the asset, so you don’t want this to happen unless it’s strictly necessary.If you check this, then the reimport won’t be an issue: Labels are set the first time you import an asset and saved in the .meta file, which means they’re also saved in your version control. A reimport will only be triggered if you rename or move your assets.With the above steps complete, all assets are automatically labeled, as in the example pictured below.Importing textures into a project usually involves tweaking the settings for each texture. Is it a regular texture? A normal map? A sprite? Is it linear or sRGB? If you want to change the settings of an asset importer, you can use the AssetPostprocessor once more.In this case, you’ll want to use the OnPreprocessTexture message, which is called right before importing a texture. This allows you to change the settings of the importer.When it comes to selecting the right settings for every texture, you need to verify what type of textures you’re working with – which is exactly why labels are key in the first step.With this information, you can write a simple TexturePreprocessor:It’s important to ensure that you only run this for textures that have the art label (our own textures). You’ll then get a reference to the importer so that you can set everything up – starting with the texture size.The AssetPostprocessor has a context property from which you can determine the target platform. As such, you can complete platform-specific changes, like setting the textures to a lower resolution for mobile:Next, check the label to see if the texture is a UI texture, and set it accordingly:For the rest of the textures, set the values to a default. It’s worth noting that Albedo is the only texture that will have sRGB enabled:Thanks to the above script, when you drag and drop the new textures into the Editor, they will automatically have the right settings in place.“Channel packing” refers to the combination of diverse textures into one by using the different channels. It is common and offers many advantages. For instance, the value of the Red channel is metallic and the value of the Green channel is its smoothness.However, combining all textures into one requires some extra work from the art team. If the packing needs to change for some reason (i.e., a change in the shader), the art team will have to redo all the textures that are used with that shader.As you can see, there’s room for improvement here. The approach that I like to use for channel packing is to create a special asset type where you set the “raw” textures and generate a channel-packed texture to use in your materials.First, I create a dummy file with a specific extension and then use a Scripted Importer that does all the heavy lifting when importing that asset. This is how it works:The importers can have parameters, such as the textures you need to combine.From the importer, you can set the textures as a dependency, which allows the dummy asset to be reimported every time one of the source textures changes. This lets you rebuild the generated textures accordingly.The importer has a version. If you need to change the way that textures are packed, you can modify the importer and bump the version. This will force a regeneration of all the packed textures in your project and everything will be packed in the new way, immediately.A nice side effect of generating things in an importer is that the generated assets only live in the Library folder, so it doesn’t fill up your version control.To implement this, create a ScriptableObject that will hold the created textures and serve as the result of the importer. In the example, I called this class TexturePack.With this created, you can begin by declaring the importer class and adding the ScriptedImporterAttribute to define the version and extension associated with the importer:In the importer, declare the fields you want to use. They will appear in the Inspector, just as MonoBehaviours and ScriptableObjects do:With the parameters ready, create new textures from the ones you have set as parameters. Note, however, that in the Preprocessor (from the previous section), we set isReadable to True to do this.In this prototype, you’ll notice two textures: the Albedo, which has the Albedo in the RGB and a mask for applying the player color in the Alpha, and the Mask texture, which includes the metallic in the Red channel and the smoothness in the Green channel.While this is perhaps outside the scope of this article, let’s look at how to combine the Albedo and the player mask as an example. First, check to see if the textures are set, and if they are, get their color data. Then set the textures as dependencies using AssetImportContext.DependsOnArtifact. As mentioned above, this will force the object to be recalculated if any of the textures end up changing.You also need to create a new texture. To do this, get the size from the TexturePreprocessor that you created in the previous section so that it follows the preset restrictions:Next, fill in all the data for the new texture. This could be massively optimized by using Jobs and Burst (but that would require an entire article on its own). Here we’ll use a simple loop:Set this data in the texture:Now, you can create the method for generating another texture in a very similar way. Once this is ready, create the main body of the importer. In this case, we’ll only create the ScriptableObject that holds the results, creates the textures, and sets the result of the importer through the AssetImportContext.When you write an importer, all of the assets generated must be registered using AssetImportContext.AddObjectToAsset so that they appear in the project window. Select a main asset using AssetImportContext.SetMainObject. This is what it looks like:The only thing left to do is to create the dummy assets. As these are custom, you can’t use the CreateAssetMenuattribute. You must make them manually instead.Using the MenuItem attribute, specify the full path to the create the asset menu, Assets/Create. To create the asset, use ProjectWindowUtil.CreateAssetWithContent, which generates a file with the content you’ve specified and allows the user to input a name for it. It looks like this:Finally, create the channel-packed textures.Most projects use custom shaders. Sometimes they’re used to add extra effects, like a dissolve effect to fade out defeated enemies, and other times, the shaders implement a custom art style, like toon shaders. Whatever the use case, Unity will create new materials with the default shader, and you will need to change it to use the custom shader.In this example, the shader used for units has two added features: the dissolve effect and the player color (red and blue in the video prototype). When implementing these in your project, you must ensure that all the buildings and units use the appropriate shader.To validate that an asset matches certain requirements – in this case, that it uses the right shader – there is another useful class: the AssetModificationProcessor. With AssetModificationProcessor.OnWillSaveAssets, in particular, you’ll be notified when Unity is about to write an asset to disk. This will give you the opportunity to check if the asset is correct and fix it before it’s saved.Additionally, you can “tell” Unity not to save the asset, which is effective for when the problem you detect cannot be fixed automatically. To accomplish this, create the OnWillSaveAssets method:To process the assets, check whether they are materials and if they have the right labels. If they match the code below, then you have the correct shader:What’s convenient here is that this code is also called when the asset is created, meaning the new material will have the correct shader.As a new feature in Unity 2022, we also have Material Variants. Material Variants are incredibly useful when creating materials for units. In fact, you can create a base material and derive the materials for each unit from there – overriding the relevant fields (like the textures) and inheriting the rest of the properties. This allows for solid defaults for our materials, which can be updated as needed.Importing animations is similar to importing textures. There are various settings that need to be established, and some of them can be automated.Unity imports the materials of all the FBX (.fbx) files by default. For animations, the materials you want to use will either be in the project or in the FBX of the mesh. The extra materials from the animation FBX appear every time you search for materials in the project, adding quite a bit of noise, so it’s worth disabling them.To set up the rig – that is, choosing between Humanoid and Generic, and in cases where we are using a carefully setup avatar, assigning it – apply the same approach that was applied to textures. But for animations, the message you’ll use is AssetPostprocessor.OnPreprocessModel. This will be called for all FBX files, so you need to discern animation FBX files from model FBX files.Thanks to the labels you set up earlier, this shouldn’t be too complicated. The method starts much like the one for textures:Next up, you’ll want to use the rig from the mesh FBX, so you need to find that asset. To locate the asset, use the labels once more. In the case of this prototype, animations have labels that end with “animation,” whereas meshes have labels that end with “model.” You can complete a simple replacement to get the label for your model. Once you have the label, find your asset using AssetDatabase.FindAssets with “l:label-name.”When accessing other assets, there’s something else to consider: It’s possible that, in the middle of the import process, the avatar has not yet been imported when this method is called. If this occurs, the LoadAssetAtPath will return null and you won’t be able to set the avatar. To work around this issue, set a dependency to the path of the avatar. The animation will be imported again once the avatar is imported, and you will be able to set it there.Putting all of this into code will look something like this:Now you can drag the animations into the right folder, and if your mesh is ready, each one will be set up automatically. But if there isn’t an avatar available when you import the animations, the project won’t be able to pick it up once it’s created. Instead, you’ll need to reimport the animation manually after creating it. This can be done by right-clicking the folder with the animations and selecting Reimport.You can see all of this in the sample video below.Using exactly the same ideas from the previous sections, you’ll want to set up the models you are going to use. In this case, employ AssetPostrocessor.OnPreprocessModel to set the importer settings for this model.For the prototype, I’ve set the importer to not generate materials (I will use the ones I’ve created in the project) and checked whether the model is a unit or a building (by verifying the label, as always). The units are set to generate an avatar, but the avatar creation for the buildings is disabled, as the buildings aren’t animated.For your project, you might want to set the materials and animators (and anything else you want to add) when importing the model. This way, the Prefab generated by the importer is ready for immediate use.To do this, use the AssetPostprocessor.OnPostprocessModel method. This method is called after a model is finished importing. It receives the Prefab that has been generated as a parameter, which lets us modify the Prefab however we want.For the prototype, I found the material and Animation Controller by matching the label, just as I located the avatar for the animations. With the Renderer and Animator in the Prefab, I set the material and the controller as in normal gameplay.You can then drop the model into your project and it will be ready to drop into any scene. Except we haven’t set any gameplay-related components, which I’ll address in the second part of this blog.With these advanced scripting tips, you’re just about game ready. Stay tuned for the next installment in this two-part Tech from the Trenches article, which will cover hacks for balancing game data and more.If you would like to discuss the article, or share your ideas after reading it, head on over to our Scripting forum. You can also connect with me on Twitter at @CaballolD.
    0 Commentarios 0 Acciones
  • Advanced Editor scripting hacks to save you time, part 2

    I’m back for part two! If you missed the first installment of my advanced Editor scripting hacks, check it out here. This two-part article is designed to walk you through advanced Editor tips for improving workflows so that your next project runs smoother than your last.Each hack is based on a demonstrative prototype I set up – similar to an RTS – where the units of one team automatically attack enemy buildings and other units. For a refresher, here’s the initial build prototype:In the previous article, I shared best practices on how to import and set up the art assets in the project. Now let’s start using those assets in the game, while saving as much time as possible.Let’s begin by unpacking the game’s elements. When setting up the elements of a game, we often encounter the following scenario:On one hand, we have Prefabs that come from the art team – be it a Prefab generated by the FBX Importer, or a Prefab that has been carefully set up with all the appropriate materials and animations, adding props to the Hierarchy, etc. To use this Prefab in-game, it makes sense to create a Prefab Variant from it and add all the gameplay-related components there. This way, the art team can modify and update the Prefab, and all the changes are reflected immediately in the game. While this approach works if the item only requires a couple of components with simple settings, it can add a lot of work if you need to set up something complex from scratch every time.On the other hand, many of the items will have the same components with similar values, like all the Car Prefabs or Prefabs for similar enemies. It makes sense that they’re all Variants of the same base Prefab. That said, this approach is ideal if setting up the art of the Prefab is straightforward.Next, let’s look at how to simplify the setup of gameplay components, so we can quickly add them to our art Prefabs and use them directly in the game.The most common setup I’ve seen for complex elements in a game is having a “main” componentthat behaves as an interface to communicate with the object, and a series of small, reusable components that implement the functionality itself; things like “selectable,” “CharacterMovement,” or “UnitHealth,” and Unity built-in components, like renderers and colliders.Some of the components depend on other components in order to work. For instance, the character movement might need a NavMesh agent. That’s why Unity has the RequireComponent attribute ready to define all these dependencies. So if there’s a “main” component for a given type of object, you can use the RequireComponent attribute to add all the components that this type of object needs to have.For example, the units in my prototype have these attributes:Besides setting an easy-to-find location in the AddComponentMenu, include all the extra components it needs. In this case, I added the Locomotion to move around and the AttackComponent to attack other units.Additionally, the base class unithas other RequireComponent attributes that are inherited by this class, such as the Health component. With this, I only need to add the Soldier component to a GameObject so that all the other components are added automatically. If I add a new RequireComponent attribute to a component, Unity will update all the existing GameObjects with the new component, which facilitates extending the existing objects.RequireComponent also has a more subtle benefit: If we have “component A” that requires “component B,” then adding A to a GameObject doesn’t just ensure that B is added as well – it actually ensures that B is added before A. This means that when the Reset method is called for component A, component B will already exist and we’ll readily have access to it. This enables us to set references to the components, register persistent UnityEvents, and anything else we need to do to set up the object. By combining the RequireComponent attribute and the Reset method, we can fully set up the object by adding a single component.The main drawback of the method shown above is that, if we decide to change a value, we will need to change it for every object manually. And if all the setup is done through code, it becomes difficult for designers to modify it.In the previous article, we looked at how to use AssetPostprocessor for adding dependencies and modifying objects at import time. Now let’s use this to enforce some values in our Prefabs.To make it easier for designers to modify those values, we will read the values from a Prefab. Doing so allows the designers to easily modify that Prefab to change the values for the entire project.If you’re writing Editor code, you can copy the values from a component in an object to another by taking advantage of the Preset class.Create a preset from the original component and apply it to the other componentlike this:As it stands, it will override all the values in the Prefab, but this most probably isn’t what we want it to do. Instead, copy only some values, while keeping the rest intact. To do this, use another override of the Preset.ApplyTo that takes a list of the properties it must apply. Of course, we could easily create a hardcoded list of the properties we want to override, which would work fine for most projects, but let’s see how to make this completely generic.Basically, I created a base Prefab with all the components, and then created a Variant to use as a template. Then I decided what values to apply from the list of overrides in the Variant.To get the overrides, use PrefabUtility.GetPropertyModifications. This provides you with all the overrides in the entire Prefab, so filter only the ones necessary to target this component. Something to keep in mind here is that the target of the modification is the component of the base Prefab – not the component of the Variant – so we need to get the reference to it by using GetCorrespondingObjectFrom
    #advanced #editor #scripting #hacks #save
    Advanced Editor scripting hacks to save you time, part 2
    I’m back for part two! If you missed the first installment of my advanced Editor scripting hacks, check it out here. This two-part article is designed to walk you through advanced Editor tips for improving workflows so that your next project runs smoother than your last.Each hack is based on a demonstrative prototype I set up – similar to an RTS – where the units of one team automatically attack enemy buildings and other units. For a refresher, here’s the initial build prototype:In the previous article, I shared best practices on how to import and set up the art assets in the project. Now let’s start using those assets in the game, while saving as much time as possible.Let’s begin by unpacking the game’s elements. When setting up the elements of a game, we often encounter the following scenario:On one hand, we have Prefabs that come from the art team – be it a Prefab generated by the FBX Importer, or a Prefab that has been carefully set up with all the appropriate materials and animations, adding props to the Hierarchy, etc. To use this Prefab in-game, it makes sense to create a Prefab Variant from it and add all the gameplay-related components there. This way, the art team can modify and update the Prefab, and all the changes are reflected immediately in the game. While this approach works if the item only requires a couple of components with simple settings, it can add a lot of work if you need to set up something complex from scratch every time.On the other hand, many of the items will have the same components with similar values, like all the Car Prefabs or Prefabs for similar enemies. It makes sense that they’re all Variants of the same base Prefab. That said, this approach is ideal if setting up the art of the Prefab is straightforward.Next, let’s look at how to simplify the setup of gameplay components, so we can quickly add them to our art Prefabs and use them directly in the game.The most common setup I’ve seen for complex elements in a game is having a “main” componentthat behaves as an interface to communicate with the object, and a series of small, reusable components that implement the functionality itself; things like “selectable,” “CharacterMovement,” or “UnitHealth,” and Unity built-in components, like renderers and colliders.Some of the components depend on other components in order to work. For instance, the character movement might need a NavMesh agent. That’s why Unity has the RequireComponent attribute ready to define all these dependencies. So if there’s a “main” component for a given type of object, you can use the RequireComponent attribute to add all the components that this type of object needs to have.For example, the units in my prototype have these attributes:Besides setting an easy-to-find location in the AddComponentMenu, include all the extra components it needs. In this case, I added the Locomotion to move around and the AttackComponent to attack other units.Additionally, the base class unithas other RequireComponent attributes that are inherited by this class, such as the Health component. With this, I only need to add the Soldier component to a GameObject so that all the other components are added automatically. If I add a new RequireComponent attribute to a component, Unity will update all the existing GameObjects with the new component, which facilitates extending the existing objects.RequireComponent also has a more subtle benefit: If we have “component A” that requires “component B,” then adding A to a GameObject doesn’t just ensure that B is added as well – it actually ensures that B is added before A. This means that when the Reset method is called for component A, component B will already exist and we’ll readily have access to it. This enables us to set references to the components, register persistent UnityEvents, and anything else we need to do to set up the object. By combining the RequireComponent attribute and the Reset method, we can fully set up the object by adding a single component.The main drawback of the method shown above is that, if we decide to change a value, we will need to change it for every object manually. And if all the setup is done through code, it becomes difficult for designers to modify it.In the previous article, we looked at how to use AssetPostprocessor for adding dependencies and modifying objects at import time. Now let’s use this to enforce some values in our Prefabs.To make it easier for designers to modify those values, we will read the values from a Prefab. Doing so allows the designers to easily modify that Prefab to change the values for the entire project.If you’re writing Editor code, you can copy the values from a component in an object to another by taking advantage of the Preset class.Create a preset from the original component and apply it to the other componentlike this:As it stands, it will override all the values in the Prefab, but this most probably isn’t what we want it to do. Instead, copy only some values, while keeping the rest intact. To do this, use another override of the Preset.ApplyTo that takes a list of the properties it must apply. Of course, we could easily create a hardcoded list of the properties we want to override, which would work fine for most projects, but let’s see how to make this completely generic.Basically, I created a base Prefab with all the components, and then created a Variant to use as a template. Then I decided what values to apply from the list of overrides in the Variant.To get the overrides, use PrefabUtility.GetPropertyModifications. This provides you with all the overrides in the entire Prefab, so filter only the ones necessary to target this component. Something to keep in mind here is that the target of the modification is the component of the base Prefab – not the component of the Variant – so we need to get the reference to it by using GetCorrespondingObjectFrom #advanced #editor #scripting #hacks #save
    UNITY.COM
    Advanced Editor scripting hacks to save you time, part 2
    I’m back for part two! If you missed the first installment of my advanced Editor scripting hacks, check it out here. This two-part article is designed to walk you through advanced Editor tips for improving workflows so that your next project runs smoother than your last.Each hack is based on a demonstrative prototype I set up – similar to an RTS – where the units of one team automatically attack enemy buildings and other units. For a refresher, here’s the initial build prototype:In the previous article, I shared best practices on how to import and set up the art assets in the project. Now let’s start using those assets in the game, while saving as much time as possible.Let’s begin by unpacking the game’s elements. When setting up the elements of a game, we often encounter the following scenario:On one hand, we have Prefabs that come from the art team – be it a Prefab generated by the FBX Importer, or a Prefab that has been carefully set up with all the appropriate materials and animations, adding props to the Hierarchy, etc. To use this Prefab in-game, it makes sense to create a Prefab Variant from it and add all the gameplay-related components there. This way, the art team can modify and update the Prefab, and all the changes are reflected immediately in the game. While this approach works if the item only requires a couple of components with simple settings, it can add a lot of work if you need to set up something complex from scratch every time.On the other hand, many of the items will have the same components with similar values, like all the Car Prefabs or Prefabs for similar enemies. It makes sense that they’re all Variants of the same base Prefab. That said, this approach is ideal if setting up the art of the Prefab is straightforward (i.e., setting the mesh and its materials).Next, let’s look at how to simplify the setup of gameplay components, so we can quickly add them to our art Prefabs and use them directly in the game.The most common setup I’ve seen for complex elements in a game is having a “main” component (like “enemy,” “pickup,” or “door”) that behaves as an interface to communicate with the object, and a series of small, reusable components that implement the functionality itself; things like “selectable,” “CharacterMovement,” or “UnitHealth,” and Unity built-in components, like renderers and colliders.Some of the components depend on other components in order to work. For instance, the character movement might need a NavMesh agent. That’s why Unity has the RequireComponent attribute ready to define all these dependencies. So if there’s a “main” component for a given type of object, you can use the RequireComponent attribute to add all the components that this type of object needs to have.For example, the units in my prototype have these attributes:Besides setting an easy-to-find location in the AddComponentMenu, include all the extra components it needs. In this case, I added the Locomotion to move around and the AttackComponent to attack other units.Additionally, the base class unit (which is shared with the buildings) has other RequireComponent attributes that are inherited by this class, such as the Health component. With this, I only need to add the Soldier component to a GameObject so that all the other components are added automatically. If I add a new RequireComponent attribute to a component, Unity will update all the existing GameObjects with the new component, which facilitates extending the existing objects.RequireComponent also has a more subtle benefit: If we have “component A” that requires “component B,” then adding A to a GameObject doesn’t just ensure that B is added as well – it actually ensures that B is added before A. This means that when the Reset method is called for component A, component B will already exist and we’ll readily have access to it. This enables us to set references to the components, register persistent UnityEvents, and anything else we need to do to set up the object. By combining the RequireComponent attribute and the Reset method, we can fully set up the object by adding a single component.The main drawback of the method shown above is that, if we decide to change a value, we will need to change it for every object manually. And if all the setup is done through code, it becomes difficult for designers to modify it.In the previous article, we looked at how to use AssetPostprocessor for adding dependencies and modifying objects at import time. Now let’s use this to enforce some values in our Prefabs.To make it easier for designers to modify those values, we will read the values from a Prefab. Doing so allows the designers to easily modify that Prefab to change the values for the entire project.If you’re writing Editor code, you can copy the values from a component in an object to another by taking advantage of the Preset class.Create a preset from the original component and apply it to the other component(s) like this:As it stands, it will override all the values in the Prefab, but this most probably isn’t what we want it to do. Instead, copy only some values, while keeping the rest intact. To do this, use another override of the Preset.ApplyTo that takes a list of the properties it must apply. Of course, we could easily create a hardcoded list of the properties we want to override, which would work fine for most projects, but let’s see how to make this completely generic.Basically, I created a base Prefab with all the components, and then created a Variant to use as a template. Then I decided what values to apply from the list of overrides in the Variant.To get the overrides, use PrefabUtility.GetPropertyModifications. This provides you with all the overrides in the entire Prefab, so filter only the ones necessary to target this component. Something to keep in mind here is that the target of the modification is the component of the base Prefab – not the component of the Variant – so we need to get the reference to it by using GetCorrespondingObjectFromSource:Now this will apply all overrides of the template to our Prefabs. The only detail left is that the template might be a Variant of a Variant, and we will want to apply the overrides from that Variant as well.To do this, we only need to make this recursive:Next, let’s find the template for our Prefabs. Ideally, we will want to use different templates for different types of objects. One efficient way of doing this is by placing the templates in the same folder as the objects we want to apply them to.Look for an object named Template.prefab in the same folder as our Prefab. If we can’t find it, we will look in the parent folder recursively:At this point, we have the ability to modify the template Prefab, and all the changes will be reflected in the Prefabs in that folder, even though they aren’t Variants of the template. In this example, I changed the default player color (the color used when the unit isn’t attached to any player). Notice how it updates all the objects:When balancing games, all the stats you’ll need to adjust are spread across various components, stored in one Prefab or ScriptableObject for every character. This makes the process of adjusting details rather slow.A common way to make balancing easier is by using spreadsheets. They can be very handy as they bring all the data together, and you can use formulas to automatically calculate some of the additional data. But entering this data into Unity manually can be painfully long.That’s where the spreadsheets come in. They can be exported to simple formats like CSV(.csv) or TSV(.tsv), which is exactly what ScriptedImporters are for. Below is a screen capture of the stats for the units in the prototype:The code for this is pretty simple: Create a ScriptableObject with all the stats for a unit, then you can read the file. For every row of the table, create an instance of the ScriptableObject and fill it with the data for that row.Finally, add all the ScriptableObjects to the imported asset by using the context. We also need to add a main asset, which I just set to an empty TextAsset (as we don’t really use the main asset for anything here).This works for both buildings and units, but you should check which one you’re importing as units will have many more stats.With this complete, there are now some ScriptableObjects that contain all of the data from the spreadsheet.The generated ScriptableObjects are ready to be used in the game as needed. You can also use the PrefabPostprocessor that was set up earlier.In the OnPostprocessPrefab method, we have the capacity to load this asset and use its data to fill the parameters of the components automatically. Even more, if you set a dependency to this data asset, the Prefabs will be reimported every time you modify the data, keeping everything up to date automatically.When trying to create awesome levels, it’s crucial to be able to change and test things quickly, making small adjustments and trying again. That’s why fast iteration times and reducing the steps needed to start testing are so important.One of the first things that we think of when it comes to iteration times in Unity is the Domain Reload. The Domain Reload is relevant in two key situations: after compiling code in order to load the new dynamically linked libraries (DLLs), and when entering and exiting Play Mode. Domain Reload that comes with compiling can’t be avoided, but you do have the option of disabling reloads related to Play Mode in Project Settings > Editor > Enter Play Mode Settings.Disabling the Domain Reload when entering Play Mode can cause some issues if your code isn’t prepared for it, with the most usual issue being that static variables aren’t reset after playing. If your code can work with this disabled, go for it. For this prototype, Domain Reload is disabled, so you can enter Play Mode almost instantaneously.A separate issue with iteration times has to do with recalculating data that is required in order to play. This often involves selecting some components and clicking on buttons to trigger the recalculations. For example, in this prototype, there is a TeamController for each team within the scene. This controller has a list of all the enemy buildings so that it can send the units to attack them. In order to fill this data automatically, use the IProcessSceneWithReport interface. This interface is called for the scenes on two different occasions: during builds and when loading a scene in Play Mode. With it comes the opportunity to create, destroy, and modify any object you want. Note, however, that these changes will only affect Builds and Play Mode.It is in this callback that the controllers are created and the list of buildings is set. Thanks to this, there is no need to do anything manually. The controllers with an updated list of buildings will be there when play starts, and the list will be updated with the changes we’ve made.For the prototype, a utility method was set up that allows you to get all the instances of a component in a scene. You can use this to get all the buildings:The rest of the process is somewhat trivial: Get all the buildings, get all the teams that the buildings belong to, and create a controller for every team with a list of enemy buildings.Besides the scene being edited, you also need to load other scenes in order to play (i.e., a scene with the managers, with the UI, etc.) This can take up valuable time. In the case of the prototype, the Canvas with the healthbars is in a different scene called InGameUI.An effective way of working with this is by adding a component to the scene with a list of the scenes that need to be loaded along with it. If you load those scenes synchronously in the Awake method, the scene will be loaded and all of its Awake methods will be invoked at that point. So by the time the Start method is called, you can be sure that all the scenes are loaded and initialized, which gives you access to the data in them, such as manager singletons.Remember that you might have some of the scenes open when you enter Play Mode, so it’s important to check whether the scene is already loaded before loading it:Throughout parts one and two of this article, I’ve shown you how to leverage some of the lesser known features that Unity has to offer. Everything outlined is just a fraction of what can be done, but I hope that you’ll find these hacks useful for your next project, or – at the very least – interesting.The assets used to create the prototype can be found for free in the Asset Store:Skeletons: Toon RTS Units – Undead DemoKnights: Toon RTS Units – DemoTowers: Awesome Stylized Mage TowerIf you’d like to discuss this two-parter, or share your ideas after reading it, head on over to our Scripting forum. I’m signing off for now but you can still connect with me on Twitter at @CaballolD. Be sure to stay tuned for future technical blogs from other Unity developers as part of the ongoing Tech from the Trenches series.
    0 Commentarios 0 Acciones
  • 9-to-5 jobs, ChatGPT, and preventive Botox: Gen Z is not falling for any of this ‘propaganda’ in 2025

    A new TikTok trend, set to a snippet of Charli XCX’s “I Think About It All the Time” featuring Bon Iver, sees users, particularly Gen Z women, sharing lists of “propaganda” they’re not falling for in 2025. 

    One list, shared by TikTok creator Lxyzfbxx, includes the “clean girl look,” “the normalization of OF,” and “preventative Botox,” among other things.

    Another user listed “organic deodorant,” “Teslas,” and “mouth tape” among the modern-day propaganda.

    A third user included “push-up bras,” “being anti-sunscreen,” and “branded sweatshirts.”

    A fourth took aim at “working,” “a 9-5,” and “employment.”

    From social media trends to beauty standards, internet users are drawing attention to the capitalist, political, and aesthetic pressures that they’re subjected to daily, and they are de-normalizing those they see as unhealthy, undesirable, or just cringe. 

    “Propaganda I won’t be falling for”: How did the trend start?

    While it’s hard to pinpoint exactly where the trend began, it’s clear that it’s caught on: If there’s one thing social media loves, it’s a hot take—and it can be on anything from working a full-time job to singer-songwriter Benson Boone.

    For instance, 2024 was the year of the “in” and “out” lists. Now, with the hashtag “propaganda” currently at over 240,000 posts on TikTok, we have the 2025 version of a similar trend.

    However, what is and what isn’t propaganda varies wildly, depending on whom you ask. The comments section below many of these videos is a hotbed for debate.

    “Sorry but i WILL be falling for the Labubu propaganda everytime,” one person commented under a list that included the viral dolls.

    “I hate to admit it but Dubai chocolate is soooo bomb,” another commented under a propaganda list that included the pistachio-flavored chocolate.

    Take these opinions with a rather large pinch of salt. One frequent name that appears on many of these lists is singer-songwriter Gracie Abrams.

    Does that mean the poster actually dislikes Abrams’s music? Not necessarily. As one TikTok user told The New York Times: “I think sometimes the internet just likes to have a running gag.”Casey Lewis, of the youth consumer trends newsletter After School, did the legwork and tallied up the most commonly mentioned “propaganda” across hundreds of TikToks.

    The top 10 list she compiled included matcha, the tradwife movement, MAHA-adjacent trends like beef tallow and anti-seed oil, author Colleen Hoover, and milk.

    Coming in at the No. 1 spot, to no one’s surprise, is ChatGPT.  
    #9to5 #jobs #chatgpt #preventive #botox
    9-to-5 jobs, ChatGPT, and preventive Botox: Gen Z is not falling for any of this ‘propaganda’ in 2025
    A new TikTok trend, set to a snippet of Charli XCX’s “I Think About It All the Time” featuring Bon Iver, sees users, particularly Gen Z women, sharing lists of “propaganda” they’re not falling for in 2025.  One list, shared by TikTok creator Lxyzfbxx, includes the “clean girl look,” “the normalization of OF,” and “preventative Botox,” among other things. Another user listed “organic deodorant,” “Teslas,” and “mouth tape” among the modern-day propaganda. A third user included “push-up bras,” “being anti-sunscreen,” and “branded sweatshirts.” A fourth took aim at “working,” “a 9-5,” and “employment.” From social media trends to beauty standards, internet users are drawing attention to the capitalist, political, and aesthetic pressures that they’re subjected to daily, and they are de-normalizing those they see as unhealthy, undesirable, or just cringe.  “Propaganda I won’t be falling for”: How did the trend start? While it’s hard to pinpoint exactly where the trend began, it’s clear that it’s caught on: If there’s one thing social media loves, it’s a hot take—and it can be on anything from working a full-time job to singer-songwriter Benson Boone. For instance, 2024 was the year of the “in” and “out” lists. Now, with the hashtag “propaganda” currently at over 240,000 posts on TikTok, we have the 2025 version of a similar trend. However, what is and what isn’t propaganda varies wildly, depending on whom you ask. The comments section below many of these videos is a hotbed for debate. “Sorry but i WILL be falling for the Labubu propaganda everytime,” one person commented under a list that included the viral dolls. “I hate to admit it but Dubai chocolate is soooo bomb,” another commented under a propaganda list that included the pistachio-flavored chocolate. Take these opinions with a rather large pinch of salt. One frequent name that appears on many of these lists is singer-songwriter Gracie Abrams. Does that mean the poster actually dislikes Abrams’s music? Not necessarily. As one TikTok user told The New York Times: “I think sometimes the internet just likes to have a running gag.”Casey Lewis, of the youth consumer trends newsletter After School, did the legwork and tallied up the most commonly mentioned “propaganda” across hundreds of TikToks. The top 10 list she compiled included matcha, the tradwife movement, MAHA-adjacent trends like beef tallow and anti-seed oil, author Colleen Hoover, and milk. Coming in at the No. 1 spot, to no one’s surprise, is ChatGPT.   #9to5 #jobs #chatgpt #preventive #botox
    WWW.FASTCOMPANY.COM
    9-to-5 jobs, ChatGPT, and preventive Botox: Gen Z is not falling for any of this ‘propaganda’ in 2025
    A new TikTok trend, set to a snippet of Charli XCX’s “I Think About It All the Time” featuring Bon Iver, sees users, particularly Gen Z women, sharing lists of “propaganda” they’re not falling for in 2025.  One list, shared by TikTok creator Lxyzfbxx, includes the “clean girl look,” “the normalization of OF [OnlyFans],” and “preventative Botox,” among other things. Another user listed “organic deodorant,” “Teslas,” and “mouth tape” among the modern-day propaganda. A third user included “push-up bras,” “being anti-sunscreen,” and “branded sweatshirts.” A fourth took aim at “working,” “a 9-5,” and “employment.” From social media trends to beauty standards, internet users are drawing attention to the capitalist, political, and aesthetic pressures that they’re subjected to daily, and they are de-normalizing those they see as unhealthy, undesirable, or just cringe.  “Propaganda I won’t be falling for”: How did the trend start? While it’s hard to pinpoint exactly where the trend began, it’s clear that it’s caught on: If there’s one thing social media loves, it’s a hot take—and it can be on anything from working a full-time job to singer-songwriter Benson Boone. For instance, 2024 was the year of the “in” and “out” lists. Now, with the hashtag “propaganda” currently at over 240,000 posts on TikTok, we have the 2025 version of a similar trend. However, what is and what isn’t propaganda varies wildly, depending on whom you ask. The comments section below many of these videos is a hotbed for debate. “Sorry but i WILL be falling for the Labubu propaganda everytime,” one person commented under a list that included the viral dolls. “I hate to admit it but Dubai chocolate is soooo bomb,” another commented under a propaganda list that included the pistachio-flavored chocolate. Take these opinions with a rather large pinch of salt. One frequent name that appears on many of these lists is singer-songwriter Gracie Abrams. Does that mean the poster actually dislikes Abrams’s music? Not necessarily. As one TikTok user told The New York Times: “I think sometimes the internet just likes to have a running gag.” (Jumping on the Gracie Abrams hate train, in other words, might just be good for views.) Casey Lewis, of the youth consumer trends newsletter After School, did the legwork and tallied up the most commonly mentioned “propaganda” across hundreds of TikToks. The top 10 list she compiled included matcha, the tradwife movement, MAHA-adjacent trends like beef tallow and anti-seed oil, author Colleen Hoover, and milk (both of the oat and cow variety). Coming in at the No. 1 spot, to no one’s surprise, is ChatGPT.  
    0 Commentarios 0 Acciones
  • Andor – Season 2: Mohen Leo (Production VFX Supervisor), TJ Falls (Production VFX Producer) and Scott Pritchard (ILM VFX Supervisor)

    Interviews

    Andor – Season 2: Mohen Leo, TJ Fallsand Scott PritchardBy Vincent Frei - 22/05/2025

    In 2023, Mohen Leo, TJ Falls, and Scott Pritchardoffered an in-depth look at the visual effects of Andor’s first season. Now, the trio returns to share insights into their work on the second—and final—season of this critically acclaimed series.
    Tony Gilroy is known for his detailed approach to storytelling. Can you talk about how your collaboration with him evolved throughout the production of Andor? How does he influence the VFX decisions and the overall tone of the series?
    Mohen Leo: Our history with Tony, from Rogue One through the first season of Andor, had built a strong foundation of mutual trust. For Season 2, he involved VFX from the earliest story discussions, sharing outlines and inviting our ideas for key sequences. His priority is always to keep the show feeling grounded, ensuring that visual effects serve the story’s core and never become extraneous spectacle that might distract from the narrative.
    TJ Falls: Tony is a master storyteller. As Mohen mentioned, we have a great history with Tony from Rogue One and through Season 1 of Andor. We had a great rapport with Tony, and he had implicit trust in us. We began prepping Season 2 while we were in post for Season 1. We were having ongoing conversations with Tony and Production Designer Luke Hull as we were completing work for S1 and planning out how we would progress into Season 2. We wanted to keep the show grounded and gritty while amping up the action and urgency. Tony had a lot of story to cover in 12 episodes. The time jumps between the story arcs were something we discussed early on, and the need to be able to not only justify the time jumps but also to provide the audience with a visual bridge to tell the stories that happened off-screen.
    Tony would look to us to guide and use our institutional knowledge of Star Wars to help keep him honest within the universe. He, similarly, challenged us to maintain our focus and ensure that the visual tone of the series serviced the story.
    Tony Gilroy and Genevieve O’Reilly on the set of Lucasfilm’s ANDOR Season 2, exclusively on Disney+. Photo by Des Willie. ©2024 Lucasfilm Ltd. & TM. All Rights Reserved.
    As you’ve returned for Season 2, have there been any significant changes or new challenges compared to the first season? How has the production evolved in terms of VFX and storytelling?: The return of nearly all key creatives from Season 1, both internally and at our VFX vendors, was a massive advantage. This continuity built immediate trust and an efficient shorthand. It made everyone comfortable to be more ambitious, allowing us to significantly expand the scope and complexity of the visual effects for Season 2.: We had all new directors this season. The rest of the core creative and production teams stayed consistent from Season 1. We worked to keep the creative process as seamless from Season 1 as we could while working with the new directors and adapting to their process while incorporating their individual skills and ideas that they brought to the table.
    This season we were able to work on location much more than on Season 1. That provided us with a great opportunity to build out the connective tissue between real world constraints and the virtual world we were creating. In the case with Senate Plaza in Coruscant we also had to stay consistent with what has previously been established, so that was a fun challenge.

    How did you go about dividing the workload between the various VFX studios?: I can give an answer, but probably better if TJ does.: We were very specific about how we divided the work on this series. We started, as we usually do, with a detailed breakdown of work for the 12 episodes. Mohen and I then discussed a logical split based on type of work, specific elements, and areas of commonality for particular environments. While cost is always a consideration, we focused our vendor casting around the creative strengths of the studios we were partnering with on the project.
    ILM is in the DNA of Star Wars, so we knew we’d want to be working with them on some of the most complex work. We chose ILM for the opening TIE Avenger hangar sequence and subsequent escape. We utilized ILM for work in every episode, including the CG KX/K2 work, but their main focus was on Coruscant, and they had substantial work in the ninth episode for the big Senate escape sequence. Hybride‘s chief focus was on Palmo Plaza and the Ghorman environments. They dealt with everything Ghorman on the ground from the street extensions and the truck crash, through the Ghorman massacre, sharing shots with ILM with the KX work. For Scanline VFX, we identified three primary areas of focus: the work on Mina Rau, Chandrila, and Yavin.

    The TIE Fighter sequence in Season 2 is a standout moment. Can you walk us through the VFX process for that particular sequence? What were some of the technical challenges you faced, and how did you work to make it as intense and realistic as possible?: This is a sequence I’m particularly proud of as VFX played a central role in the sequence coming together from start to finish. We were intimately involved from the initial conversations of the idea for the sequence. Mohen created digital storyboards and we pitched ideas for the sequence to Tony Gilroy. Once we had a sense of the creative brief, we started working with Luke Hulland the art department on the physical hangar set and brought it into previz for virtual scouting. With Jen Kitchingwe had a virtual camera set up that allowed us to virtually use the camera and lenses we would have on our shoot. We blocked out shots with Ariel Kleimanand Christophe Nuyens. This went back through previz and techviz so we could meticulously chart out our plan for the shoot.
    Keeping with our ethos of grounding everything in reality, we wanted to use as much of the practical set as possible. We needed to be sure our handoffs between physical and virtual were seamless – Luke Murphy, our SFX Supervisor, worked closely with us in planning elements and practical effects to be used on the day. Over the course of the shoot, we also had the challenge of the flashing red alarm that goes off once the TIE Avenger crashes into the ceiling. We established the look of the red alarm with Christophe and the lighting team, and then needed to work out the timing. For that, we collaborated with editor John Gilroy to ensure we knew precisely when each alarm beat would flash. Once we had all the pieces, we turned the sequence over to Scott Pritchard and ILM to execute the work.

    Scott Pritchard: This sequence was split between our London and Vancouver studios, with London taking everything inside the hangar, and Vancouver handling the exterior shots after Cassian blasts through the hangar door. We started from a strong foundation thanks to two factors: the amazing hangar set and TIE Avenger prop; and having full sequence previs. The hangar set was built about 2/3 of its overall length, which our environments team extended, adding the hangar doors at the end and also a view to the exterior environment. Extending the hangar was most of the work in the sequence up until the TIE starts moving, where we switched to our CG TIE. As with Season 1, we used a blend of physical SFX work for the pyro effects, augmenting with CG sparks. As TJ mentioned, the hangar’s red warning lighting was a challenge as it had to pulse in a regular tempo throughout the edit. Only the close-up shots of Cassian in the cockpit had practical red lighting, so complex lighting and comp work were required to achieve a consistent look throughout the sequence. ILM London’s compositing supervisor, Claudio Bassi, pitched the idea that as the TIE hit various sections of the ceiling, it would knock out the ceiling lights, progressively darkening the hangar. It was a great motif that helped heighten the tension as we get towards the moment where Cassian faces the range trooper.
    Once we cut to outside the hangar, ILM Vancouver took the reins. The exterior weather conditions were briefed to us as ‘polar night’ – it’s never entirely dark, instead there’s a consistent low-level ambient light. This was a challenge as we had to consider the overall tonal range of each shot and make sure there was enough contrast to guide the viewer’s eye to where it needed to be, not just on individual shots but looking at eye-trace as one shot cut to another. A key moment is when Cassian fires rockets into an ice arch, leading to its collapse. The ice could very easily look like rock, so we needed to see the light from the rocket’s explosions scattered inside the ice. It required detailed work in both lighting and comp to get to the right look. Again, as the ice arch starts to collapse and the two chase TIE Advanced ships get taken out, it needed careful balancing work to make sure viewers could read the situation and the action in each shot.
    The world-building in Andor is impressive, especially with iconic locations like Coruscant and Yavin. How did you approach creating these environments and ensuring they felt as authentic as possible to the Star Wars universe?: Our approach to world-building in Andor relied on a close collaboration between the VFX team and Luke Hull, the production designer, along with his art department. This partnership was established in Season 1 and continued for Season 2. Having worked on many Star Wars projects over the decades, VFX was often able to provide inspiration and references for art department designs.
    For example, for locations like Yavin and Coruscant, VFX provided the art department with existing 3D assets: the Yavin temple model from Rogue One and the Coruscant city layout around the Senate from the Prequel films. The Coruscant model, in particular, involved some ‘digital archaeology.’ The data was stored on tapes from around 2001 and consisted of NURBS models in an older Softimage file format. To make them usable, we had to acquire old Softimage 2010 and XSI licenses, install them on a Windows 7 PC, and then convert the data to the FBX format that current software can read.
    Supplying these original layouts to the art department enabled them to create their new designs and integrate our real-world shooting locations while maintaining consistency with the worlds seen in previous Star Wars productions. Given that Andor is set approximately twenty years after the Prequels, we also had the opportunity to update and adjust layouts and designs to reflect that time difference and realize the specific creative vision Luke Hull and Tony Gilroy had for the show.

    StageCraft technology is a huge part of the production. How did you use it to bring these complex environments, like Coruscant and Yavin, to life? What are the main benefits and limitations of using StageCraft for these settings?: Our use of StageCraft for Season 2 was similar to that on Season 1. We used it to create the exterior views through the windows of the Safehouse on Coruscant. As with our work for the Chandrillan Embassy in Season 1, we created four different times of day/weather conditions. One key difference was that the foreground buildings were much closer to the Safehouse, so we devised three projection points, which would ensure that the perspective of the exterior was correct for each room. On set we retained a large amount of flexibility with our content. We had our own video feed from the unit cameras, and we were able to selectively isolate and grade sections of the city based on their view through the camera. Working in context like this meant that we could make any final tweaks while each shot was being set up and rehearsed.
    While we were shooting a scene set at night, the lighting team rigged a series of lights running above the windows that, when triggered, would flash in sequence, casting a moving light along the floor and walls of the set, as if from a moving car above. I thought we could use the LED wall to do something similar from below, catching highlights on the metal pipework that ran across the ceiling. During a break in shooting, I hatched a plan with colour operator Melissa Goddard, brain bar supervisor Ben Brown, and we came up with a moving rectangular section on the LED wall which matched the practical lights for speed, intensity and colour temperature. We set up two buttons on our iPad to trigger the ‘light’ to move in either direction. We demoed the idea to the DP after lunch, who loved it, and so when it came to shoot, he could either call from a car above from the practical lights, or a car below from the LEDs.: Just to clarify – the Coruscant Safehouse set was the only application of Stagecraft LED screens in Season 2. All other Coruscant scenes relied on urban location photography or stage sets with traditional blue screen extensions.
    The various Yavin locations were achieved primarily with large backlot sets at Longcross Studios. A huge set of the airfield, temple entrance and partial temple interior was extended by Scanline VFX, led by Sue Rowe, in post, creating the iconic temple exterior from A New Hope. VFX also added flying and parked spaceships, and augmented the surrounding forest to feel more tropical.

    Andor blends CG with actual real-world locations. Can you share how you balanced these two elements, especially when creating large-scale environments or specific landscapes that felt grounded in reality?: A great example of this is the environment around the Senate. The plates for this were shot in the City of Arts & Sciences in Valencia. Blending the distinctive Calatrava architecture with well-known Star Wars buildings like the Senate was an amazing challenge, it wasn’t immediately clear how the two could sit alongside each other. Our Vancouver team, led by Tania Richard, did an incredible job taking motifs and details from the Valencia buildings and incorporating them into the Senate building on both large and small scales, but still contiguous with the overall Senate design. The production team was ingenious in how they used each of the Valencia buildings to represent many locations around the Senate and the surrounding areas. For example, the Science Museum was used for the walkway where Cassian shoots Kloris, the main entrance to the Senate, and the interior of the Senate Atrium. It was a major challenge ensuring that all those locations were represented across the larger environment, so viewers understood the geography of the scene, but also blended with the design language of their immediate surroundings.
    Everything in the Senate Plaza had a purpose. When laying out the overall layout of the Plaza, we considered aspects such as how far Senators would realistically walk from their transports to the Senate entrance. When extending the Plaza beyond the extents of the City of Arts & Sciences, we used Calatrava architecture from elsewhere. The bridge just in front of the Senatorial Office Building is based on a Calatrava-designed bridge in my home city of Dublin. As we reach the furthest extents of the Senate Plaza, we begin blending in more traditional Coruscant architecture so as to soften the transition to the far background.

    Coruscant is such a pivotal location in Star Wars. How did you approach creating such a vast, densely populated urban environment? What were the key visual cues that made it feel alive and realistic?: Our approach to Coruscant in Season 2 built upon what we established in the first season: primarily, shooting in real-world city locations whenever feasible. The stunning Calatrava architecture at Valencia’s City of Arts and Sciences, for instance, served as the foundation for the Senate exterior and other affluent districts. For the city’s grittier neighborhoods, we filmed in urban environments in London, like the Barbican and areas around Twickenham Stadium.
    Filming in these actual city locations provided a strong, realistic basis for the cinematography, lighting, and overall mood of each environment. This remained true even when VFX later modified large portions of the frame with Star Wars architecture. This methodology gave the director and DP confidence on set that their vision would carry through to the final shot. Our art department and VFX concept artists then created numerous paintovers based on plates and location photography, offering clear visual guides for transforming each real location into its Coruscant counterpart during post-production. For the broader cityscapes, we took direct inspiration from 3D street maps of cities such as Tokyo, New York, and Hong Kong. We would exaggerate the scale and replace existing buildings with our Coruscant designs while preserving the fundamental urban patterns.

    When it comes to creating environments like Yavin, which has a very natural, jungle-like aesthetic, how do you ensure the VFX stays true to the organic feel of the location while still maintaining the science-fiction elements of Star Wars?: Nearly all of the Yavin jungle scenes were shot in a large wooded area that is part of Longcross Studios. The greens and art departments did an amazing job augmenting the natural forest with tropical plants and vines. The scenes featuring the two rebel factions in the clearing were captured almost entirely in-camera, with VFX primarily adding blaster fire, augmenting the crashed ship, and painting out equipment. Only the shots of the TIE Avenger landing and taking off, as well as the giant creature snatching the two rebels, featured significant CG elements. The key elements connecting these practical locations back to the Yavin established in A New Hope and Rogue One were the iconic temples. The establishing shots approaching the main temple in episode 7 utilized plate photography from South America, which had been shot for another Disney project but ultimately not used. Other aerial shots, such as the U-Wing flying above the jungle in episode 12, were fully computer-generated by ILM.
    K-2SO is a beloved character, and his return is highly anticipated. What can you tell us about the process of bringing him back to life with VFX in Season 2? What new challenges did this bring compared to his original appearance?: We had already updated a regular KX droid for the scene on Niamos in Season 1, so much of the work to update the asset to the latest pipeline requirements had already been done. We now needed to switch over to the textures & shaders specific to K2, and give them the same updates. Unique to Series 2 was that there were a number of scenes involving both a practical and a digital K2 – when he gets crushed on Ghorman in episode 8, and then ‘rebooted’ on Yavin in episode 9. The practical props were a lot more beaten up than our hero asset, so we made bespoke variants to match the practical droid in each sequence. Additionally, for the reboot sequence on Yavin, we realised pretty quickly that the extreme movements meant that we were seeing into areas that previously had not required much detail – for instance, underneath his shoulder armour. We came up with a shoulder joint design that allowed for the required movement while also staying mechanically correct. When we next see him in Episode 10, a year has passed, and he is now the K-2SO as we know him from Rogue One.

    K-2SO has a unique design, particularly in his facial expressions and movement. How did you approach animating him for Season 2, and were there any specific changes or updates made to his character model or animation?: Following Rogue One, Mohen made detailed records of the takeaways learned from creating K-2SO, and he kindly shared these notes with us early on in the show. They were incredibly helpful in tuning the fine details of the animation. Our animation team, led by Mathieu Vig, did a superb job of identifying the nuances of Alan’s performance and making sure they came across. There were plenty of pitfalls to avoid – for instance, the curve to his upper back meant that it was very easy for his neck to look hyperextended. We also had to be very careful with his eyes, as they’re sources of light, they could very easily look cartoonish if they moved around too much. Dialling in just the right amount of eye movement was crucial to a good performance.
    As the eyes also had several separate emissive and reflective components, they required delicate balancing in the comp on a per-shot basis. Luckily, we had great reference from Rogue One to be able to dial in the eyes to suit both the lighting of a shot but also its performance details. One Rogue One shot in particular, where he says ‘Your behavior, Jyn Erso, is continually unexpected’, was a particularly good reference for how we could balance the lights in his eyes to, in effect, enlarge his pupils, and give him a softer expression.
    K-2SO also represented my first opportunity to work with ILM’s new studio in Mumbai. Amongst other shots, they took on the ‘hallway fight’ sequence in Episode 12 where K2 dispatches Heert and his troopers, and they did a fantastic job from animation right through to final comp.
    K-2SO’s interactions with the live-action actors are key to his character. How did you work with the actors to ensure his presence felt as real and integrated as possible on screen, especially in terms of timing and reactions?: Alan Tudyk truly defined K-2SO in Rogue One, so his return for Andor Season 2 was absolutely critical to us. He was on set for every one of K2’s shots, performing on stilts and in a performance capture suit. This approach was vital because it gave Alan complete ownership of the character’s physical performance and, crucially, allowed for spontaneous, genuine interactions with the other actors, particularly Diego Luna. Witnessing Alan and Diego reunite on camera was fantastic; that unique chemistry and humor we loved in Rogue One was instantly palpable.
    In post-production, our VFX animators then meticulously translated every nuance of Alan’s on-set performance to the digital K-2SO model. It’s a detailed process that still requires artistic expertise. For instance, K2’s facial structure is largely static, so direct translation of Alan’s facial expressions isn’t always possible. In these cases, our animators found creative solutions – translating a specific facial cue from Alan into a subtle head tilt or a particular eye movement for K2, always ensuring the final animation remained true to the intent and spirit of Alan’s original performance.

    Were there any memorable moments or scenes from the series that you found particularly rewarding or challenging to work on from a visual effects standpoint?: The Plaza sequence in episode 8, which runs for about 23 minutes, stands out as particularly memorable – both for its challenges and its rewarding outcome. Just preparing for it was a daunting task. Its successful execution hinged on incredibly tight collaboration between numerous departments: stunts, creature effects, special effects, the camera department, our tireless greenscreens crew, and of course, VFX. The stunts team, under Marc Mailley, drove the choreography of all the action.
    Our On-Set VFX Supervisor, Marcus Dryden, was instrumental. He worked hand-in-glove with the director, DP, and assistant directors to ensure we meticulously captured all the necessary elements. This included everything from crowd replication plates and practical effects elements to the performances of stunt teams and creature actors, plus all the crucial on-set data. The shoot for this sequence alone took over three weeks.
    Hybride, under the leadership of Joseph Kasparian and Olivier Beaulieu, then completed the environments, added the blaster fire, and augmented the special effects in post-production, with ILM contributing the KX droids that wreak havoc in the plaza.: I agree with Mohen here, for me the Ghorman Plaza episode is the most rewarding to have worked on. It required us to weave our work into that of so many other departments – stunts, sfx, costume – to name just a few. When we received the plates, to see the quality of the work that had gone into the photography alone was inspirational for me and the ILM crew. It’s gratifying to be part of a team where you know that everyone involved is on top of their game. And of course all that is underpinned by writing of that calibre from Tony Gilroy and his team – it just draws everything together.
    From a pure design viewpoint, I’m also very proud of the work that Tania Richard and her ILM Vancouver crew did for the Senate shots. As I mentioned before, it was a hugely challenging environment not just logistically, but also in bringing together two very distinctive architectural languages, and they made them work in tandem beautifully.

    Looking back on the project, what aspects of the visual effects are you most proud of?: I’m incredibly proud of this entire season. The seamless collaboration we had between Visual Effects and every other department made the work, while challenging, an absolute joy to execute. Almost all of the department heads returned from the first season, which provided a shorthand shortcut as we started the show with implicit trust and understanding of what we were looking to achieve.
    The work is beautiful, and the commitment of our crew and vendors has been unwavering. I’m most proud of the effort and care that each individual person contributed to the show and the fact that we went into the project with a common goal and were, as a team, able to showcase the vision that we, and Tony, had for the series.: I’m really proud of the deep integration of the visual effects – not just visually, but fundamentally within the filmmaking process and storytelling. Tony invited VFX to be a key participant in shaping the story, from early story drafts through to the final color grade. Despite the scale and spectacle of many sequences, the VFX always feel purposeful, supporting the narrative and characters rather than distracting from them.
    This was significantly bolstered by the return of a large number of key creatives from Season 1, both within the production and at our VFX vendors. That shared experience and established understanding of Tony’s vision for Andor were invaluable in making the VFX an organic part of the show.: I could not be prouder of the entire ILM team for everything they brought to their work on the show. Working across three sites, Andor was a truly global effort, and I particularly enjoyed how each site took complete ownership of their work. It was a privilege working with all of them and contributing to such an exceptional series.

    VFX progression frame Lucasfilm’s ANDOR Season 2, exclusively on Disney+. Photo courtesy of Lucasfilm. ©2025 Lucasfilm Ltd. & TM. All Rights Reserved.
    How long have you worked on this show?: This show has been an unbelievable journey. Season 2 alone was nearly 3 years. We wrapped Season 2 in January of 2025. We started prepping Season 2 in February 2022, while we were still in post for Season 1.
    I officially started working on Season 1 early in 2019 while it was still being developed. So that’s 6 years of time working on Andor. Mohen and I both also worked on Rogue One, so if you factor in the movie, which was shooting in 2015, that’s nearly ten years of work within this part of the Star Wars universe.: I started on the project during early development in the summer of 2019 and finished in December of 2024.: I started on Season 1 in September 2020 and finished up on Season 2 in December 2024.
    What’s the VFX shots count?: We had a grand total of 4,124 shots over the course of our 12 episodes. Outside of Industrial Light & Magic, which oversaw the show, we also partnered with Hybride, Scanline, Soho VFX, and Midas VFX.
    What is your next project?: You’ll have to wait and see!: Unfortunately, I can’t say just yet either!
    A big thanks for your time.
    WANT TO KNOW MORE?ILM: Dedicated page about Andor – Season 2 on ILM website.
    © Vincent Frei – The Art of VFX – 2025
    #andor #season #mohen #leo #production
    Andor – Season 2: Mohen Leo (Production VFX Supervisor), TJ Falls (Production VFX Producer) and Scott Pritchard (ILM VFX Supervisor)
    Interviews Andor – Season 2: Mohen Leo, TJ Fallsand Scott PritchardBy Vincent Frei - 22/05/2025 In 2023, Mohen Leo, TJ Falls, and Scott Pritchardoffered an in-depth look at the visual effects of Andor’s first season. Now, the trio returns to share insights into their work on the second—and final—season of this critically acclaimed series. Tony Gilroy is known for his detailed approach to storytelling. Can you talk about how your collaboration with him evolved throughout the production of Andor? How does he influence the VFX decisions and the overall tone of the series? Mohen Leo: Our history with Tony, from Rogue One through the first season of Andor, had built a strong foundation of mutual trust. For Season 2, he involved VFX from the earliest story discussions, sharing outlines and inviting our ideas for key sequences. His priority is always to keep the show feeling grounded, ensuring that visual effects serve the story’s core and never become extraneous spectacle that might distract from the narrative. TJ Falls: Tony is a master storyteller. As Mohen mentioned, we have a great history with Tony from Rogue One and through Season 1 of Andor. We had a great rapport with Tony, and he had implicit trust in us. We began prepping Season 2 while we were in post for Season 1. We were having ongoing conversations with Tony and Production Designer Luke Hull as we were completing work for S1 and planning out how we would progress into Season 2. We wanted to keep the show grounded and gritty while amping up the action and urgency. Tony had a lot of story to cover in 12 episodes. The time jumps between the story arcs were something we discussed early on, and the need to be able to not only justify the time jumps but also to provide the audience with a visual bridge to tell the stories that happened off-screen. Tony would look to us to guide and use our institutional knowledge of Star Wars to help keep him honest within the universe. He, similarly, challenged us to maintain our focus and ensure that the visual tone of the series serviced the story. Tony Gilroy and Genevieve O’Reilly on the set of Lucasfilm’s ANDOR Season 2, exclusively on Disney+. Photo by Des Willie. ©2024 Lucasfilm Ltd. & TM. All Rights Reserved. As you’ve returned for Season 2, have there been any significant changes or new challenges compared to the first season? How has the production evolved in terms of VFX and storytelling?: The return of nearly all key creatives from Season 1, both internally and at our VFX vendors, was a massive advantage. This continuity built immediate trust and an efficient shorthand. It made everyone comfortable to be more ambitious, allowing us to significantly expand the scope and complexity of the visual effects for Season 2.: We had all new directors this season. The rest of the core creative and production teams stayed consistent from Season 1. We worked to keep the creative process as seamless from Season 1 as we could while working with the new directors and adapting to their process while incorporating their individual skills and ideas that they brought to the table. This season we were able to work on location much more than on Season 1. That provided us with a great opportunity to build out the connective tissue between real world constraints and the virtual world we were creating. In the case with Senate Plaza in Coruscant we also had to stay consistent with what has previously been established, so that was a fun challenge. How did you go about dividing the workload between the various VFX studios?: I can give an answer, but probably better if TJ does.: We were very specific about how we divided the work on this series. We started, as we usually do, with a detailed breakdown of work for the 12 episodes. Mohen and I then discussed a logical split based on type of work, specific elements, and areas of commonality for particular environments. While cost is always a consideration, we focused our vendor casting around the creative strengths of the studios we were partnering with on the project. ILM is in the DNA of Star Wars, so we knew we’d want to be working with them on some of the most complex work. We chose ILM for the opening TIE Avenger hangar sequence and subsequent escape. We utilized ILM for work in every episode, including the CG KX/K2 work, but their main focus was on Coruscant, and they had substantial work in the ninth episode for the big Senate escape sequence. Hybride‘s chief focus was on Palmo Plaza and the Ghorman environments. They dealt with everything Ghorman on the ground from the street extensions and the truck crash, through the Ghorman massacre, sharing shots with ILM with the KX work. For Scanline VFX, we identified three primary areas of focus: the work on Mina Rau, Chandrila, and Yavin. The TIE Fighter sequence in Season 2 is a standout moment. Can you walk us through the VFX process for that particular sequence? What were some of the technical challenges you faced, and how did you work to make it as intense and realistic as possible?: This is a sequence I’m particularly proud of as VFX played a central role in the sequence coming together from start to finish. We were intimately involved from the initial conversations of the idea for the sequence. Mohen created digital storyboards and we pitched ideas for the sequence to Tony Gilroy. Once we had a sense of the creative brief, we started working with Luke Hulland the art department on the physical hangar set and brought it into previz for virtual scouting. With Jen Kitchingwe had a virtual camera set up that allowed us to virtually use the camera and lenses we would have on our shoot. We blocked out shots with Ariel Kleimanand Christophe Nuyens. This went back through previz and techviz so we could meticulously chart out our plan for the shoot. Keeping with our ethos of grounding everything in reality, we wanted to use as much of the practical set as possible. We needed to be sure our handoffs between physical and virtual were seamless – Luke Murphy, our SFX Supervisor, worked closely with us in planning elements and practical effects to be used on the day. Over the course of the shoot, we also had the challenge of the flashing red alarm that goes off once the TIE Avenger crashes into the ceiling. We established the look of the red alarm with Christophe and the lighting team, and then needed to work out the timing. For that, we collaborated with editor John Gilroy to ensure we knew precisely when each alarm beat would flash. Once we had all the pieces, we turned the sequence over to Scott Pritchard and ILM to execute the work. Scott Pritchard: This sequence was split between our London and Vancouver studios, with London taking everything inside the hangar, and Vancouver handling the exterior shots after Cassian blasts through the hangar door. We started from a strong foundation thanks to two factors: the amazing hangar set and TIE Avenger prop; and having full sequence previs. The hangar set was built about 2/3 of its overall length, which our environments team extended, adding the hangar doors at the end and also a view to the exterior environment. Extending the hangar was most of the work in the sequence up until the TIE starts moving, where we switched to our CG TIE. As with Season 1, we used a blend of physical SFX work for the pyro effects, augmenting with CG sparks. As TJ mentioned, the hangar’s red warning lighting was a challenge as it had to pulse in a regular tempo throughout the edit. Only the close-up shots of Cassian in the cockpit had practical red lighting, so complex lighting and comp work were required to achieve a consistent look throughout the sequence. ILM London’s compositing supervisor, Claudio Bassi, pitched the idea that as the TIE hit various sections of the ceiling, it would knock out the ceiling lights, progressively darkening the hangar. It was a great motif that helped heighten the tension as we get towards the moment where Cassian faces the range trooper. Once we cut to outside the hangar, ILM Vancouver took the reins. The exterior weather conditions were briefed to us as ‘polar night’ – it’s never entirely dark, instead there’s a consistent low-level ambient light. This was a challenge as we had to consider the overall tonal range of each shot and make sure there was enough contrast to guide the viewer’s eye to where it needed to be, not just on individual shots but looking at eye-trace as one shot cut to another. A key moment is when Cassian fires rockets into an ice arch, leading to its collapse. The ice could very easily look like rock, so we needed to see the light from the rocket’s explosions scattered inside the ice. It required detailed work in both lighting and comp to get to the right look. Again, as the ice arch starts to collapse and the two chase TIE Advanced ships get taken out, it needed careful balancing work to make sure viewers could read the situation and the action in each shot. The world-building in Andor is impressive, especially with iconic locations like Coruscant and Yavin. How did you approach creating these environments and ensuring they felt as authentic as possible to the Star Wars universe?: Our approach to world-building in Andor relied on a close collaboration between the VFX team and Luke Hull, the production designer, along with his art department. This partnership was established in Season 1 and continued for Season 2. Having worked on many Star Wars projects over the decades, VFX was often able to provide inspiration and references for art department designs. For example, for locations like Yavin and Coruscant, VFX provided the art department with existing 3D assets: the Yavin temple model from Rogue One and the Coruscant city layout around the Senate from the Prequel films. The Coruscant model, in particular, involved some ‘digital archaeology.’ The data was stored on tapes from around 2001 and consisted of NURBS models in an older Softimage file format. To make them usable, we had to acquire old Softimage 2010 and XSI licenses, install them on a Windows 7 PC, and then convert the data to the FBX format that current software can read. Supplying these original layouts to the art department enabled them to create their new designs and integrate our real-world shooting locations while maintaining consistency with the worlds seen in previous Star Wars productions. Given that Andor is set approximately twenty years after the Prequels, we also had the opportunity to update and adjust layouts and designs to reflect that time difference and realize the specific creative vision Luke Hull and Tony Gilroy had for the show. StageCraft technology is a huge part of the production. How did you use it to bring these complex environments, like Coruscant and Yavin, to life? What are the main benefits and limitations of using StageCraft for these settings?: Our use of StageCraft for Season 2 was similar to that on Season 1. We used it to create the exterior views through the windows of the Safehouse on Coruscant. As with our work for the Chandrillan Embassy in Season 1, we created four different times of day/weather conditions. One key difference was that the foreground buildings were much closer to the Safehouse, so we devised three projection points, which would ensure that the perspective of the exterior was correct for each room. On set we retained a large amount of flexibility with our content. We had our own video feed from the unit cameras, and we were able to selectively isolate and grade sections of the city based on their view through the camera. Working in context like this meant that we could make any final tweaks while each shot was being set up and rehearsed. While we were shooting a scene set at night, the lighting team rigged a series of lights running above the windows that, when triggered, would flash in sequence, casting a moving light along the floor and walls of the set, as if from a moving car above. I thought we could use the LED wall to do something similar from below, catching highlights on the metal pipework that ran across the ceiling. During a break in shooting, I hatched a plan with colour operator Melissa Goddard, brain bar supervisor Ben Brown, and we came up with a moving rectangular section on the LED wall which matched the practical lights for speed, intensity and colour temperature. We set up two buttons on our iPad to trigger the ‘light’ to move in either direction. We demoed the idea to the DP after lunch, who loved it, and so when it came to shoot, he could either call from a car above from the practical lights, or a car below from the LEDs.: Just to clarify – the Coruscant Safehouse set was the only application of Stagecraft LED screens in Season 2. All other Coruscant scenes relied on urban location photography or stage sets with traditional blue screen extensions. The various Yavin locations were achieved primarily with large backlot sets at Longcross Studios. A huge set of the airfield, temple entrance and partial temple interior was extended by Scanline VFX, led by Sue Rowe, in post, creating the iconic temple exterior from A New Hope. VFX also added flying and parked spaceships, and augmented the surrounding forest to feel more tropical. Andor blends CG with actual real-world locations. Can you share how you balanced these two elements, especially when creating large-scale environments or specific landscapes that felt grounded in reality?: A great example of this is the environment around the Senate. The plates for this were shot in the City of Arts & Sciences in Valencia. Blending the distinctive Calatrava architecture with well-known Star Wars buildings like the Senate was an amazing challenge, it wasn’t immediately clear how the two could sit alongside each other. Our Vancouver team, led by Tania Richard, did an incredible job taking motifs and details from the Valencia buildings and incorporating them into the Senate building on both large and small scales, but still contiguous with the overall Senate design. The production team was ingenious in how they used each of the Valencia buildings to represent many locations around the Senate and the surrounding areas. For example, the Science Museum was used for the walkway where Cassian shoots Kloris, the main entrance to the Senate, and the interior of the Senate Atrium. It was a major challenge ensuring that all those locations were represented across the larger environment, so viewers understood the geography of the scene, but also blended with the design language of their immediate surroundings. Everything in the Senate Plaza had a purpose. When laying out the overall layout of the Plaza, we considered aspects such as how far Senators would realistically walk from their transports to the Senate entrance. When extending the Plaza beyond the extents of the City of Arts & Sciences, we used Calatrava architecture from elsewhere. The bridge just in front of the Senatorial Office Building is based on a Calatrava-designed bridge in my home city of Dublin. As we reach the furthest extents of the Senate Plaza, we begin blending in more traditional Coruscant architecture so as to soften the transition to the far background. Coruscant is such a pivotal location in Star Wars. How did you approach creating such a vast, densely populated urban environment? What were the key visual cues that made it feel alive and realistic?: Our approach to Coruscant in Season 2 built upon what we established in the first season: primarily, shooting in real-world city locations whenever feasible. The stunning Calatrava architecture at Valencia’s City of Arts and Sciences, for instance, served as the foundation for the Senate exterior and other affluent districts. For the city’s grittier neighborhoods, we filmed in urban environments in London, like the Barbican and areas around Twickenham Stadium. Filming in these actual city locations provided a strong, realistic basis for the cinematography, lighting, and overall mood of each environment. This remained true even when VFX later modified large portions of the frame with Star Wars architecture. This methodology gave the director and DP confidence on set that their vision would carry through to the final shot. Our art department and VFX concept artists then created numerous paintovers based on plates and location photography, offering clear visual guides for transforming each real location into its Coruscant counterpart during post-production. For the broader cityscapes, we took direct inspiration from 3D street maps of cities such as Tokyo, New York, and Hong Kong. We would exaggerate the scale and replace existing buildings with our Coruscant designs while preserving the fundamental urban patterns. When it comes to creating environments like Yavin, which has a very natural, jungle-like aesthetic, how do you ensure the VFX stays true to the organic feel of the location while still maintaining the science-fiction elements of Star Wars?: Nearly all of the Yavin jungle scenes were shot in a large wooded area that is part of Longcross Studios. The greens and art departments did an amazing job augmenting the natural forest with tropical plants and vines. The scenes featuring the two rebel factions in the clearing were captured almost entirely in-camera, with VFX primarily adding blaster fire, augmenting the crashed ship, and painting out equipment. Only the shots of the TIE Avenger landing and taking off, as well as the giant creature snatching the two rebels, featured significant CG elements. The key elements connecting these practical locations back to the Yavin established in A New Hope and Rogue One were the iconic temples. The establishing shots approaching the main temple in episode 7 utilized plate photography from South America, which had been shot for another Disney project but ultimately not used. Other aerial shots, such as the U-Wing flying above the jungle in episode 12, were fully computer-generated by ILM. K-2SO is a beloved character, and his return is highly anticipated. What can you tell us about the process of bringing him back to life with VFX in Season 2? What new challenges did this bring compared to his original appearance?: We had already updated a regular KX droid for the scene on Niamos in Season 1, so much of the work to update the asset to the latest pipeline requirements had already been done. We now needed to switch over to the textures & shaders specific to K2, and give them the same updates. Unique to Series 2 was that there were a number of scenes involving both a practical and a digital K2 – when he gets crushed on Ghorman in episode 8, and then ‘rebooted’ on Yavin in episode 9. The practical props were a lot more beaten up than our hero asset, so we made bespoke variants to match the practical droid in each sequence. Additionally, for the reboot sequence on Yavin, we realised pretty quickly that the extreme movements meant that we were seeing into areas that previously had not required much detail – for instance, underneath his shoulder armour. We came up with a shoulder joint design that allowed for the required movement while also staying mechanically correct. When we next see him in Episode 10, a year has passed, and he is now the K-2SO as we know him from Rogue One. K-2SO has a unique design, particularly in his facial expressions and movement. How did you approach animating him for Season 2, and were there any specific changes or updates made to his character model or animation?: Following Rogue One, Mohen made detailed records of the takeaways learned from creating K-2SO, and he kindly shared these notes with us early on in the show. They were incredibly helpful in tuning the fine details of the animation. Our animation team, led by Mathieu Vig, did a superb job of identifying the nuances of Alan’s performance and making sure they came across. There were plenty of pitfalls to avoid – for instance, the curve to his upper back meant that it was very easy for his neck to look hyperextended. We also had to be very careful with his eyes, as they’re sources of light, they could very easily look cartoonish if they moved around too much. Dialling in just the right amount of eye movement was crucial to a good performance. As the eyes also had several separate emissive and reflective components, they required delicate balancing in the comp on a per-shot basis. Luckily, we had great reference from Rogue One to be able to dial in the eyes to suit both the lighting of a shot but also its performance details. One Rogue One shot in particular, where he says ‘Your behavior, Jyn Erso, is continually unexpected’, was a particularly good reference for how we could balance the lights in his eyes to, in effect, enlarge his pupils, and give him a softer expression. K-2SO also represented my first opportunity to work with ILM’s new studio in Mumbai. Amongst other shots, they took on the ‘hallway fight’ sequence in Episode 12 where K2 dispatches Heert and his troopers, and they did a fantastic job from animation right through to final comp. K-2SO’s interactions with the live-action actors are key to his character. How did you work with the actors to ensure his presence felt as real and integrated as possible on screen, especially in terms of timing and reactions?: Alan Tudyk truly defined K-2SO in Rogue One, so his return for Andor Season 2 was absolutely critical to us. He was on set for every one of K2’s shots, performing on stilts and in a performance capture suit. This approach was vital because it gave Alan complete ownership of the character’s physical performance and, crucially, allowed for spontaneous, genuine interactions with the other actors, particularly Diego Luna. Witnessing Alan and Diego reunite on camera was fantastic; that unique chemistry and humor we loved in Rogue One was instantly palpable. In post-production, our VFX animators then meticulously translated every nuance of Alan’s on-set performance to the digital K-2SO model. It’s a detailed process that still requires artistic expertise. For instance, K2’s facial structure is largely static, so direct translation of Alan’s facial expressions isn’t always possible. In these cases, our animators found creative solutions – translating a specific facial cue from Alan into a subtle head tilt or a particular eye movement for K2, always ensuring the final animation remained true to the intent and spirit of Alan’s original performance. Were there any memorable moments or scenes from the series that you found particularly rewarding or challenging to work on from a visual effects standpoint?: The Plaza sequence in episode 8, which runs for about 23 minutes, stands out as particularly memorable – both for its challenges and its rewarding outcome. Just preparing for it was a daunting task. Its successful execution hinged on incredibly tight collaboration between numerous departments: stunts, creature effects, special effects, the camera department, our tireless greenscreens crew, and of course, VFX. The stunts team, under Marc Mailley, drove the choreography of all the action. Our On-Set VFX Supervisor, Marcus Dryden, was instrumental. He worked hand-in-glove with the director, DP, and assistant directors to ensure we meticulously captured all the necessary elements. This included everything from crowd replication plates and practical effects elements to the performances of stunt teams and creature actors, plus all the crucial on-set data. The shoot for this sequence alone took over three weeks. Hybride, under the leadership of Joseph Kasparian and Olivier Beaulieu, then completed the environments, added the blaster fire, and augmented the special effects in post-production, with ILM contributing the KX droids that wreak havoc in the plaza.: I agree with Mohen here, for me the Ghorman Plaza episode is the most rewarding to have worked on. It required us to weave our work into that of so many other departments – stunts, sfx, costume – to name just a few. When we received the plates, to see the quality of the work that had gone into the photography alone was inspirational for me and the ILM crew. It’s gratifying to be part of a team where you know that everyone involved is on top of their game. And of course all that is underpinned by writing of that calibre from Tony Gilroy and his team – it just draws everything together. From a pure design viewpoint, I’m also very proud of the work that Tania Richard and her ILM Vancouver crew did for the Senate shots. As I mentioned before, it was a hugely challenging environment not just logistically, but also in bringing together two very distinctive architectural languages, and they made them work in tandem beautifully. Looking back on the project, what aspects of the visual effects are you most proud of?: I’m incredibly proud of this entire season. The seamless collaboration we had between Visual Effects and every other department made the work, while challenging, an absolute joy to execute. Almost all of the department heads returned from the first season, which provided a shorthand shortcut as we started the show with implicit trust and understanding of what we were looking to achieve. The work is beautiful, and the commitment of our crew and vendors has been unwavering. I’m most proud of the effort and care that each individual person contributed to the show and the fact that we went into the project with a common goal and were, as a team, able to showcase the vision that we, and Tony, had for the series.: I’m really proud of the deep integration of the visual effects – not just visually, but fundamentally within the filmmaking process and storytelling. Tony invited VFX to be a key participant in shaping the story, from early story drafts through to the final color grade. Despite the scale and spectacle of many sequences, the VFX always feel purposeful, supporting the narrative and characters rather than distracting from them. This was significantly bolstered by the return of a large number of key creatives from Season 1, both within the production and at our VFX vendors. That shared experience and established understanding of Tony’s vision for Andor were invaluable in making the VFX an organic part of the show.: I could not be prouder of the entire ILM team for everything they brought to their work on the show. Working across three sites, Andor was a truly global effort, and I particularly enjoyed how each site took complete ownership of their work. It was a privilege working with all of them and contributing to such an exceptional series. VFX progression frame Lucasfilm’s ANDOR Season 2, exclusively on Disney+. Photo courtesy of Lucasfilm. ©2025 Lucasfilm Ltd. & TM. All Rights Reserved. How long have you worked on this show?: This show has been an unbelievable journey. Season 2 alone was nearly 3 years. We wrapped Season 2 in January of 2025. We started prepping Season 2 in February 2022, while we were still in post for Season 1. I officially started working on Season 1 early in 2019 while it was still being developed. So that’s 6 years of time working on Andor. Mohen and I both also worked on Rogue One, so if you factor in the movie, which was shooting in 2015, that’s nearly ten years of work within this part of the Star Wars universe.: I started on the project during early development in the summer of 2019 and finished in December of 2024.: I started on Season 1 in September 2020 and finished up on Season 2 in December 2024. What’s the VFX shots count?: We had a grand total of 4,124 shots over the course of our 12 episodes. Outside of Industrial Light & Magic, which oversaw the show, we also partnered with Hybride, Scanline, Soho VFX, and Midas VFX. What is your next project?: You’ll have to wait and see!: Unfortunately, I can’t say just yet either! A big thanks for your time. WANT TO KNOW MORE?ILM: Dedicated page about Andor – Season 2 on ILM website. © Vincent Frei – The Art of VFX – 2025 #andor #season #mohen #leo #production
    WWW.ARTOFVFX.COM
    Andor – Season 2: Mohen Leo (Production VFX Supervisor), TJ Falls (Production VFX Producer) and Scott Pritchard (ILM VFX Supervisor)
    Interviews Andor – Season 2: Mohen Leo (Production VFX Supervisor), TJ Falls (Production VFX Producer) and Scott Pritchard (ILM VFX Supervisor) By Vincent Frei - 22/05/2025 In 2023, Mohen Leo (Production VFX Supervisor), TJ Falls (Production VFX Producer), and Scott Pritchard (ILM VFX Supervisor) offered an in-depth look at the visual effects of Andor’s first season. Now, the trio returns to share insights into their work on the second—and final—season of this critically acclaimed series. Tony Gilroy is known for his detailed approach to storytelling. Can you talk about how your collaboration with him evolved throughout the production of Andor? How does he influence the VFX decisions and the overall tone of the series? Mohen Leo (ML): Our history with Tony, from Rogue One through the first season of Andor, had built a strong foundation of mutual trust. For Season 2, he involved VFX from the earliest story discussions, sharing outlines and inviting our ideas for key sequences. His priority is always to keep the show feeling grounded, ensuring that visual effects serve the story’s core and never become extraneous spectacle that might distract from the narrative. TJ Falls (TJ): Tony is a master storyteller. As Mohen mentioned, we have a great history with Tony from Rogue One and through Season 1 of Andor. We had a great rapport with Tony, and he had implicit trust in us. We began prepping Season 2 while we were in post for Season 1. We were having ongoing conversations with Tony and Production Designer Luke Hull as we were completing work for S1 and planning out how we would progress into Season 2. We wanted to keep the show grounded and gritty while amping up the action and urgency. Tony had a lot of story to cover in 12 episodes. The time jumps between the story arcs were something we discussed early on, and the need to be able to not only justify the time jumps but also to provide the audience with a visual bridge to tell the stories that happened off-screen. Tony would look to us to guide and use our institutional knowledge of Star Wars to help keep him honest within the universe. He, similarly, challenged us to maintain our focus and ensure that the visual tone of the series serviced the story. Tony Gilroy and Genevieve O’Reilly on the set of Lucasfilm’s ANDOR Season 2, exclusively on Disney+. Photo by Des Willie. ©2024 Lucasfilm Ltd. & TM. All Rights Reserved. As you’ve returned for Season 2, have there been any significant changes or new challenges compared to the first season? How has the production evolved in terms of VFX and storytelling? (ML): The return of nearly all key creatives from Season 1, both internally and at our VFX vendors, was a massive advantage. This continuity built immediate trust and an efficient shorthand. It made everyone comfortable to be more ambitious, allowing us to significantly expand the scope and complexity of the visual effects for Season 2. (TJ): We had all new directors this season. The rest of the core creative and production teams stayed consistent from Season 1. We worked to keep the creative process as seamless from Season 1 as we could while working with the new directors and adapting to their process while incorporating their individual skills and ideas that they brought to the table. This season we were able to work on location much more than on Season 1. That provided us with a great opportunity to build out the connective tissue between real world constraints and the virtual world we were creating. In the case with Senate Plaza in Coruscant we also had to stay consistent with what has previously been established, so that was a fun challenge. How did you go about dividing the workload between the various VFX studios? (ML): I can give an answer, but probably better if TJ does. (TJ): We were very specific about how we divided the work on this series. We started, as we usually do, with a detailed breakdown of work for the 12 episodes. Mohen and I then discussed a logical split based on type of work, specific elements, and areas of commonality for particular environments. While cost is always a consideration, we focused our vendor casting around the creative strengths of the studios we were partnering with on the project. ILM is in the DNA of Star Wars, so we knew we’d want to be working with them on some of the most complex work. We chose ILM for the opening TIE Avenger hangar sequence and subsequent escape. We utilized ILM for work in every episode, including the CG KX/K2 work, but their main focus was on Coruscant, and they had substantial work in the ninth episode for the big Senate escape sequence. Hybride‘s chief focus was on Palmo Plaza and the Ghorman environments. They dealt with everything Ghorman on the ground from the street extensions and the truck crash, through the Ghorman massacre, sharing shots with ILM with the KX work. For Scanline VFX, we identified three primary areas of focus: the work on Mina Rau, Chandrila, and Yavin. The TIE Fighter sequence in Season 2 is a standout moment. Can you walk us through the VFX process for that particular sequence? What were some of the technical challenges you faced, and how did you work to make it as intense and realistic as possible? (TJ): This is a sequence I’m particularly proud of as VFX played a central role in the sequence coming together from start to finish. We were intimately involved from the initial conversations of the idea for the sequence. Mohen created digital storyboards and we pitched ideas for the sequence to Tony Gilroy. Once we had a sense of the creative brief, we started working with Luke Hull (Production Designer) and the art department on the physical hangar set and brought it into previz for virtual scouting. With Jen Kitching (our Previz Supervisor from The Third Floor) we had a virtual camera set up that allowed us to virtually use the camera and lenses we would have on our shoot. We blocked out shots with Ariel Kleiman (Director) and Christophe Nuyens (the DoP). This went back through previz and techviz so we could meticulously chart out our plan for the shoot. Keeping with our ethos of grounding everything in reality, we wanted to use as much of the practical set as possible. We needed to be sure our handoffs between physical and virtual were seamless – Luke Murphy, our SFX Supervisor, worked closely with us in planning elements and practical effects to be used on the day. Over the course of the shoot, we also had the challenge of the flashing red alarm that goes off once the TIE Avenger crashes into the ceiling. We established the look of the red alarm with Christophe and the lighting team, and then needed to work out the timing. For that, we collaborated with editor John Gilroy to ensure we knew precisely when each alarm beat would flash. Once we had all the pieces, we turned the sequence over to Scott Pritchard and ILM to execute the work. Scott Pritchard (SP): This sequence was split between our London and Vancouver studios, with London taking everything inside the hangar, and Vancouver handling the exterior shots after Cassian blasts through the hangar door. We started from a strong foundation thanks to two factors: the amazing hangar set and TIE Avenger prop; and having full sequence previs. The hangar set was built about 2/3 of its overall length (as much as could be built on the soundstage), which our environments team extended, adding the hangar doors at the end and also a view to the exterior environment. Extending the hangar was most of the work in the sequence up until the TIE starts moving, where we switched to our CG TIE. As with Season 1, we used a blend of physical SFX work for the pyro effects, augmenting with CG sparks. As TJ mentioned, the hangar’s red warning lighting was a challenge as it had to pulse in a regular tempo throughout the edit. Only the close-up shots of Cassian in the cockpit had practical red lighting, so complex lighting and comp work were required to achieve a consistent look throughout the sequence. ILM London’s compositing supervisor, Claudio Bassi, pitched the idea that as the TIE hit various sections of the ceiling, it would knock out the ceiling lights, progressively darkening the hangar. It was a great motif that helped heighten the tension as we get towards the moment where Cassian faces the range trooper. Once we cut to outside the hangar, ILM Vancouver took the reins. The exterior weather conditions were briefed to us as ‘polar night’ – it’s never entirely dark, instead there’s a consistent low-level ambient light. This was a challenge as we had to consider the overall tonal range of each shot and make sure there was enough contrast to guide the viewer’s eye to where it needed to be, not just on individual shots but looking at eye-trace as one shot cut to another. A key moment is when Cassian fires rockets into an ice arch, leading to its collapse. The ice could very easily look like rock, so we needed to see the light from the rocket’s explosions scattered inside the ice. It required detailed work in both lighting and comp to get to the right look. Again, as the ice arch starts to collapse and the two chase TIE Advanced ships get taken out, it needed careful balancing work to make sure viewers could read the situation and the action in each shot. The world-building in Andor is impressive, especially with iconic locations like Coruscant and Yavin. How did you approach creating these environments and ensuring they felt as authentic as possible to the Star Wars universe? (ML): Our approach to world-building in Andor relied on a close collaboration between the VFX team and Luke Hull, the production designer, along with his art department. This partnership was established in Season 1 and continued for Season 2. Having worked on many Star Wars projects over the decades, VFX was often able to provide inspiration and references for art department designs. For example, for locations like Yavin and Coruscant, VFX provided the art department with existing 3D assets: the Yavin temple model from Rogue One and the Coruscant city layout around the Senate from the Prequel films. The Coruscant model, in particular, involved some ‘digital archaeology.’ The data was stored on tapes from around 2001 and consisted of NURBS models in an older Softimage file format. To make them usable, we had to acquire old Softimage 2010 and XSI licenses, install them on a Windows 7 PC, and then convert the data to the FBX format that current software can read. Supplying these original layouts to the art department enabled them to create their new designs and integrate our real-world shooting locations while maintaining consistency with the worlds seen in previous Star Wars productions. Given that Andor is set approximately twenty years after the Prequels, we also had the opportunity to update and adjust layouts and designs to reflect that time difference and realize the specific creative vision Luke Hull and Tony Gilroy had for the show. StageCraft technology is a huge part of the production. How did you use it to bring these complex environments, like Coruscant and Yavin, to life? What are the main benefits and limitations of using StageCraft for these settings? (SP): Our use of StageCraft for Season 2 was similar to that on Season 1. We used it to create the exterior views through the windows of the Safehouse on Coruscant. As with our work for the Chandrillan Embassy in Season 1, we created four different times of day/weather conditions. One key difference was that the foreground buildings were much closer to the Safehouse, so we devised three projection points (one for each room of the Safehouse), which would ensure that the perspective of the exterior was correct for each room. On set we retained a large amount of flexibility with our content. We had our own video feed from the unit cameras, and we were able to selectively isolate and grade sections of the city based on their view through the camera. Working in context like this meant that we could make any final tweaks while each shot was being set up and rehearsed. While we were shooting a scene set at night, the lighting team rigged a series of lights running above the windows that, when triggered, would flash in sequence, casting a moving light along the floor and walls of the set, as if from a moving car above. I thought we could use the LED wall to do something similar from below, catching highlights on the metal pipework that ran across the ceiling. During a break in shooting, I hatched a plan with colour operator Melissa Goddard, brain bar supervisor Ben Brown, and we came up with a moving rectangular section on the LED wall which matched the practical lights for speed, intensity and colour temperature. We set up two buttons on our iPad to trigger the ‘light’ to move in either direction. We demoed the idea to the DP after lunch, who loved it, and so when it came to shoot, he could either call from a car above from the practical lights, or a car below from the LEDs. (ML): Just to clarify – the Coruscant Safehouse set was the only application of Stagecraft LED screens in Season 2. All other Coruscant scenes relied on urban location photography or stage sets with traditional blue screen extensions. The various Yavin locations were achieved primarily with large backlot sets at Longcross Studios. A huge set of the airfield, temple entrance and partial temple interior was extended by Scanline VFX, led by Sue Rowe, in post, creating the iconic temple exterior from A New Hope. VFX also added flying and parked spaceships, and augmented the surrounding forest to feel more tropical. Andor blends CG with actual real-world locations. Can you share how you balanced these two elements, especially when creating large-scale environments or specific landscapes that felt grounded in reality? (SP): A great example of this is the environment around the Senate. The plates for this were shot in the City of Arts & Sciences in Valencia. Blending the distinctive Calatrava architecture with well-known Star Wars buildings like the Senate was an amazing challenge, it wasn’t immediately clear how the two could sit alongside each other. Our Vancouver team, led by Tania Richard, did an incredible job taking motifs and details from the Valencia buildings and incorporating them into the Senate building on both large and small scales, but still contiguous with the overall Senate design. The production team was ingenious in how they used each of the Valencia buildings to represent many locations around the Senate and the surrounding areas. For example, the Science Museum was used for the walkway where Cassian shoots Kloris (Mon’s driver), the main entrance to the Senate, and the interior of the Senate Atrium (where Ghorman Senator Oran is arrested). It was a major challenge ensuring that all those locations were represented across the larger environment, so viewers understood the geography of the scene, but also blended with the design language of their immediate surroundings. Everything in the Senate Plaza had a purpose. When laying out the overall layout of the Plaza, we considered aspects such as how far Senators would realistically walk from their transports to the Senate entrance. When extending the Plaza beyond the extents of the City of Arts & Sciences, we used Calatrava architecture from elsewhere. The bridge just in front of the Senatorial Office Building is based on a Calatrava-designed bridge in my home city of Dublin. As we reach the furthest extents of the Senate Plaza, we begin blending in more traditional Coruscant architecture so as to soften the transition to the far background. Coruscant is such a pivotal location in Star Wars. How did you approach creating such a vast, densely populated urban environment? What were the key visual cues that made it feel alive and realistic? (ML): Our approach to Coruscant in Season 2 built upon what we established in the first season: primarily, shooting in real-world city locations whenever feasible. The stunning Calatrava architecture at Valencia’s City of Arts and Sciences, for instance, served as the foundation for the Senate exterior and other affluent districts. For the city’s grittier neighborhoods, we filmed in urban environments in London, like the Barbican and areas around Twickenham Stadium. Filming in these actual city locations provided a strong, realistic basis for the cinematography, lighting, and overall mood of each environment. This remained true even when VFX later modified large portions of the frame with Star Wars architecture. This methodology gave the director and DP confidence on set that their vision would carry through to the final shot. Our art department and VFX concept artists then created numerous paintovers based on plates and location photography, offering clear visual guides for transforming each real location into its Coruscant counterpart during post-production. For the broader cityscapes, we took direct inspiration from 3D street maps of cities such as Tokyo, New York, and Hong Kong. We would exaggerate the scale and replace existing buildings with our Coruscant designs while preserving the fundamental urban patterns. When it comes to creating environments like Yavin, which has a very natural, jungle-like aesthetic, how do you ensure the VFX stays true to the organic feel of the location while still maintaining the science-fiction elements of Star Wars? (ML): Nearly all of the Yavin jungle scenes were shot in a large wooded area that is part of Longcross Studios. The greens and art departments did an amazing job augmenting the natural forest with tropical plants and vines. The scenes featuring the two rebel factions in the clearing were captured almost entirely in-camera, with VFX primarily adding blaster fire, augmenting the crashed ship, and painting out equipment. Only the shots of the TIE Avenger landing and taking off, as well as the giant creature snatching the two rebels, featured significant CG elements. The key elements connecting these practical locations back to the Yavin established in A New Hope and Rogue One were the iconic temples. The establishing shots approaching the main temple in episode 7 utilized plate photography from South America, which had been shot for another Disney project but ultimately not used. Other aerial shots, such as the U-Wing flying above the jungle in episode 12, were fully computer-generated by ILM. K-2SO is a beloved character, and his return is highly anticipated. What can you tell us about the process of bringing him back to life with VFX in Season 2? What new challenges did this bring compared to his original appearance? (SP): We had already updated a regular KX droid for the scene on Niamos in Season 1, so much of the work to update the asset to the latest pipeline requirements had already been done. We now needed to switch over to the textures & shaders specific to K2, and give them the same updates. Unique to Series 2 was that there were a number of scenes involving both a practical and a digital K2 – when he gets crushed on Ghorman in episode 8, and then ‘rebooted’ on Yavin in episode 9. The practical props were a lot more beaten up than our hero asset, so we made bespoke variants to match the practical droid in each sequence. Additionally, for the reboot sequence on Yavin, we realised pretty quickly that the extreme movements meant that we were seeing into areas that previously had not required much detail – for instance, underneath his shoulder armour. We came up with a shoulder joint design that allowed for the required movement while also staying mechanically correct. When we next see him in Episode 10, a year has passed, and he is now the K-2SO as we know him from Rogue One. K-2SO has a unique design, particularly in his facial expressions and movement. How did you approach animating him for Season 2, and were there any specific changes or updates made to his character model or animation? (SP): Following Rogue One, Mohen made detailed records of the takeaways learned from creating K-2SO, and he kindly shared these notes with us early on in the show. They were incredibly helpful in tuning the fine details of the animation. Our animation team, led by Mathieu Vig, did a superb job of identifying the nuances of Alan’s performance and making sure they came across. There were plenty of pitfalls to avoid – for instance, the curve to his upper back meant that it was very easy for his neck to look hyperextended. We also had to be very careful with his eyes, as they’re sources of light, they could very easily look cartoonish if they moved around too much. Dialling in just the right amount of eye movement was crucial to a good performance. As the eyes also had several separate emissive and reflective components, they required delicate balancing in the comp on a per-shot basis. Luckily, we had great reference from Rogue One to be able to dial in the eyes to suit both the lighting of a shot but also its performance details. One Rogue One shot in particular, where he says ‘Your behavior, Jyn Erso, is continually unexpected’, was a particularly good reference for how we could balance the lights in his eyes to, in effect, enlarge his pupils, and give him a softer expression. K-2SO also represented my first opportunity to work with ILM’s new studio in Mumbai. Amongst other shots, they took on the ‘hallway fight’ sequence in Episode 12 where K2 dispatches Heert and his troopers, and they did a fantastic job from animation right through to final comp. K-2SO’s interactions with the live-action actors are key to his character. How did you work with the actors to ensure his presence felt as real and integrated as possible on screen, especially in terms of timing and reactions? (ML): Alan Tudyk truly defined K-2SO in Rogue One, so his return for Andor Season 2 was absolutely critical to us. He was on set for every one of K2’s shots, performing on stilts and in a performance capture suit. This approach was vital because it gave Alan complete ownership of the character’s physical performance and, crucially, allowed for spontaneous, genuine interactions with the other actors, particularly Diego Luna. Witnessing Alan and Diego reunite on camera was fantastic; that unique chemistry and humor we loved in Rogue One was instantly palpable. In post-production, our VFX animators then meticulously translated every nuance of Alan’s on-set performance to the digital K-2SO model. It’s a detailed process that still requires artistic expertise. For instance, K2’s facial structure is largely static, so direct translation of Alan’s facial expressions isn’t always possible. In these cases, our animators found creative solutions – translating a specific facial cue from Alan into a subtle head tilt or a particular eye movement for K2, always ensuring the final animation remained true to the intent and spirit of Alan’s original performance. Were there any memorable moments or scenes from the series that you found particularly rewarding or challenging to work on from a visual effects standpoint? (ML): The Plaza sequence in episode 8, which runs for about 23 minutes, stands out as particularly memorable – both for its challenges and its rewarding outcome. Just preparing for it was a daunting task. Its successful execution hinged on incredibly tight collaboration between numerous departments: stunts, creature effects, special effects, the camera department, our tireless greenscreens crew, and of course, VFX. The stunts team, under Marc Mailley, drove the choreography of all the action. Our On-Set VFX Supervisor, Marcus Dryden, was instrumental. He worked hand-in-glove with the director, DP, and assistant directors to ensure we meticulously captured all the necessary elements. This included everything from crowd replication plates and practical effects elements to the performances of stunt teams and creature actors, plus all the crucial on-set data. The shoot for this sequence alone took over three weeks. Hybride, under the leadership of Joseph Kasparian and Olivier Beaulieu, then completed the environments, added the blaster fire, and augmented the special effects in post-production, with ILM contributing the KX droids that wreak havoc in the plaza. (SP): I agree with Mohen here, for me the Ghorman Plaza episode is the most rewarding to have worked on. It required us to weave our work into that of so many other departments – stunts, sfx, costume – to name just a few. When we received the plates, to see the quality of the work that had gone into the photography alone was inspirational for me and the ILM crew. It’s gratifying to be part of a team where you know that everyone involved is on top of their game. And of course all that is underpinned by writing of that calibre from Tony Gilroy and his team – it just draws everything together. From a pure design viewpoint, I’m also very proud of the work that Tania Richard and her ILM Vancouver crew did for the Senate shots. As I mentioned before, it was a hugely challenging environment not just logistically, but also in bringing together two very distinctive architectural languages, and they made them work in tandem beautifully. Looking back on the project, what aspects of the visual effects are you most proud of? (TJ): I’m incredibly proud of this entire season. The seamless collaboration we had between Visual Effects and every other department made the work, while challenging, an absolute joy to execute. Almost all of the department heads returned from the first season, which provided a shorthand shortcut as we started the show with implicit trust and understanding of what we were looking to achieve. The work is beautiful, and the commitment of our crew and vendors has been unwavering. I’m most proud of the effort and care that each individual person contributed to the show and the fact that we went into the project with a common goal and were, as a team, able to showcase the vision that we, and Tony, had for the series. (ML): I’m really proud of the deep integration of the visual effects – not just visually, but fundamentally within the filmmaking process and storytelling. Tony invited VFX to be a key participant in shaping the story, from early story drafts through to the final color grade. Despite the scale and spectacle of many sequences, the VFX always feel purposeful, supporting the narrative and characters rather than distracting from them. This was significantly bolstered by the return of a large number of key creatives from Season 1, both within the production and at our VFX vendors. That shared experience and established understanding of Tony’s vision for Andor were invaluable in making the VFX an organic part of the show. (SP): I could not be prouder of the entire ILM team for everything they brought to their work on the show. Working across three sites, Andor was a truly global effort, and I particularly enjoyed how each site took complete ownership of their work. It was a privilege working with all of them and contributing to such an exceptional series. VFX progression frame Lucasfilm’s ANDOR Season 2, exclusively on Disney+. Photo courtesy of Lucasfilm. ©2025 Lucasfilm Ltd. & TM. All Rights Reserved. How long have you worked on this show? (TJ): This show has been an unbelievable journey. Season 2 alone was nearly 3 years. We wrapped Season 2 in January of 2025. We started prepping Season 2 in February 2022, while we were still in post for Season 1. I officially started working on Season 1 early in 2019 while it was still being developed. So that’s 6 years of time working on Andor. Mohen and I both also worked on Rogue One, so if you factor in the movie, which was shooting in 2015, that’s nearly ten years of work within this part of the Star Wars universe. (ML): I started on the project during early development in the summer of 2019 and finished in December of 2024. (SP): I started on Season 1 in September 2020 and finished up on Season 2 in December 2024. What’s the VFX shots count? (TJ): We had a grand total of 4,124 shots over the course of our 12 episodes. Outside of Industrial Light & Magic, which oversaw the show, we also partnered with Hybride, Scanline, Soho VFX, and Midas VFX. What is your next project? (TJ): You’ll have to wait and see! (SP): Unfortunately, I can’t say just yet either! A big thanks for your time. WANT TO KNOW MORE?ILM: Dedicated page about Andor – Season 2 on ILM website. © Vincent Frei – The Art of VFX – 2025
    0 Commentarios 0 Acciones