

IMAGE-ENGINE.COM
Dune: Prophecy Case Study
Set 10,000 years before the birth of Paul Atreides, the HBO prequel Dune: Prophecy follows two Harkonnen sisters as they combat forces that threaten the future of humankind and establish the fabled sect that will become known as the Bene Gesserit.
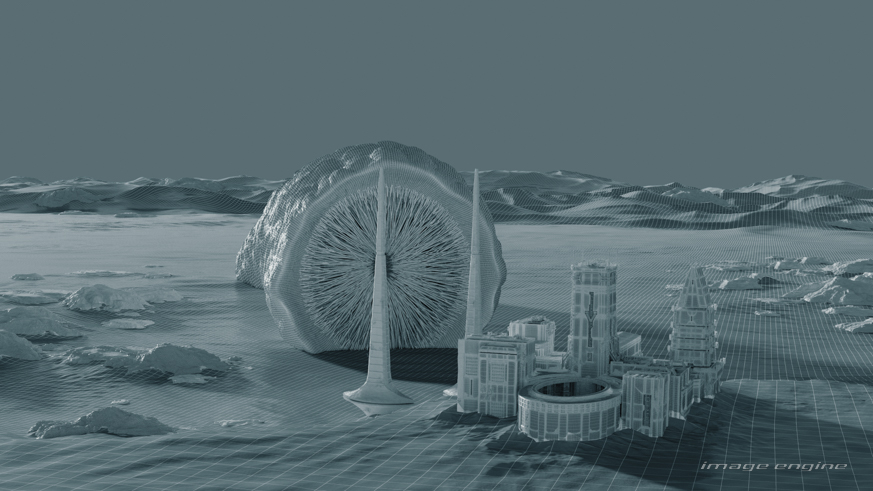
Image Engine created visual effects for 208 shots across episodes 1 and 3-6 of this series, bringing the world of Arrakis to life. From the awe-inspiring desert landscapes to the intricate, towering structures of the Sisterhood’s complex, our VFX work captured the beauty and aesthetic of the Dune universe.
This case study shares the challenges and successes of our VFX work, illustrating the technical artistry that made Dune: Prophecy an unforgettable extension of the Dune legacy with our crew:
Cara Davies, visual effects executive producer
Martyn Culpitt, visual effects supervisor
Viktoria Rucker, visual effects producer
Jeremy Mesana, animation supervisor
Adrien Vallecilla, CG supervisor
Xander Kennedy, CG supervisor
Daniel Bigaj, compositing supervisor
Francisco Palomares, compositing supervisor
Mariusz Wesierski, FX TD
Rob Richardson, head of FX
Daniel James Cox, concept artist
David Bocquillon, concept artist
Dan Herlihy, art director at Territory Studio
Sand dreams
In the opening episode of Dune: Prophecy, our team created a series of complex sand FX simulations during a haunting vision in Raquella’s nightmare, involving the mighty sandworm of Arrakis, Shai-Hulud. The sequence shows the immense power of the sandworm as it devours the Sisterhood complex, built from sand, amid the desert.
“The surreal nature of this sequence posed multiple challenges,” says Martyn Culpitt, VFX supervisor at Image Engine. “We had to recreate the Sisterhood structures entirely from sand and ensure they collapsed in a way that balanced dreamlike fluidity with realism.”
“Capturing the scale and movement of the sandworm and the desert was critical,” notes Viktoria Rucker, VFX producer. “Achieving the immense scale and fluidity of the sand took innovative approaches and required pushing our particle system to simulate thousands of sand grains in motion.”
Each sand pass was meticulously crafted to show the sandworm’s devastating force, annihilating the complex with dust and debris swirling into the desert landscape. Extensive iterations of simulations in sand movement, lighting, and volumetric dust were necessary to create a dynamic sequence true to the Dune aesthetic.
The sandworm’s scale had to be flawlessly integrated into the environment. “Even though this was a dream, our FX team had to ensure the scale between the worm, the complex, and the desert felt plausible,” explains Rob Richardson, head of FX. “We used several simulations for the collapse, and certain simulations were even used as inputs for other simulations to achieve the visual complexity required.”
“There was a lot of preparation required for the incoming 3D assets to ensure the relative scales between the worm, the Sisterhood complex and the surrounding desert made sense and that the velocity of the worm was physically plausible.”
The complex had to be fractured to reflect its inevitable destruction under the worm’s force. “We fractured the Sisterhood complex geometry into hundreds of pieces, then created an RBD simulation for the larger building components. Once we had the timing and composition right, the transform data from the RBD simulation was accessed from inside a grain particle solver,” adds Rob.
When simulating sand interacting with the sandworm, the team used art direction to ensure the sand moved naturally and seamlessly. Rob elaborates: “We needed to make sure that the sand collided with the internal structures of the worm—its hairs or teeth—so we developed techniques to control where and how the sand flowed between them.”
This data was used to animate the sand and its neighbour constraints, when the calculated torque applied to the constraints went above a threshold, the sand was allowed to break apart. The solver then created attributes so that we could emit even more grains of sand in another post-simulation of smaller-scale sand.
“For rendering purposes, we needed to ensure that we had a volume of particles, rather than just an outside coating, for sub-surface scattering, but not so many points that it became too memory intensive to render,” says Rob. “We created an up-res technique that took the simulations as an input, so we could dial up and down the number of points until we found the sweet spot of having enough density and being able to fit the data into RAM.”
“The volumetric layers of dust were also generated from the several layers of sand simulations, and in many cases we split those layers down even further by partitioning them spatially and wedging the domains, then re-combining them later for more efficient rendering,” explains Rob.
The sandworm had a pre-existing look that had been well-defined in the movies that our team was asked to match as closely as possible. When referencing the worm pushing through the sand, the team noticed that the sand would bulge up before breaking up and generating dust. We created procedural deformers and forces so that we could art direct the amount of bulge depending on the shot composition as well as artistically defining the breakup area and manipulating velocity fields for the volumetric dust solvers.
There were multiple simulations depending on which part of the worm was interacting with the sand, be it the front of the worm or the sides, or whether the worm was submerged or was above ground.
“The worm would swallow much of the sand as it moved through the desert,” Rob notes. “This required additional simulation work that was dependent on animated velocity fields that would funnel the sand inwards as well as collide with the mouth hairs and teeth of the worm.”
In another surreal vision, a cascade of sand descends from a shrinking hole in the ceiling. The brief for the FX team was again to create something which had an otherworldly feel to it while remaining somewhat grounded in physics.
“The hole in the ceiling revealed an upside-down environment containing a pool room,” shares Rob. “But instead of water falling, it was sand cascading like a waterfall. This required extensive FX sand simulations to get the weight and movement of the sand just right.”
Creating the flowing sand was no small feat. The FX team ran multiple simulations, carefully adjusting the interaction between the grains of sand and the play of light and shadow. The goal was to evoke both the natural flow of falling sand and the eerie, surreal aesthetic of the vision.
“The scene contained two plates stitched together and animated to move apart,” Rob explains. “The set geometry from the plates was blended to match the stitch, creating the illusion of a seamless environment.”
Once the foundational look was approved, the team fine-tuned the details. “We started by spacing the emitters and dialing in the turbulence for the grain and volumetric solvers on a static frame,” Rob continues. “But as the hole shrank and rose, the next challenge was to have the sand and dust fall gracefully without appearing visually jarring.”
Bringing the desert into the war room
In Dune: Prophecy, the holotable serves as a vital strategic tool, used by key characters to analyze scenarios, track events across planets, and explore possible futures based on historical and genetic data. In this sequence, Emperor Corrino is woken from a bad dream and enters the war room to activate the large, interactive holotable. He watches the projection of Desmond Hart survive an attack, but then is devoured by a giant sandworm in the Arrakis desert.
This sequence required the seamless blending of two distinct environments: the fully lit, expansive desert and the dimly lit, enclosed war room. Achieving this balance meant making the hologram appear semi-transparent and slightly distorted while still integrated into the scene. The team essentially “rebuilt” the desert environment through the lens of a projector, deconstructing rendered images of the desert and adding dimensionality to ensure the hologram had visual depth and accuracy.
“I’m really proud of the details from the hologram we created,” states Xander Kennedy, CG supervisor. “The hues of the highlights and the semi-transparent shadows provide enough detail to be a hologram, but enough room to see through to the effects that build up the surrounding image. The team did a pretty outstanding job across all departments. The level of communication and collaboration that was necessary to pull this off was a feat of its own.”
The hologram table itself was a technical marvel, featuring hundreds of independent lights and projectors. Precise coordination between departments was essential to maintain consistency across all shots, from wide angles to close-ups.
“One of the biggest challenges was maintaining two worlds—the war room where the projection is taking place and the actual Arrakis desert, which was hundreds of times larger,” explains Xander. “The concept of the overall look meant that the Arrakis desert had to be fully lit as if it were actually photographed independently of the war room.”
Martyn further elaborates on the intricate process: “The multi-scene scale integration and cross-pollination of FX, lighting, and compositing to create a projected hologram look was complex. These departmental elements had to be carefully considered and work perfectly in sync to maintain a correct scene/scale for connection from table to hologram to the final look.”
Specific Passes for the Holotable
“On the FX side, we had two main parts that contributed to the look. A field of volumetric lights, which would react to the scene with geometry GOBOs that were generated from terrain details,” Mariusz Wesierski, FX TD describes.
“The other part was the reverse: holographic streaks coming from the geometry and shooting towards the light sources. To keep RAM usage low and get sharp lines without having to generate high-resolution volumes, we used motion blur in a creative way. The table was divided into overlapping circular grids projected from the camera onto the scene in “table space”. Each grid would have their velocity vectors pointed to their light sources. The beauty passes from the desert would then be used as a texture and rendered with motion blur to get pixel-perfect streaks without the use of volumes. Arnolds shutter curve was also used to control how the rays fade off.”
Also featured in the hologram table projection is the spice harvester, a large, heavy, mobile vehicle designed to harvest melange, a fictional psychedelic drug in the Dune universe. These machines would harvest and process the spice from the sand of the desert floor.
“For the spice harvester redesign, we sought to give the vehicle an updated design, fitting the show’s timeline that predates the events depicted in the films,” says Daniel Cox, concept artist. “Research played a key role in this process, as we examined the original movie vehicle and learned that it had been inspired by NASA’s space shuttle transport carriers.”
“A series of small thumbnail silhouettes were created to provide a wide range of options for the client. After a review, the design that resonated most was one where the harvester’s main chassis was angled at roughly 20 degrees upwards. This choice was intentional to give the vehicle a “hot rod” feel, suggesting a modified, upgraded version of its predecessors. The angle also reinforced the notion that it expels sand at higher velocities, creating a dynamic, more aggressive harvesting process. Concepts were also done for the damage to the rear of the vehicle, complete with embers and a smoke plume.”
Image Engine Concepts for the Harvester
Final Concept
Final Asset
The chaos of war
Episode 1 also showcases a massive battle featuring a towering battlefield robot—a four-legged mechanical giant—facing off against an advancing army. This sequence included full CG shots and detailed set extensions to transform the battlefield into a sprawling, rubble-filled warzone.
“For the battlefield robot, the goal was to create a machine of war that was both imposing and practical,” explains Daniel Cox, concept artist. “The client initially referred to it as a ‘mech,’ which inspired us to craft a heavily armoured design with a unique, standout look. We wanted something that felt like a tank but with more flexibility and agility.”
The robot’s four-legged design drew inspiration from an elephant’s gait, but with an enhanced, mechanized version. “We gave each leg ball joints, which allowed for incredible movement and maneuverability,” Daniel shares. “This gave the machine a dynamic presence—something that could navigate the battlefield with both strength and precision.”
While the main structure featured a hard-surface, armoured chassis, advanced “nanotechnology” was suggested in the design of its arms and legs through geometric patterns. “We wanted to balance its massive power with a sense of high-tech sophistication, embedding subtle details,” says Daniel.
The robot’s primary weapon was a laser emitter integrated into its “eye”. “The eye laser was a crucial design element,” Daniel notes. “It needed to reinforce its nature as a formidable opponent, cutting through the battlefield with precision and power.”
The final design balanced function and intimidation, bringing to life a machine designed for the kind of high-stakes combat emblematic of the Dune universe.
Concepts
Final Asset
“At the beginning of this sequence, one of the Atreides soldiers throws a grenade at the four-legged robot,” recalls David Bocquillon, concept artist. “The goal was to create a grenade design with a clear and simple silhouette—something that could be visually read from a distance—while still embodying the technical complexity of a weapon capable of unleashing an electromagnetic pulse strong enough to completely paralyze an enormous robot.”
David continues, “For animation, we wanted the EMP Grenade to have a tactile, mechanical feel, so we incorporated the idea of it being magnetized to the robot. This concept was inspired by Dune: Part Two, where a landmine is shown snapping onto the surface of a harvester. That detail added an extra layer of realism and tension to the grenade’s behaviour in this sequence.”
Final Asset
As soldiers charged toward the battlefield robot, it retaliated with a devastating laser blast, hurling them back in a chaotic eruption of smoke, dust, and debris. Each element of the scene, from the fiery explosions to the dense clouds of shrapnel, added to the raw energy of battle.
“There was a lot of back-and-forth between departments to make sure the final look was unified,” recalls Martyn. “The challenge wasn’t just in creating the explosions or the robot, but in blending everything seamlessly into a single, believable environment.”
The FX team meticulously crafted the explosion effects, adding layers of detail, such as dynamic debris trajectories and realistic smoke simulations. These elements worked in tandem to heighten the realism of the war-torn landscape, ensuring that the Mek robot felt like an integral part of the action.
“This battle takes place in a junkyard and it was a unique challenge because it was designed entirely as a full CG environment, without any prior conceptual direction from the client,” explains Daniel. “We aimed to create a desolate, atmospheric setting filled with discarded robot parts. The composition was deliberately expansive—a vast canvas of industrial detritus—highlighting the utilitarian and unforgiving nature of the junkyard.”
He continues, “At the heart of the environment was the melting plant, where Mech parts were melted down. It was a central visual element, surrounded by a sense of looming industry and decay. We used backlighting to cast silhouettes, emphasizing the harsh industrial processes. Atmospheric fog swirling through the junkyard added an extra layer of mystery and foreboding, underscoring the bleak nature of the scene.”
Concepts
The mechanical lizard
During the engagement party in episode 1, a little boy pulls out a small, seemingly harmless toy ball from his pocket. Suddenly, the ball transforms into a mechanical lizard that darts around the room, shocking the royal guests.
“The challenge here was to create this animated mechanical lizard that was part toy and part companion for the prince, but also represent the forbidden AI technology,” explains Jeremy Mesana, animation supervisor. “We needed it to feel alive and aware, with the unpredictable energy of a real creature, but also retain the stop-and-start staccato movements of a mechanical toy.”
The transformation from ball to lizard involved meticulous attention to detail. Each metallic panel of the lizard’s shell was individually animated to unfurl smoothly, creating a sense of mechanical intricacy.
“Having to incorporate elements of the lizard state into the ball state and vice versa so that the transformation could flow between both end states believably was tricky,” Jeremy reflects. “As was convincingly hiding other parts that existed only in one state but not both.”
The resulting movements combined precision with a touch of abruptness, amplifying the lizard’s unique identity as both lifelike and artificial.
When the lizard is stabbed later in the scene, its movements shift, becoming erratic and jerky as it malfunctions. Despite its injury, the lizard retains a sense of life and consciousness. We really leaned into a more staccato mechanical movement when the lizard was stabbed through the body. To really show that despite being spit through with a knife it was still functioning but more in its robotic nature.
Illuminating the genetic archive
In Dune: Prophecy, a genetic thinking machine named Anirul is revealed to be a secret, high-functioning computer that survived the war. Located within a cavern, this immense data center houses the empire’s vast genetic archive, serving as a living repository of its bloodlines and histories, spanning countless generations.
When activated, intricate data streams pulse with light, forming holographic trees—dynamic representations of the flow of genetic information—illuminating the environment with a breathtaking organic quality. As the Bene Gesserit sisters explore this archive, holographic family trees and bloodline data materialize, adding to the visual experience.
“The Anirul environment was designed to feel alive, like a character in the episode,” says Adrien Vallecilla, CG supervisor. “Each asset and graphic had to pulse, fade, and move with purpose, all while interacting with realistic reflections and lighting. Organizing these elements to tell the story elegantly and seamlessly was one of the most challenging but rewarding aspects of the work.”
“With such strong concept work successfully translated into the asset, compositing played a crucial role in bringing the final look to life,” says Dan Bigaj, compositing supervisor. “Collaborating closely with the lighting and asset teams, we iterated through multiple rounds of look development to ensure fidelity to the original concept and the showrunner’s vision. Once we achieved a look that the client loved, we optimized the workflow by integrating as much of the compositing work as possible into the asset and lighting setup. This approach streamlined the process, allowing us to complete the final compositing work with maximum efficiency.”
To maintain consistency across all of the Anirual sequences, Dan developed a comprehensive Nuke template that consolidated key elements and compositing treatments. “This not only ensured a cohesive visual style but also enabled our small compositing team to meet the tight production deadlines without compromising on quality,” he explains.
One of the key challenges in look development was determining how to handle the atmosphere within Anirul’s vast cavern. “Though subtle in the final images, this atmospheric layer played a significant role in enhancing the sense of mystery surrounding the immense thinking machine,” says Dan. “A fully CG approach proved too costly to render for such a large environment, so we implemented a Nuke particle system to dynamically generate atmospheric sprites. This solution allowed us to create a responsive, volumetric effect that was both efficient to render and required minimal manual intervention in each shot.”
Another successful application of Nuke’s particle system was the addition of dust motes to the scene. “Though a minor detail, these particles subtly enhanced the interplay of light in the foreground, helping to sell the abundance of light sources in a natural and immersive way,” notes Dan.
Finally, to ground the sequence in realism, Dan and his compositing team focused on ensuring that all animated light play—from the trees and servers to the graphical elements—interacted believably with the lens and plate photography. “We developed a dynamic, lightweight flare system driven by luminance, mimicking the anamorphic flare characteristics captured in the original footage,” he says. “This final touch really brought Anirul to life, seamlessly integrating the CG elements into the final composite and delivering a visually compelling result.”
Concept art of the ring
“The ring plays an important part in the Bene Gesserit sister’s cavern, with many pivotal scenes revolving around it,” explains David Bocquillon, concept artist. “Originally, it was a practical prop on set, but we ended up re-designing it and replacing it with a CG asset. We needed to elevate its visual impact while maintaining continuity with the original concept and shape.”
He continues, “We focused on refining the Ring’s structure, especially the continuity of the band of light along the interior, which played an important role in the visual storytelling. Additional details, such as intricate ornaments and old Bene Gesserit inscriptions, were incorporated because we wanted to make it feel deeply rooted in the lore of Dune. These elements catch the light beautifully and give the design a sense of complexity and believability, fitting seamlessly into the world.”
Once Territory Studios had delivered the initial designs and graphics elements for Anirul’s visual identity, Image Engine built upon their work to bring the environment to life. Territory developed intricate concept art and a graphical language for the archival systems, which served as the foundation for the sequence. From there, Image Engine’s team extended and integrated these elements into a fully realized 3D environment, refining the designs and adding storytelling layers to ensure they aligned seamlessly with the show’s narrative and aesthetic.
“The client emphasized that the machine should feel like an intelligent system—a library of bloodlines and dynasties,” explains Dan Herlihy, Art Director at Territory Studios. “Our goal was to create a design that felt like an archival network with a synaptic quality, balancing both beauty and the capacity to house thousands of years of data.”
Taking these initial concepts, Image Engine elevated the visual language, transforming the graphics into a fully dynamic and immersive environment. The glowing holograms and pulse-like animations were designed with storytelling at the forefront, ensuring the visual complexity of Anirul wasn’t just a backdrop but an integral part of the narrative.
“In order to deliver this sequence on a tight schedule, we decided to build attributes for each holographic asset so it would allow our animation team greater control during production,” says Adrien. “The goal was for the animators to bring the trees to life early in the production stage. Choosing this workflow, instead of a more traditional downstream approach for the holograms, allowed us to approve the storytelling of the sequence early in the production process, giving us time at the end to focus on the artistic finalization of the sequence.”
Image Engine also took the lead in conceptualizing the servers and providing ideas on how to incorporate them into the surrounding rock formations. “The servers were a critical part of the environment, acting as nodes in the archival network,” Adrien explains. “The goal was to create something visually unique that explores communication through technology and nature. We decided on a mixture of pulsing calligraphy on the tanks and flowing particle effects across the branches, merging technology with the organic texture of the stone to create the final look of being both ancient and advanced.”
“The cavern sequence posed a particularly complex challenge,” explains Daniel, “as it was essential to visually represent the movement of data and information within a mysterious and potentially ancient subterranean environment. The cavern itself was intended to function not just as a physical space but as a conduit for the transmission of information, making it a key narrative device. The challenge was to effectively communicate this flow of data while still preserving the haunting, otherworldly atmosphere of the cavern.”
“Initially, the concepts for how the data would manifest within the cavern leaned toward a more organic design, with flowing, curving lines that mimicked natural forms,” Daniel continues. “This idea was grounded in the concept of information as a living, breathing entity, almost like the lifeblood of the cavern itself.”
“However, as the design process evolved, the client favoured a shift towards a more structured, mechanical aesthetic. This was in keeping with the established visual motif of the show, where the pervasive blue light served as a constant thematic anchor. The decision was made to focus on geometric shapes and sharp, angular data lines that would interact with the glowing blue light, making the data flow seem more mechanical and systematic. The shapes were placed around the blue light in a deliberate arrangement, creating a visual harmony between the data and the environment and reinforcing the show’s overarching technological tone.”
“Ultimately,” Daniel concludes, “the cavern sequence became a blend of organic inspiration and mechanical precision, perfectly aligning with the show’s visual language. The data, no longer just a passive element, became an active participant in the narrative, adding to the visual complexity of the cavern and reinforcing the themes of control and hidden knowledge that run throughout Dune: Prophecy.”
Main Anirul Server
The claw and the truth revealed
In the final episode of Dune: Prophecy, a chilling revelation demonstrates the calculated precision of a Thinking Machine’s robotic claw. This imposing mech performs a disturbing microsurgery to attach advanced technology to a human eye.
“Compositing played a major role in bringing this creepy concept to life on screen,” says Daniel Bigaj, compositing supervisor. “This was an incredibly fun mini-sequence to work on—a compositor’s dream (pun intended)—because it demanded a high level of creativity to successfully execute such a unique visual experience.”
A key aspect of this scene is that it unfolds from the perspective of the patient whose eye is being operated on. “That perspective was a major driving factor in the creative decisions I made while crafting the final image,” Dan explains. “I wanted to truly put the audience in the patient’s position—to give them an image as close as possible to what they might experience if they were lying on the operating table themselves.”
To achieve this, Dan studied how human vision reacts in extreme conditions. “I spent a lot of time staring at nothing, adjusting my focus, blinking, squinting, and straining my eyes—really observing how these natural movements affect our perception,” he says. “From the strong vignette to the eye blinks, blurry vision, chromatic aberration, shallow depth of field, flaring, and subtle eye vibrations—every element was carefully crafted to heighten the viewer’s immersion.”
However, replicating the real human experience too accurately wasn’t the goal. “Our eye movements are far too rapid to translate well to the screen, so I had to find a balance—something that felt real but remained visually readable,” notes Dan.
One final detail that helped reinforce the intimate scale of the scene was the addition of floating dust motes. “I made sure they were true to scale, drifting in and out of focus in sync with the patient’s panicked eye movements,” he explains. “It’s a subtle touch, but it adds another layer of realism and tension to the sequence.”
The final result was so unsettling that even showrunner Alison Schapker had chills while watching it. “That was the best reaction we could have hoped for,” Dan says with a smile.
Developing the concept for the Thinking Machine in this sequence was particularly challenging to visualize due to its complex nature and unique function in the narrative.
“This massive mechanical construct was more than just a machine; it needed to symbolize a disturbing and clinical purpose,” explains Daniel Cox. The concept art team began with over 20 thumbnail sketches to explore its potential shapes, focusing on wide-side views to capture the mech’s sheer scale and silhouette. The brainstorming helped pinpoint the most promising direction for the design. Once the client selected a preferred design, the focus shifted to refining the intricate details, ensuring its anatomy was tailored for its specialized purpose.
A critical element of the design was the integration of multiple arms equipped with surgical tools. “Given its role in surgery, the tools needed to strike a balance between plausibility and futurism,” says Daniel. Some instruments were inspired by real-world surgical equipment, while others were entirely fictional, pushing the boundaries of the show’s technological vision.
The silhouette played a vital role in the Thinking Machine’s visual impact since the sequence was heavily backlit with the show’s signature glowing blue light. “The shape had to stand out against this lighting and appear imposing and mysterious,” notes Daniel.
As the sequence progresses, the camera introduces a warm glow in the distance. “This was intentional,” Daniel shares, “it’s meant to suggest the presence of a Guild member, whose silhouette was partially revealed. The warm light contrasted with the cool, sterile environment, adding another layer of mystery and hinting at a greater force at play in the narrative.”
Explore the evolution of this intricate sequence—from initial concept art to final CG renders—in the images below.
Concepts
Concept
Final
Concept
Final
A nightmare on thin ice
In the season finale, Valya finds herself trapped in a chilling nightmare—a frozen lake where she is battling fierce winds and a relentless blizzard. Reliving a traumatic memory, she struggles across cracking ice, determined to save her brother Griffin from drowning in the ice hole.
The ice lake sequence is as much a psychological battle as a visual spectacle, with the environment reflecting Valya’s turmoil. “The amount of turbulence in the snowstorm was designed to be a reaction to Valya’s emotional state,” explains Rob. “As the sequence progresses, the ice beneath her feet fractures, and black snow is introduced as a manifestation of her internal chaos.”
To enable nuanced control of this dynamic environment, the FX team developed multiple layers of passes for the comp artists, including random ID passes, rest position noises at various scales, depth from the camera, velocity and proximity to Valya. “We weren’t certain how much artistic flexibility we’d need over the snow’s colour, so we ensured the compositing team could adjust the balance between the black and white snow on top of the levels directly coming from FX,” Rob elaborates. The trickiest elements to manipulate were the volume layers, where the black and white values would mix very quickly and turn gray. The team experimented with NDC techniques to project particle colours on the volume render passes, but achieved more fluidic results by re-rendering volume layers separately after the compositing team dialled in the distribution of colours.
The FX team also developed procedural techniques to simulate ice cracks forming beneath Valya’s hands as she crawled forward to save Griffin. “The curves for the cracks were extruded and rendered with the ice lake geometry,” Rob adds, “while shaders used ray-depth lookups to the FX geometry to achieve the effect of cracks fracturing and spreading across the ice surface.” To switch between shots dynamically, we used proprietary tools inside of Houdini, which helped with continuity and being able to submit many shots at once. This also helped the lighting and compositing teams with consistency in the data caches between shots.
The conceptualization of the frozen lake environment for the concept art team was equally intricate. Daniel reflects on the evolution of the sequence: “It was originally envisioned with a giant worm erupting from the ice, but the final version took a more atmospheric and psychological approach. The focus shifted to the eerie, unstable nature of the ice itself and the escalating tension.”
One of the most striking designs was a wide, top-down shot, where the vastness of the lake is shown, as well as cracks in the ice which formed the shape of Sh’alud’s mouth—a chilling metaphor that suggested the ice was alive, a thin, fragile boundary between Valya and the lurking unknown dangers below. “The cracks became a symbol of her vulnerability, amplifying the sense of imminent peril,” Daniel notes.
The challenge of making the ice appear natural yet treacherous was achieved by carefully designing the texture of the ice to appear jagged, uneven, and fragile. Daniel explains, “To make the environment appear cold, it was conveyed not just through the icy surfaces, but also through the use of lighting and atmosphere. The play of light on the frozen landscape helped highlight the severity of the surroundings, making the viewer feel the biting chill as her footsteps creaked across the surface.”
In its final form, the combination of lighting, ice textures, and the Sh’alud-shaped cracks reinforced the atmosphere of isolation and terror. The icy lake, in the end, became not just a physical environment but a manifestation of the character’s internal terror, making it a haunting and memorable visual in the show.
FX Passes/Layers for Snow
At the end of the sequence, Valya herself begins to dissipate and blend into the storm, metaphorically letting the storm pass through her. This transformation was a technical challenge for the team. “We had some 3D geometry representing Valya,” shares Rob, “but the details of her hair and the folds in her clothing were too complicated to replicate in 3D.” To overcome this, the FX team utilized NDC projection techniques, matching the live-action plate and emitting particles directly from Valya’s body and hair. “Once the particles reached a certain distance, they began to inherit the turbulent forces driving the storm,” Rob adds.
The emotional weight of this key moment was further heightened by the interplay of lighting and mood. Drawing from the client’s vision, the team developed a series of keyframe concepts to explore different lighting setups and atmospheric effects that would reflect Valya’s internal battle and transformation.
“The goal was to emphasize the strength of the winds and the contrast between the coldness of Lankiveil and the warmth of Arrakis in the background,” David says. This duality of the environment reinforced Valya’s internal conflict while hinting at her deep connection to the larger forces at play.
“Her dissolution was a powerful metaphor, showing that she isn’t just battling the storm—she is part of it,” David explains. By combining the detailed FX work with carefully crafted lighting and symbolic visuals, this final shot captures the haunting beauty and emotional depth that defines the ice lake sequence.
Concept
Witness to vengeance
In Dune: Prophecy, the bull is a significant symbol associated with House Atreides, representing their traditions and the dangers they face. In episode 3, “Sisterhood Above All,” Tula Harkonnen infiltrates a bull-hunting event with a sinister agenda of vengeance.
Amidst the tension, a Salusan bull appears atop a rocky cliff. Its piercing gaze seems to lock onto Tula, bearing witness to her act. This moment sets an ominous tone, with the bull’s presence foreshadowing the calamity that lies ahead.
Concept artist Daniel Cox explains: “Building on its natural animalistic qualities, we focused on enhancing its size and musculature, adding a level of ‘natural’ armour. The armour design extended from the bull’s horns, down its back and spine, creating a more rugged and defensive profile. This added layer of armour not only increased its survivability but also aligned with the show’s thematic elements of survival in a hostile and dangerous world. The variations in the design were intended to reflect its status as a creature of both beauty and brutality.”
Concept
Final Asset
Original plate and final comp
A testament to collaboration and craft
Dune: Prophecy showcases how thoughtful collaboration and technical expertise can bring a legendary universe to life. From Anirul’s intricate holographic library to the chaos of battle, every detail was carefully crafted to serve the story.
“Our goal was to create visuals that felt both grounded in the Dune universe and unique to the Bene Gesserit’s story,” says Martyn Culpitt, VFX Supervisor. “Every scene had to feel massive and intimate at the same time, and that duality is what makes this show so compelling. It was an exciting challenge.”
As the series transports viewers to an era before Paul Atreides’ rise, Image Engine is proud to have contributed to the visual effects of the first season of Dune: Prophecy.
0 Commentaires
0 Parts