How to Use the Greyscalegorilla Studio App and Customize 3D Assets
greyscalegorilla.com
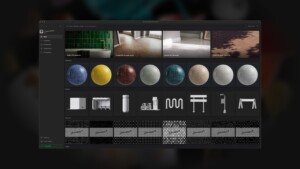
Unlock Every Asset with Greyscalegorilla PlusIf you are an existing Greyscalegorilla Plus member, you will already have access to download all assets (materials, models, HDRI, and textures). Just login with youre Plus account and youre ready to go.You will need to download assets through the Studio app for them to be one-click compatible. Current Cinema 4D HUB assets are limited to their select compatible render engine. With the new Studio assets, you only have to download an asset once and it will work anywhere Studio is compatible.Get Started with 50+ Free AssetsNot a Plus member? You can still get started with Studio for free. Just create a free Greyscalegorilla account, download the app, and once you login to Studio, you will find over 50 assets to use in any project. Download the Greyscalegorilla Studio appDownload the latest version of Studio for Mac or PC.Download the Connector plugins to connect to your 3D app of choice. Signing InOnce Studio is installed on your Mac or PC, open the app and login with your Greyscalegorilla Plus Account or your Free Account. Settings and OptionsNext you will choose where you want your asset files to live on your machine or hard drive. (For existing Plus members using the Cinema 4D HUB, you will need to create a new folder, as old assets are not compatible with Studio.)Next choose your default 3D Application to make things fast and easy when you launch the app. You can choose between Cinema 4D, Blender, Houdini, and Unreal Engine.Under Renderer, you can choose to have the default Automatic option if you use multiple render engines. Studio will automatically assemble materials for your 3D app and render engine once connected.Finally youll need install the Studio Connector Plugin for any 3D app you will be using. This will allow you to connect Studio to any compatible 3D app and start sending assets into your projects. You can find additional help installing Connector Plugins here. Navigating StudioThe Studio app has a dedicated menu to help you find assets by category or collection, or you can use the new intuitive Search to dive into the entire Plus asset catalogue.Search will provide all results based on your query, and you can filter results down to individual categories or new assets. FavoritesYou can now favorite any asset so you can easily find your go-to assets. They will appear in your favorites folder, and show the icon as you explore the app. Downloading AssetsGone are the days of downloading massive zip files or assets that only work with specific apps or render engines. Studio lets you download any asset once, and it will automatically assemble assets based on your 3D app of choice.For Plus members, downloads are unlimited. There are no credit systems or restrictions, you can download as many assets as you want, whenever you want. Connect to Your 3D AppWith your Studio Connectors installed, you just have to click Connect to have Studio make the handshake with the app of your choice.Based on the settings you set above, all assets will be automatically optimized and assembled for the compatible 3D app and render engine. Sending AssetsWith Studio connected to your 3D app, all you have to do is send assets into your project.Sending and Customizing MaterialsDownload the Material of your choice, and then click Send and the fully-assembled material will appear in your material library.You can then drag the materials onto your objects in your scene.Materials are also setup with Nodes, allowing you to fully customize settings like displacement, roughness, color, and more.Importing 3D ModelsDownload the 3D Model of your choice, and then click Send and the model will appear in your objects manager.Copy Paste -or- Drag and Drop any Texture, HDRI, Area Light Map, and MoreDownload any HDRI or Texture asset.Click Copy to copy the file path of your asset. In your 3D app, go to your texture file path and Paste.-or-Click on the HDRI image in the Studio app, and drag the HDRI into your 3D app and drop it in the texture file path. For any prompts, you can choose to say Yes to import the file into your project.In your 3D app, you can adjust settings or rotate your HDRI for the best lighting results.Bonus: Adding Textures to MaterialsWith collections like Surface Imperfections or Patterns, you can use textures in your scene, or you can use them within materials. You can add the textures to your materials with the same drag-and-drop functionality by placing the texture in the material Node Editor.Then you can feed the texture into the Roughness node, Color, Displacement, or a Bump Map and completely change the look of your materials.
0 Comments
·0 Shares
·0 Reviews


