500px
500px
A global online network where millions of photographers discover + share incredible photos
  • 3 people like this
  • 37 Posts
  • 2 Photos
  • 0 Videos
  • 0 Reviews
  • Design & Architecture
Search
Recent Updates
  • ISO.500PX.COM
    Using color contrast to elevate winter photography
    Winter is a season dominated by muted tones and white landscapes, making it an ideal backdrop for experimenting with color contrast. By highlighting bold colors against the winter backdrop, you can create striking images that convey both the chill of the season and the warmth of vibrant hues. Heres how to make the most of color contrast in winter to bring your photographs to life.Understanding winter color dynamicsWinter landscapes often appear monochromatic, with whites, greys, and shades of blue dominating the scene. This natural palette offers a unique opportunity to make colors pop, whether its the warmth of a sunset or a subject wearing a bright jacket. Look for natural contrastsLook for natural color contrasts such as the deep green of evergreens against the snow or the orange glow of a winter sunrise over a frosty landscape. These natural hues can add a powerful, atmospheric quality to your images, creating a dynamic interplay between warm and cool tones.Add a pop of color through wardrobe or propsIf your subject is a person or pet, encourage them to wear colors that contrast with their surroundings, like a red scarf or bright yellow hat. Small details like this draw the viewers eye and add an inviting warmth to the image without overwhelming the winter atmosphere.Timing and lighting for optimal color contrastWinter light changes throughout the day and can affect how colors appear in your images. Use these lighting tips to enhance color contrasts naturally.Capture colors during golden and blue hoursThe golden hour, with its warm tones, provides a beautiful contrast to the cool winter environment, highlighting textures in snow and ice. The blue hour, just before sunrise or after sunset, emphasizes cooler shades and creates a serene, almost magical quality. Experiment with both times of day to see how the colors in your scene transform. Adjust exposure to balance colorsWinters bright snow can sometimes wash out colors, so its crucial to manage your exposure carefully. Underexposing slightly can help deepen colors, especially in the sky, and bring out the rich contrast between snowy landscapes and other tones. A polarizing filter can also help by enhancing the skys blue tones, creating a more vivid background. Creative composition with color contrastIncorporate color contrast into your composition to make your images more engaging and visually balanced.Frame with foreground elementsUse naturally colorful foreground elements, such as pine trees, fallen leaves, or rocks, to introduce color contrast and guide the viewers eye through the frame. This layering technique helps add depth, making the image feel immersive and balanced. Place subjects against blank spacesIsolate your subject by placing it against snow-covered areas. A person, animal, or brightly colored object against a white or grey backdrop stands out beautifully, allowing the viewer to focus on the subject and color contrast without distractions.Additional tips for enhancing color contrast in winterColor contrast in winter isnt only about composition and timing; its also about using techniques that bring out the richness and depth of each hue.Use reflections for double impactIf youre near water, take advantage of reflections to double the impact of the color contrast. The reflection of a colorful sunset or trees in a partially frozen lake can enhance the colors in your composition and add visual interest.Try monochromatic scenes with a color accentFor a minimalist yet impactful look, capture mostly monochromatic winter scenes with one colorful accent, like a red berry bush in a snow-covered field. This approach emphasizes the starkness of winter while drawing attention to the single vibrant element. By mastering color contrast in winter photography, you can create images that are visually arresting and emotionally resonant. Experiment with timing, composition, and thoughtful use of color accents to add richness to your winter portfolio. With these techniques, your photos will reflect both the tranquility and the vibrancy that winter landscapes have to offer. Not on 500px yet? Sign up here to explore more impactful photography.The post Using color contrast to elevate winter photography appeared first on 500px.
    0 Comments 0 Shares 26 Views
  • ISO.500PX.COM
    Techniques for capturing wildlife in winter
    Winter offers photographers unique opportunities to capture wildlife in a setting that emphasizes the stark beauty and resilience of nature. Snow-covered landscapes, frosty mornings, and the quiet calm of winter months provide a stunning backdrop for animals in their natural habitat. Heres how to approach winter wildlife photography with a professional touch, focusing on advanced techniques for lighting, composition, and patience.Using light to enhance winter wildlifeThe lighting in winter is often softer and lower, casting a gentle glow over the landscape. Understanding how to harness this light can bring out the best in your wildlife photos. Utilize soft, diffused light for detailThe low winter sun provides a gentle, diffused light that enhances the natural textures of animal fur and feathers. This lighting is perfect for highlighting details without harsh shadows, giving your images a soft, balanced look. Shooting in the morning or late afternoon will add a warm tone to your subjects, which contrasts beautifully with the cooler winter environment. Backlight for a dramatic silhouetteWinters low sun makes backlighting more accessible throughout the day. When positioned carefully, it can create a glowing outline around your subject, adding drama and depth to the shot. To prevent overexposure, meter for the highlights on the animal or use exposure compensation to maintain detail in the background.Capturing wildlife behaviorOne of the best aspects of wildlife photography is observing animals in their natural routines. Winter provides a unique opportunity to capture behaviors such as foraging, hunting, and interaction with the environment.Be patient and observePatience is crucial in winter wildlife photography. Animals tend to conserve energy during colder months, making them less active. By observing quietly, you can anticipate movements and be ready to capture subtle behaviors that convey the essence of the season. Allowing animals to come closer rather than approaching them directly often results in more intimate and authentic images. Look for animal tracks and signsSnow-covered landscapes highlight animal tracks, which can tell a story about where animals have been and what theyve been doing. Use these tracks as visual cues to find your subjects or incorporate them into the composition for a storytelling element.Composition techniques for winter wildlifeThe winter environment allows for minimalist compositions that focus attention on the subject without distractions. Use these techniques to frame your wildlife subjects effectively.Frame with the natural environmentUse trees, branches, or snowdrifts as natural framing elements to focus attention on your subject. For example, framing a fox against a backdrop of bare trees or snow-capped rocks creates depth and adds context, showing the animals relationship with its environment. Include negative space for isolationSnowy landscapes often create a natural negative space that emphasizes the subject. By placing your subject within a vast, open space, you can create a sense of isolation or solitude, which is powerful in winter scenes. This technique works particularly well when photographing solitary animals like deer or foxes. Get low for an immersive perspectiveShooting from a lower angle places the viewer at eye level with the animal, creating an immersive experience. This perspective not only brings out details in the subject but also allows the viewer to connect with the animal on a more personal level. In snowy environments, getting low can also let you capture the texture of the snow and add dimension to your images.Practical tips for winter wildlife photographyCamouflage and quiet gearIn winter, animals are highly aware of their surroundings. Dress in neutral colors and use silent gear to avoid startling your subjects. Many professional wildlife photographers invest in camouflage covers for their equipment to help them blend into the environment.Capture breath and frost for effectOn particularly cold days, you may notice animals breath creating small clouds or frost forming on their fur. Capture these elements to add a sense of realism and atmosphere to your photos. Timing is keywatch for when an animal pauses to breathe, creating an opportunity for a shot that conveys the chill of winter. Adapt your shutter speed to movementWhen photographing animals in motion, use a faster shutter speed to freeze the action, especially in snowy conditions where even a small movement can stir up snow. Conversely, a slower shutter speed can blur background snow, adding a sense of movement and dynamism to a stationary subject.Winter wildlife photography offers the chance to capture animals in a world transformed by cold and snow. By carefully considering lighting, composition, and environmental elements, you can create images that highlight the resilience and beauty of wildlife during this challenging season. Embrace the quiet, be patient, and let winters natural rhythm guide you to capturing these captivating moments.Not on 500px yet? Click here to learn about Licensing with 500px.The post Techniques for capturing wildlife in winter appeared first on 500px.
    0 Comments 0 Shares 18 Views
  • ISO.500PX.COM
    Novembers Licensing Rush winners are here!
    This past November, Licensing Rush continued to grow, with more than 25,000 photos submitted from participating photographers around the world. All month long they competed to have the most new and exclusive photos accepted to Licensing, earning bonus points for each photo with an attached model release. The results have been counted and its time to reveal the winners with the most points!Taking first place is ghanwa111Altaf Shah$300 US prize. Altaf is a UK-based aerial and drone photographer, who claimed first place in this Licensing Rush with an impressive 6,423 points. Altaf took the gold without the need for any bonus points. Aerial photography is great for Licensing because it highlights the beauty of nature through different landscapes and shifting perspectives.Coming in second place is necmettinsobutayNecmettin Sobutay$150 US prize. Necmettin Sobutay takes second place with a score of 2,360 points. Using the bonus points to his advantage, Necmettin had 1,862 new and exclusive photos accepted and earned 498 bonus points for attached model releases. While focusing on landscapes, nature, and the great outdoors Necmettins work connects with travel, adventure, and seasonal change.Last but not least, in third place is ElmarWeissElmar Weiss$50 US prize. Elmar Weiss is a seasoned photographer, based in Germany, whose passion behind the lens has taken him on adventures around the globe. Elmar secured third place by earning 2,040 points. Licensing pillars of wildlife and nature photography, which often connect with concepts of sustainability, ecology, and adventure, can be seen throughout Elmars Portfolio.November saw the fiercest Licensing Rush yet, with more than 25,000 photos submitted. The next Licensing Rush winner could be anyone, as 500px photographers continue to embrace the challenge and compete to earn the top spots.Be the first to know about the next 500px Licensing Rush by opting in for 500px Licensing News!Check out our Licensing Quests for more opportunities to win prizes. Not on 500px yet? Click here to learn about Licensing with 500px.The post Novembers Licensing Rush winners are here! appeared first on 500px.
    0 Comments 0 Shares 17 Views
  • ISO.500PX.COM
    The 500px Global Photography Awards 2024: Submit your best work
    The 500px Global Photography Awards are back, and were inviting photographers from around the world to submit their best photos taken or uploaded to 500px in 2024. Open to both Hobbyists and Professionals, these awards celebrate outstanding photography across six diverse categories.Whether youre a seasoned pro or just starting in photography, this is your chance to showcase your talent, connect with a global community of passionate photographers, and compete for $23,000 in incredible prizes.What are the 500px Global Photography Awards?The 500px Global Photography Awards are an annual competition designed to recognize and celebrate creativity, innovation, and storytelling in photography. Photographers can enter their work into one of six unique categories.Landscape: Showcase the beauty of nature, from grand vistas to intimate moments in the wild.Portrait: Capture the essence of human connection, emotion, and personality.Fine Art: Express your creativity with imaginative and artistic compositions.Documentary: Share compelling stories and real-world moments through honest imagery.Still Life: Turn everyday objects into works of art with careful composition.Architecture: Highlight the design, lines, and elegance of man-made structures.Each category will award two winnersone Hobbyist and one Professionalwith 12 total winners selected.Why submit to the awards?Heres why the 500px Global Photography Awards are worth your time:Recognition: Have your work seen and celebrated by a global photography community.Prizes: Compete for a share of $23,000 in prizes, including high-end gear, cash prizes, and more.Exposure: Winners will be featured on 500pxs blog, social media, and email campaigns, reaching millions of photography enthusiasts worldwide.Community: Be part of a passionate group of photographers who inspire and support one another.Submitting is free for all 500px members. Not a member? Sign up today and join the competition!What can you win?Category winners: Each of the six category winners (Pro and Hobbyist) will receive:Pro: DJI Mini 4 Pro Fly More Combo, Crucial X9 Pro Portable SSD, Lowepro PhotoSport Backpack, Manfrotto Befree Advanced Tripod, Xpozer 2436 Print, and more. Total value: $2,000 US.Hobbyist: DJI Mini 3 Fly More Combo, Crucial X10 Pro 1TB Portable SSD, JOBY GorillaPod 3K Kit, Xpozer 2436 Print, and more. Total value: $900 US.Photographer of the Year (Selected from the category winners):Pro: DJI Mavic 3 Pro Fly More Combo, ThinkTank BackLight 26L Backpack, and $1,000 US cash prize. Total value: $4,150 US.Hobbyist: DJI Mini 4 Pro Fly More Combo, ThinkTank BackLight 26L Backpack, and $500 US cash prize. Total value: $1,800 US.How to enterEntering the 500px Global Photography Awards is easy:1. Join 500px: If youre not already a member, sign up for free and become part of a passionate photography community.2. Submit your work: Upload your best photos taken or uploaded in 2024 to one of the six categories.3. Stand out: Showcase your creativity, skill, and perspective to impress the judges.Key dates to rememberSubmissions open: December 17, 2024Submission deadline: January 19, 2024Dont waitstart planning your submissions now!Be part of the 500px Global Photography AwardsThe 500px Global Photography Awards are more than just a competitiontheyre a celebration of the art and passion that define photography. Whether youre a Professional looking to make your mark or a Hobbyist ready to share your talent, this is your chance to shine.Join the 500px community, submit your best work, and you could walk away with incredible prizes, recognition, and the coveted title of 500px Photographer of the Year.Submit your photos today!The post The 500px Global Photography Awards 2024: Submit your best work appeared first on 500px.
    0 Comments 0 Shares 24 Views
  • ISO.500PX.COM
    Creative approaches to winter portraits
    Winter is a unique season for portraits, offering a chance to capture the contrast of cold surroundings with the warmth of human connection. With a bit of planning, you can create portraits that arent just seasonal, but also deeply atmospheric. Heres how to approach winter portraits with a professional touch, focusing on advanced techniques for light, texture, and storytelling.Leveraging winter lightThe quality of light in wintersoft, low, and slightly diffuseoffers excellent opportunities for portrait photographers to craft intimate and evocative images. Understanding how to use and shape this light will give your portraits a signature winter mood. Utilize reflective snow lightIn winter, snow acts as a natural reflector, filling shadows on the subjects face with a soft, cool glow. Position your subject to face the snow to take full advantage of this effect, which creates a subtle, even light that highlights skin tones and softens facial lines. For added control, try using a handheld reflector to bring a warm tone back into the skin if needed. Play with side lighting for depthPositioning your subject at a 45-degree angle to the light source (sun or artificial) allows you to create a balance of light and shadow on the face. This technique, often called Rembrandt lighting, emphasizes depth and creates a more sculpted look. In winter, side lighting can add a striking, dimensional quality to the subject against softer snowy backgrounds.Using backlight for dramaWinter sun tends to stay low throughout the day, making backlighting more accessible and less intense than in summer. This light is perfect for creating a soft halo effect around your subjects hair or clothing, lending a dreamy quality to the portrait. Keep exposure slightly lower to avoid washing out the background and preserve detail in the subjects silhouette.Adding texture and atmosphereTexture in winter portraits goes beyond clothingits about building layers of mood and story within the frame. Try to bring out textures that enhance the emotional tone of the portrait, whether its the frost on trees or the softness of snowflakes. Use natural elements to frame the shotPosition your subject among bare branches, evergreen boughs, or snow-covered fences. These elements add foreground interest, creating depth and drawing attention to the subject. Look for textures like ice or frosted grass to surround the frame and contrast with the warmth of the person.Incorporate breath or steam for moodOn especially cold days, visible breath or steam from a hot drink can add a sense of realism and place to your portrait. Timing is essential herehave your subject exhale slowly and watch for natural patterns, as capturing this detail can bring an intimate, candid feel to the portrait. You can also use the steam to soften the background, giving it a painterly effect. Composition techniques for winter portraitsWinter landscapes are often minimal and muted, which can allow for bold composition choices. Embrace the simplicity of winter backdrops to emphasize form and content.Negative space for minimalismPosition your subject within a vast, snow-covered landscape to create a sense of isolation or peaceful solitude. By using negative space, you allow the subject to become the main point of focus, surrounded by the expansive quiet of winter. This technique is powerful for conveying emotion, whether its calm, introspection, or resilience. Leading lines with footprintsIf youre photographing in fresh snow, consider using your subjects footprints as leading lines to guide the viewers eye. Footprints can add a storytelling element to the portrait, suggesting movement or journey, and adding subtle texture to the snow.Layering with background elementsAdd depth by including layers of elements in the background, such as snow-covered trees or rolling hills. This setup emphasizes the subjects place within a larger scene, creating a narrative that feels immersive. The contrast between the subject and these background layers is especially effective when your subject wears a contrasting color, such as deep red or forest green, to stand out against the white surroundings. Advanced tips for winter portraitsHere are some additional tips that go beyond the basics to help you make the most of winter portrait sessions.Try shallow depth of field to blur snowflakesA wide aperture (e.g., f/2.8) allows you to blur the falling snow, adding a dreamy, magical effect. Experiment with different distances from your subject to control how the snowflakes appearcloser to the lens creates larger, more pronounced blurs, while a bit of distance creates a gentle haze.Experiment with shutter speed to capture falling snowUse a slower shutter speed (around 1/100) to capture the movement of snowflakes for a gentle, streaked effect. This setting works well in low light and brings out the motion within the frame, giving the scene a sense of quiet action. For a crisper, more playful look, increase the shutter speed to freeze individual flakes in mid-air, especially in brighter conditions.Cold weather gear careWinter elements can be hard on camera gear. Bring extra batteries, as the cold drains them quickly, and keep a microfiber cloth handy to wipe off snow or condensation. Store your camera in a sealed bag before moving it back indoors to prevent condensation from forming on the lens or sensor.By focusing on advanced lighting techniques, intentional composition, and creative use of atmosphere, you can create winter portraits that go beyond the traditional. Whether your goal is to convey warmth, solitude, or the quiet beauty of winter, these techniques will allow you to capture the seasons essence in a way that resonates with viewers and stands out from the ordinary.Not on 500px yet? Sign up here to explore more impactful photography.The post Creative approaches to winter portraits appeared first on 500px.
    0 Comments 0 Shares 34 Views
  • ISO.500PX.COM
    Mastering winter landscapes in photography
    Winter landscapes offer a stunning canvas soft light, snow-covered scenes, and unique textures that create serene, almost magical images. However, photographing these wintery vistas requires planning and technique to capture their full potential. Heres how to elevate your winter landscape photography.Understanding winter lightWinter light is soft and subdued, which can add a quiet, moody quality to images when used effectively. Knowing when and how to work with winter light is key to capturing the seasons beauty. Golden hour advantageIn winter, the sun sits lower in the sky, elongating the golden hour and casting warm tones over frosty landscapes. Use this time to photograph landscapes with rich, warm light that contrasts against the cool tones of snow and ice. Early morning light can also reveal subtle colors and intricate frost details, perfect for close-ups or wider scenes.Overcast skies and diffused lightThough golden hours are magical, overcast skies bring their own benefits. A blanket of clouds acts as a natural softbox, casting diffused, even light over snowy scenes and eliminating harsh shadows. This soft lighting is ideal for emphasizing the texture and contrast in a snowy forest or frozen lake. Aim to capture these scenes around midday when overcast conditions are at their peak brightness.Composition tips for winter scenesSnow and ice transform landscapes into minimalist settings, simplifying the composition but also requiring thoughtful planning. Use leading lines in snowSnow can create natural lines and pathways, especially on trails, rivers, or roads. Leading lines in snow-covered areas can guide the viewers eye through the image toward a focal point, like a cabin, tree, or mountain peak. Footprints, ski tracks, or the edge of a river can also act as subtle leading lines.Focus on foreground elementsAdding layers to a winter landscape brings depth to your photos. Try including a tree, rock, or fence post in the foreground to add dimension. Snow-covered branches or frost-laden leaves in the foreground can create a frame for the main scene, adding context and drawing the viewer deeper into the image.Capturing contrast and colorWinter landscapes are often composed of whites, grays, and muted tones, but incorporating color can make your photos pop and add emotion to the scene. Look for splashes of colorA red barn, orange jacket, or evergreen tree can add a striking contrast to a snow-covered scene. Position these colors thoughtfully within the frame to naturally guide the eye and create balance. Remember that warm colors can evoke comfort, while cooler tones add to the serene, quiet feel of winter.Enhance natural monochromeMany winter landscapes naturally fall into monochromatic color schemes. Use this to your advantage by emphasizing tones, textures, and patterns. For instance, the contrast between freshly fallen snow and dark tree trunks can create a striking, high-contrast effect without needing any additional color.Techniques for working with snowSnow offers unique photographic opportunities but also comes with its own challenges, such as exposure and detail preservation.Mastering exposure for snowSnow can confuse a cameras metering system, often resulting in underexposed images. To avoid gray, dull snow, consider overexposing by +1 to +2 stops to achieve bright, true-to-life whites. Use your histogram as a guide to avoid blowing out the highlights while ensuring the snow retains texture and detail. Play with shutter speedsCapture falling snow by experimenting with different shutter speeds. A faster shutter speed (1/500 or higher) will freeze individual snowflakes, while a slower shutter (1/30 or lower) will create a soft, dreamy effect by blurring the snows movement. Adjust according to the look you want and the intensity of snowfall.Additional tips for winter photographyPolarizing filterA polarizer can reduce glare from snow and ice, enhance sky contrast, and deepen colors, making it invaluable for snowy landscapes.Protect your gearCold temperatures can drain batteries quickly, so bring extra. Also, keep your camera safe from moisture by placing it in a sealed plastic bag when moving between warm and cold environments to avoid condensation.Experiment with minimalismWinter scenes naturally lend themselves to minimalism. Use the open spaces created by snow-covered ground to simplify your compositions and highlight a single focal point. Winter landscapes have a unique, quiet beauty thats unlike those in any other season. By understanding how to work with winter light, mastering composition techniques, and thoughtfully handling snow and exposure challenges, you can capture images that showcase the magic of the season. Remember, patience and preparation are keyembrace the elements, and youll be rewarded with stunning, evocative winter photographs.Not on 500px yet? Click here to learn about Licensing with 500px.The post Mastering winter landscapes in photography appeared first on 500px.
    0 Comments 0 Shares 37 Views
  • ISO.500PX.COM
    Capture the magic: Enter this Questmas photo competition and win big!
    It is a season thats special for manya season filled with cheer and with another amazing Questmas where 500px has collaborated with some of your favorite brands in the spirit of giving.This years edition features 12 exciting photo Quests over 12 days, offering 12 opportunities to win big. What a time to be festive and merrily show off your photography skillsyou know you want toWhats in store this Questmas12 Days. 12 Quests. 12 Chances to Win!This holiday season, Questmas 2024 brings you 12 exciting opportunities to level up your photography game! From December 112, showcase your talent by submitting your best shots across 12 challenges. Compete for premium prizes from top industry brands and make this a season to remember for your photography journey!The Quests and prizesMinimalistSponsored by FractalsENTER THE QUESTDiscover the art of less is more. Minimalism may seem simple to create at first glance, but it challenges photographers to strip away distractions and focus on the essentialscrafting images that resonate through simplicity in subjects, colors, and narratives. Its a true test of your eye, editing, and storytelling skills.Submit your best minimalist shots and you will stand a chance to win three packs of Fractals award-winning classic prism filters! Known for transforming everyday scenes into jaw-dropping works of art, these filters will elevate your photography from meh to magnificent.Ready to see your vision shine? Lets make minimalism powerful!Explore Fractals award-winning prism filtersAdventureSponsored by LoweproENTER THE QUESTAdventure photography has the power to transport viewers to far-off places and thrilling momentsand we cant wait to journey through your lens! If youre always chasing adventure and capturing it along the way, this challenge is for you.Submit your best adventure shots for a chance to win the Lowepro PhotoSport PRO, a backpack designed for photographers on the go. Lightweight yet rugged, it offers unmatched comfort and protection, making it the ultimate companion for your next expedition.Ready to inspire wanderlust? Let the adventures begin!Learn more about Lowepros photography backpacksAerialSponsored by F-stopENTER THE QUESTTake us to breathtaking new perspectives! Whether its drone shots, mountain vistas, or high-rise views, this competition celebrates the art of top-down aerial photography that wows and inspires. Our creative community has mastered the art of showcasing the world from abovenow its your turn to shine!Submit your best high-altitude imagery for a chance to elevate your gear collection with the Dyota 20L Camera Bag and Accessory Pouch from F-stop. Designed with adventurers in mind, this duo keeps your gear safe and organized wherever your next shoot takes you. Lets see the world from your vantage point!Learn more about the Dyota 20L Camera Bag and Accessory Pouch by F-stopStreetlifeSponsored by JobyENTER THE QUESTHit the streets and show us what makes your city come alive! Whether you document urban life, showcase street style, craft editorial-worthy scenes, or freeze candid moments in time, the possibilities are endless. Street photography holds a special place in the hearts of our 500px community, and we cant wait to see how you bring this genre to life.Submit your best street shots for a chance to win the versatile JOBY GorillaPod 5K Kit. This portable, adaptable tripod offers unparalleled stability, making it your perfect companion for capturing the ever-changing rhythms of street life. Lets see your city, your way!Check out the JOBY GorillaPod 5K KitLandscapeSponsored by XpozerENTER THE QUESTLandscape photography captures our hearts dailyand for good reason. It connects us all to the beauty of our surroundings and offers a creative playground for photographers of every skill level. Whether youre just starting out or constantly refining your craft, landscapes are an endless source of inspiration. We hope this challenge sparks your imagination and encourages you to immerse yourself in the natural world.But capturing beauty is only half the journeydisplaying it completes the story. Thats why were thrilled to partner with Xpozer for this prize. Their innovative print and floating frame system transforms your work into gallery-worthy pieces, combining stunning sharpness, vibrant colors, and a sleek, reflection-free finish. Lets bring your landscapes to life!See Xpozers print and frame system for photographersPerspectiveSponsored by AstrHoriENTER THE QUESTPerspective isnt just a mindsetits a game-changer in photography. By playing with angles, height, distance, and depth, you can turn everyday scenes into extraordinary works of art. Perspective photography invites you to explore new viewpoints, transforming the ordinary into the unexpected and revealing fresh ways of seeing the world.Show us your unique perspective for a chance to win the AstrHori Full-Frame Tilt Lens. This one-of-a-kind lens lets you push creative boundaries, offering wide apertures for dreamy blur effects and tilt-shift capabilities to completely transform the focal plane. Its a tool that will inspire you to seeand capturethe world like never before!Check out the AstrHori Full-Frame Tilt LensAnimalsSponsored by 7artisansENTER THE QUESTFrom the untamed wilderness to the comfort of our homes, animals captivate us with their personality, movement, and beauty. Whether its a powerful wildlife encounter, a serene moment in nature, or a heartfelt pet portrait, animal photography connects us to the extraordinary bond between creatures and the world around them.Join the Animals Quest, created in partnership with 7Artisans, and share your best shots of animal life. The prize? A remarkable medium telephoto lens from 7Artisansan essential addition to any wildlife photographers kit. Its precision and versatility will elevate your work, helping you capture the animal kingdom like never before.Didnt know you needed it? Now you doso submit your shots and get closer to making it yours!Discover the 7Artisans medium telephoto lensFacesSponsored by ViltroxENTER THE QUESTFaces are windows to emotion, each one telling a story thats uniquely human. From powerful portraits to candid expressions or fleeting moments of joy and introspection, face photography captures the essence of connection and emotion in its purest form.Take on this Quest and show us the power of your portraiture for a chance to win the Viltrox AF 56mm F1.7 APS-C Lens for Fujifilm X-Mount, paired with a Protection Filter. This dynamic duo ensures high-quality, crystal-clear captures, featuring an autofocus motor for smooth, precise, and noiseless focusing. Ready to bring stories to life? Lets see your best work!Learn more about the Viltrox AF 56mm F1.7 LensMotionSponsored by CrucialENTER THE QUESTMotion photography captures the energy and excitement of life in motion, freezing moments that showcase the dynamism of the world around us. Whether its the hustle of a city street, the raw power of athletes in action, or the flowing grace of nature, these shots bring stories to life with every frame.Submit your best motion-filled images for a chance to win the Crucial X10 Pro 2TB Portable SSD. This compact, palm-sized powerhouse ensures youll never have to worry about running out of storage space again, giving you the freedom to focus on your craft. Ready to capture life in motion? Lets see your energy in action!Explore the Crucial X10 Pro 2TB Portable SSDReflectionsSponsored by CalibriteENTER THE QUESTReflections reveal hidden worlds in still water, glass, or any reflective surface, offering a unique way to showcase both your subject and its surroundings. These images create visually stunning compositions that play with symmetry and perspective, challenging the viewers perception and adding depth to your work.Still unsure whether to enter your reflective shots? Let us give you another reason toaccuracy. The ColorChecker Passport Photo 2 and Display Pro HL from Calibrate will ensure your colors are pure and true from capture to edit. The winning photographer will receive this powerful duo, giving you the tools to perfect your color workflow and bring your vision to life with precision.Ready to see your reflections in their truest form? Submit your shots today!Check out the Calibrite ColorChecker Passport Photo 2ArchitectureSponsored by ManfrottoENTER THE QUESTArchitecture photography reveals the artistry and craftsmanship behind the spaces we inhabit, from sweeping cityscapes to intricate details. It showcases the design, form, and context of manmade structures, telling the story of human creativity through every angle.Submit your best architectural shots for a chance to win the Manfrotto Befree GT XPRO Carbon Tripod. With its precision engineering and adaptability to all photo orientations, this tripod will elevate your photography practice. If youve never used a tripod before, youll quickly discover how it transforms your shots and opens new creative possibilities.Ready to capture the beauty of design? Lets see your architectural vision come to life!Learn more about the Manfrotto Befree GT XPRO TripodTextureSponsored by Great Big Photography WorldENTER THE QUESTGreat Big Photography WorldOur world is rich with textures, and we want to see how you capture them! Texture photography highlights the tactile quality of surfaces, bringing ordinary objects to life by showcasing the patterns, lines, and materials that surround us. From the roughness of bark to the smoothness of a pebble or the delicate intricacies of fabric, every shot invites the viewer to experience the world in a new and sensory way.If your images bring the sense of touch to life, you could be the lucky winner of a 3-year community membership to a leading platform dedicated to photography development. This is your chance to take your texture photography to the next level and connect with a vibrant creative community.Ready to let your images speak through texture? Submit your best shots today!Learn more about Great Big Photography World membershipNow that you know about the incredible prizes and exciting Quests, its time to showcase your photography skills. Join the Questmas Challenges today for your chance to win amazing gear from top brands like Fractals, Lowepro, F-stop, and more.Join in the Questmas ChallengesNot on 500px yet? Sign up here to explore more impactful photography.The post Capture the magic: Enter this Questmas photo competition and win big! appeared first on 500px.
    0 Comments 0 Shares 46 Views
  • ISO.500PX.COM
    Dynamic street photography in black and white
    Street photography captures the essence of everyday life, and when shot in black and white, it gains a timeless, raw quality that emphasizes the mood, texture, and contrast of the scene. By focusing on the interplay of light and shadow, human interaction, and the urban environment, you can create compelling and dynamic street photographs. Heres how to make your black-and-white street photography stand out.Emphasizing contrast and textureIn black-and-white street photography, contrast plays a key role in defining the subject and creating depth within the frame. Without color to distract, the focus shifts to the textures and tones that make up the scene.High contrast for impactStrong contrast between light and dark areas can create drama and intensity in your photos. Look for scenes where bright sunlight casts deep shadows, or where artificial light from street lamps or shop windows creates strong highlights. High-contrast images, especially in bustling urban environments, can convey a sense of energy and movement. Capturing textureUrban landscapes are full of rich textures, from the roughness of brick walls to the smoothness of glass windows. In black-and-white photography, these textures become more pronounced, adding visual interest and complexity to your images. Pay attention to surfaces and patterns that might otherwise be overlooked in color photography, and use them to enhance the feel of your photo.Playing with light and shadowStreet photography often relies on natural or available light, and black-and-white photography excels at capturing the dynamic range between light and shadow.Silhouettes and shadowsLook for opportunities to capture silhouettes or dramatic shadows cast by people, buildings, or objects. Shooting against the light, such as during sunrise or sunset, can turn your subjects into striking silhouettes. Shadows, on the other hand, can add layers to your composition, guiding the viewers eye and creating depth. Using reflectionsPuddles, windows, and mirrors offer opportunities to play with reflections, which can add complexity to your street shots. In black-and-white photography, reflections create interesting shapes and contrasts, especially when combined with the starkness of urban light sources. Capturing emotion and interactionOne of the most powerful elements of street photography is its ability to capture candid moments of human emotion and interaction. Black and white helps strip away distractions, focusing the viewer on the expression, gesture, or moment at hand.Candid momentsLook for spontaneous interactions, whether its a conversation, a shared laugh, or even a fleeting glance. These moments tell a story and add emotional depth to your image. Since black and white emphasizes contrast, pay attention to how expressions and body language are highlighted by light and shadow. Framing the sceneUse your surroundings to frame your subjects and enhance the story youre telling. Doorways, windows, or the spaces between buildings can serve as natural frames, drawing the viewers attention to the human interaction happening within the scene.Movement in street photographyStreet photography is often dynamic, with people, cars, and city life in constant motion. Black-and-white photography allows you to capture this movement in creative ways.Freezing the actionTo capture fast-moving subjects like pedestrians or vehicles, use a fast shutter speed to freeze the action. In black and white, the stark contrast between a sharp subject and blurred background can emphasize the energy of the moment. Long exposuresAlternatively, you can experiment with slower shutter speeds to blur motion, creating a sense of fluidity. Moving subjects, like passing crowds or vehicles, will appear as streaks of light or shadow, giving your image a dynamic, dreamlike quality.Mastering black-and-white street photography is about observing the subtleties of light, shadow, and human interaction. By focusing on contrast, texture, and movement, you can capture the energy and raw beauty of everyday life in the city. Experiment with different techniques and be ready for those unplanned, candid moments that make street photography so captivating. Not on 500px yet? Sign up here to explore more impactful photography.The post Dynamic street photography in black and white appeared first on 500px.
    0 Comments 0 Shares 59 Views
  • ISO.500PX.COM
    Minimalism in monochrome: Less is more
    Minimalism in black-and-white photography is about stripping away distractions and focusing on simplicity, using negative space, clean lines, and isolated subjects to create a powerful visual impact. In a world where complexity often reigns, minimalist photography stands out by embracing simplicity. Heres how you can use the principles of minimalism to craft striking black-and-white images that resonate. Understanding minimalism in photographyMinimalist photography aims to convey a clear message with as few elements as possible. This approach emphasizes the importance of composition, light, and subject placement. In black-and-white photography, minimalism becomes even more potent because theres no color to rely on, so every detail, shadow, and texture must contribute to the overall impact.Simplicity is keyAt its core, minimalism is about reducing the scene to its most essential elements. Whether its a lone tree in a vast field or a single architectural line, the goal is to focus attention on the subject without distractions. Embracing negative spaceNegative space, or the empty area around your subject, plays a significant role in minimalist photography. By giving your subject plenty of room to breathe, you draw the viewers eye directly to it, enhancing its importance within the frame. In black-and-white photography, the use of negative space can create a sense of calm, isolation, or contemplation, depending on how you frame it.Composition techniques for minimalismMinimalist photography relies heavily on strong composition. Without the complexity of multiple elements or colors, the arrangement of the subject within the frame becomes paramount.Rule of thirdsWhile minimalism often leans toward simplicity, the rule of thirds is still an effective compositional guideline. Placing your subject off-center within the frame can create a sense of balance and flow. The surrounding negative space becomes a complementary element to the subject.Symmetry and balanceMinimalism and symmetry go hand in hand. Symmetrical compositions in black-and-white photography can create a sense of order and tranquility. Whether its a reflection in water or a perfectly centered subject, symmetry adds to the overall simplicity and elegance of the image. Leading linesUsing leading lines can guide the viewers eye directly to your subject, enhancing the minimalist effect. Look for strong, simple lines in architecture, landscapes, or even shadows that draw attention to the focal point of your composition. Light and shadow in minimalist photographyIn black-and-white minimalism, light and shadow are your primary tools for adding depth and contrast to an otherwise simple image. The way you use light can turn a basic composition into something extraordinary.Harsh light for bold contrastStrong, directional light can create sharp contrasts between light and dark areas, which works particularly well in minimalism. The stark contrast between black and white emphasizes the simplicity of the scene and brings focus to the shapes and lines within the frame. Soft light for subtletySoft, diffused light can also be effective in minimalist black-and-white photography. This type of light reduces harsh shadows, allowing for a more gentle, understated composition. Use soft light when you want to highlight subtle textures or create a sense of calm and tranquility.Silhouettes for impactSilhouettes are a powerful tool in minimalist photography. By shooting against a bright background, such as the sky or a well-lit wall, you can turn your subject into a simple, dark shape that stands out boldly against the lighter background. This high-contrast approach strips the subject down to its most basic form, creating a striking visual impact.Choosing the right subjectIn minimalist photography, your choice of subject plays a critical role. It needs to be visually interesting on its own, as there are no other elements to distract or complement it.Isolated subjectsLook for isolated subjects that stand alone in their environment. A single tree in a field, a person walking along a deserted street, or a lone building against the sky are all examples of minimalist subjects. The simplicity of these compositions forces the viewer to focus entirely on the subject, amplifying its importance. Abstract formsMinimalism often blurs the line between reality and abstraction. By focusing on simple shapes, patterns, or textures, you can create abstract compositions that invite the viewer to interpret the image in their own way. In black-and-white photography, the absence of color allows abstract forms to stand out more clearly, making them ideal for minimalist compositions.Maximizing negative spaceNegative space isnt just emptyits an essential part of your composition. The space around your subject can evoke a sense of isolation, loneliness, or peace, depending on how you use it.Balance between subject and spaceWhen incorporating negative space into your composition, the key is balance. Too little negative space, and the image can feel cramped or cluttered; too much, and the subject may get lost. Finding the right balance ensures that the subject remains the focal point while the surrounding space complements it. Creating tension with spaceNegative space can also be used to create tension in your image. By positioning the subject in one corner or at the edge of the frame, you create a sense of unease or imbalance. This can add emotional depth to your minimalist composition and make it more thought-provoking. Techniques for minimalist black-and-white photographySlow down and simplifyWhen approaching minimalist photography, take your time. Slow down, observe your surroundings, and look for simple compositions. Its easy to overcomplicate a shot, but with minimalism, less is always more.Shoot in monochrome modeMany digital cameras allow you to shoot in black-and-white mode, which can help you see your compositions in terms of light, shadow, and contrast without the distraction of color. While you can always convert to black and white in post-processing, shooting in monochrome mode can help you visualize the final image more clearly. Minimalism in black-and-white photography is a celebration of simplicity. By focusing on clean compositions, strong lines, and the interplay of light and shadow, you can create powerful images that speak volumes without saying too much. The key to success in minimalist photography is restraintletting the subject and the space around it do the talking.Not on 500px yet? Click here to learn about Licensing with 500px.The post Minimalism in monochrome: Less is more appeared first on 500px.
    0 Comments 0 Shares 91 Views
  • ISO.500PX.COM
    Capturing emotion with black and white portraits
    Black-and-white portraits have a timeless quality that brings out the raw emotion and character of the subject. Without the distraction of color, the focus shifts entirely to expression, texture, light, and shadow. Whether youre shooting in natural light or in a studio, capturing powerful black-and-white portraits requires a thoughtful approach to composition, lighting, and connection with your subject. Heres how to create striking monochrome portraits that stand out. Understanding the power of black-and-white portraitsBlack-and-white portraits are compelling because they simplify the image, allowing the viewer to focus more on the emotional aspects of the photograph. The absence of color emphasizes textures, facial expressions, and subtle nuances in light that might be overlooked in color portraits.Highlighting emotionWithout the distraction of color, black-and-white photography draws attention to the subjects eyes, body language, and facial expressions. A well-timed smile or a pensive gaze becomes the focal point, conveying a sense of emotion that is often more powerful in monochrome. Enhancing texture and detailBlack-and-white photography excels at showcasing details like skin texture, hair, and wrinkles. These elements can add depth to your portraits, making them feel more authentic and raw. By controlling light, you can enhance or soften these textures to suit the mood of the image. Using light to sculpt your subjectLighting is one of the most crucial elements in black-and-white portrait photography. The way light falls on your subject can dramatically change the mood and impact of the image.Side lighting for depthSide lighting, also known as Rembrandt lighting in portraiture, can create depth and dimension in your portraits. Position your light source to the side of the subject, casting shadows on one side of the face while illuminating the other. This contrast between light and shadow adds drama and highlights the contours of the face.Soft light for subtletyIf youre aiming for a softer, more flattering look, use diffused light to wrap gently around your subject. This can be achieved by shooting on an overcast day or using a diffuser in a studio setup. Soft light minimizes harsh shadows and creates a more even tone, perfect for capturing the gentle details of a subjects face. High contrast lighting for dramaFor a more intense, moody portrait, high contrast lighting can create a dramatic effect. Using strong directional light, such as a spotlight, can highlight certain features of your subject while casting deep shadows on others. This works especially well in black-and-white, where the interplay between light and dark becomes the focal point. Composition tips for black-and-white portraitsWithout color to guide the viewers eye, composition becomes even more critical in black-and-white portraiture. The placement of the subject, the use of space, and the framing of the shot all contribute to the overall impact of the image.Framing and croppingClose-up portraits tend to work exceptionally well in black and white because they focus attention on the subjects face and expression. Tight cropping around the face can intensify the emotional connection between the subject and the viewer. Experiment with cropping just below the chin or closer to the eyes to direct the viewers gaze where you want it. Negative space for balanceUsing negative space in your composition can enhance the simplicity and impact of your black-and-white portraits. Leaving empty space around the subject can make the portrait feel more contemplative or peaceful, allowing the viewer to focus entirely on the emotion conveyed in the face or posture. Eye contact and gazeIn portraits, where the subject is looking can dramatically influence the viewers engagement. Direct eye contact with the camera creates an immediate connection, drawing the viewer in. Alternatively, having the subject gaze off-camera can add an element of mystery or introspection, encouraging the viewer to wonder what the subject is thinking or looking at.Capturing raw emotion in portraitsThe key to a successful black-and-white portrait is capturing authentic emotion. This requires building a rapport with your subject and making them feel comfortable in front of the camera.Building connectionSpend time talking to your subject before and during the shoot. Encourage natural conversation to help them relax and express their true emotions. Candid moments often lead to the most powerful portraits, so be ready to capture them when they happen. Directing with purposeGive your subject clear, simple directions that evoke emotion. Rather than telling them to smile, ask them to think about something that makes them happy. Similarly, if youre aiming for a more serious portrait, ask them to reflect on a meaningful moment in their life. These subtle prompts can elicit genuine expressions that resonate in your final image.Incorporating texture and contrastBlack-and-white portraits thrive on texture and contrast. From the texture of the skin to the fabric of the clothing, each element plays a role in shaping the overall feel of the image.Highlighting skin textureIn monochrome portraits, skin texture can add character and realism. Dont shy away from wrinkles, freckles, or imperfectionsinstead, use them to tell a story. The interplay of light and shadow across the skin can add dimension and make your subjects face come to life. Contrast between light and darkStrong contrast between light and dark areas can create a sense of drama and intensity. Whether its the contrast between your subjects hair and the background, or the sharp distinction between their features and the shadows on their face, embrace contrast to enhance the depth and impact of your portraits.Black-and-white portraiture is an art form that strips away distractions and focuses on the essence of the subject. By mastering the interplay of light and shadow, using thoughtful composition, and building a strong connection with your subject, you can create powerful, emotional portraits that resonate with viewers.Not on 500px yet? Sign up here to explore more impactful photography.The post Capturing emotion with black and white portraits appeared first on 500px.
    0 Comments 0 Shares 103 Views
  • ISO.500PX.COM
    Textures and patterns in monochrome photography
    Black-and-white photography relies heavily on textures and patterns to bring depth and interest to your images, as you dont have the distraction of color to fall back on. Understanding how to effectively capture textures and patterns in monochrome is essential for creating strong, compelling photographs. Lets explore how to use these elements to their full potential.Why textures and patterns matter in monochromeIn the absence of color, texture and pattern take center stage in defining the subject and guiding the viewers eye. When captured well, these elements can add dimension, contrast, and a sense of realism to your black-and-white images.Defining texture in monochromeTexture refers to the tactile quality of the subject as it appears in your photograph. Whether its the rough bark of a tree, the smooth surface of a stone, or the fine grain of a weathered wall, texture adds a sensory dimension to your image. In black-and-white photography, texture becomes more pronounced because the interplay of light and shadow is more visible, giving your subject a heightened sense of realism. The role of patternsPatterns, on the other hand, are repeated visual elementslines, shapes, or formsthat create rhythm in an image. Whether its the repetitive arrangement of tiles on a roof or the natural pattern of waves in the sand, patterns draw the viewers attention and add visual structure to your composition. In monochrome, patterns can create a strong sense of balance and cohesion in your image, especially when combined with texture.Capturing texture in black-and-whiteTo highlight textures in black-and-white photography, focus on the way light interacts with your subject. Textures are most prominent when light hits the surface at an angle, creating shadows and highlights that emphasize its structure.Side lighting for textureSide lighting is one of the most effective ways to bring out texture. By positioning your light source to the side of your subject, you create strong shadows that accentuate every detail. This technique works particularly well with subjects like rocks, wood, fabric, or skin, where the fine details are crucial to the composition. Close-up shots for detailGet in close to your subject to capture the intricate details of its texture. In black-and-white, even the smallest elementslike the weave of a fabric or the ridges of a leafcan become the focal point of your image. A macro lens can be helpful here, allowing you to focus on minute textures that may go unnoticed in a color photograph.Using patterns in monochrome photographyPatterns in black-and-white photography can give your images a sense of order and repetition, creating visual interest even in simple compositions. Look for natural or man-made patterns that stand out in the frame.Finding patterns in natureNature is full of repeating patterns, from the veins of a leaf to the spirals of a seashell. When shooting in black-and-white, these patterns become more striking because the focus shifts away from color and onto the form. Use natural elements like trees, rocks, or clouds to create repeating lines or shapes that add rhythm to your composition. Exploring architectural patternsIn urban settings, architectural details offer endless opportunities to explore patterns. Look for repetitive lines in buildings, fences, windows, or staircases. When photographed in monochrome, these patterns can create a sense of structure and precision, especially when contrasted with irregular natural elements. Combining texture and pattern for impactThe real magic in monochrome photography happens when you combine texture and pattern. By doing so, you create layers of interest that draw the viewers eye deeper into the frame.Contrast between smooth and roughUse contrasting textures to add depth to your composition. For example, juxtaposing the rough bark of a tree against a smooth river stone can create an intriguing visual contrast. The interplay between these elements becomes even more pronounced in black-and-white, where light and shadow do most of the work in defining texture.Repetition and disruptionWhile patterns are naturally pleasing to the eye, breaking a pattern can be just as impactful. A single object that disrupts an otherwise consistent pattern can serve as a focal point in your image. For instance, a lone bird perched on a row of identical fence posts can add interest and balance to the composition, especially in black-and-white. Techniques for enhancing texture and patternOnce youve identified textures and patterns in your scene, you can use a few techniques to enhance them further in your black-and-white photography.Play with depth of fieldA shallow depth of field can isolate textures or patterns, making them stand out from the background. For example, focusing on the textured surface of a stone wall while blurring the background can create a more impactful image, emphasizing the tactile quality of the subject. Experiment with lightingDont be afraid to experiment with different lighting conditions to bring out textures and patterns. Harsh, directional light will enhance texture by creating sharp contrasts between light and shadow, while softer, diffused light will smooth out textures and emphasize patterns. Textures and patterns are vital tools in black-and-white photography, offering depth, contrast, and visual intrigue to your images. By paying attention to how light interacts with surfaces and finding repeating elements in nature or architecture, you can elevate your monochrome photography to new heights. Remember to experiment with lighting, composition, and focus to bring out the best in your subjects.Not on 500px yet? Click here to learn about Licensing with 500px.The post Textures and patterns in monochrome photography appeared first on 500px.
    0 Comments 0 Shares 122 Views
  • ISO.500PX.COM
    Understanding light and shadow in black-and-white photography
    Black-and-white photography removes the distraction of color, allowing light and shadow to take center stage in shaping the mood and depth of an image. Whether youre shooting landscapes, portraits, or abstract compositions, mastering the interplay between light and shadow can elevate your black-and-white photography. Heres how to harness these elements effectively.The role of light in black-and-white photographyIn black-and-white photography, light defines the subject, highlights texture, and emphasizes form. Without color, your composition relies on how the light interacts with the elements in your scene, creating a strong sense of contrast and depth.Hard vs. soft lightHard light, such as direct sunlight or a single artificial light source, produces sharp, well-defined shadows. Its perfect for adding drama to a scene, especially when shooting architecture, landscapes, or still life. In contrast, soft light, found during overcast days or diffused through curtains, creates gentle transitions between light and shadow. This type of lighting is often used in portrait photography, where it flatters skin tones and softens features. Using shadows to create depth and moodShadows in black-and-white photography arent just the absence of lightthey play a crucial role in defining the structure of your image and conveying mood. Deep shadows can add mystery and tension, while subtle shadows bring softness and nuance to the composition.Creating depth with shadowsTo create depth in your images, use the interplay between light and shadow to separate the foreground from the background. Shadows can help guide the viewers eye through the image, leading them from the darker areas into the lighter, more focused parts of the composition.Mood through shadow placementWhere you place the shadows in your frame can dramatically influence the mood of your photo. For example, shadows cast from the side emphasize texture and form, while backlit subjects create striking silhouettes, reducing your subject to an outline and focusing the attention on their shape and posture. Natural vs. artificial lighting for black-and-white photographyLighting conditions, whether natural or artificial, will greatly affect the outcome of your black-and-white photos. Understanding how to manipulate both types of light will give you more control over your final image.Natural lightNatural light offers a wide range of possibilities, depending on the time of day and weather conditions. The golden hourearly in the morning or late in the afternoonprovides low, soft light that can create long, dramatic shadows, perfect for landscapes and outdoor portraits. On the other hand, midday sun produces harsher, more direct light, which can be great for architectural shots or street photography where you want high contrast between light and shadow. Artificial lightIn a controlled environment like a studio, artificial lighting allows you to shape your light and shadow precisely. By adjusting the distance, angle, and intensity of your light source, you can create a wide range of effects. Softboxes and reflectors can diffuse light, while spotlights can add sharp, intense highlights and deep shadows.Composing with light and shadowGood composition in black-and-white photography often revolves around the balance of light and shadow in the frame. Pay attention to how these elements work together to highlight your subject and draw the viewers eye.The power of contrastHigh-contrast imagesthose with strong differences between light and darkare a hallmark of black-and-white photography. When composing your shot, look for scenes that naturally offer a range of tonal values, from pure whites to deep blacks. This will help create a visually dynamic image that grabs the viewers attention. Low-contrast compositionsWhile high contrast is often a go-to technique, dont overlook the power of low-contrast scenes. In these images, the difference between the light and dark areas is more subtle, creating a soft, ethereal effect. Low-contrast compositions work well for subjects like foggy landscapes or portraits in diffused light, where the mood is more contemplative and quiet.Capturing motion with light and shadowBlack-and-white photography lends itself well to capturing motion through light and shadow. Whether its the blur of moving water or the gentle sway of grass in the wind, motion can be enhanced by the way light interacts with your subject.Long exposures for movementTo capture motion, use longer shutter speeds to blur moving elements while keeping stationary objects sharp. In black-and-white, this can create a beautiful contrast between solid and fluid forms, making the motion feel more dynamic.Freezing motionFor a more dramatic effect, freeze motion using a fast shutter speed. The sharp contrast between frozen movement and deep shadows can result in a powerful, high-impact image.Mastering light and shadow is the key to creating compelling black-and-white photographs. By understanding how different types of light shape your subject and how shadows contribute to the mood and depth of your image, you can craft photos that go beyond the basics and make a lasting impression. Experiment with both natural and artificial light, play with contrast, and dont be afraid to let the shadows do some of the storytelling for you.Not on 500px yet? Sign up here to explore more impactful photography.The post Understanding light and shadow in black-and-white photography appeared first on 500px.
    0 Comments 0 Shares 131 Views
  • ISO.500PX.COM
    And the winners of Septembers Licensing Rush are
    This past September, photographers from around the world raced to showcase their creativity in our most recent Licensing Rush competitionand the results are finally in! For a whole month, participants pushed their limits to get as many exclusive photos accepted to 500px Licensing, earning bonus points for every photo with an attached model release.Now, its time to reveal the top three photographers who captured the spotlight and will be taking home cash prizes!In first place is AllNeaOlha Dobosh$300 US prize. Olha, an exceptional 500px Licensing contributor, claims first place in this Licensing Rush with an impressive 1,997 points! Out of 1,103 accepted photos, 894 included model releases, doubling their point value. Olhas portfolio focuses on authentic lifestyle moments centered around travel, creativity, adventure, connection, and family. Her talent lies in capturing different models in real, relatable moments, making each shoot feel dynamic and genuine.Coming in second place is PetervanHaastrechtPeter van Haastrecht$150 US prize. Taking the silver medal with a score of 597 points is Peter van Haastrecht. With 577 new photos accepted, Peter earned bonus points for model releases attached to 20 photos. Peters Licensing series showcases stunning landscapes during golden hour and interesting architecture. Peters photos highlight not only the beauty of nature but also that of man-made structures, rich with history and purpose.The third place prize goes to a new contributor almeidawilsonWilson Almeida$50 US prize. New to 500px, Wilson Almeida has quickly made a name for himself, earning third place in the Licensing Rush with 466 points. Despite not using models and missing out on bonus points, Wilson secured the bronze with 466 stunning new photos. His portfolio showcases a mix of vibrant landscapes and beautifully plated food, two timeless and always-demand categories in commercial photography.With over a thousand photographers participating and more than nine thousand photos submitted, Septembers Licensing Rush was highly competitive. The additional bonus for model-released content made the challenge even greater, but 500px photographers rose to the challenge with remarkable creativity and skill.Opt in for 500px Licensing News to stay in the know and watch out for the next Licensing Rush announcement, for your chance to win!Check out our Licensing Quests for more opportunities to win prizes.Not on 500px yet? Click here to learn about Licensing with 500px.The post And the winners of Septembers Licensing Rush are appeared first on 500px.
    0 Comments 0 Shares 121 Views
  • ISO.500PX.COM
    Making the most of seasonal color contrast in photography
    As the colors of autumn emerge in full force, using contrast in your photography becomes a powerful tool for creating images with depth and impact. The interplay between warm and cool tones, combined with the shifting light, allows for unique opportunities to highlight your subjects in creative ways. Heres how to make the most of seasonal color contrast in your fall photography.Understanding color contrastColor contrast refers to the juxtaposition of different colors that stand out against one another. In autumn, the natural contrast between warm colors (reds, oranges, and yellows) and cool colors (blues and greens) creates a dynamic scene that draws the viewers attention.Warm vs. cool tonesWarm tones, like the fiery reds and oranges of autumn leaves, evoke feelings of warmth and comfort. In contrast, cool tones, like a crisp blue sky or green foliage, bring balance and calm to your images. When these two are combined thoughtfully, the resulting contrast can create a striking composition. Complementary colorsIncorporate complementary colors to enhance the contrast in your photos. For example, capture the bold contrast between red autumn leaves against a clear blue sky or golden foliage reflected in a cool, blue body of water. These color combinations are visually stimulating and naturally guide the viewers eye to your subject. Composing with color contrastOnce youve identified the colors in your scene, its time to compose your shot to maximize the impact of the contrast.Use natural divisionsLook for natural divisions in the landscape where warm and cool tones meet. This could be the line where golden trees meet a green field, or where warm sunlight cuts through a cool shadow. These natural divisions help balance your composition and add visual interest.Layering colorsAdd depth to your photos by layering warm and cool colors in the foreground, middle ground, and background. For instance, a photo with a yellow tree in the foreground, a blue river in the midground, and a forest of red and orange trees in the background creates a layered image full of contrast and depth. Contrast in lightingFall light often comes in softer and lower, providing long shadows and gentle highlights. Make use of this lighting to add contrast to your photos. Warm, golden-hour light enhances the reds and oranges of fall foliage, while the cooler shadows create a dynamic contrast within the same image. Techniques for enhancing color contrastUnderstanding how to work with color contrast is just the beginning. Here are a few techniques to help you maximize the impact of seasonal colors.Polarizing filtersA polarizing filter can enhance color contrast by deepening blue skies and reducing reflections. This is particularly useful when shooting landscapes with both warm autumn leaves and cool skies or water. It also helps eliminate the glare on wet surfaces, making colors appear more vibrant.Adjusting white balanceTweak your cameras white balance to either warm up or cool down your shots. For example, you can make an autumn scene feel cozier by slightly warming the white balance, emphasizing the natural glow of the fall colors. Alternatively, you can cool down the background to make the warm tones pop even more. Shooting in overcast conditionsWhile sunny days might seem ideal, overcast conditions are perfect for bringing out the richness of fall colors. The diffused light softens harsh shadows, allowing the vibrant hues of the season to stand out without the distraction of stark lighting. The contrast between soft, gray skies and bright autumn foliage is naturally compelling.Techniques for capturing seasonal color contrastTo truly elevate your autumn photography, its essential to understand how to make color contrast work in various settings.Include a pop of colorIf youre working in a scene dominated by one color, such as a forest filled with red and orange leaves, find a way to introduce a contrasting element. This could be a person wearing a blue jacket or a river running through the scene. The single contrasting color will grab attention and create focus in an otherwise monochromatic image.Focus on simplicityWhile color contrast is visually stimulating, too much can overwhelm the viewer. Keep your compositions simple by focusing on a few key contrasting colors. Use the natural fall palette of reds, oranges, and yellows against cooler blues and greens to create balanced yet impactful images. Autumns vibrant and varied colors make it one of the most exciting seasons for photographers. By harnessing the power of color contrast, you can create images that are not only visually striking but emotionally resonant. Experiment with warm and cool tones, play with light and shadow, and let the natural contrast of the season elevate your photography to the next level.Not on 500px yet? Click here to learn about Licensing with 500px.The post Making the most of seasonal color contrast in photography appeared first on 500px.
    0 Comments 0 Shares 143 Views
  • ISO.500PX.COM
    Creating stunning autumn portraits
    Autumn provides an incredible backdrop for portrait photography, with its natural warmth and vibrancy. However, capturing the essence of a subject in a seasonal setting requires more than just pointing the camera. Here are some expert tips to elevate your autumn portrait shots, ensuring your images resonate with the seasons mood while highlighting the subject.Choosing the right locationThe right location can significantly impact the tone of your portraits. Whether in a park, forest, or urban setting, look for spots that naturally highlight the warm autumn colors.Forests and wooded areasA forest or wooded area filled with trees in fall colors offers a soft and diffused background. The leaves create a beautiful texture that enhances the subject without overpowering them. Look for areas where the leaves are scattered on the ground to add additional depth and visual interest to your portraits. Urban settingsEven in urban areas, autumn leaves can create fantastic contrasts. Think of tree-lined streets, parks, or even buildings covered in ivy turning red and orange. These urban settings can provide both structure and nature in one frame. Working with natural lightLighting is critical in portrait photography, and autumn brings unique opportunities to experiment with natural light.Golden hour magicThe soft, golden light just after sunrise or before sunset is ideal for autumn portraits. This time of day casts a flattering, warm glow on the subject, complementing the colors of the season. Position your subject so that the sunlight gently highlights their face while avoiding harsh shadows.Overcast daysDont shy away from overcast days. The clouds act as a natural diffuser, softening the light and reducing harsh contrasts. This results in a more even light across the subjects face, making it perfect for moody or intimate autumn portraits.Composition and framingPortrait composition is just as important as any landscape or environmental shot. Use the surrounding environment to frame your subject effectively.Rule of thirdsPosition your subject slightly off-center to create a more dynamic and engaging composition. You can use the autumn foliage or trees to naturally balance the frame, guiding the viewers eye toward the subject. Frame within a frameUse natural elements, such as arching tree branches or even doorways, to create a frame within the image. This technique focuses the viewers attention on the subject while adding structure to your portrait.Bringing out emotionGreat portrait photography isnt just about techniqueits about capturing the emotion and personality of your subject. In autumn, the warmth and serenity of the season can enhance the mood.Candid momentsEncourage your subject to interact with their surroundings, whether its throwing leaves, walking through a forest, or simply enjoying the cool breeze. These candid moments bring authenticity to your portraits, allowing the viewer to connect more deeply with the image.Connection with the cameraFor more posed portraits, work on building a rapport with your subject so they feel comfortable in front of the camera. A relaxed subject will express more genuine emotion, which is essential for creating compelling autumn portraits. Colors and wardrobeThe color palette of autumn offers a natural harmony that complements most subjects, but careful consideration of wardrobe choices can make a huge difference in the overall feel of the portrait.Coordinating with the backgroundEncourage your subject to wear neutral or earthy tones that blend well with the autumn surroundingsthink warm browns, deep reds, mustard yellows, or olive greens. These colors create a harmonious and cohesive look that enhances the mood of the portrait. Contrasting colorsAlternatively, you can have your subject wear colors that contrast with the background. A deep blue jacket against a sea of orange leaves can create an eye-catching contrast that makes the subject pop without overwhelming the image.Practical tips for autumn portraitsLayering texturesPlay with the textures of falllayered clothing, scarves, and hats all add depth and character to your portraits. Use propsA well-placed prop, like a blanket or coffee cup, can make the subject feel more natural and relaxed, adding context to your autumn scene.Autumn portraits offer the perfect opportunity to combine the rich colors of the season with the unique personality of your subject. By thoughtfully considering your location, lighting, composition, and wardrobe choices, you can create timeless portraits that evoke the warmth and beauty of autumn.Not on 500px yet? Sign up here to explore more impactful photography.The post Creating stunning autumn portraits appeared first on 500px.
    0 Comments 0 Shares 200 Views
  • ISO.500PX.COM
    Your guide to shooting seasonal landscapes
    Autumn landscapes offer a rich tapestry of colors and textures that transform familiar scenes into breathtaking vistas. Capturing these seasonal landscapes is about more than just finding the right location; its about using the changing light and unique features of fall to tell a story through your photographs. Heres how to make the most of seasonal landscapes this fall.Understanding the atmosphereFall landscapes are dynamic, changing dramatically depending on weather, light, and time of day. The interplay of light and atmosphere in autumn creates opportunities to capture mood and depth in ways that arent possible at other times of the year.Embrace misty morningsEarly autumn mornings often bring mist and fog, which can add a mysterious, ethereal quality to your images. Mist can soften the background and isolate your subject, making it stand out. When shooting in fog, aim for simplicity by focusing on one or two key elements in the scene, as the fog will naturally reduce distractions and guide the viewers eye. Time of day mattersThe time of day can dramatically affect the mood of your landscape images. While the golden hour is always a favorite, autumn provides opportunities to shoot during different times of the day. Overcast skies can give you soft, diffused light that brings out the natural colors of the landscape without harsh shadows. Dont overlook mid-afternoon or cloudy daysboth can yield beautifully balanced and moody shots.Composition techniques for seasonal landscapesWhen composing your autumn landscape shots, think about how to use the natural elements around you to create depth, texture, and interest.Use layers to add depthAutumn landscapes often have natural layers, from the colorful tree canopy down to the fallen leaves on the forest floor. Position yourself to capture these layers, using foreground elements to lead the viewers eye deeper into the frame. For example, fallen leaves in the foreground can act as a natural border, drawing attention to the trees in the background. Incorporate waterLakes, rivers, and streams can mirror the vibrant colors of autumn, creating symmetry and interest in your landscape photos. Reflections can also provide a sense of balance and calm, particularly when shooting early in the morning or late in the day when the water is still. Framing with natural elementsUsing natural frames like tree branches, archways, or rock formations can help guide the viewers eye toward the focal point of your image. This technique adds structure and enhances the overall composition, making your landscape photos feel more intentional.Light and shadow playAutumn is a season of low, soft sunlight that casts long shadows and highlights textures in the landscape. This interplay between light and shadow can create dramatic and visually interesting scenes.Capture the golden lightThe golden hour in autumn is particularly special. The warm tones of the leaves complement the soft, golden light of the setting sun, creating a harmonious color palette. During this time, the sunlight is more directional, which helps emphasize the texture and form of the landscape, making your shots feel more three-dimensional. Pay attention to shadowsLong shadows in the fall can help create depth and dimension in your landscapes. Look for ways to incorporate shadows into your composition, either as leading lines or as a contrast to the brightly lit areas of the image. This technique is especially effective when shooting in forests or areas with uneven terrain.Capturing motion in autumn landscapesDont just capture still scenesbring a sense of movement into your photos by focusing on elements like falling leaves, rushing water, or swaying grasses. Using a slower shutter speed can help blur these moving elements, creating a dynamic contrast with the solid, stationary parts of your composition.Autumn is a season that offers photographers endless creative possibilities. By understanding how to use light, atmosphere, and compositional techniques, you can capture the essence of this fleeting season in ways that are both visually stunning and emotionally evocative. Remember to explore different perspectives, play with the dynamic colors of the season, and embrace the unique opportunities that autumn brings. Whether youre capturing misty mornings, golden afternoons, or vibrant reflections, the key is to be patient, experiment, and let the beauty of the season guide your creativity. Not on 500px yet? Click here to learn about Licensing with 500px.The post Your guide to shooting seasonal landscapes appeared first on 500px.
    0 Comments 0 Shares 198 Views
  • ISO.500PX.COM
    How to take jaw-dropping travel images
    Whether youre trying to escape the winter blues and are jetting off to the tropics, or youre an adrenaline junkie thats venturing into the cold to hit the slopes, travel fills us with excitement and a sense of adventure. Its the perfect chance to capture photos of new, unique places or experiences. Were often more aware of our surroundings when we travel, so dont miss the opportunity to pull out your camera and take captivating photos.Travel photography is a genre of photography that captures the culture, people, and landscapes of a specific location. It can be used to document a tripor to create a narrative about a placeand every click tells a unique story. If you arent sure where or how to begin, these travel photography tips will be a good starting point.1. Invest in a camera that suits your aesthetic and is easy to carry with you2. Plan your shots3. Get creative with the composition to help your image stand out4. Tell a storythis makes an impact and ensures the image is thought out5. Use leading lines6. Search for the details7. Shoot in RAW8. Use a tripod for stability9. Incorporate the local culture10. Edit your photosNow, lets dive into more detail for each tip.Invest in a cameraYour device of choice doesnt need to break the bankwe hope it doesnt! When making your choice, think about the functionality that you are looking for. For example, if youre an experienced photographer, you might want a newer DSLR with advanced settings that lets you shoot in manual mode, and makes the most of a diverse range of lighting scenarios. Another thing to consider is the weight of your device. Gone are the days when bigger meant better when it came to your camera. Mirrorless cameras are a great alternative to a DSLR, as they dont compromise quality but are lighter, and easy to travel with.Plan your shotsAs the saying goesif you fail to prepare, prepare to fail. That saying applies to photography, as there are many variables to consider when capturing a moment in a place you know, and they are doubled when in a new place. Dont panic, thoughthe unknown is half the excitement of travel photography!When planning your shots, consider the time of day and what the light will be like, how busy the location will be, and what gear you might need to get the architecture or people from the right angle with the best framing. As you start to shoot, you will be grateful that you planned, and were prepared for the new terrain. Get creative with compositionsExperiment with angles. Try shooting from the ground up to capture a towers soaring height, or get an aerial view from a nearby hill. These tactics will help your final image stand out from the clichs, whether youre capturing the Great Pyramid of Giza in Egypt or La Sagrada Familia in Spain. Its all about how you see it. Tell a storyYour photos should convey a narrative or evoke emotions. Try to capture the atmosphere, mood, and the essence of the place youre visiting.Use leading linesDirect your viewers eye with leading lines. Look for things like roads, railways, rivers, etc. Anything that leads the eye towards your subject will work to create a path for your viewer to follow. Search for the detailsGet up close and personal with your subject, or use objects in the foreground to add detail and dimension within the frame. When you pay attention to details in travel photos, it can take your image from boring to amazing by adding depth. Shoot in RAWWhen you shoot in RAW, youre giving yourself more wiggle room for post-production. This will be a huge help if some of your images turn out to be over or underexposed Use a tripod for stabilityNothing ruins a good picture quite like a shaky hand. Capture the culturePhotograph local people, customs, and traditions. Ask for permission before taking photos of individuals, and try to capture candid moments that reveal the essence of the culture. Edit to perfectionExperiment with your editing software to push your images to new levels. The goal is always to achieve perfect lighting and sharpness in the camera, but sometimes, its that extra tweak in post-production that gets us to that level of perfection. Have the travel bug and want to check out more articles?[Travel Photography] A Beginners Guide to Learning Travel PhotographySeven ways to create wanderlust in your travel photographyWhats Trending in Licensing: Travel photography and the freedom of solo travelNot on 500px yet? Click here to learn about Licensing with 500px.The post How to take jaw-dropping travel images appeared first on 500px.
    0 Comments 0 Shares 214 Views
  • ISO.500PX.COM
    Capturing fall foliage
    Fall is one of the most breathtaking times of the year for photography, with its rich palette of reds, oranges, and yellows transforming landscapes into vibrant canvases. Capturing the beauty of autumn foliage requires more than just pointing your camera at the trees; it involves thoughtful composition, timing, and technique. Heres how to make your fall foliage photography stand out. Timing is everythingTo capture the perfect fall shot, timing is crucial. Different regions peak at different times, and the window to capture fall colors at their best is often brief. Use online resources or foliage tracking apps to find out when the leaves are at their peak in your area. The golden hour, just after sunrise or before sunset, provides soft, warm light that enhances the color of the leaves without harsh shadows. Choose your compositionA powerful autumn foliage photo depends heavily on composition. Consider how to use leading lines, patterns, and framing to guide the viewers eye through the scene.Leading lines: Utilize paths, rivers, or fences to draw attention to the fall colors. This technique adds depth and leads the viewers eye to the heart of the image. Framing: Use natural elements like tree branches or archways to frame the foliage and add structure to your photo.Patterns and repetition: Look for repeating elements like rows of trees or leaves on the ground to create harmony and balance in your composition.Play with lightFall colors tend to glow under certain lighting conditions, and using light creatively can transform a good shot into a great one. Consider the following lighting tips.Backlighting: Shooting with the sun behind your subject can make the leaves appear as though they are glowing, highlighting their translucence and depth.Side lighting: This can accentuate the texture of leaves and bring out the details, especially in larger landscapes or when shooting trees up close.Overcast days: Cloudy skies act like a giant softbox, diffusing the light and making the colors appear more saturated and vibrant. Dont shy away from these days, as they often provide the best conditions for capturing true fall colors.Focus on detailsWide-angle shots of trees in full color are impressive, but zooming in on the details can make for equally compelling images. Look for unique close-up opportunities, such as dew on a single leaf, patterns on the forest floor, or the texture of bark covered in autumn moss. These detailed shots offer viewers a more intimate connection with the season. Capture color contrastTake advantage of contrasting colors to make your foliage pop. Look for compositions that juxtapose the warm tones of the leaves against cooler tones, like the sky or water. If youre shooting in a forest with predominantly yellow tones, a bit of blue sky peeking through the trees can make a big impact.Post-processing tipsWhen editing fall photos, aim to enhance the natural beauty without going overboard. Here are a few key adjustments to consider.Boost saturation: Autumn colors are naturally vibrant, but a slight boost in saturation can make them stand out even more. Increase contrast: Adjust the contrast to bring out the vividness of the leaves while retaining the darker, moodier tones of the forest floor or trunks.Use graduated filters: If the sky is too bright compared to the rest of your image, use a graduated filter to balance the exposure.Practical tips for shooting fall foliageBring a polarizer: A polarizing filter can help reduce glare from wet leaves and enhance the vibrancy of colors, particularly when shooting on sunny days.Play with angles: Dont just shoot from eye level. Get down low to include fallen leaves in the foreground, or shoot from above for a more dramatic perspective. Be patient: Sometimes, the best light or composition doesnt happen immediately. Stay a little longer to see how the light changes, and be ready to adjust.Capturing fall foliage is all about making the most of the fleeting beauty of the season. With a little patience, and creative thinking, you can create stunning, memorable images that truly capture the magic of autumn.Not on 500px yet? Sign up here to explore more impactful photography.The post Capturing fall foliage appeared first on 500px.
    0 Comments 0 Shares 288 Views
  • ISO.500PX.COM
    Using Color to Strengthen Your Photographic Narratives
    Color is a powerful element in photography that can evoke emotions, set the tone, and enhance the story youre telling. By understanding how to use color strategically, you can guide the viewers emotions and create more impactful images. In this article, well explore how you can effectively incorporate color into your storytelling, drawing from the practices of experienced photographers. The Emotional Impact of ColorUnderstanding Color PsychologyWarm Colors: Red, orange, and yellow are considered warm colors. They tend to evoke emotions ranging from warmth and comfort to anger and hostility. In photography, these colors can be used to create a sense of energy, excitement, or even tension. Cool Colors: Blue, green, and purple are cool colors. They are often associated with calmness, serenity, and sadness. Use these colors in your photography to create a tranquil, peaceful atmosphere or to convey melancholy. Neutral Colors: White, black, and gray are neutral colors that can be used to balance your composition or emphasize other colors. These colors often serve as a backdrop, allowing other colors to stand out more vividly.Using Color to Tell a StoryHighlighting the Subject: Use color contrast to make your subject stand out. For instance, a bright red coat against a snowy background immediately draws the viewers eye to the subject.Creating Mood: The color palette you choose can greatly influence the mood of your photograph. A landscape bathed in warm, golden light feels inviting and nostalgic, while one in cool, blue tones might feel lonely or mysterious. Symbolism in Color: Colors can also carry symbolic meanings that add depth to your story. For example, red can symbolize love, passion, or danger, while green often represents growth, renewal, or envy.Advanced Techniques for Using Color in StorytellingColor GradingCreating Consistency: Color grading involves adjusting the colors in your images to create a cohesive look across a series of photos. This technique is often used in film to establish a consistent mood or tone throughout the narrative. In photography, you can use color grading to unify your portfolio or a specific project.Enhancing Emotion: By subtly shifting the colors in your image, you can enhance the emotional impact. For example, adding a warm tint to a portrait can make the subject appear more approachable, while a cool tint can add a sense of distance or detachment.Complementary ColorsCreating Visual Interest: Complementary colors are opposite each other on the color wheel and create strong contrast when used together. This contrast can make your images more visually striking and can be used to draw attention to specific elements in your composition.Balancing the Scene: While complementary colors provide high contrast, its important to balance them to avoid overwhelming the viewer. Use one color as the dominant hue and the other as an accent to maintain harmony in your composition. Analogous ColorsHarmonious Composition: Analogous colors are next to each other on the color wheel and tend to create a harmonious, pleasing effect. These colors often occur naturally together, such as in a sunset or a forest scene, making them ideal for creating cohesive, calming images. Subtle Storytelling: Because analogous colors blend well together, they can be used to tell a more subtle, nuanced story. For example, using shades of blue and green in a landscape can evoke a sense of tranquility and connection with nature.Monochromatic Color SchemesFocus on Form and Texture: A monochromatic color scheme uses variations of a single color. This approach simplifies the composition and allows the viewer to focus more on the form, texture, and contrast within the image rather than being distracted by multiple colors.Creating Unity: Monochromatic images can create a strong sense of unity and cohesion. They are often used in fine art photography to convey a specific mood or theme. For instance, a series of black-and-white images can emphasize the starkness or simplicity of the subject matter.Practical Tips for Working with ColorUse Color Intentionally: Think about what you want the color to achieve in your image. Are you trying to convey a specific mood, highlight a subject, or create a sense of balance? Use color intentionally to guide your composition and storytelling.Experiment with Post-Processing: Post-processing tools allow you to fine-tune the colors in your images. Experiment with different color grades, tints, and saturation levels to see how they affect the mood and narrative of your photograph. Remember, subtle adjustments can often have a significant impact.Consider the Environment: Pay attention to the colors present in your shooting environment. Sometimes, you can find natural color schemes that enhance your story without needing much adjustment in post-processing. For example, the natural blues of the ocean and sky can be complemented by the warm tones of a sunset. Learn from Film and Art: Study how filmmakers and artists use color to tell stories. Film directors often use color palettes to evoke specific emotions or themes. Similarly, painters have used color theory for centuries to create harmony, contrast, and depth in their work.Color is a powerful tool in photography that can elevate your storytelling by evoking emotions, setting the tone, and drawing attention to your subject. By understanding the emotional impact of color and applying advanced techniques like color grading, complementary colors, and monochromatic schemes, you can create images that resonate deeply with your viewers. Practice using color intentionally in your compositions, and watch as your photographs transform into compelling visual stories.Not on 500px yet? Sign up here to explore more impactful photography.The post Using Color to Strengthen Your Photographic Narratives appeared first on 500px.
    0 Comments 0 Shares 267 Views
  • ISO.500PX.COM
    Enhancing Your Storytelling with Strong Compositional Techniques
    Composition is the backbone of photography, determining how the elements within your frame interact to convey a story. A well-composed image can guide the viewers eye, create a sense of balance, and emphasize the narrative you wish to tell. In this article, well explore how you can harness the power of composition to enhance your storytelling, using insights from professional photographers who excel in visual storytelling.Understanding the Basics of CompositionLeading LinesGuiding the Viewer: Leading lines are one of the most powerful tools in a photographers arsenal. These are lines within the image that naturally draw the viewers eye towards a specific point, usually the main subject. Roads, rivers, fences, or even shadows can act as leading lines.Creating Depth: Use leading lines to create a sense of depth and perspective in your images. For instance, a winding path that leads to a distant subject can make the viewer feel as though they are traveling through the scene. Rule of ThirdsBalanced Composition: The rule of thirds involves dividing your frame into a 33 grid and placing the most important elements along these lines or their intersections. This technique helps create a balanced and harmonious composition.Enhancing Narrative: By placing your subject off-center, you can create a more dynamic image that draws the viewer in. For example, positioning a person on one of the vertical thirds while leaving space in front of them can suggest movement or the anticipation of something to come.FramingFocus on the Subject: Framing involves using elements within your environment to create a frame around your subject, drawing attention to it. This could be anything from a window or doorway to natural elements like trees or archways. Adding Context: Framing not only highlights your subject but also adds context to the image. For example, photographing someone through a car window can convey a sense of travel or transition.Advanced Compositional Techniques for StorytellingSymmetry and PatternsCreating Harmony: Symmetry in photography involves creating balanced images where one half mirrors the other. This technique can be used to convey a sense of order, tranquility, or beauty. Patterns, on the other hand, involve repeating elements that can create a rhythm in your composition.Breaking Symmetry: While symmetry is pleasing, breaking it can be even more powerful. Introducing an element that disrupts the pattern, or symmetry can draw attention to that part of the image and add intrigue to your story. Negative SpaceIsolating the Subject: Negative space refers to the empty or unoccupied areas of an image. By surrounding your subject with negative space, you can emphasize it and make it stand out more. Creating Mood: Negative space can also create a mood or atmosphere, such as solitude or tranquility. For example, a lone tree in a vast open field conveys isolation and simplicity.Use of TrianglesDynamic Composition: Triangles are a powerful compositional tool that can add stability and structure to your image. Arranging elements in a triangular shape can create a sense of balance and direct the viewers eye around the frame.Conveying Relationships: Triangles can also be used to convey relationships between subjects. For instance, positioning three people in a triangular formation can suggest a connection or hierarchy among them. LayeringAdding Depth: Layering involves including elements in the foreground, middle ground, and background to create a sense of depth in your image. This technique is particularly effective in landscape and environmental photography.Building a Narrative: Layers can also help build a narrative by showing different aspects of a scene or story. For example, photographing a street vendor with customers in the foreground and the market scene in the background tells a more complete story.Practical Tips for Compositional StorytellingPre-Visualize Your Shots: Before you start shooting, take a moment to visualize the composition. Think about where you want the viewers eye to go and how you can use compositional techniques to achieve that. Experiment with Different Angles: Changing your angle can dramatically alter the composition and the story youre telling. Try shooting from high above, low to the ground, or from an unusual perspective to create more interesting compositions.Simplify Your Frame: Dont overcrowd your image with too many elements. Simplify your composition by focusing on the essential elements that contribute to the story. Remove any distractions that dont add to the narrative.Use Post-Processing Wisely: In post-processing, use cropping and adjustments to refine your composition. Enhance leading lines, emphasize symmetry, or adjust the balance of negative space to strengthen the story your image tells.Composition is much more than just arranging elements within a frameits about guiding the viewers eye, creating balance, and enhancing the narrative of your image. By mastering both basic and advanced compositional techniques, you can elevate your photography and tell more compelling stories through your work. Practice these techniques, and youll find that your images not only capture moments but also convey deeper meanings and emotions.Not on 500px yet? Sign up here to explore more impactful photography.The post Enhancing Your Storytelling with Strong Compositional Techniques appeared first on 500px.
    0 Comments 0 Shares 301 Views
  • ISO.500PX.COM
    Four horsemen of viewers attention: How to make people look
    The photographers job resembles that of a magician. We tell our viewers: look right here, here is the hero of this story. A magician will use gestures and attractive assistants to guide their viewers attention. We have our own methods. I like calling them the Four Horsemen of Viewers Attention. ScaleSharpnessBrightnessColorThe eye usually catches something big, sharp, bright, and warm. Lets see how it works.ScaleScale is the relative (!) size of an object within a shot. Place a small object at the front, and it will make it more prominent. Put a bulky object in the back of a shot, and it will stop looking so bulky. A large kaleidoscope is placed in the background. If you put it on the same plane as the asteroid and UFO, it would take up too much space and probably wouldnt even fit within the frame. But in the background, it looks perfectly harmonious. The scale is measured against other objects as much as against the frame of the shot itself. Here, the composition is framed too tightly, almost touching the edges. This leaves the shot feeling suffocated, as if you need to step back and take a breath. In contrast, this one could use a tighter crop. Otherwise, the donut seems to be floating in an infinite, cold, indifferent space. And heres a better crop!SharpnessThis should be really obvious. What should be in the focus? The main character, of course! The real question here is the extent to which we can blur the background. If you have an obvious hero that you want to separate from the background, you can work with maximum blur. However, if you have a hero working with an ensemble, its important to set sharpness in a way that doesnt turn the support team into indistinguishable blots. Here I dont want the background to blur into bokeh, making all the objects in the back completely unrecognizable. I want the viewer to be able to make out the outline of the cup of hot chocolate and the pine branches. The fine details on these objects arent important to me, so I need a fairly strong blur, but not 100%. Theres a kaleidoscope in the background. Its details are blurred, but the shape is still easily recognizable. Why do I need it in the frame? It adds dynamic upward movement and clarifies the identity of the colorful disk in the foreground.When building a composition, we work with tangible objects that eventually become pixels on the screen. Even when blurred, we see these objectslike books or a kettlebecause we know what they are. But the viewer, lacking this context, only sees a blurry blot, which can be distracting, causing the main subject to get lost in the scene. In this case, the stack of books on the left isnt just bright on its own; it also creates a rhythmic structure of parallel lines that distracts the eye. It would be much better without it.So, sometimes if the object gets turned into an unidentifiable blot, you may want to remove it from the shot entirely. BrightnessObviously, the brighter the object, the easier it is to see. That doesnt mean, though, that your main objects must shine. It simply means that if your main character gets lost in the shot, you can either aim some light towards it, or cut some lighting from the back, putting any distracting objects in shadow. In this example, the lighting in the foreground stays the same, but it looks brighter thanks to a black flag that darkens the castle in the background. This makes the candle and the ballerina look brighter. Here, the backlight doesnt make the main object overall brighter, but accentuates the outline drawing our attention to it. If you want to take this technique to the extreme, try creating a bright glowing spot with smoke or a sparkler.ColorThe warmer the color is, the easier it is to notice. This effect can be further amplified by adding contrast with the background.Compare these two donuts: The donut looks more harmonious on a pink background, but more active and prominent on a blue one. If you want a multi-object setup to look less chaotic, group your props based on color.A photo palette is called that because it is, in fact, a palette, it does not feature all the colors of the spectrum, only the ones that you chose for your shot. There are many small objects here: tomatoes, leaves, and scattered spices. But they easily group into two clusters: red and green. As a result, the image doesnt feel overly busy or cluttered. The entire photograph is done in two colors: gold on black. Theres no color contrast, but there is a contrast in brightness (light, shiny objects on a dark background). Here, colors are rhyming. The Top Secret label is red, so the threads of the mind map in the background are also red. The color of the paper is close to the color of pancakes. And the blueberries echo the blue shadows and highlights in the background. Here, the choice of color has a narrative significance. Gold, orange, and brown are the colors of autumn. Red is also an autumn color, but it seemed too bold for this shot. The calm palette is balanced by the explosive (literally!) movement.Its like coordinating an outfit. Wearing all your best pieces at the same time might not be a good idea. As in any outfit, colors need to go well together. In photos they can either rhyme or be in contrast with each other.Theres a lot to be said about the Four Horsemen of Viewers Attention, but this is a quick outline to get you started. Hope it is helpful and motivationalstay inspired, and good luck! Not on 500px yet? Click here to learn about Licensing with 500px.The post Four horsemen of viewers attention: How to make people look appeared first on 500px.
    0 Comments 0 Shares 287 Views
  • ISO.500PX.COM
    Harnessing Light and Shadow to Enhance Your Storytelling
    Light and shadow are powerful tools in photography, capable of transforming an ordinary scene into a compelling narrative. By understanding how to manipulate light and shadow, you can add depth, mood, and emotion to your images, making your stories more vivid and impactful. Heres how you can effectively use these elements to tell stronger photographic stories, with insights from seasoned photographers who excel in this craft. Understanding the Role of Light in StorytellingCreating Mood with LightSoft, Diffused Light: Soft light, such as that found during the golden hour or on overcast days, tends to create a calm, serene atmosphere. Its ideal for portraits and scenes where you want to convey warmth and intimacy.Harsh, Direct Light: On the other hand, direct sunlight or artificial light can introduce strong contrasts and deep shadows, adding drama or tension to your scene. This is particularly effective in urban photography or when you want to highlight the intensity of a moment. Directing the Viewers AttentionHighlighting the Subject: Use light to draw attention to your main subject. For instance, positioning your subject in a beam of sunlight, or under a spotlight in an otherwise dark scene, naturally guides the viewers eye to the intended focal point.Controlling Shadows: Shadows can help define shapes, create patterns, and add a layer of complexity to your image. By controlling the direction and intensity of shadows, you can emphasize certain aspects of your story while downplaying others. Mastering Shadows in PhotographyShadows as Narrative ElementsCreating Depth: Shadows can add a sense of depth and dimension to your photos, making them feel more three-dimensional. This can enhance the realism of your image and draw the viewer further into the scene.Symbolism in Shadows: Shadows can also be used symbolically to represent hidden aspects, tension, or duality. For example, the shadow of a person can sometimes be more telling than the person themselves, hinting at something ominous or mysterious.Balancing Light and ShadowThe Dance of Light and Dark: Successful storytelling with light and shadow requires a balance between the two. Too much light can wash out your image, while too much shadow can obscure important details. Experiment with different lighting setups to find the right balance for your narrative. Using Negative Space: Shadows often create negative space, which can be used to isolate your subject and focus the viewers attention. This technique is particularly useful in minimalist compositions where simplicity is key.Techniques for Effective Light and Shadow StorytellingSide Lighting for Drama: Side lighting casts long shadows and emphasizes texture, making it ideal for creating dramatic, moody images. Its often used in portrait photography to add depth to the subjects face and convey emotion.Backlighting for Atmosphere: Backlighting, where the light source is behind the subject, can create silhouettes or halo effects that add a sense of mystery or ethereal quality to your images. This technique works well in outdoor photography during sunrise or sunset. Low-Key Lighting for Intensity: Low-key lighting involves using minimal light to illuminate only specific parts of your subject, leaving the rest in deep shadow. This technique is often used in film noir and other genres that require a moody, intense atmosphere.High-Key Lighting for Softness: High-key lighting, in contrast, uses bright, even lighting to minimize shadows and create a light, airy feel. This is often used in fashion and product photography to convey a sense of cleanliness and simplicity.Practical Tips for Working with Light and ShadowPlan Your Lighting: Before you start shooting, consider how the available light can be used to enhance your story. Scout your location at different times of day to see how natural light interacts with the environment. Experiment with Angles: The angle of light can drastically change the mood of your photo. Dont be afraid to move around and experiment with different lighting angles to see how they affect your scene.Use Reflectors and Diffusers: To control light more effectively, consider using reflectors to bounce light onto your subject or diffusers to soften harsh shadows. These tools can help you achieve the desired lighting effect without relying solely on natural light.Pay Attention to Post-Processing: In post-production, you can further manipulate light and shadow to refine your story. Adjusting exposure, contrast, and highlights can help you bring out the details that matter most.Light and shadow are more than just technical aspects of photographythey are fundamental elements of storytelling. By mastering the use of light and shadow, you can create images that are not only visually striking but also rich in narrative and emotion. Whether youre shooting a dramatic portrait, a serene landscape, or an intense street scene, understanding how to manipulate light and shadow will elevate your photography and bring your stories to life.Not on 500px yet? Click here to learn about Licensing with 500px.The post Harnessing Light and Shadow to Enhance Your Storytelling appeared first on 500px.
    0 Comments 0 Shares 362 Views
  • ISO.500PX.COM
    Crafting Compelling Stories Through Your Lens
    Photography is more than just capturing a momentits about telling a story that resonates with the viewer. Whether youre shooting a series or a single image, understanding how to build a narrative can transform your work from a simple photograph to a powerful piece of storytelling. Heres how you can effectively convey stories through your photography, drawing from the experiences and techniques of professional photographers.Understanding the Elements of a StoryA great story in photography has a beginning, middle, and end, much like a written narrative. Its important to identify these elements within the scenes you capture. The Beginning: Setting the SceneContext Matters: The setting provides essential background information and establishes the tone of your story. Consider which elements in your environment can help set the stage. For example, if youre photographing in an urban setting, the architecture, street signs, and people in the background can provide context and place the viewer right in the middle of the action.Creating Atmosphere: Use light, weather conditions, and color schemes to evoke the desired mood. Soft morning light might convey a sense of calm, while harsh midday sun could add tension. The Middle: Developing the PlotCapturing Emotion: The heart of any story is the emotion it evokes. Focus on the expressions, body language, and interactions of your subjects. Candid moments often tell a more authentic story, so be patient and ready to capture those unscripted instances.Layering Elements: To add depth to your story, include multiple elements in the frame that interact with one another. For instance, a street vendor handing food to a customer, while a child watches from the side, creates a layered narrative thats rich in detail.The End: Bringing ClosureImplying a Conclusion: Not every story needs a literal ending. Sometimes, leaving an image open to interpretation can be more powerful. Allow the viewer to imagine what happens next, which engages them more deeply with your work.The Decisive Moment: Borrowing from Henri Cartier-Bressons concept of the decisive moment, aim to capture that precise point in time when all elements in the frame come together to tell the story most effectively. Techniques for Enhancing Your StorytellingSequencing ImagesTelling a Complete Story: A series of images can often tell a story more comprehensively than a single frame. Think of your sequence as a visual book, where each image represents a chapter that builds upon the previous one. Plan your shots to ensure continuity and flow.Using Symbols and MetaphorsSymbolism in Photography: Introduce symbols that represent broader concepts or themes. For example, a wilting flower might symbolize the passage of time or loss. These subtle elements can add layers of meaning to your work.Metaphorical Representation: Use visual metaphors to convey complex ideas. A long, winding road might represent a journey or the challenges ahead. Consider how your subjects can represent something beyond their literal appearance.The Power of Color and LightColor as a Storytelling Tool: Colors can greatly influence the story your image tells. Warm colors like red and yellow can convey energy and passion, while cooler tones like blue and green can evoke calm or melancholy. Use color to guide the emotional response of your viewers.Manipulating Light: Light can add drama, mystery, or clarity to your story. Experiment with different lighting setups, whether its natural light, artificial light, or a combination of both, to see how it changes the mood and narrative of your images. Creating a Connection with the ViewerEngage Your Audience: A successful photograph often makes the viewer feel something. Whether its nostalgia, empathy, or intrigue, aim to evoke a response. Consider who your audience is and what story will resonate with them.Include Human Elements: People are naturally drawn to other people. Including human subjects in your photography can create a sense of connection and relatability, making your story more compelling.Practical Tips for Storytelling in PhotographyStart with a Concept: Before you begin shooting, think about the story you want to tell. What message or emotion do you want to convey? Having a clear concept in mind will guide your choices in composition, lighting, and subject matter.Be Observant: Pay attention to the details in your environment. Sometimes, the smallest elements can make the biggest impact on your storytelling. Notice the way light falls on a subject, the interplay between people, or the textures that add richness to a scene.Edit with Intention: Post-processing can enhance your story if done thoughtfully. Adjust contrast, brightness, and color to match the mood youre trying to convey. However, be careful not to over-edit, as this can detract from the authenticity of your story. Storytelling in photography is about more than just capturing a scene; its about conveying emotion, context, and meaning through your lens. By focusing on the elements of a story and using techniques that enhance the narrative, you can create images that resonate deeply with your audience. Whether youre telling a personal story, documenting an event, or exploring conceptual photography, remember that the most compelling stories are those that connect with viewers on an emotional level. Practice these techniques, and watch as your photography evolves into a powerful storytelling medium.Not on 500px yet? Sign up here to explore more impactful photography.The post Crafting Compelling Stories Through Your Lens appeared first on 500px.
    0 Comments 0 Shares 426 Views
  • ISO.500PX.COM
    PULSEpx: Elevate Your Photography Quests with Fair Competition and Skill-Based Challenges
    We know how much you love participating in Quests, pushing your creative limits, and sharing your incredible work. Thats why weve taken things up a notch and built PULSEpxan entirely new app designed to take your Quest experience to the next level.Why PULSEpx?PULSEpx isnt just another platformits a space dedicated to Quests, where you can compete day in and day out, with contests tailored to your skill level. Whether youre just starting out or are a seasoned pro, youll find Quests that match your expertise, making every competition fair and motivating. As you progress, you can move up in the ranks, challenging yourself to reach new heights while also competing for amazing prizes.Compete on Your LevelPULSEpx uses a skill-ranked system that matches you with photographers at your level. This isnt about competing with everyoneits about competing with peers who are at a similar stage in their photography journey. This means every Quest is designed to challenge you just enough to help you grow and push your limits, while keeping things fair.Fair Voting, Real MeritWe know how important it is for your photos to be judged fairly. Thats why PULSEpxs voting system is designed to ensure that every photo is evaluated based on its quality, not the photographers follower count or popularity. This way, your work gets the recognition it deserves, and the best shots always rise to the top.Daily Opportunities to ShineWith new Quests launching regularly, youll always have fresh opportunities to test your skills and showcase your creativity. Plus, with more rewards distributed across each contest, you have a higher chance of earning prizes, gaining recognition, and moving up the ranks. Its not just about winning one big prizeits about continuous growth and rewarding your dedication.Exclusive Perks for 500px MembersIf youre a Pro or Awesome member on 500px, youll receive monthly rewards on PULSEpx, giving you access to even more contests and opportunities to win. Its our way of saying thank you for being a part of our community and giving you the tools to take your photography even further.Get Started TodayPULSEpx is your new home for photography Questsa place where you can compete, grow, and connect with photographers around the world. Were excited to see how youll use PULSEpx to elevate your photography and reach new levels of creativity.Ready to jump in?Download PULSEpx on the App Store or Google Play, and start exploring a whole new world of Quests.The post PULSEpx: Elevate Your Photography Quests with Fair Competition and Skill-Based Challenges appeared first on 500px.
    0 Comments 0 Shares 418 Views
  • ISO.500PX.COM
    Enhancing your images: Exploring color in post-processing
    Post-processing is a crucial step in modern photography, allowing photographers to manipulate and enhance colors to achieve their desired effects. Heres how to effectively use post-processing techniques to bring your images to life.Understanding color in post-processingColor adjustment: Color adjustment involves modifying colors to improve balance and visual appeal. This includes correcting white balance to ensure accurate color representation, adjusting saturation and vibrancy to make colors pop, and tweaking hue to alter tones. For instance, adjusting white balance can neutralize a yellowish indoor light, making skin tones look more natural. Fine-tuning saturation can bring out the vividness of a sunset without looking unnatural.Color enhancement: Color enhancement focuses on boosting specific colors to make them stand out. For example, enhancing blue tones in a seascape can make the water more striking, while boosting reds in a portrait adds warmth and vitality. Techniques like selective color adjustment allow for precise control, enhancing specific colors without affecting the entire image. Using a tool like vibrance targets less saturated colors, enhancing your image subtly compared to saturation adjustments. Common applicationsColor correction: Adjusting colors to make them more accurate and natural-looking. For example, correcting a photo taken under fluorescent light might involve reducing the green tint to restore natural skin tones. Additionally, color correction can fix issues like washed-out colors or overly dark images, bringing out the true colors captured by your camera.Color grading: Applying stylistic color effects to create a specific mood or look. For instance, you might use cool blue tones in the shadows and warm orange tones in the highlights to create a dramatic, cinematic effect. Color grading can transform the emotional impact of an image, making it a powerful tool for storytelling.Techniques for post-processing colorBasic adjustmentsWhite balance: Correct the white balance to ensure the colors in your image are true to life.Exposure and contrast: Adjust the exposure and contrast to enhance the overall look of your image. Advanced adjustmentsHue/saturation: Fine-tune the hue and saturation of individual colors to achieve the desired effect.Color curves: Use color curves to make precise adjustments to the tones and colors in your image.Selective colorTarget specific colors: Adjust specific colors in your image without affecting the whole photo. This technique is useful for enhancing complementary colors or creating harmony.Masking: Use masks to apply color adjustments selectively to certain areas of your image. Advanced techniquesSplit toningAdding mood: Apply different colors to the highlights and shadows of your image to create a specific mood. For example, adding blue tones to the shadows and orange tones to the highlights can create a dramatic, cinematic look.Application: Ideal for landscape and portrait photography to add depth and interest.Color gradingCinematic look: Use color grading to achieve a cinematic look. Adjust the midtones, highlights, and shadows individually to create a cohesive color palette.Stylized effects: Experiment with different color grading presets to find a style that suits your image and enhances its emotional impact. Gradient mapsCreative color effects: Use gradient maps to apply a gradient of colors to your image. This technique can create unique and artistic effects that enhance the visual appeal.Application: Ideal for creating abstract or surreal images.Practical tips to tryUsing presetsConsistency: Use color grading presets to maintain a consistent look across a series of images. This is particularly useful for photo essays or themed shoots.Customization: Customize presets to suit your specific style and preferences.Shooting in RAWFlexibility: RAW files retain more color information, allowing for greater flexibility in post-processing. You can make significant color adjustments without losing image quality.Fine-tuning: Make precise adjustments to colors and tones to achieve the perfect look. Field tipsPre-visualization: Consider how you will adjust colors in post-processing while shooting. This helps in composing your shots more effectively.Practice regularly: Regular practice with post-processing techniques will improve your ability to achieve the desired color effects.Exploring color in post-processing can transform your photos, enhancing their visual appeal and emotional impact. By understanding and applying these techniques, you can bring your images to life and create stunning works of art. Experiment with different methods to find what works best for your style and subject matter.Not on 500px yet? Sign up here to explore more impactful photography.The post Enhancing your images: Exploring color in post-processing appeared first on 500px.
    0 Comments 0 Shares 376 Views
  • ISO.500PX.COM
    Utilizing negative space to highlight your subject
    Negative space is the art of using the empty areas around your subject to emphasize its importance and deliver powerful visual messages. By mastering the effective use of negative space, photographers can create minimalist compositions that captivate viewers with their elegance and simplicity. Heres a guide to understanding and using negative space like a pro.What is negative space?Negative space is the empty, or open space around your primary subject in a photograph. The main subject, often called the positive space, occupies a portion of the frame, while the negative space surrounds it and helps direct the viewers attention. It offers a sense of scale, depth, and simplicity, bringing a refreshing contrast to visually cluttered scenes. Why use negative space?Focus on the subject: Negative space draws the viewers attention to your subject by creating visual contrast. It acts as a frame that makes the subject stand out.Creates minimalist impact: By minimizing distractions, negative space evokes strong emotions through simplicity, emphasizing the core message of your photograph.Provides room for interpretation: The ample space around the subject allows the viewer to connect more deeply, leaving room for imagination and interpretation. Elicits emotions: The vast emptiness can evoke feelings like solitude, peace, or loneliness, depending on the subject and overall composition.Applying negative space to your photographyChoose a simple background: Avoid busy, distracting backgrounds. Select uncluttered backdrops, whether a clear sky, blank wall, or vast landscape.Frame your subject deliberately: Place your subject in a visually interesting part of the frame. Experiment with different positionsoff-center or near the edgeto see how it interacts with the surrounding negative space. Balance positive and negative space: The negative space should dominate, but not overwhelm your subject. Too much negative space can diminish the subjects impact, while too little can undermine the compositions elegance.Use colors and contrast: Opt for contrasting colors between the positive and negative spaces to make your subject pop. Monochrome backgrounds also help simplify the composition. Advanced tips and techniquesAsymmetry for impact: Utilize asymmetrical compositions with ample negative space on one side. This adds tension and dynamic energy, emphasizing the direction of the subject.Pattern disruption: Break repetitive patterns or textures with your subject to make it stand out more. For example, isolate a single leaf among vast open water.Perspective and scale: Play with perspective by contrasting a small subject against a large negative space. This creates a sense of grandeur or isolation that adds to the compositions emotional impact.Textures and layers: Negative space doesnt have to be empty or featureless. Using subtle textures like gentle waves or layered mist adds dimension without detracting from the main subject. Negative space is a subtle yet powerful tool that can transform the impact of your photographs. By carefully balancing the positive and negative spaces, and making deliberate choices regarding composition, color, and perspective, you can create images that carry strong messages with minimalist simplicity. Experiment with asymmetrical framing, pattern disruption, and layered textures to enrich your compositions and convey emotions through the art of less. The mastery of negative space not only elevates your images but also invites viewers into a more intimate, evocative visual experience.Not on 500px yet? Click here to learn about Licensing with 500px.The post Utilizing negative space to highlight your subject appeared first on 500px.
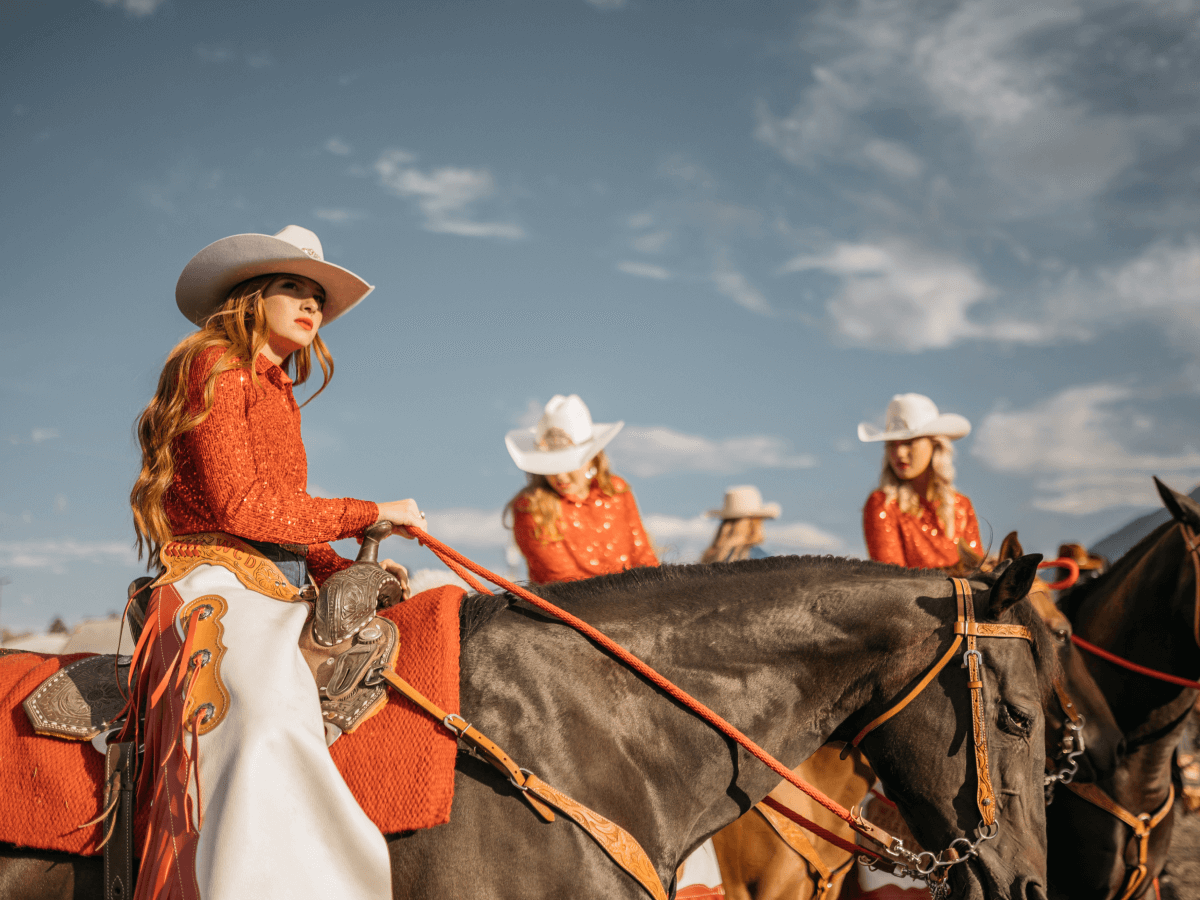
    0 Comments 0 Shares 389 Views
  • ISO.500PX.COM
    Mastering Low Light Photography
    Low light photography presents unique challenges, but it also offers the opportunity to create dramatic and evocative images. With the right techniques and a bit of practice, you can capture stunning photos even in the darkest conditions. Heres a comprehensive guide to mastering low light photography.Understanding Low Light PhotographyLow light photography involves shooting in environments with limited light, such as indoors, during twilight, or at night. This type of photography requires a good understanding of how to manipulate your camera settings to get the best results without compromising image quality. Essential Techniques for Low Light PhotographyUse a Wide Aperture: A wide aperture (low f-stop number) allows more light to enter the camera, making it easier to shoot in low light. Apertures like f/1.8 or f/2.8 are ideal for capturing more light and creating a shallow depth of field, which can add a beautiful bokeh effect to your images. Increase ISO Sensitivity: Raising your cameras ISO sensitivity allows you to capture more light, but be cautious of introducing noise. Modern cameras perform well at higher ISOs, so experiment with different levels to find the best balance between brightness and noise.Slow Shutter Speed: A slower shutter speed allows more light to reach the camera sensor, but it can result in motion blur if your camera or subject moves. To capture sharp images with slower shutter speeds, use a tripod to stabilize your camera. Use a Tripod: Stability is crucial in low light photography. A tripod helps eliminate camera shake, allowing you to use slower shutter speeds without blurring your images. If you dont have a tripod, try stabilizing your camera on a solid surface.Manual Focus: Autofocus can struggle in low light conditions. Switch to manual focus to ensure your subject is sharp. Use your cameras live view and zoom in to fine-tune the focus.Advanced TechniquesLong Exposure Photography: Experiment with long exposure techniques to capture light trails, smooth water surfaces, and star trails. Use a tripod and remote shutter release to stabilize your camera during long exposures.Bracketing and HDR: Use exposure bracketing to capture multiple shots at different exposures. Combine them in post-processing to create a High Dynamic Range (HDR) image, which preserves details in both the shadows and highlights. Light Painting: Use a flashlight or other light sources to add light to specific parts of your scene. This technique, known as light painting, can create unique and creative effects in your photos. Post-Processing: Enhance your low light images in post-processing by adjusting exposure, contrast, and noise reduction. Software like Adobe Lightroom and Photoshop offer powerful tools to fine-tune your images.Practical Tips for Low Light PhotographyShoot in RAW: RAW files retain more information than JPEGs, giving you greater flexibility in post-processing. This is especially important in low light photography, where you may need to make significant adjustments to exposure and noise.Use a Fast Lens: Fast lenses with wide apertures (e.g., f/1.4, f/1.8) are excellent for low light photography. They allow more light to enter the camera, making it easier to capture sharp images. Take Test Shots: Before you start shooting, take a few test shots to check your exposure and focus. Make any necessary adjustments to ensure you capture the best possible shot.Low light photography can be challenging, but with these techniques and tips, you can capture stunning images in any lighting condition. Practice and experimentation are key to mastering this art form, so dont be afraid to try new techniques and push your creative boundaries.Not on 500px yet? Sign up here to explore more impactful photography.The post Mastering Low Light Photography appeared first on 500px.
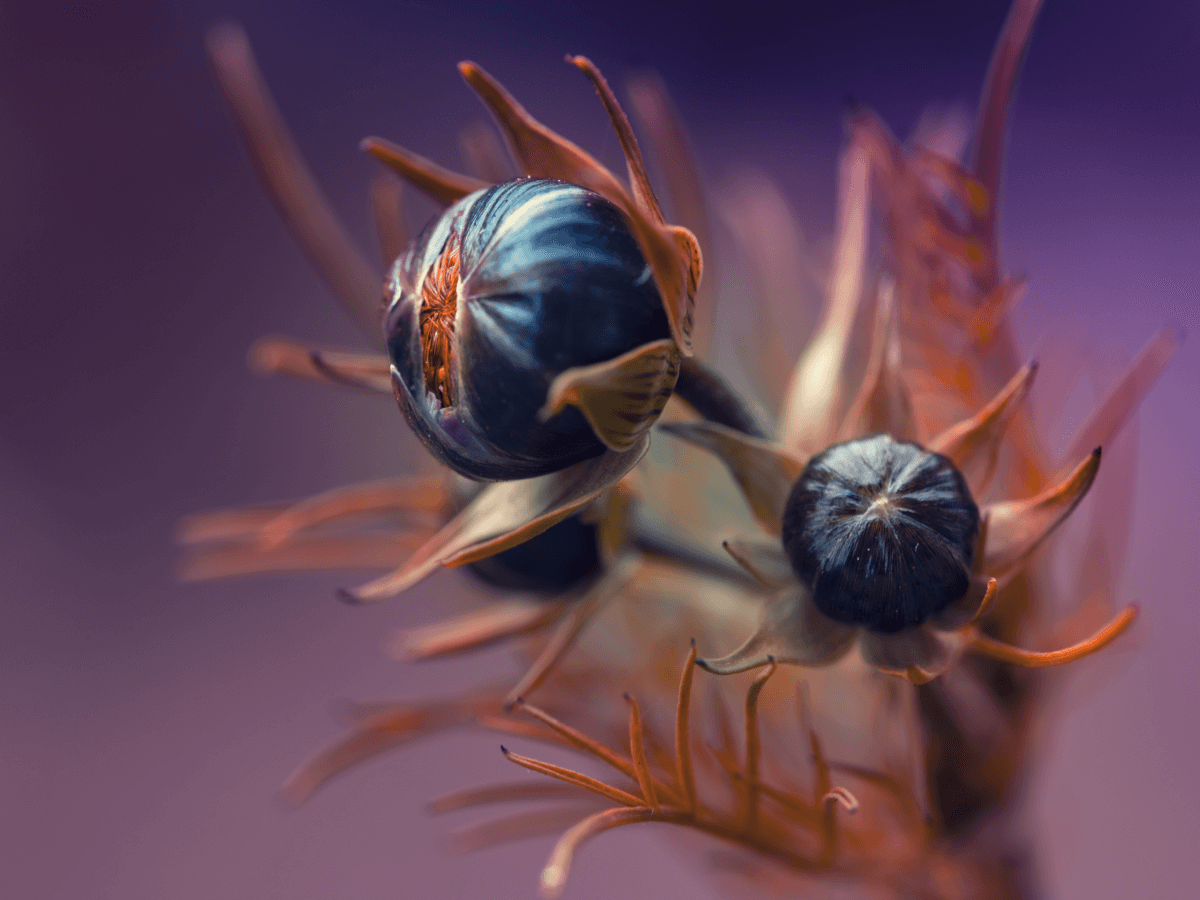
    0 Comments 0 Shares 394 Views
  • ISO.500PX.COM
    Unlocking the potential of flash photography
    Flash photography can dramatically enhance your images by adding light where its needed most. Whether youre shooting portraits, still life, or even landscapes, mastering flash techniques can elevate your photography to new heights. Heres a comprehensive guide to getting the most out of your flash.Understanding flash photographyFlash photography involves using artificial light sources to illuminate your subject. This can be an on-camera flash, an external flash unit, or studio lighting. The key to successful flash photography is learning to control and modify the light to achieve the desired effect.Essential techniques for creative flash photographyBounce flash: Instead of pointing the flash directly at your subject, bounce it off a ceiling or wall to create a softer, more natural light. This technique reduces harsh shadows and spreads light evenly across your scene.Diffused flash: Use a diffuser to soften the light from your flash. This can be achieved with commercial diffusers, homemade solutions like a tissue, or built-in diffusers on some flash units. Diffused light reduces the intensity of the flash, creating a more pleasing and less harsh illumination.Off-camera flash: Moving your flash off-camera provides greater flexibility and creativity in your lighting setup. Use wireless triggers or sync cords to position the flash at different angles, creating dramatic and three-dimensional lighting effects.Fill flash: Use your flash as a fill light to brighten shadows in outdoor shots, especially during harsh midday sunlight. This technique helps balance the exposure between your subject and the background, reducing contrast and improving overall image quality.Advanced techniquesRear curtain sync: Set your flash to rear curtain sync to fire at the end of the exposure rather than the beginning. This technique captures motion blur behind a sharply focused subject, adding a sense of movement and dynamism to your images.High-speed sync: Use high-speed sync to shoot with flash at shutter speeds faster than your cameras sync speed. This technique is ideal for freezing fast action or shooting wide open in bright conditions without overexposing your image.Creative gels: Attach colored gels to your flash to add creative color effects to your images. Gels can be used to match ambient light, create interesting color contrasts, or simply add a splash of color for artistic effect.Multiple flash setup: Use multiple flash units to create complex lighting setups. This technique allows you to control the light on different parts of your scene independently, adding depth and dimension to your images.Practical tips for creative flash photographyManual flash control: Learn to control your flash manually rather than relying on automatic settings. Adjust the flash power, zoom, and direction to get the desired lighting effect.Light modifiers: Experiment with various light modifiers such as softboxes, umbrellas, and snoots. These tools help shape and control the light, allowing for greater creative expression.Test shots: Take test shots to see how your flash setup affects the scene. Adjust your settings and setup as needed to achieve the best results.Flash photography opens up a world of creative possibilities. By mastering these techniques and experimenting with different setups, you can add drama, depth, and impact to your images. Practice regularly, and dont be afraid to push the boundaries of what you can achieve with your flash.Not on 500px yet? Click here to learn about Licensing with 500px.The post Unlocking the potential of flash photography appeared first on 500px.
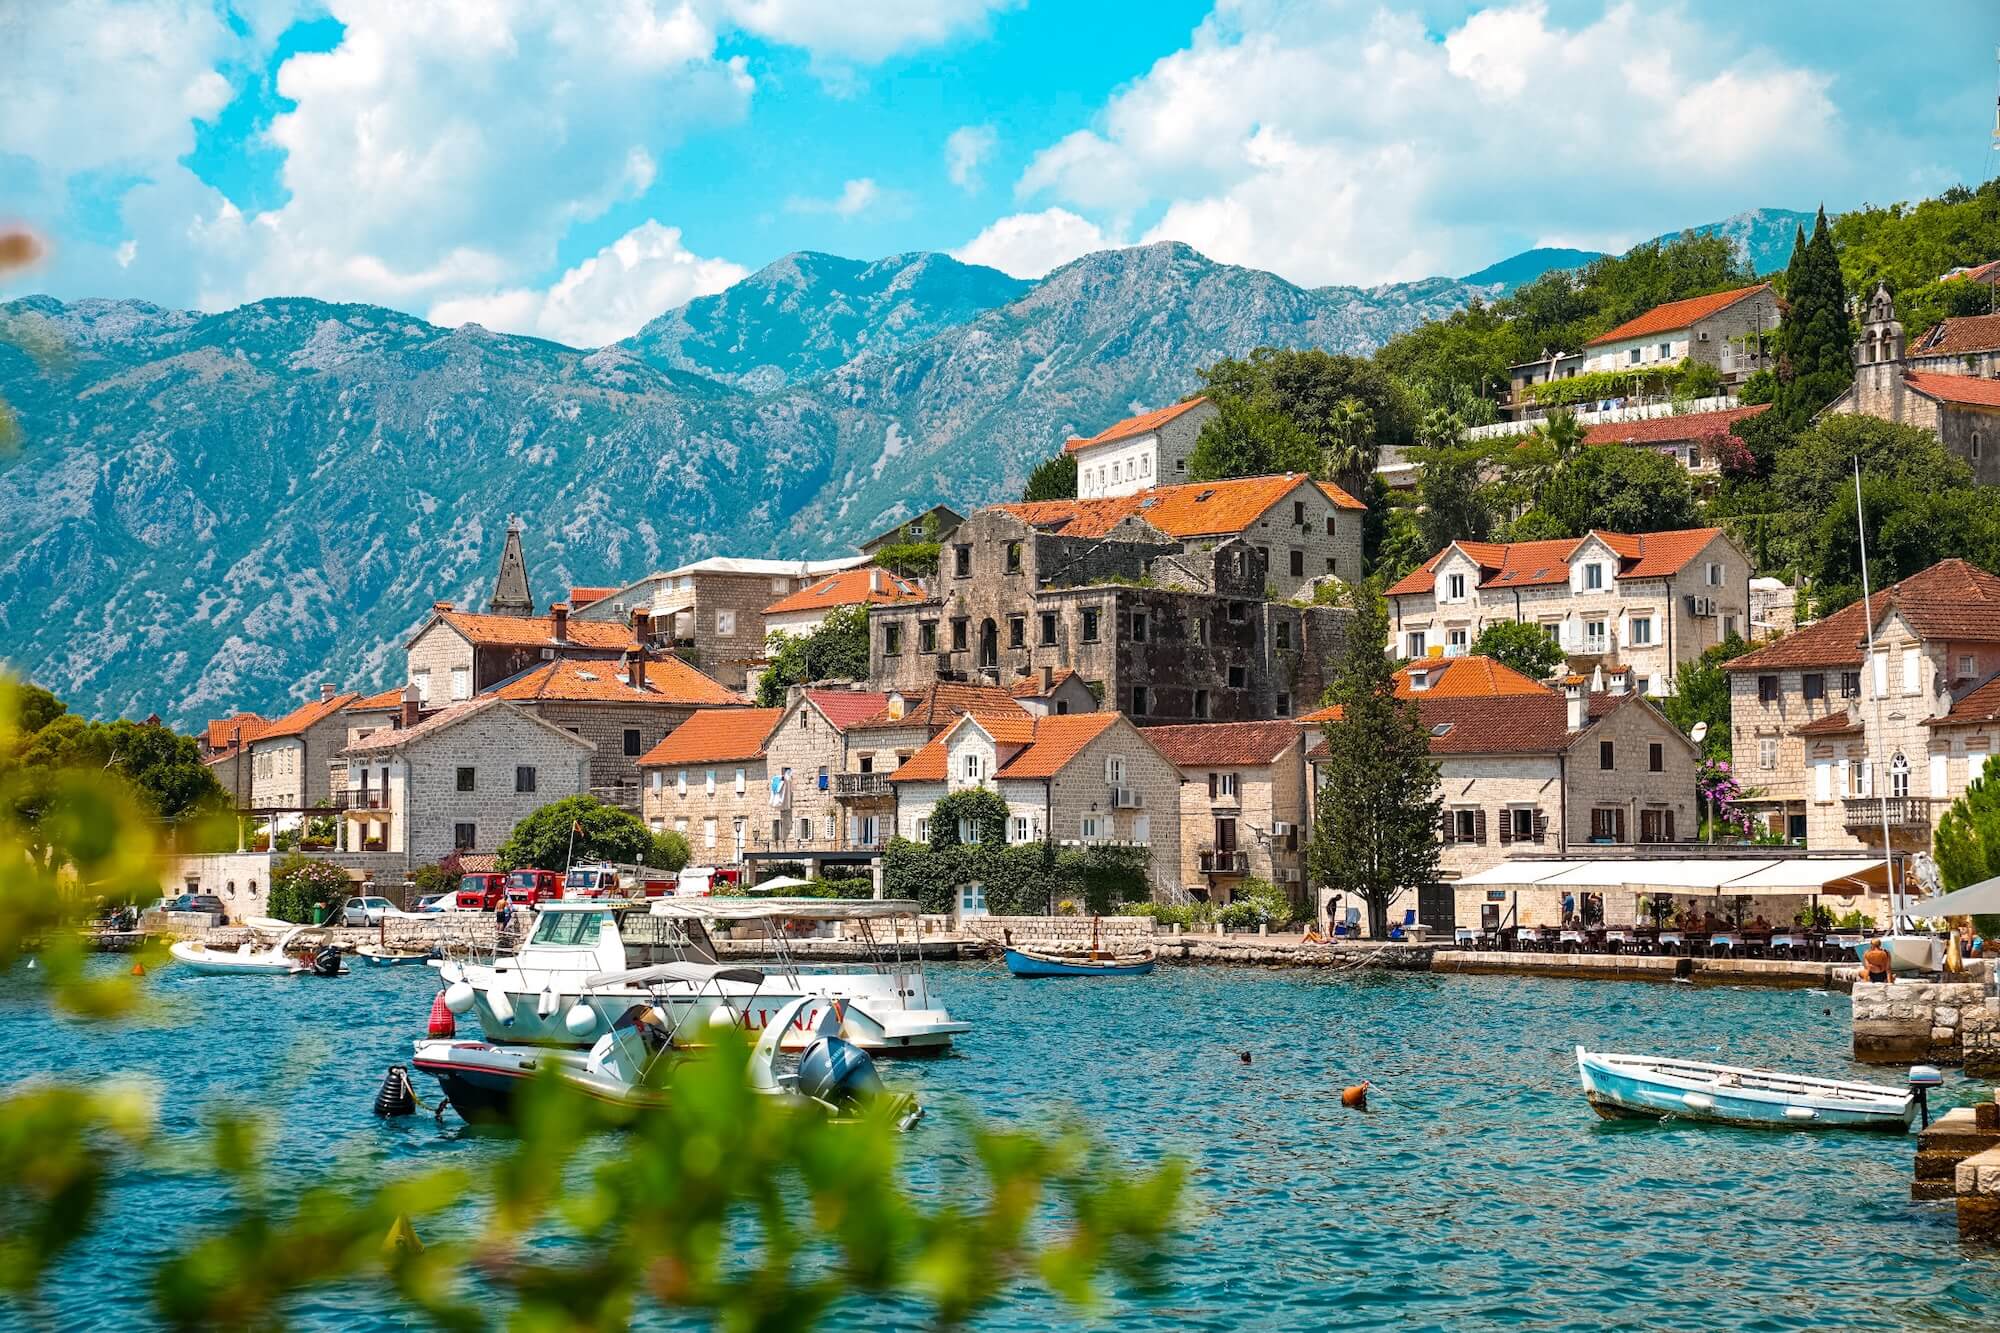
    0 Comments 0 Shares 384 Views
  • ISO.500PX.COM
    Creating depth and drama with shadows
    Shadows are a powerful, yet often underutilized element in photography. By mastering the use of shadows, you can add a sense of depth, dimension, and drama to your images, transforming ordinary scenes into extraordinary compositions. Heres a guide to harnessing the creative potential of shadows in your photography.Understanding shadows in photographyShadows are created when an object blocks light, resulting in areas of darkness that contrast with the illuminated parts of your scene. Shadows can add texture, emphasize shapes, and create a sense of mystery or tension. The key is to learn how to control and manipulate shadows to enhance your images.Techniques for creative shadow photographyHard vs. soft shadows: Understand the difference between hard and soft shadows. Hard shadows have sharp, defined edges and are created by direct light sources like the sun or a spotlight. Soft shadows have blurred edges and are made with diffused light sources, such as an overcast sky or a softbox. Use hard shadows for dramatic, high-contrast images and soft shadows for a more gentle, nuanced effect.Silhouettes: Create striking silhouettes by positioning your subject in front of a strong light source. Adjust your exposure for the background to render the subject in complete shadow, highlighting its shape and form. Silhouettes are most effective with recognizable shapes and convey a powerful, simplistic beauty.Shadow patterns: Look for interesting patterns created by shadows. Objects with intricate details, such as lace curtains, tree branches, or architectural elements, can cast fascinating shadows that add complexity and interest to your images.Directional light: Use directional light to control where shadows fall in your scene. Adjusting the angle and distance of your light source can create different shadow effects, from long, dramatic shadows to subtle, soft ones. Experiment with different lighting angles to find the most compelling compositions.Advanced techniquesDouble exposure with shadows: Combine two exposures in one image to create a surreal effect. Capture a shadow in one exposure and overlay it with another scene or subject in the second exposure. This technique can produce unique and imaginative images that challenge the viewers perception.Shadow portraits: Use shadows creatively in portrait photography to add mood and character. Position your subject so that part of their face or body is cast in shadow, creating a mysterious and dramatic effect. Experiment with different lighting setups to find the most flattering and intriguing results.Reflected shadows: Utilize reflective surfaces like water, glass, or polished floors to capture and manipulate shadows. Reflections can add depth and symmetry to your images, creating a dynamic interplay between light and shadow.Shadow play in street photography: Incorporate shadows into your street photography to add an extra layer of narrative and context. Look for shadows cast by buildings, people, and street furniture to create compelling compositions that tell a story.Practical tips for shadow photographyShoot in black and white: Shadows often have a more pronounced impact in black and white photography. Removing color distractions allows you to focus on the interplay of light and shadow, emphasizing textures and contrasts.Adjust your exposure: When photographing shadows, you may need to adjust your exposure to prevent losing detail in the highlights or shadows. Use exposure compensation or shoot in manual mode to find the perfect balance.Use a tripod: A tripod can be essential for maintaining stability when experimenting with shadow photography, especially in low light conditions. It allows you to use slower shutter speeds without introducing camera shake.Shadows are a versatile and powerful tool in photography. By experimenting with different techniques and approaches, you can harness the potential of shadows to create images with depth, drama, and a unique artistic touch. Embrace the creative possibilities that shadows offer and let them transform your photography.Not on 500px yet? Sign up here to explore more impactful photography.The post Creating depth and drama with shadows appeared first on 500px.
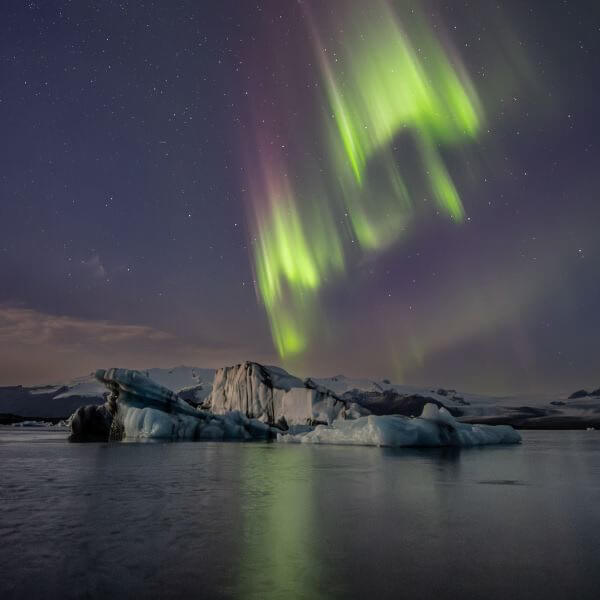
    0 Comments 0 Shares 373 Views
  • ISO.500PX.COM
    How to use complementary colors to make your photos pop
    Complementary colors, found directly opposite each other on the color wheel, offer a powerful way to add visual interest and energy to your photos. Heres how to effectively use these colors to make your images stand out, with tips from professional photographers whove mastered the technique.Understanding complementary colorsComplementary colors are pairs of colors that, when combined, cancel each other out by producing a grayscale color like white or black. When placed next to each other, they create the strongest contrast and reinforce each others intensity. This principle is widely used in various art forms, including photography, to make certain elements of a composition stand out. Common complementary color pairsRed and green: This pair is highly effective in nature photography, where you often see green foliage and red flowers or berries.Blue and orange: Frequently seen during the golden hour when the blue sky contrasts with the warm tones of the setting sun.Yellow and purple: Often used in flower photography, where purple flowers stand out against yellow backgrounds or vice versa.Practical applicationCreating depth and focus: By using complementary colors, photographers can draw attention to the subject and create a sense of depth in the image. For instance, a red subject against a green background will pop and appear more three-dimensional.Balancing colors: While using complementary colors, its important to balance the composition. Too much of both colors can overwhelm the viewer, while subtle use can lead to a harmonious and striking image.Adjusting in post-processing: Even if you cant find natural complementary colors in your environment, you can adjust hues in post-processing to create or enhance this effect. For example, you can tweak the colors of a sunset to bring out the blue and orange contrast more vividly. Techniques for using complementary colorsNatural occurrencesFind in nature: Look for natural pairings, like red flowers against green leaves or a blue sky with an orange sunset. Nature provides some of the best examples of complementary colors.Seasonal colors: Picture orange autumn leaves against a blue sky, or purple spring flowers against yellow-green grass. These combinations are naturally harmonious and striking. Incorporating props and wardrobeStyling: When shooting portraits or still life, plan your subjects clothing and props to include complementary colors. For example, place a subject in a blue dress against an orange backdrop.Accessorize: Small accessories like scarves, hats, or even makeup can introduce complementary colors subtly yet effectively. Background and foregroundUrban Settings: In urban environments, look for graffiti, painted walls, or signage that offers a complementary color to your subjects clothing or skin tone.Foreground Elements: Use flowers, leaves, or other objects in the foreground to add a complementary color to your subject.Practical tips to tryLighting and time of dayGolden hour: This time provides naturally warm light, which can enhance complementary colors like blue and orange. Plan your shoots during this period for the best results.Artificial lighting: Use colored gels on your lights to add or enhance complementary colors. This is particularly useful in studio settings.Shooting in RAWFlexibility: RAW files retain more color information, allowing you to adjust and enhance complementary colors in post-processing without degrading image quality.Adjustments: You can fine-tune white balance and individual color channels more effectively with RAW files. Field tipsExperiment: Dont be afraid to experiment with different combinations and settings. Sometimes the best color combinations are found through trial and error.Practice: Regular practice with complementary colors will improve your eye for spotting these opportunities naturally in your environment.Complementary colors can transform your photography by adding depth, contrast, and visual interest. By understanding the principles of the color wheel and experimenting with various techniques, you can create stunning images that captivate and engage your audience. Practice incorporating complementary colors into your compositions, and watch your photos come to life with vibrant energy. Remember, the key is to experiment and find what works best for your style and subject matter. Not on 500px yet? Sign up here to explore more impactful photography.The post How to use complementary colors to make your photos pop appeared first on 500px.

    0 Comments 0 Shares 374 Views
  • ISO.500PX.COM
    Creating Impact with Monochromatic Color Schemes
    Monochromatic color schemes involve using different shades, tones, and tints of a single color to create cohesive and visually impactful images. This technique simplifies the color palette, allowing photographers to focus on composition, texture, and lighting. Heres how to effectively use monochromatic color schemes to enhance your photography, with insights from professional photographers.Understanding Color SchemesMonochromatic color schemes use one base color and extend it using its shades (adding black), tints (adding white), and tones (adding gray). This approach creates a harmonious and unified look, making the subject stand out through subtle variations in the same hue.Common applicationsBlack and white photography: This is the most well-known form of monochromatic photography, where all colors are converted to shades of gray.Color monochrome: Using shades of a single color, such as blues or reds, to create a unified theme.Techniques for Working with Color and TonesChoosing the right colorEmotional impact: Different colors evoke different emotions. Blues can be calming, reds can be intense, and greens can be soothing. Choose a color that aligns with the mood you want to convey.Subject suitability: Ensure the chosen color complements your subject. For example, greens work well with nature photography, while blues might suit urban scenes.Lighting and shadowsEnhanced textures: Monochromatic schemes highlight textures and details that might be overlooked in color images. Use lighting to accentuate these elements.Controlled lighting: Experiment with different lighting setups to see how shadows and highlights affect the various shades and tones of your chosen color.Background and foregroundConsistent palette: Ensure the background and foreground elements are within the same color family to maintain cohesion. This can be achieved through careful selection of props and settings.Texture contrast: Use textures to differentiate between elements in your composition. A smooth subject against a rough background can create visual interest within a single color scheme.Advanced techniquesHigh-key and low-key monochromeHigh-key: Focuses on lighter tones and minimal shadows, creating an airy and bright feel. Ideal for subjects that convey purity or simplicity.Low-key: Emphasizes darker tones and deep shadows, adding drama and intensity. Perfect for creating a moody or mysterious atmosphere.Selective monochromeAccent color: Occasionally, introduce a single element in a different color to break the monotony and draw attention. This should be used sparingly to maintain the monochromatic integrity.Post-processing: Convert your image to monochrome in post-processing, then selectively bring back color to specific areas for a striking effect.Infrared monochromeInfrared photography: Use infrared filters to capture unique monochromatic images. This technique reveals details and contrasts that are invisible to the naked eye, creating surreal and otherworldly photos.Practical tips to tryUsing filtersColor filters: Use color filters on your lens to enhance specific shades and tones of your chosen color. This is especially effective in black and white photography.Polarizing filters: Helps manage reflections and enhance contrast within your monochromatic scheme.Shooting in RAWAdjustability: Shooting in RAW gives you greater flexibility to adjust shades, tones, and tints during post-processing without losing quality.Fine-tuning: You can make precise adjustments to achieve the perfect balance of light and dark in your monochromatic image.Field tipsPre-visualization: Train your eye to see in shades and tones of a single color. This helps in composing your shots more effectively.Practice regularly: Regular practice with monochromatic schemes will improve your ability to spot potential compositions and refine your technique.Monochromatic color schemes can simplify your compositions while enhancing the visual impact. By focusing on shades, tones, and textures, you can create images that are both cohesive and striking. Experiment with different colors and techniques to find what works best for your style and subject matter.Not on 500px yet? Sign up here to explore more impactful photography.The post Creating Impact with Monochromatic Color Schemes appeared first on 500px.
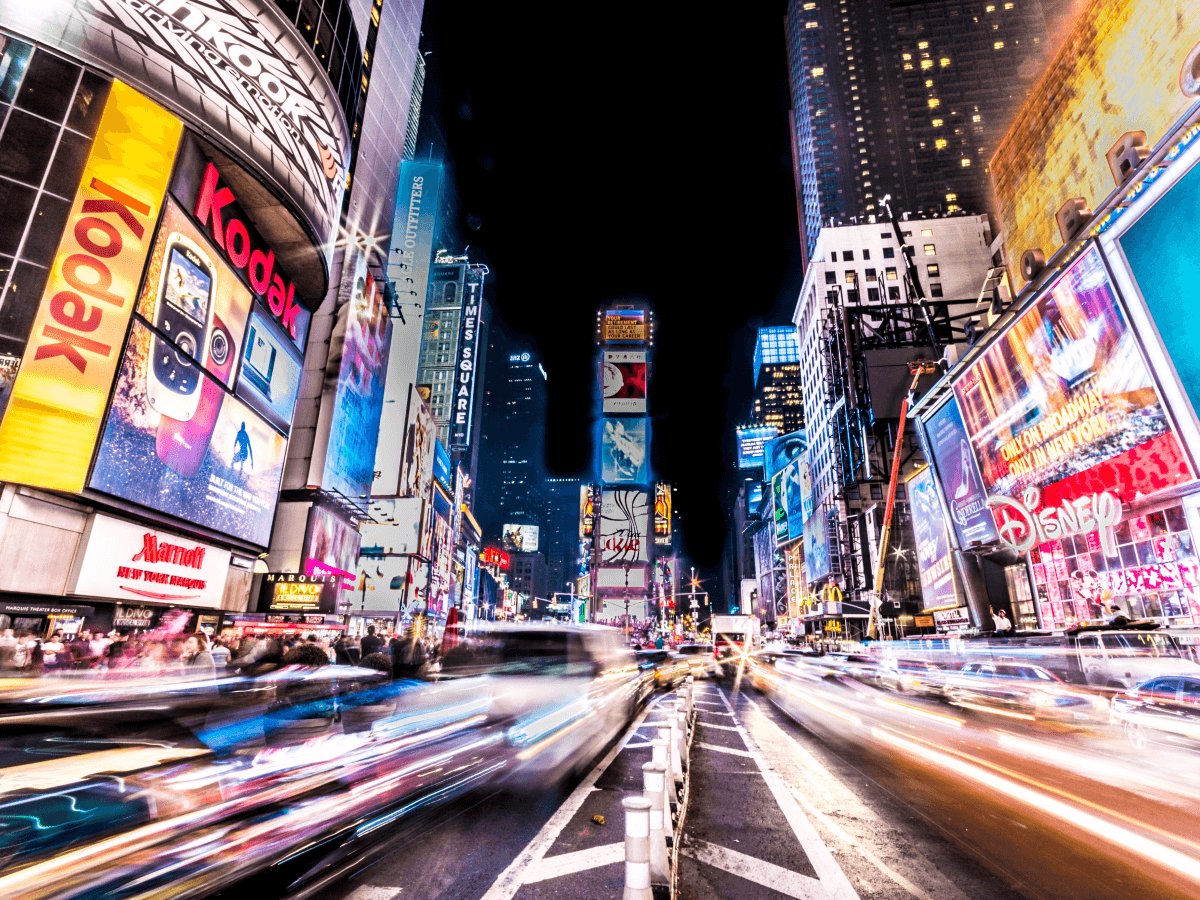
    0 Comments 0 Shares 371 Views
  • ISO.500PX.COM
    Meet the winners of Junes Licensing Rush
    Our most recent Licensing Rush was a little different than usual. While each Licensing Rush has photographers competing to get as many new and exclusive photos accepted to 500px Licensing throughout the contest month, during Junes Licensing Rush, participating photographers were awarded bonus points for each accepted photo with an attached model release. Models help elevate commercial photography, and attached model releases often lead to more Licensing sales. Its time to meet the top three photographers who will be taking home cash prizes:In first place is AllNea Olha Dobosh $300 US prize. Olha is an outstanding 500px Licensing contributor who takes first place in this Licensing Rush, with a score of 1,691 points! Olha had 868 accepted photos, but 823 of her photos had model releases making them worth double the points. Olhas photos focus on lifestyle moments tied to vacation, adventure, connection, and family. She maximizes her shoots by following her models through different scenes, capturing a wide variety of perspectives around each moment, and taking multiple photos that all connect with a theme while looking different from each other.Coming in second place is TeeBangkok Anucha Muphasa $150 US prize. Anucha takes the silver medal with a score of 1,093 points. With 1,077 new photos accepted, Anucha earned bonus points for model releases attached to 16 photos. Anuchas Licensing series showcases the food and culture of Bangkok, Thailand. Featuring a great blend of food, nature, and lifestyle experiences, from busy street markets to stunning beaches, Anuchas photos present the rich visuals of life in Thailand.Lastly, third place goes to PetervanHaastrecht Peter van Haastrecht $50 US prize. With a score of 423 points, Peter van Haastrecht takes the third place prize with 423 accepted photos. Peters photos present nature from many different perspectives, blending aerial shots, wide landscapes and vistas, and close-ups of smaller elements of nature. Peters photos easily connect with evergreen Licensing themes of sustainability, nature, ecology, wanderlust, and travel. With thousands of photographers participating and more than twelve thousand photos submitted the competition for Junes Licensing Rush was fierce, and the bonus for model content made it even tougher thankfully so many great 500px photographers rose to the challenge. Opt in for 500px Licensing News to stay in the know and watch out for the next Licensing Rush announcement, for your chance to win!Check out our Licensing Quests for more opportunities to win prizes.Not on 500px yet? Click here to learn about Licensing with 500px.The post Meet the winners of Junes Licensing Rush appeared first on 500px.
    0 Comments 0 Shares 365 Views
  • ISO.500PX.COM
    Balancing color contrast and harmony in your photos
    Color contrast and harmony are essential elements in creating visually engaging photos. Properly balancing these elements can make your images more dynamic and pleasing to the eye. Heres how to achieve the perfect balance.Understanding color contrast and harmonyColor contrast: The difference in luminance or color that makes objects distinguishable. High contrast can make images pop, while low contrast can create a subtle, soft look. High color contrast can make the main subject stand out more vividly. For example, placing a bright red subject against a green background will make the red pop due to the stark difference between the two colors. Conversely, using low contrast can create a more serene and cohesive image, such as using varying shades of blue in a seascape.Color harmony: This is the pleasing arrangement of colors. Harmonious colors create a sense of order and balance in an image. Achieving color harmony involves using colors that naturally look good together, like analogous colors (colors next to each other on the color wheel) or a monochromatic palette. For instance, a photo with different shades of green can evoke a sense of tranquility and unity.Common applicationsHigh contrast: Using colors from opposite ends of the color wheel to create vibrant, attention-grabbing images. For example, a blue sky with an orange building can create a striking visual impact.Low contrast: Using colors that are close to each other on the color wheel to create a more unified and soothing image. A landscape photo with various shades of green can feel peaceful and cohesive.Techniques for balancing color contrast and harmonyUsing the color wheelComplementary colors: Opposite on the wheel, these colors provide high contrast and make each other stand out. For instance, pairing blue with orange or red with green creates a vibrant contrast that draws attention.Analogous colors: Next to each other on the wheel, they create harmony and a cohesive look. Using colors like blue, teal, and green together can create a serene and visually pleasing image.Lighting and shadowsHighlighting contrast: Use lighting to enhance color contrast. For instance, a well-lit subject against a dark background. This technique can make the subject stand out more and add depth to the photo.Balancing harmony: Soft, even lighting can help maintain color harmony by reducing harsh contrasts. This approach works well for portraits and nature photography where a calm and balanced look is desired.Background and foregroundContrasting elements: Use contrasting colors for the subject and background to make the subject pop. For example, a bright yellow flower against a purple background creates a striking contrast.Harmonious elements: Ensure that the background and foreground have harmonious colors to create a unified look. This technique works well in landscape photography, where the sky, water, and land can all share similar hues for a cohesive composition.Advanced techniquesSplit-complementary schemeBalanced contrast: This involves using a base color and two adjacent complementary colors. It offers vibrant contrast while maintaining harmony. For example, using blue with yellow-orange and red-orange in a sunset scene can create a balanced and visually appealing image.Application: Use this in scenes where you want to highlight the subject without overwhelming the viewer.Triadic color schemeDynamic balance: Uses three colors evenly spaced around the color wheel. This creates a balanced yet lively composition. An example would be using red, blue, and yellow in a single image, providing a vibrant and energetic look.Implementation: Ideal for more complex scenes where multiple elements are controlled, such as fashion shoots or still life.Editing for contrast and harmonyPost-processing: Enhance or reduce color contrast and harmony in editing software. Adjust saturation and vibrance to achieve the desired effect. Tools like the HSL panel in Lightroom can be used to fine-tune specific colors.Selective color: Focus on specific colors in post-processing to either enhance contrast or bring harmony to the image. This technique can help in achieving the perfect color balance and making your subject stand out.Practical tips to tryUsing filtersColor filters: Enhance specific colors in your scene, helping to either create contrast or maintain harmony. For instance, a polarizing filter can enhance the blues in a sky while reducing glare.Polarizing filters: Manage reflections and enhance contrast in outdoor photography. This filter is particularly useful for landscape photography.Shooting in RAWAdjustability: Shooting in RAW allows for greater flexibility in post-processing, helping you achieve the perfect balance of contrast and harmony.Fine-tuning: Make precise adjustments to colors and tones during post-processing.Field tipsPre-visualization: Train your eye to see potential color contrasts and harmonies in your environment. Look for scenes where complementary or analogous colors naturally occur.Practice regularly: Regular practice with color schemes will improve your ability to spot opportunities and refine your technique.Balancing color contrast and harmony can transform your photos, making them more engaging and visually appealing. By understanding and applying these principles, you can create images that captivate your audience. Experiment with different techniques to find what works best for your style and subject matterNot on 500px yet? Sign up here to explore more impactful photography.The post Balancing color contrast and harmony in your photos appeared first on 500px.
    0 Comments 0 Shares 377 Views
  • ISO.500PX.COM
    Celebrate World Photography Day with 500px: Win 1 of 2 Dream Photography Retreats!
    World Photography Day is here. What better way to celebrate than by joining an exciting competition? This could take your photography to stunning locations across the globe. Whether youre a seasoned photographer or just starting to find your creative voice, 500px is giving you the opportunity of a lifetime. Our Around the World with 500px competition is one you wont want to miss.What is 500px?If youre new to 500px, let us introduce you. 500px is a global online photography community. It connects photographers of all levels. The platform allows you to showcase your work, discover stunning images, and connect with like-minded creatives. With millions of users worldwide, 500px is a hub for those who are passionate about photography. It offers tools and resources to help you grow and refine your craft.The Around the World with 500px CompetitionThis year, in celebration of World Photography Day, 500px is launching a special competition. It invites photographers from around the world to participate in two exclusive Quests. Each Quest offers a chance to win a once-in-a-lifetime photography retreat with one of two world-renowned photographers: Paul Zizka or Tobias Hgg.Quest 1: The Intangible MomentPaul Zizka, known for his breathtaking images of remote landscapes, invites you to capture a powerful and intangible moment in your photography. This Quest goes beyond technical aspects. It showcases the beauty that often goes unnoticed. The winner will join Paul for an exclusive 5-day photography retreat at the newly renovated Lodge at Bow Lake in Banff National Park. This retreat is valued at $5,500 USD.Quest 2: Natures CanvasTobias Hgg, celebrated for his stunning landscape and aerial photography, challenges you to capture the raw and untamed beauty of nature. Whether its a dramatic landscape or intricate patterns found in the wild, this Quest is your chance to showcase the natural world through your unique lens. The winner will enjoy a 5-day photography retreat on the Lofoten Islands in Norway, also valued at $5,500 USD.How to ParticipateParticipation is easy. Whether youre already part of the 500px community or new to the platform, you can join the competition by submitting your best photos to one or both Quests. Simply sign up or log in to 500px, head over to the Quest page, and upload your submission.For those on the go, 500px offers a mobile app. This makes it even easier to participate. Download the 500px app and submit your photos directly from your phone. The app also lets you track your progress, engage with the community, and discover inspiring work from photographers around the world.Key Details to Remember:Competition Dates: August 19 September 8Judging: Winners will be judged by Paul Zizka and Tobias Hgg for their respective Quests.Submission Requirements: Free to enter for 500px members. No AI-generated images. The winner must be available to travel on the specified retreat dates.Why Join 500px?By joining 500px, youre not just entering a competitionyoure becoming part of a global community of passionate photographers. 500px offers tools to help you improve your photography, opportunities to get noticed, and a platform to connect with others who share your passion. Plus, with the 500px app, you can stay connected and inspired wherever you are.Dont miss your chance to be part of this global celebration. Submit your photos today and take the first step towards winning a dream photography retreat that could change the way you see the world.Join the 500px community and enter the Quest today!The post Celebrate World Photography Day with 500px: Win 1 of 2 Dream Photography Retreats! appeared first on 500px.
    0 Comments 0 Shares 375 Views
  • ISO.500PX.COM
    Setting the mood: Using color to evoke emotion
    Colors have a profound impact on human emotions and can significantly influence the mood of a photograph. Heres how to use color intentionally to evoke emotions and enhance the storytelling aspect of your images.Understanding the emotional impact of colorsWarm colors: Reds, oranges, and yellows are associated with warmth, passion, and energy.Cool colors: Blues, greens, and purples evoke calmness, serenity, and sometimes sadness.Neutral colors: Blacks, whites, and grays can convey simplicity, elegance, and formality. Common applicationsWarm tones: Use warm colors to create a sense of excitement, warmth, and energy in your photos.Cool tones: Use cool colors to convey calmness, tranquility, or melancholy.Neutral tones: Use neutral colors to add sophistication or to draw focus on form and composition without the distraction of vivid colors.Techniques for using color to evoke emotionChoosing the right colorsMood matching: Select colors that match the mood you want to convey. For a lively, energetic photo, use warm tones like reds, oranges, and yellows. These colors can evoke feelings of excitement, passion, and warmth, making them perfect for scenes involving action, celebrations, or vibrant cityscapes. For example, capturing a festival scene with orange and red hues can amplify the sense of joy and energy.For a peaceful, serene image, opt for cool tones such as blues, greens, and purples. These colors are calming and can evoke a sense of tranquility and relaxation. They are ideal for landscapes, seascapes, and quiet moments. An image of a calm lake at dusk, with deep blue and soft purple tones, can convey a serene and reflective mood. Context appropriateness: Ensure the colors fit the context of your subject and setting. When photographing nature, consider using earthy tones like greens and browns to reflect the natural environment and create a cohesive look. For urban settings, bold and contrasting colors might be more appropriate to capture the dynamic and diverse nature of city life.Additionally, consider cultural and contextual implications of colors. For example, in some cultures, red signifies luck and celebration, while in others, it may symbolize danger or warning. Understanding the cultural context can help in making more meaningful and contextually appropriate color choices.Lighting and shadowsColor temperature: Adjust the color temperature of your lighting to enhance the mood. Warm lighting can make a scene feel cozy, while cool lighting can create a more clinical or mysterious atmosphere.Shadow colors: Use colored gels on your lights to cast shadows in complementary or contrasting colors to enhance the emotional impact. Background and foregroundColor harmony: Ensure that the background and foreground elements complement the main colors in your composition.Contrast for emotion: Use contrasting colors between the subject and background to emphasize the emotional tone of the photo.Advanced techniquesColor gradingCinematic effect: Use color grading techniques in post-processing to create a specific mood. For example, a teal and orange color grade can add a dramatic, cinematic feel.Selective color adjustment: Adjust specific colors in your image to enhance the emotional impact without altering the entire color balance. Psychological color pairsEnhancing impact: Pair colors that psychologically complement each other to intensify the desired emotion. For example, red and black can evoke feelings of power and intensity.Application: Use these pairs in compositions where the emotional message is key.Infrared and ultraviolet photographyUnique color effects: Experiment with infrared or ultraviolet photography to capture colors and contrasts not visible to the naked eye, creating surreal and emotionally charged images.Practical tips to tryUsing filtersColored gels: Use colored gels on your lights to add emotional tones to your images directly during the shoot.Color filters: Apply color filters on your lens to enhance specific tones and moods.Shooting in RAWFlexibility: Shooting in RAW allows for greater flexibility in post-processing to adjust colors and tones to match the desired mood.Fine-tuning: Make precise adjustments to achieve the perfect color balance for the emotional tone of your image. Field tipsPre-visualization: Train your eye to see how different colors in your environment can evoke different emotions.Practice regularly: Regular practice with color moods will improve your ability to spot potential compositions and refine your technique.Using color to evoke emotion can transform your photography by adding depth and storytelling. By understanding the emotional impact of different colors and experimenting with various techniques, you can create images that resonate deeply with your audience.Not on 500px yet? Click here to learn about Licensing with 500px.The post Setting the mood: Using color to evoke emotion appeared first on 500px.
    0 Comments 0 Shares 376 Views
  • 0 Comments 0 Shares 373 Views
  • 0 Comments 0 Shares 371 Views
More Stories