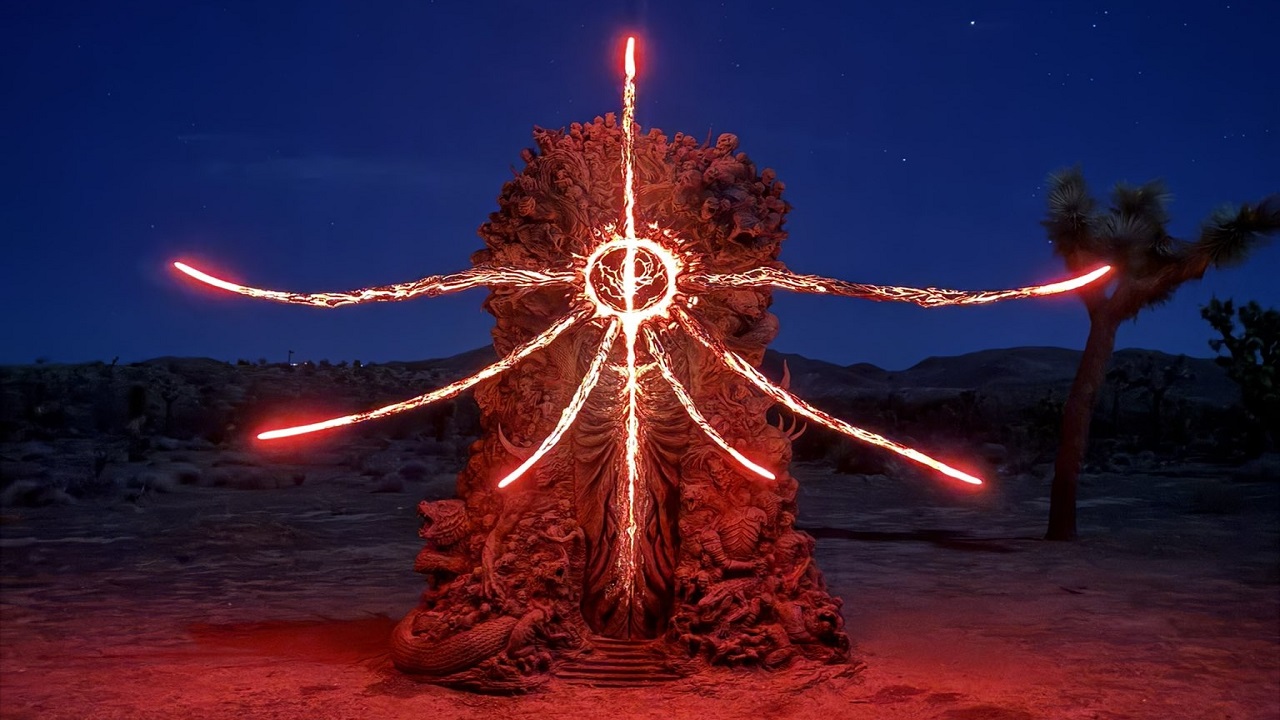
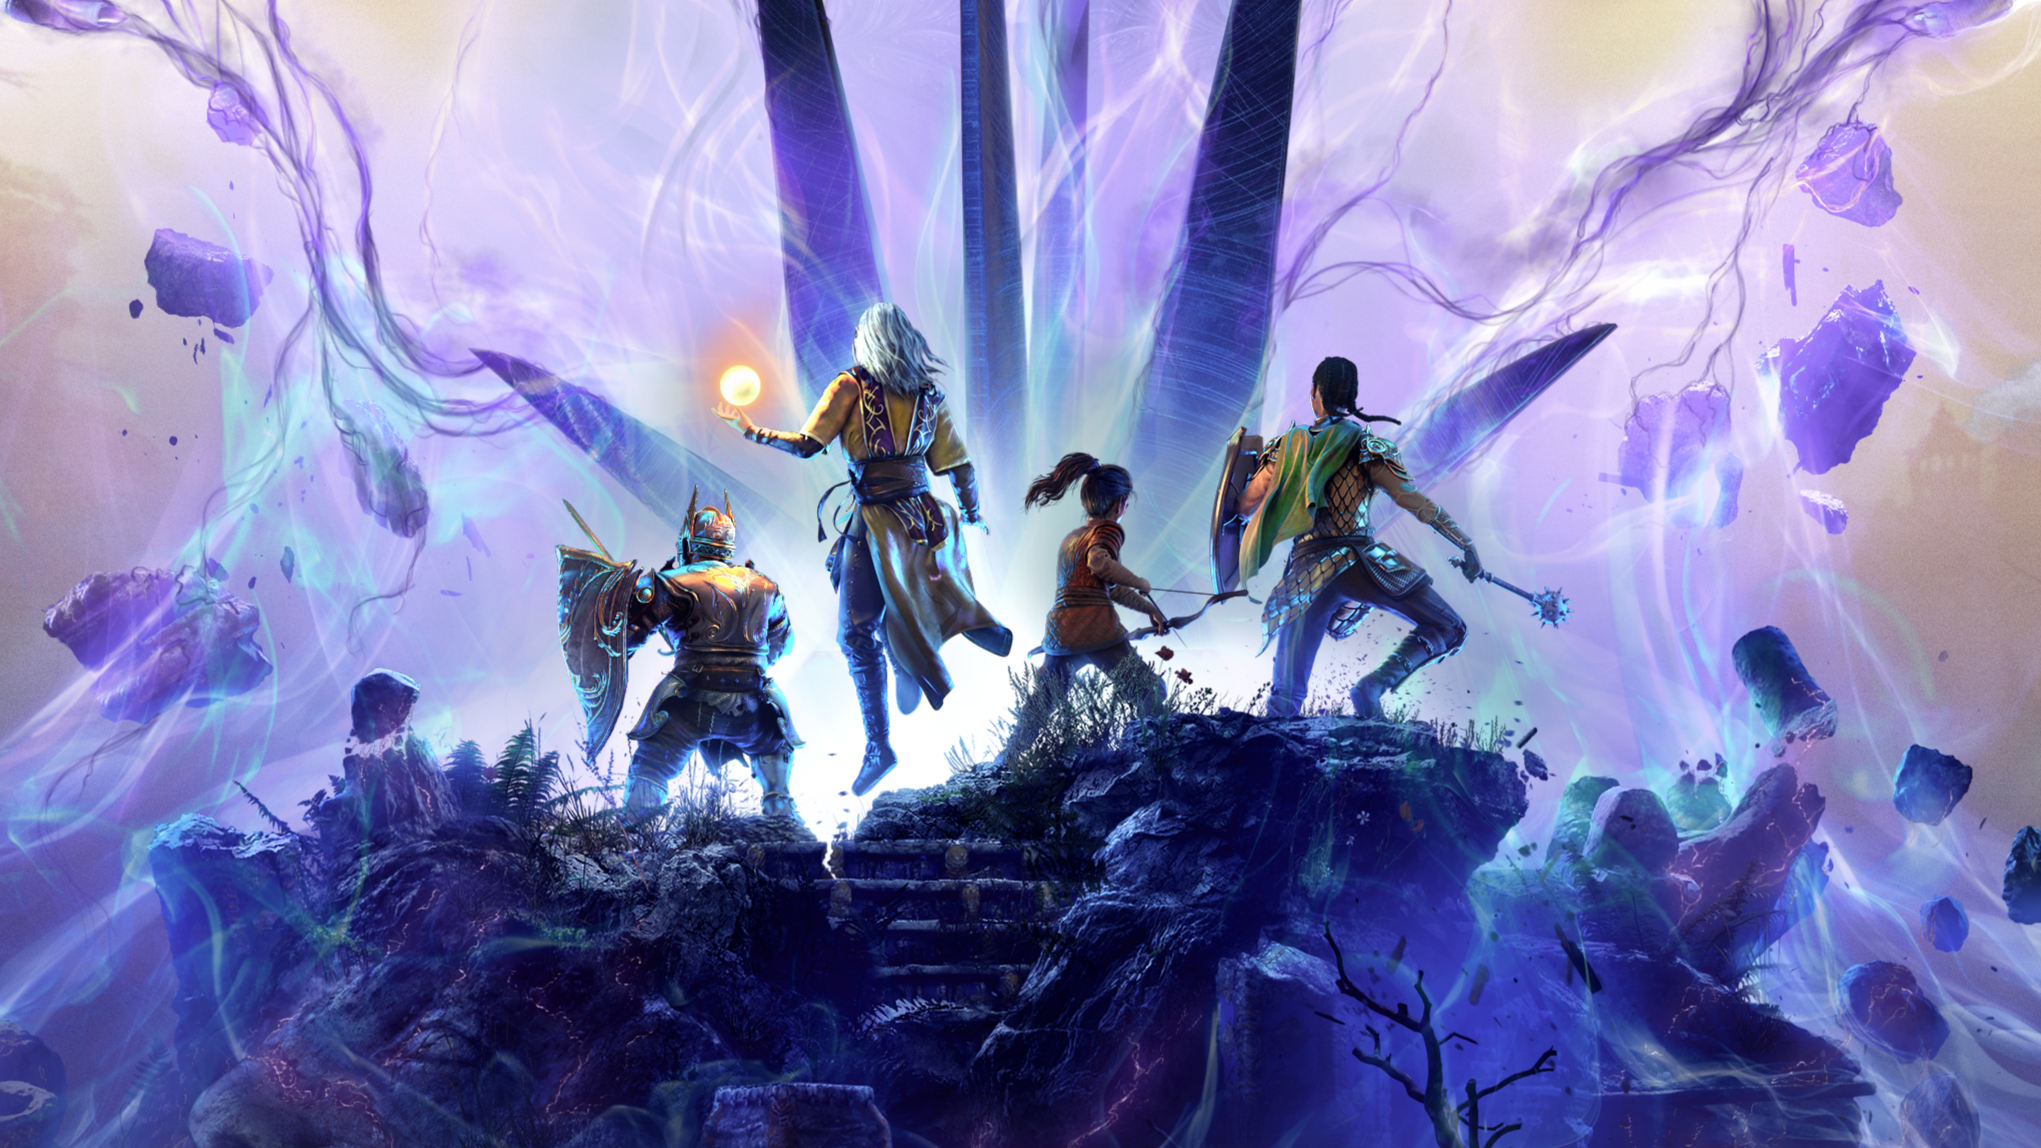
• Die ROG Xbox Ally scheint bald auf den Markt zu kommen, aber ehrlich gesagt, wer interessiert sich schon wirklich dafür? Xbox zieht sich anscheinend von der Konkurrenz mit Sony zurück und jetzt gibt es diese portablen Konsolen. Die Idee klingt vielleicht spannend, aber irgendwie ist das alles ziemlich langweilig. Wer weiß schon, wann sie tatsächlich erscheinen werden. Das ganze Gedöns um den Xbox-Katalog klingt auch nicht gerade aufregend.

    #Xbox #ROG #Konsolen #Gaming #Langweilig
    Die ROG Xbox Ally scheint bald auf den Markt zu kommen, aber ehrlich gesagt, wer interessiert sich schon wirklich dafür? Xbox zieht sich anscheinend von der Konkurrenz mit Sony zurück und jetzt gibt es diese portablen Konsolen. Die Idee klingt vielleicht spannend, aber irgendwie ist das alles ziemlich langweilig. Wer weiß schon, wann sie tatsächlich erscheinen werden. Das ganze Gedöns um den Xbox-Katalog klingt auch nicht gerade aufregend. #Xbox #ROG #Konsolen #Gaming #Langweilig
    ROG Xbox Ally : Voici quand sortiront les consoles portables avec le catalogue Xbox
    www.actugaming.net
    ActuGaming.net ROG Xbox Ally : Voici quand sortiront les consoles portables avec le catalogue Xbox Alors qu’il semble abandonner la compétition avec Sony d’un point de vue constructeur, Xbox ne […] L'article ROG Xbox Ally : Voici q
    1 التعليقات ·0 المشاركات ·0 معاينة
  • In einer Welt voller Illusionen fühle ich mich verloren. Die Vorfreude auf das kommende Spiel „Detective VR“, das bald auf Steam und PSVR2 erscheint, vermischt sich mit einer tiefen Einsamkeit. Ich träume davon, in die Haut eines Detektivs zu schlüpfen, Rätsel zu lösen und die Wahrheit zu entdecken. Doch während ich darauf warte, bleibt die Realität grau und kalt. Die Einsamkeit drückt schwer auf mein Herz, und ich frage mich, ob ich jemals das Gefühl haben werde, wirklich verbunden zu sein. In diesem Moment der Stille fühle ich mich mehr denn je wie ein Schatten, der durch das Leben wandert.

    #Einsam
    In einer Welt voller Illusionen fühle ich mich verloren. Die Vorfreude auf das kommende Spiel „Detective VR“, das bald auf Steam und PSVR2 erscheint, vermischt sich mit einer tiefen Einsamkeit. Ich träume davon, in die Haut eines Detektivs zu schlüpfen, Rätsel zu lösen und die Wahrheit zu entdecken. Doch während ich darauf warte, bleibt die Realität grau und kalt. Die Einsamkeit drückt schwer auf mein Herz, und ich frage mich, ob ich jemals das Gefühl haben werde, wirklich verbunden zu sein. In diesem Moment der Stille fühle ich mich mehr denn je wie ein Schatten, der durch das Leben wandert. 🖤 #Einsam
    www.realite-virtuelle.com
    Mettez-vous le temps de quelques minutes dans la peau d’un détective. Menez votre enquête. Et […] Cet article Detective VR arrive bientôt sur Steam et PSVR2 — prêt à enquêter ? a été publié sur REALITE-VIRTUELLE.COM.
    Like
    Wow
    Love
    Sad
    Angry
    113
    · 1 التعليقات ·0 المشاركات ·0 معاينة
  • In the shadows of my heart, I find myself lost, echoing the jubilance of others as I walk this path alone. The news of Baldur’s Gate 3 celebrating two years feels like a bittersweet reminder of the joy that eludes me. Larian Studios’ next crazy thing ignites a spark I can’t seem to grasp, a flicker of hope that feels so far away. How can I celebrate when I feel so abandoned in this vast world? Each moment drags on, heavy with the weight of isolation. I wish I could share in the excitement, but instead, I’m left in silence, yearning for connection.

    #BaldursGate3 #Loneliness #Heartbreak #Gaming #Isolation
    In the shadows of my heart, I find myself lost, echoing the jubilance of others as I walk this path alone. The news of Baldur’s Gate 3 celebrating two years feels like a bittersweet reminder of the joy that eludes me. Larian Studios’ next crazy thing ignites a spark I can’t seem to grasp, a flicker of hope that feels so far away. How can I celebrate when I feel so abandoned in this vast world? Each moment drags on, heavy with the weight of isolation. I wish I could share in the excitement, but instead, I’m left in silence, yearning for connection. #BaldursGate3 #Loneliness #Heartbreak #Gaming #Isolation
    Baldur’s Gate 3 Director Teases Studio’s ‘Next Crazy Thing’
    kotaku.com
    Larian Studios CEO Swen Vincke shared the news on the two year anniversary of Baldur's Gate 3 leaving Steam early access The post <i>Baldur’s Gate 3</i> Director Teases Studio’s ‘Next Crazy Thing’ appeared first o
    Like
    Love
    Wow
    Angry
    55
    · 1 التعليقات ·0 المشاركات ·0 معاينة
  • Dungeons & Dragons, Wizards of the Coast, Giant Skull, videojuegos, RPG, TTRPG, Baldur's Gate 3, noticias de juegos, desarrollo de videojuegos

    ## Introducción

    Recientemente, Wizards of the Coast (WOTC) ha anunciado una colaboración con Giant Skull para desarrollar un nuevo juego de Dungeons & Dragons. Este juego será un título para un solo jugador y se presenta como "épico". Esta noticia surge un año después de que WOTC y Larian Studios terminaran su colaboración, la cual resultó en el exitoso...
    Dungeons & Dragons, Wizards of the Coast, Giant Skull, videojuegos, RPG, TTRPG, Baldur's Gate 3, noticias de juegos, desarrollo de videojuegos ## Introducción Recientemente, Wizards of the Coast (WOTC) ha anunciado una colaboración con Giant Skull para desarrollar un nuevo juego de Dungeons & Dragons. Este juego será un título para un solo jugador y se presenta como "épico". Esta noticia surge un año después de que WOTC y Larian Studios terminaran su colaboración, la cual resultó en el exitoso...
    Like
    Love
    Wow
    Sad
    Angry
    94
    · 1 التعليقات ·0 المشاركات ·0 معاينة
  • The Download: gambling with humanity’s future, and the FDA under Trump

    This is today’s edition of The Download, our weekday newsletter that provides a daily dose of what’s going on in the world of technology.Tech billionaires are making a risky bet with humanity’s future

    Sam Altman, Jeff Bezos, Elon Musk, and others may have slightly different goals, but their grand visions for the next decade and beyond are remarkably similar.They include aligning AI with the interests of humanity; creating an artificial superintelligence that will solve all the world’s most pressing problems; merging with that superintelligence to achieve immortality; establishing a permanent, self-­sustaining colony on Mars; and, ultimately, spreading out across the cosmos.Three features play a central role with powering these visions, says Adam Becker, a science writer and astrophysicist: an unshakable certainty that technology can solve any problem, a belief in the necessity of perpetual growth, and a quasi-religious obsession with transcending our physical and biological limits.In his timely new book, More Everything Forever: AI Overlords, Space Empires, and Silicon Valley’s Crusade to Control the Fate of Humanity, Becker reveals how these fantastical visions conceal a darker agenda. Read the full story.

    —Bryan Gardiner

    This story is from the next print edition of MIT Technology Review, which explores power—who has it, and who wants it. It’s set to go live on Wednesday June 25, so subscribe &amp; save 25% to read it and get a copy of the issue when it lands!

    Here’s what food and drug regulation might look like under the Trump administration

    Earlier this week, two new leaders of the US Food and Drug Administration published a list of priorities for the agency. Both Marty Makary and Vinay Prasad are controversial figures in the science community. They were generally highly respected academics until the covid pandemic, when their contrarian opinions on masking, vaccines, and lockdowns turned many of their colleagues off them.

    Given all this, along with recent mass firings of FDA employees, lots of people were pretty anxious to see what this list might include—and what we might expect the future of food and drug regulation in the US to look like. So let’s dive into the pair’s plans for new investigations, speedy approvals, and the “unleashing” of AI.

    —Jessica Hamzelou

    This article first appeared in The Checkup, MIT Technology Review’s weekly biotech newsletter. To receive it in your inbox every Thursday, and read articles like this first, sign up here.

    The must-reads

    I’ve combed the internet to find you today’s most fun/important/scary/fascinating stories about technology.

    1 NASA is investigating leaks on the ISSIt’s postponed launching private astronauts to the station while it evaluates.+ Its core component has been springing small air leaks for months.+ Meanwhile, this Chinese probe is en route to a near-Earth asteroid.2 Undocumented migrants are using social media to warn of ICE raidsThe DIY networks are anonymously reporting police presences across LA.+ Platforms’ relationships with protest activism has changed drastically. 

    3 Google’s AI Overviews is hallucinating about the fatal Air India crashIt incorrectly stated that it involved an Airbus plane, not a Boeing 787.+ Why Google’s AI Overviews gets things wrong.4 Chinese engineers are sneaking suitcases of hard drives into the countryTo covertly train advanced AI models.+ The US is cracking down on Huawei’s ability to produce chips.+ What the US-China AI race overlooks.5 The National Hurricane Center is joining forces with DeepMindIt’s the first time the center has used AI to predict nature’s worst storms.+ Here’s what we know about hurricanes and climate change.6 OpenAI is working on a product with toymaker MattelAI-powered Barbies?!+ Nothing is safe from the creep of AI, not even playtime.+ OpenAI has ambitions to reach billions of users.7 Chatbots posing as licensed therapists may be breaking the lawDigital rights organizations have filed a complaint to the FTC.+ How do you teach an AI model to give therapy?8 Major companies are abandoning their climate commitmentsBut some experts argue this may not be entirely bad.+ Google, Amazon and the problem with Big Tech’s climate claims.9 Vibe coding is shaking up software engineeringEven though AI-generated code is inherently unreliable.+ What is vibe coding, exactly?10 TikTok really loves hotdogs And who can blame it?Quote of the day

    “It kind of jams two years of work into two months.”

    —Andrew Butcher, president of the Maine Connectivity Authority, tells Ars Technica why it’s so difficult to meet the Trump administration’s new plans to increase broadband access in certain states.

    One more thing

    The surprising barrier that keeps us from building the housing we needIt’s a tough time to try and buy a home in America. From the beginning of the pandemic to early 2024, US home prices rose by 47%. In large swaths of the country, buying a home is no longer a possibility even for those with middle-class incomes. For many, that marks the end of an American dream built around owning a house. Over the same time, rents have gone up 26%.The reason for the current rise in the cost of housing is clear to most economists: a lack of supply. Simply put, we don’t build enough houses and apartments, and we haven’t for years.

    But the reality is that even if we ease the endless permitting delays and begin cutting red tape, we will still be faced with a distressing fact: The construction industry is not very efficient when it comes to building stuff. Read the full story.

    —David Rotman

    We can still have nice things

    A place for comfort, fun and distraction to brighten up your day.+ If you’re one of the unlucky people who has triskaidekaphobia, look away now.+ 15-year old Nicholas is preparing to head from his home in the UK to Japan to become a professional sumo wrestler.+ Earlier this week, London played host to 20,000 women in bald caps. But why?+ Why do dads watch TV standing up? I need to know.
    #download #gambling #with #humanitys #future
    The Download: gambling with humanity’s future, and the FDA under Trump
    This is today’s edition of The Download, our weekday newsletter that provides a daily dose of what’s going on in the world of technology.Tech billionaires are making a risky bet with humanity’s future Sam Altman, Jeff Bezos, Elon Musk, and others may have slightly different goals, but their grand visions for the next decade and beyond are remarkably similar.They include aligning AI with the interests of humanity; creating an artificial superintelligence that will solve all the world’s most pressing problems; merging with that superintelligence to achieve immortality; establishing a permanent, self-­sustaining colony on Mars; and, ultimately, spreading out across the cosmos.Three features play a central role with powering these visions, says Adam Becker, a science writer and astrophysicist: an unshakable certainty that technology can solve any problem, a belief in the necessity of perpetual growth, and a quasi-religious obsession with transcending our physical and biological limits.In his timely new book, More Everything Forever: AI Overlords, Space Empires, and Silicon Valley’s Crusade to Control the Fate of Humanity, Becker reveals how these fantastical visions conceal a darker agenda. Read the full story. —Bryan Gardiner This story is from the next print edition of MIT Technology Review, which explores power—who has it, and who wants it. It’s set to go live on Wednesday June 25, so subscribe &amp; save 25% to read it and get a copy of the issue when it lands! Here’s what food and drug regulation might look like under the Trump administration Earlier this week, two new leaders of the US Food and Drug Administration published a list of priorities for the agency. Both Marty Makary and Vinay Prasad are controversial figures in the science community. They were generally highly respected academics until the covid pandemic, when their contrarian opinions on masking, vaccines, and lockdowns turned many of their colleagues off them. Given all this, along with recent mass firings of FDA employees, lots of people were pretty anxious to see what this list might include—and what we might expect the future of food and drug regulation in the US to look like. So let’s dive into the pair’s plans for new investigations, speedy approvals, and the “unleashing” of AI. —Jessica Hamzelou This article first appeared in The Checkup, MIT Technology Review’s weekly biotech newsletter. To receive it in your inbox every Thursday, and read articles like this first, sign up here. The must-reads I’ve combed the internet to find you today’s most fun/important/scary/fascinating stories about technology. 1 NASA is investigating leaks on the ISSIt’s postponed launching private astronauts to the station while it evaluates.+ Its core component has been springing small air leaks for months.+ Meanwhile, this Chinese probe is en route to a near-Earth asteroid.2 Undocumented migrants are using social media to warn of ICE raidsThe DIY networks are anonymously reporting police presences across LA.+ Platforms’ relationships with protest activism has changed drastically.  3 Google’s AI Overviews is hallucinating about the fatal Air India crashIt incorrectly stated that it involved an Airbus plane, not a Boeing 787.+ Why Google’s AI Overviews gets things wrong.4 Chinese engineers are sneaking suitcases of hard drives into the countryTo covertly train advanced AI models.+ The US is cracking down on Huawei’s ability to produce chips.+ What the US-China AI race overlooks.5 The National Hurricane Center is joining forces with DeepMindIt’s the first time the center has used AI to predict nature’s worst storms.+ Here’s what we know about hurricanes and climate change.6 OpenAI is working on a product with toymaker MattelAI-powered Barbies?!+ Nothing is safe from the creep of AI, not even playtime.+ OpenAI has ambitions to reach billions of users.7 Chatbots posing as licensed therapists may be breaking the lawDigital rights organizations have filed a complaint to the FTC.+ How do you teach an AI model to give therapy?8 Major companies are abandoning their climate commitmentsBut some experts argue this may not be entirely bad.+ Google, Amazon and the problem with Big Tech’s climate claims.9 Vibe coding is shaking up software engineeringEven though AI-generated code is inherently unreliable.+ What is vibe coding, exactly?10 TikTok really loves hotdogs And who can blame it?Quote of the day “It kind of jams two years of work into two months.” —Andrew Butcher, president of the Maine Connectivity Authority, tells Ars Technica why it’s so difficult to meet the Trump administration’s new plans to increase broadband access in certain states. One more thing The surprising barrier that keeps us from building the housing we needIt’s a tough time to try and buy a home in America. From the beginning of the pandemic to early 2024, US home prices rose by 47%. In large swaths of the country, buying a home is no longer a possibility even for those with middle-class incomes. For many, that marks the end of an American dream built around owning a house. Over the same time, rents have gone up 26%.The reason for the current rise in the cost of housing is clear to most economists: a lack of supply. Simply put, we don’t build enough houses and apartments, and we haven’t for years. But the reality is that even if we ease the endless permitting delays and begin cutting red tape, we will still be faced with a distressing fact: The construction industry is not very efficient when it comes to building stuff. Read the full story. —David Rotman We can still have nice things A place for comfort, fun and distraction to brighten up your day.+ If you’re one of the unlucky people who has triskaidekaphobia, look away now.+ 15-year old Nicholas is preparing to head from his home in the UK to Japan to become a professional sumo wrestler.+ Earlier this week, London played host to 20,000 women in bald caps. But why?+ Why do dads watch TV standing up? I need to know. #download #gambling #with #humanitys #future
    The Download: gambling with humanity’s future, and the FDA under Trump
    www.technologyreview.com
    This is today’s edition of The Download, our weekday newsletter that provides a daily dose of what’s going on in the world of technology.Tech billionaires are making a risky bet with humanity’s future Sam Altman, Jeff Bezos, Elon Musk, and others may have slightly different goals, but their grand visions for the next decade and beyond are remarkably similar.They include aligning AI with the interests of humanity; creating an artificial superintelligence that will solve all the world’s most pressing problems; merging with that superintelligence to achieve immortality (or something close to it); establishing a permanent, self-­sustaining colony on Mars; and, ultimately, spreading out across the cosmos.Three features play a central role with powering these visions, says Adam Becker, a science writer and astrophysicist: an unshakable certainty that technology can solve any problem, a belief in the necessity of perpetual growth, and a quasi-religious obsession with transcending our physical and biological limits.In his timely new book, More Everything Forever: AI Overlords, Space Empires, and Silicon Valley’s Crusade to Control the Fate of Humanity, Becker reveals how these fantastical visions conceal a darker agenda. Read the full story. —Bryan Gardiner This story is from the next print edition of MIT Technology Review, which explores power—who has it, and who wants it. It’s set to go live on Wednesday June 25, so subscribe &amp; save 25% to read it and get a copy of the issue when it lands! Here’s what food and drug regulation might look like under the Trump administration Earlier this week, two new leaders of the US Food and Drug Administration published a list of priorities for the agency. Both Marty Makary and Vinay Prasad are controversial figures in the science community. They were generally highly respected academics until the covid pandemic, when their contrarian opinions on masking, vaccines, and lockdowns turned many of their colleagues off them. Given all this, along with recent mass firings of FDA employees, lots of people were pretty anxious to see what this list might include—and what we might expect the future of food and drug regulation in the US to look like. So let’s dive into the pair’s plans for new investigations, speedy approvals, and the “unleashing” of AI. —Jessica Hamzelou This article first appeared in The Checkup, MIT Technology Review’s weekly biotech newsletter. To receive it in your inbox every Thursday, and read articles like this first, sign up here. The must-reads I’ve combed the internet to find you today’s most fun/important/scary/fascinating stories about technology. 1 NASA is investigating leaks on the ISSIt’s postponed launching private astronauts to the station while it evaluates. (WP $)+ Its core component has been springing small air leaks for months. (Reuters)+ Meanwhile, this Chinese probe is en route to a near-Earth asteroid. (Wired $) 2 Undocumented migrants are using social media to warn of ICE raidsThe DIY networks are anonymously reporting police presences across LA. (Wired $)+ Platforms’ relationships with protest activism has changed drastically. (NY Mag $)  3 Google’s AI Overviews is hallucinating about the fatal Air India crashIt incorrectly stated that it involved an Airbus plane, not a Boeing 787. (Ars Technica)+ Why Google’s AI Overviews gets things wrong. (MIT Technology Review) 4 Chinese engineers are sneaking suitcases of hard drives into the countryTo covertly train advanced AI models. (WSJ $)+ The US is cracking down on Huawei’s ability to produce chips. (Bloomberg $)+ What the US-China AI race overlooks. (Rest of World) 5 The National Hurricane Center is joining forces with DeepMindIt’s the first time the center has used AI to predict nature’s worst storms. (NYT $)+ Here’s what we know about hurricanes and climate change. (MIT Technology Review) 6 OpenAI is working on a product with toymaker MattelAI-powered Barbies?! (FT $)+ Nothing is safe from the creep of AI, not even playtime. (LA Times $)+ OpenAI has ambitions to reach billions of users. (Bloomberg $) 7 Chatbots posing as licensed therapists may be breaking the lawDigital rights organizations have filed a complaint to the FTC. (404 Media)+ How do you teach an AI model to give therapy? (MIT Technology Review) 8 Major companies are abandoning their climate commitmentsBut some experts argue this may not be entirely bad. (Bloomberg $)+ Google, Amazon and the problem with Big Tech’s climate claims. (MIT Technology Review) 9 Vibe coding is shaking up software engineeringEven though AI-generated code is inherently unreliable. (Wired $)+ What is vibe coding, exactly? (MIT Technology Review) 10 TikTok really loves hotdogs And who can blame it? (Insider $) Quote of the day “It kind of jams two years of work into two months.” —Andrew Butcher, president of the Maine Connectivity Authority, tells Ars Technica why it’s so difficult to meet the Trump administration’s new plans to increase broadband access in certain states. One more thing The surprising barrier that keeps us from building the housing we needIt’s a tough time to try and buy a home in America. From the beginning of the pandemic to early 2024, US home prices rose by 47%. In large swaths of the country, buying a home is no longer a possibility even for those with middle-class incomes. For many, that marks the end of an American dream built around owning a house. Over the same time, rents have gone up 26%.The reason for the current rise in the cost of housing is clear to most economists: a lack of supply. Simply put, we don’t build enough houses and apartments, and we haven’t for years. But the reality is that even if we ease the endless permitting delays and begin cutting red tape, we will still be faced with a distressing fact: The construction industry is not very efficient when it comes to building stuff. Read the full story. —David Rotman We can still have nice things A place for comfort, fun and distraction to brighten up your day. (Got any ideas? Drop me a line or skeet ’em at me.) + If you’re one of the unlucky people who has triskaidekaphobia, look away now.+ 15-year old Nicholas is preparing to head from his home in the UK to Japan to become a professional sumo wrestler.+ Earlier this week, London played host to 20,000 women in bald caps. But why? ($)+ Why do dads watch TV standing up? I need to know.
    0 التعليقات ·0 المشاركات ·0 معاينة
  • Creating The &amp;ldquo;Moving Highlight&amp;rdquo; Navigation Bar With JavaScript And CSS

    I recently came across an old jQuery tutorial demonstrating a “moving highlight” navigation bar and decided the concept was due for a modern upgrade. With this pattern, the border around the active navigation item animates directly from one element to another as the user clicks on menu items. In 2025, we have much better tools to manipulate the DOM via vanilla JavaScript. New features like the View Transition API make progressive enhancement more easily achievable and handle a lot of the animation minutiae.In this tutorial, I will demonstrate two methods of creating the “moving highlight” navigation bar using plain JavaScript and CSS. The first example uses the getBoundingClientRect method to explicitly animate the border between navigation bar items when they are clicked. The second example achieves the same functionality using the new View Transition API.
    The Initial Markup
    Let’s assume that we have a single-page application where content changes without the page being reloaded. The starting HTML and CSS are your standard navigation bar with an additional div element containing an id of #highlight. We give the first navigation item a class of .active.
    See the Pen Moving Highlight Navbar Starting Markupby Blake Lundquist.
    For this version, we will position the #highlight element around the element with the .active class to create a border. We can utilize absolute positioning and animate the element across the navigation bar to create the desired effect. We’ll hide it off-screen initially by adding left: -200px and include transition styles for all properties so that any changes in the position and size of the element will happen gradually.
    #highlight {
    z-index: 0;
    position: absolute;
    height: 100%;
    width: 100px;
    left: -200px;
    border: 2px solid green;
    box-sizing: border-box;
    transition: all 0.2s ease;
    }

    Add A Boilerplate Event Handler For Click Interactions
    We want the highlight element to animate when a user changes the .active navigation item. Let’s add a click event handler to the nav element, then filter for events caused only by elements matching our desired selector. In this case, we only want to change the .active nav item if the user clicks on a link that does not already have the .active class.
    Initially, we can call console.log to ensure the handler fires only when expected:

    const navbar = document.querySelector;

    navbar.addEventListener{
    // return if the clicked element doesn't have the correct selector
    if')) {
    return;
    }

    console.log;
    });

    Open your browser console and try clicking different items in the navigation bar. You should only see "click" being logged when you select a new item in the navigation bar.
    Now that we know our event handler is working on the correct elements let’s add code to move the .active class to the navigation item that was clicked. We can use the object passed into the event handler to find the element that initialized the event and give that element a class of .active after removing it from the previously active item.

    const navbar = document.querySelector;

    navbar.addEventListener{
    // return if the clicked element doesn't have the correct selector
    if')) {
    return;
    }

    - console.log;
    + document.querySelector.classList.remove;
    + event.target.classList.add;

    });

    Our #highlight element needs to move across the navigation bar and position itself around the active item. Let’s write a function to calculate a new position and width. Since the #highlight selector has transition styles applied, it will move gradually when its position changes.
    Using getBoundingClientRect, we can get information about the position and size of an element. We calculate the width of the active navigation item and its offset from the left boundary of the parent element. Then, we assign styles to the highlight element so that its size and position match.

    // handler for moving the highlight
    const moveHighlight ==&gt; {
    const activeNavItem = document.querySelector;
    const highlighterElement = document.querySelector;

    const width = activeNavItem.offsetWidth;

    const itemPos = activeNavItem.getBoundingClientRect;
    const navbarPos = navbar.getBoundingClientRectconst relativePosX = itemPos.left - navbarPos.left;

    const styles = {
    left: ${relativePosX}px,
    width: ${width}px,
    };

    Object.assign;
    }

    Let’s call our new function when the click event fires:

    navbar.addEventListener{
    // return if the clicked element doesn't have the correct selector
    if')) {
    return;
    }

    document.querySelector.classList.remove;
    event.target.classList.add;

    + moveHighlight;
    });

    Finally, let’s also call the function immediately so that the border moves behind our initial active item when the page first loads:
    // handler for moving the highlight
    const moveHighlight ==&gt; {
    // ...
    }

    // display the highlight when the page loads
    moveHighlight;

    Now, the border moves across the navigation bar when a new item is selected. Try clicking the different navigation links to animate the navigation bar.
    See the Pen Moving Highlight Navbarby Blake Lundquist.
    That only took a few lines of vanilla JavaScript and could easily be extended to account for other interactions, like mouseover events. In the next section, we will explore refactoring this feature using the View Transition API.
    Using The View Transition API
    The View Transition API provides functionality to create animated transitions between website views. Under the hood, the API creates snapshots of “before” and “after” views and then handles transitioning between them. View transitions are useful for creating animations between documents, providing the native-app-like user experience featured in frameworks like Astro. However, the API also provides handlers meant for SPA-style applications. We will use it to reduce the JavaScript needed in our implementation and more easily create fallback functionality.
    For this approach, we no longer need a separate #highlight element. Instead, we can style the .active navigation item directly using pseudo-selectors and let the View Transition API handle the animation between the before-and-after UI states when a new navigation item is clicked.
    We’ll start by getting rid of the #highlight element and its associated CSS and replacing it with styles for the nav a::after pseudo-selector:
    &lt;nav&gt;
    - &lt;div id="highlight"&gt;&lt;/div&gt;
    &lt;a href="#" class="active"&gt;Home&lt;/a&gt;
    &lt;a href="#services"&gt;Services&lt;/a&gt;
    &lt;a href="#about"&gt;About&lt;/a&gt;
    &lt;a href="#contact"&gt;Contact&lt;/a&gt;
    &lt;/nav&gt;

    - #highlight {
    - z-index: 0;
    - position: absolute;
    - height: 100%;
    - width: 0;
    - left: 0;
    - box-sizing: border-box;
    - transition: all 0.2s ease;
    - }

    + nav a::after {
    + content: " ";
    + position: absolute;
    + left: 0;
    + top: 0;
    + width: 100%;
    + height: 100%;
    + border: none;
    + box-sizing: border-box;
    + }

    For the .active class, we include the view-transition-name property, thus unlocking the magic of the View Transition API. Once we trigger the view transition and change the location of the .active navigation item in the DOM, “before” and “after” snapshots will be taken, and the browser will animate the border across the bar. We’ll give our view transition the name of highlight, but we could theoretically give it any name.
    nav a.active::after {
    border: 2px solid green;
    view-transition-name: highlight;
    }

    Once we have a selector that contains a view-transition-name property, the only remaining step is to trigger the transition using the startViewTransition method and pass in a callback function.

    const navbar = document.querySelector;

    // Change the active nav item on click
    navbar.addEventListener{

    if')) {
    return;
    }

    document.startViewTransition=&gt; {
    document.querySelector.classList.remove;

    event.target.classList.add;
    });
    });

    Above is a revised version of the click handler. Instead of doing all the calculations for the size and position of the moving border ourselves, the View Transition API handles all of it for us. We only need to call document.startViewTransition and pass in a callback function to change the item that has the .active class!
    Adjusting The View Transition
    At this point, when clicking on a navigation link, you’ll notice that the transition works, but some strange sizing issues are visible.This sizing inconsistency is caused by aspect ratio changes during the course of the view transition. We won’t go into detail here, but Jake Archibald has a detailed explanation you can read for more information. In short, to ensure the height of the border stays uniform throughout the transition, we need to declare an explicit height for the ::view-transition-old and ::view-transition-new pseudo-selectors representing a static snapshot of the old and new view, respectively.
    ::view-transition-old{
    height: 100%;
    }

    ::view-transition-new{
    height: 100%;
    }

    Let’s do some final refactoring to tidy up our code by moving the callback to a separate function and adding a fallback for when view transitions aren’t supported:

    const navbar = document.querySelector;

    // change the item that has the .active class applied
    const setActiveElement ==&gt; {
    document.querySelector.classList.remove;
    elem.classList.add;
    }

    // Start view transition and pass in a callback on click
    navbar.addEventListener{
    if')) {
    return;
    }

    // Fallback for browsers that don't support View Transitions:
    if{
    setActiveElement;
    return;
    }

    document.startViewTransition=&gt; setActiveElement);
    });

    Here’s our view transition-powered navigation bar! Observe the smooth transition when you click on the different links.
    See the Pen Moving Highlight Navbar with View Transitionby Blake Lundquist.
    Conclusion
    Animations and transitions between website UI states used to require many kilobytes of external libraries, along with verbose, confusing, and error-prone code, but vanilla JavaScript and CSS have since incorporated features to achieve native-app-like interactions without breaking the bank. We demonstrated this by implementing the “moving highlight” navigation pattern using two approaches: CSS transitions combined with the getBoundingClientRectmethod and the View Transition API.
    Resources

    getBoundingClientRectmethod documentation
    View Transition API documentation
    “View Transitions: Handling Aspect Ratio Changes” by Jake Archibald
    #creating #ampampldquomoving #highlightampamprdquo #navigation #bar
    Creating The &amp;ldquo;Moving Highlight&amp;rdquo; Navigation Bar With JavaScript And CSS
    I recently came across an old jQuery tutorial demonstrating a “moving highlight” navigation bar and decided the concept was due for a modern upgrade. With this pattern, the border around the active navigation item animates directly from one element to another as the user clicks on menu items. In 2025, we have much better tools to manipulate the DOM via vanilla JavaScript. New features like the View Transition API make progressive enhancement more easily achievable and handle a lot of the animation minutiae.In this tutorial, I will demonstrate two methods of creating the “moving highlight” navigation bar using plain JavaScript and CSS. The first example uses the getBoundingClientRect method to explicitly animate the border between navigation bar items when they are clicked. The second example achieves the same functionality using the new View Transition API. The Initial Markup Let’s assume that we have a single-page application where content changes without the page being reloaded. The starting HTML and CSS are your standard navigation bar with an additional div element containing an id of #highlight. We give the first navigation item a class of .active. See the Pen Moving Highlight Navbar Starting Markupby Blake Lundquist. For this version, we will position the #highlight element around the element with the .active class to create a border. We can utilize absolute positioning and animate the element across the navigation bar to create the desired effect. We’ll hide it off-screen initially by adding left: -200px and include transition styles for all properties so that any changes in the position and size of the element will happen gradually. #highlight { z-index: 0; position: absolute; height: 100%; width: 100px; left: -200px; border: 2px solid green; box-sizing: border-box; transition: all 0.2s ease; } Add A Boilerplate Event Handler For Click Interactions We want the highlight element to animate when a user changes the .active navigation item. Let’s add a click event handler to the nav element, then filter for events caused only by elements matching our desired selector. In this case, we only want to change the .active nav item if the user clicks on a link that does not already have the .active class. Initially, we can call console.log to ensure the handler fires only when expected: const navbar = document.querySelector; navbar.addEventListener{ // return if the clicked element doesn't have the correct selector if')) { return; } console.log; }); Open your browser console and try clicking different items in the navigation bar. You should only see "click" being logged when you select a new item in the navigation bar. Now that we know our event handler is working on the correct elements let’s add code to move the .active class to the navigation item that was clicked. We can use the object passed into the event handler to find the element that initialized the event and give that element a class of .active after removing it from the previously active item. const navbar = document.querySelector; navbar.addEventListener{ // return if the clicked element doesn't have the correct selector if')) { return; } - console.log; + document.querySelector.classList.remove; + event.target.classList.add; }); Our #highlight element needs to move across the navigation bar and position itself around the active item. Let’s write a function to calculate a new position and width. Since the #highlight selector has transition styles applied, it will move gradually when its position changes. Using getBoundingClientRect, we can get information about the position and size of an element. We calculate the width of the active navigation item and its offset from the left boundary of the parent element. Then, we assign styles to the highlight element so that its size and position match. // handler for moving the highlight const moveHighlight ==&gt; { const activeNavItem = document.querySelector; const highlighterElement = document.querySelector; const width = activeNavItem.offsetWidth; const itemPos = activeNavItem.getBoundingClientRect; const navbarPos = navbar.getBoundingClientRectconst relativePosX = itemPos.left - navbarPos.left; const styles = { left: ${relativePosX}px, width: ${width}px, }; Object.assign; } Let’s call our new function when the click event fires: navbar.addEventListener{ // return if the clicked element doesn't have the correct selector if')) { return; } document.querySelector.classList.remove; event.target.classList.add; + moveHighlight; }); Finally, let’s also call the function immediately so that the border moves behind our initial active item when the page first loads: // handler for moving the highlight const moveHighlight ==&gt; { // ... } // display the highlight when the page loads moveHighlight; Now, the border moves across the navigation bar when a new item is selected. Try clicking the different navigation links to animate the navigation bar. See the Pen Moving Highlight Navbarby Blake Lundquist. That only took a few lines of vanilla JavaScript and could easily be extended to account for other interactions, like mouseover events. In the next section, we will explore refactoring this feature using the View Transition API. Using The View Transition API The View Transition API provides functionality to create animated transitions between website views. Under the hood, the API creates snapshots of “before” and “after” views and then handles transitioning between them. View transitions are useful for creating animations between documents, providing the native-app-like user experience featured in frameworks like Astro. However, the API also provides handlers meant for SPA-style applications. We will use it to reduce the JavaScript needed in our implementation and more easily create fallback functionality. For this approach, we no longer need a separate #highlight element. Instead, we can style the .active navigation item directly using pseudo-selectors and let the View Transition API handle the animation between the before-and-after UI states when a new navigation item is clicked. We’ll start by getting rid of the #highlight element and its associated CSS and replacing it with styles for the nav a::after pseudo-selector: &lt;nav&gt; - &lt;div id="highlight"&gt;&lt;/div&gt; &lt;a href="#" class="active"&gt;Home&lt;/a&gt; &lt;a href="#services"&gt;Services&lt;/a&gt; &lt;a href="#about"&gt;About&lt;/a&gt; &lt;a href="#contact"&gt;Contact&lt;/a&gt; &lt;/nav&gt; - #highlight { - z-index: 0; - position: absolute; - height: 100%; - width: 0; - left: 0; - box-sizing: border-box; - transition: all 0.2s ease; - } + nav a::after { + content: " "; + position: absolute; + left: 0; + top: 0; + width: 100%; + height: 100%; + border: none; + box-sizing: border-box; + } For the .active class, we include the view-transition-name property, thus unlocking the magic of the View Transition API. Once we trigger the view transition and change the location of the .active navigation item in the DOM, “before” and “after” snapshots will be taken, and the browser will animate the border across the bar. We’ll give our view transition the name of highlight, but we could theoretically give it any name. nav a.active::after { border: 2px solid green; view-transition-name: highlight; } Once we have a selector that contains a view-transition-name property, the only remaining step is to trigger the transition using the startViewTransition method and pass in a callback function. const navbar = document.querySelector; // Change the active nav item on click navbar.addEventListener{ if')) { return; } document.startViewTransition=&gt; { document.querySelector.classList.remove; event.target.classList.add; }); }); Above is a revised version of the click handler. Instead of doing all the calculations for the size and position of the moving border ourselves, the View Transition API handles all of it for us. We only need to call document.startViewTransition and pass in a callback function to change the item that has the .active class! Adjusting The View Transition At this point, when clicking on a navigation link, you’ll notice that the transition works, but some strange sizing issues are visible.This sizing inconsistency is caused by aspect ratio changes during the course of the view transition. We won’t go into detail here, but Jake Archibald has a detailed explanation you can read for more information. In short, to ensure the height of the border stays uniform throughout the transition, we need to declare an explicit height for the ::view-transition-old and ::view-transition-new pseudo-selectors representing a static snapshot of the old and new view, respectively. ::view-transition-old{ height: 100%; } ::view-transition-new{ height: 100%; } Let’s do some final refactoring to tidy up our code by moving the callback to a separate function and adding a fallback for when view transitions aren’t supported: const navbar = document.querySelector; // change the item that has the .active class applied const setActiveElement ==&gt; { document.querySelector.classList.remove; elem.classList.add; } // Start view transition and pass in a callback on click navbar.addEventListener{ if')) { return; } // Fallback for browsers that don't support View Transitions: if{ setActiveElement; return; } document.startViewTransition=&gt; setActiveElement); }); Here’s our view transition-powered navigation bar! Observe the smooth transition when you click on the different links. See the Pen Moving Highlight Navbar with View Transitionby Blake Lundquist. Conclusion Animations and transitions between website UI states used to require many kilobytes of external libraries, along with verbose, confusing, and error-prone code, but vanilla JavaScript and CSS have since incorporated features to achieve native-app-like interactions without breaking the bank. We demonstrated this by implementing the “moving highlight” navigation pattern using two approaches: CSS transitions combined with the getBoundingClientRectmethod and the View Transition API. Resources getBoundingClientRectmethod documentation View Transition API documentation “View Transitions: Handling Aspect Ratio Changes” by Jake Archibald #creating #ampampldquomoving #highlightampamprdquo #navigation #bar
    Creating The &amp;ldquo;Moving Highlight&amp;rdquo; Navigation Bar With JavaScript And CSS
    smashingmagazine.com
    I recently came across an old jQuery tutorial demonstrating a “moving highlight” navigation bar and decided the concept was due for a modern upgrade. With this pattern, the border around the active navigation item animates directly from one element to another as the user clicks on menu items. In 2025, we have much better tools to manipulate the DOM via vanilla JavaScript. New features like the View Transition API make progressive enhancement more easily achievable and handle a lot of the animation minutiae. (Large preview) In this tutorial, I will demonstrate two methods of creating the “moving highlight” navigation bar using plain JavaScript and CSS. The first example uses the getBoundingClientRect method to explicitly animate the border between navigation bar items when they are clicked. The second example achieves the same functionality using the new View Transition API. The Initial Markup Let’s assume that we have a single-page application where content changes without the page being reloaded. The starting HTML and CSS are your standard navigation bar with an additional div element containing an id of #highlight. We give the first navigation item a class of .active. See the Pen Moving Highlight Navbar Starting Markup [forked] by Blake Lundquist. For this version, we will position the #highlight element around the element with the .active class to create a border. We can utilize absolute positioning and animate the element across the navigation bar to create the desired effect. We’ll hide it off-screen initially by adding left: -200px and include transition styles for all properties so that any changes in the position and size of the element will happen gradually. #highlight { z-index: 0; position: absolute; height: 100%; width: 100px; left: -200px; border: 2px solid green; box-sizing: border-box; transition: all 0.2s ease; } Add A Boilerplate Event Handler For Click Interactions We want the highlight element to animate when a user changes the .active navigation item. Let’s add a click event handler to the nav element, then filter for events caused only by elements matching our desired selector. In this case, we only want to change the .active nav item if the user clicks on a link that does not already have the .active class. Initially, we can call console.log to ensure the handler fires only when expected: const navbar = document.querySelector('nav'); navbar.addEventListener('click', function (event) { // return if the clicked element doesn't have the correct selector if (!event.target.matches('nav a:not(active)')) { return; } console.log('click'); }); Open your browser console and try clicking different items in the navigation bar. You should only see "click" being logged when you select a new item in the navigation bar. Now that we know our event handler is working on the correct elements let’s add code to move the .active class to the navigation item that was clicked. We can use the object passed into the event handler to find the element that initialized the event and give that element a class of .active after removing it from the previously active item. const navbar = document.querySelector('nav'); navbar.addEventListener('click', function (event) { // return if the clicked element doesn't have the correct selector if (!event.target.matches('nav a:not(active)')) { return; } - console.log('click'); + document.querySelector('nav a.active').classList.remove('active'); + event.target.classList.add('active'); }); Our #highlight element needs to move across the navigation bar and position itself around the active item. Let’s write a function to calculate a new position and width. Since the #highlight selector has transition styles applied, it will move gradually when its position changes. Using getBoundingClientRect, we can get information about the position and size of an element. We calculate the width of the active navigation item and its offset from the left boundary of the parent element. Then, we assign styles to the highlight element so that its size and position match. // handler for moving the highlight const moveHighlight = () =&gt; { const activeNavItem = document.querySelector('a.active'); const highlighterElement = document.querySelector('#highlight'); const width = activeNavItem.offsetWidth; const itemPos = activeNavItem.getBoundingClientRect(); const navbarPos = navbar.getBoundingClientRect() const relativePosX = itemPos.left - navbarPos.left; const styles = { left: ${relativePosX}px, width: ${width}px, }; Object.assign(highlighterElement.style, styles); } Let’s call our new function when the click event fires: navbar.addEventListener('click', function (event) { // return if the clicked element doesn't have the correct selector if (!event.target.matches('nav a:not(active)')) { return; } document.querySelector('nav a.active').classList.remove('active'); event.target.classList.add('active'); + moveHighlight(); }); Finally, let’s also call the function immediately so that the border moves behind our initial active item when the page first loads: // handler for moving the highlight const moveHighlight = () =&gt; { // ... } // display the highlight when the page loads moveHighlight(); Now, the border moves across the navigation bar when a new item is selected. Try clicking the different navigation links to animate the navigation bar. See the Pen Moving Highlight Navbar [forked] by Blake Lundquist. That only took a few lines of vanilla JavaScript and could easily be extended to account for other interactions, like mouseover events. In the next section, we will explore refactoring this feature using the View Transition API. Using The View Transition API The View Transition API provides functionality to create animated transitions between website views. Under the hood, the API creates snapshots of “before” and “after” views and then handles transitioning between them. View transitions are useful for creating animations between documents, providing the native-app-like user experience featured in frameworks like Astro. However, the API also provides handlers meant for SPA-style applications. We will use it to reduce the JavaScript needed in our implementation and more easily create fallback functionality. For this approach, we no longer need a separate #highlight element. Instead, we can style the .active navigation item directly using pseudo-selectors and let the View Transition API handle the animation between the before-and-after UI states when a new navigation item is clicked. We’ll start by getting rid of the #highlight element and its associated CSS and replacing it with styles for the nav a::after pseudo-selector: &lt;nav&gt; - &lt;div id="highlight"&gt;&lt;/div&gt; &lt;a href="#" class="active"&gt;Home&lt;/a&gt; &lt;a href="#services"&gt;Services&lt;/a&gt; &lt;a href="#about"&gt;About&lt;/a&gt; &lt;a href="#contact"&gt;Contact&lt;/a&gt; &lt;/nav&gt; - #highlight { - z-index: 0; - position: absolute; - height: 100%; - width: 0; - left: 0; - box-sizing: border-box; - transition: all 0.2s ease; - } + nav a::after { + content: " "; + position: absolute; + left: 0; + top: 0; + width: 100%; + height: 100%; + border: none; + box-sizing: border-box; + } For the .active class, we include the view-transition-name property, thus unlocking the magic of the View Transition API. Once we trigger the view transition and change the location of the .active navigation item in the DOM, “before” and “after” snapshots will be taken, and the browser will animate the border across the bar. We’ll give our view transition the name of highlight, but we could theoretically give it any name. nav a.active::after { border: 2px solid green; view-transition-name: highlight; } Once we have a selector that contains a view-transition-name property, the only remaining step is to trigger the transition using the startViewTransition method and pass in a callback function. const navbar = document.querySelector('nav'); // Change the active nav item on click navbar.addEventListener('click', async function (event) { if (!event.target.matches('nav a:not(.active)')) { return; } document.startViewTransition(() =&gt; { document.querySelector('nav a.active').classList.remove('active'); event.target.classList.add('active'); }); }); Above is a revised version of the click handler. Instead of doing all the calculations for the size and position of the moving border ourselves, the View Transition API handles all of it for us. We only need to call document.startViewTransition and pass in a callback function to change the item that has the .active class! Adjusting The View Transition At this point, when clicking on a navigation link, you’ll notice that the transition works, but some strange sizing issues are visible. (Large preview) This sizing inconsistency is caused by aspect ratio changes during the course of the view transition. We won’t go into detail here, but Jake Archibald has a detailed explanation you can read for more information. In short, to ensure the height of the border stays uniform throughout the transition, we need to declare an explicit height for the ::view-transition-old and ::view-transition-new pseudo-selectors representing a static snapshot of the old and new view, respectively. ::view-transition-old(highlight) { height: 100%; } ::view-transition-new(highlight) { height: 100%; } Let’s do some final refactoring to tidy up our code by moving the callback to a separate function and adding a fallback for when view transitions aren’t supported: const navbar = document.querySelector('nav'); // change the item that has the .active class applied const setActiveElement = (elem) =&gt; { document.querySelector('nav a.active').classList.remove('active'); elem.classList.add('active'); } // Start view transition and pass in a callback on click navbar.addEventListener('click', async function (event) { if (!event.target.matches('nav a:not(.active)')) { return; } // Fallback for browsers that don't support View Transitions: if (!document.startViewTransition) { setActiveElement(event.target); return; } document.startViewTransition(() =&gt; setActiveElement(event.target)); }); Here’s our view transition-powered navigation bar! Observe the smooth transition when you click on the different links. See the Pen Moving Highlight Navbar with View Transition [forked] by Blake Lundquist. Conclusion Animations and transitions between website UI states used to require many kilobytes of external libraries, along with verbose, confusing, and error-prone code, but vanilla JavaScript and CSS have since incorporated features to achieve native-app-like interactions without breaking the bank. We demonstrated this by implementing the “moving highlight” navigation pattern using two approaches: CSS transitions combined with the getBoundingClientRect() method and the View Transition API. Resources getBoundingClientRect() method documentation View Transition API documentation “View Transitions: Handling Aspect Ratio Changes” by Jake Archibald
    0 التعليقات ·0 المشاركات ·0 معاينة
  • All Verso Outfits in Clair Obscur: Expedition 33 and how to unlock them

    Verso is more than just a Devil May Cry stand-in. In Clair Obscur: Expedition 33, Verso’s combat playstyle evokes this feeling of style, but style doesn’t have to stop at combat. With the right fit, you can defeat the paintress in style. Verso’s outfits unlock many combinations of expression.

    As you play Clair Obscur: Expedition 33, you’ll find both outfits and hairstyles to experiment with. Many of them will be directly in your path, but many of them are missable — hidden behind Mimes, side quests, or complex challenges.

    In this Clair Obscur: Expedition 33 guide, we offer a list of all Verso outfits and hairstyles and how to unlock them.

    All Verso outfits in Clair Obscur: Expedition 33

    There are 12 outfits you can unlock for Verso. We’ve only unlocked eight so far, though, we can confirm through community sources how to unlock the other four. Included above are screenshots of the Verso outfits we’ve unlocked to date, with an asteriskbelow to indicate those we’ve yet to unlock.

    Here’s how you unlock the following Verso outfits in Clair Obscur: Expedition 33:

    Verso — Available from the beginning of the game.

    Baguette — Defeat the Mime in the Joy sub-section of Visages.

    Expedition — Unlocks automatically once you reach Act 2.

    Civilian* — Found in the Manor. Access the Manor through the continent north of Lost Woods once you unlock swimming with Esquie, and it’s behind a secret door you find after checking the upstairs bookcase.

    Clair* — Complete Stage 11, Trial 3 in Endless Tower.

    Pelerin* — Purchase from Verogo the Merchant in Frozen Hearts.

    Pure — Purchase from Granasori the Merchant on the island next to the Monolith.

    Renoir’s Suit — Defeat Renoir in the Monolith.

    Sakapatate — Purchase from Delsitra the Merchant in Gestral Village.

    Simple — Purchase from Rubiju the Merchant on the island next to the Visages on the World Map.

    Swimsuit I — Reach relationship level 6 with Sciel.

    Swimsuit II* — Achieve the Gold Medal in the Time Trial at Gestral Beach.

    All Verso hairstyles in Clair Obscur: Expedition 33

    There are 10 hairstyles you can unlock for Verso. Similar to his outfits, we’ve only unlocked five, but through the community, we have confirmed how to unlock the other six. We’ve included screenshots of the Verso hairstyles we’ve unlocked so far, and have added an asteriskbelow to indicate those we’ve yet to unlock.

    Here’s how you unlock the following Verso hairstyles in Clair Obscur: Expedition 33:

    Verso — Available from the beginning of the game.

    Bald* — Defeat the Mime in Sunless Cliffs with Verso.

    Curly* — Purchase from Sodasso the Merchant, northwest of Visages.

    Gustave’s Haircut — Purchase from Papasso the Merchant on the beach next to Monoco’s Station.

    Baguette — Defeat the Mime in the Joy section of Visages.

    Bun — Purchase from Blackora the Merchant next to Monoco’s Station.

    Expedition White* — Complete Stage 9, Trial 3 of Endless Tower.

    Gestral* — Received from Sastro once you find 5 Lost Gestrals.

    Samurai — Reach relationship level 3 with Monoco and select “Fine” when you’re able during the dialogue.

    Renoir Haircut* — Get the Verso ending at the end of the game. You must choose “Fight as Verso” in the final battle.

    For more Clair Obscur: Expedition 33 guides, here’s our recommendation for how to get all endings.
    #all #verso #outfits #clair #obscur
    All Verso Outfits in Clair Obscur: Expedition 33 and how to unlock them
    Verso is more than just a Devil May Cry stand-in. In Clair Obscur: Expedition 33, Verso’s combat playstyle evokes this feeling of style, but style doesn’t have to stop at combat. With the right fit, you can defeat the paintress in style. Verso’s outfits unlock many combinations of expression. As you play Clair Obscur: Expedition 33, you’ll find both outfits and hairstyles to experiment with. Many of them will be directly in your path, but many of them are missable — hidden behind Mimes, side quests, or complex challenges. In this Clair Obscur: Expedition 33 guide, we offer a list of all Verso outfits and hairstyles and how to unlock them. All Verso outfits in Clair Obscur: Expedition 33 There are 12 outfits you can unlock for Verso. We’ve only unlocked eight so far, though, we can confirm through community sources how to unlock the other four. Included above are screenshots of the Verso outfits we’ve unlocked to date, with an asteriskbelow to indicate those we’ve yet to unlock. Here’s how you unlock the following Verso outfits in Clair Obscur: Expedition 33: Verso — Available from the beginning of the game. Baguette — Defeat the Mime in the Joy sub-section of Visages. Expedition — Unlocks automatically once you reach Act 2. Civilian* — Found in the Manor. Access the Manor through the continent north of Lost Woods once you unlock swimming with Esquie, and it’s behind a secret door you find after checking the upstairs bookcase. Clair* — Complete Stage 11, Trial 3 in Endless Tower. Pelerin* — Purchase from Verogo the Merchant in Frozen Hearts. Pure — Purchase from Granasori the Merchant on the island next to the Monolith. Renoir’s Suit — Defeat Renoir in the Monolith. Sakapatate — Purchase from Delsitra the Merchant in Gestral Village. Simple — Purchase from Rubiju the Merchant on the island next to the Visages on the World Map. Swimsuit I — Reach relationship level 6 with Sciel. Swimsuit II* — Achieve the Gold Medal in the Time Trial at Gestral Beach. All Verso hairstyles in Clair Obscur: Expedition 33 There are 10 hairstyles you can unlock for Verso. Similar to his outfits, we’ve only unlocked five, but through the community, we have confirmed how to unlock the other six. We’ve included screenshots of the Verso hairstyles we’ve unlocked so far, and have added an asteriskbelow to indicate those we’ve yet to unlock. Here’s how you unlock the following Verso hairstyles in Clair Obscur: Expedition 33: Verso — Available from the beginning of the game. Bald* — Defeat the Mime in Sunless Cliffs with Verso. Curly* — Purchase from Sodasso the Merchant, northwest of Visages. Gustave’s Haircut — Purchase from Papasso the Merchant on the beach next to Monoco’s Station. Baguette — Defeat the Mime in the Joy section of Visages. Bun — Purchase from Blackora the Merchant next to Monoco’s Station. Expedition White* — Complete Stage 9, Trial 3 of Endless Tower. Gestral* — Received from Sastro once you find 5 Lost Gestrals. Samurai — Reach relationship level 3 with Monoco and select “Fine” when you’re able during the dialogue. Renoir Haircut* — Get the Verso ending at the end of the game. You must choose “Fight as Verso” in the final battle. For more Clair Obscur: Expedition 33 guides, here’s our recommendation for how to get all endings. #all #verso #outfits #clair #obscur
    All Verso Outfits in Clair Obscur: Expedition 33 and how to unlock them
    www.polygon.com
    Verso is more than just a Devil May Cry stand-in. In Clair Obscur: Expedition 33, Verso’s combat playstyle evokes this feeling of style, but style doesn’t have to stop at combat. With the right fit, you can defeat the paintress in style. Verso’s outfits unlock many combinations of expression. As you play Clair Obscur: Expedition 33, you’ll find both outfits and hairstyles to experiment with. Many of them will be directly in your path, but many of them are missable — hidden behind Mimes, side quests, or complex challenges. In this Clair Obscur: Expedition 33 guide, we offer a list of all Verso outfits and hairstyles and how to unlock them. All Verso outfits in Clair Obscur: Expedition 33 There are 12 outfits you can unlock for Verso. We’ve only unlocked eight so far, though, we can confirm through community sources how to unlock the other four. Included above are screenshots of the Verso outfits we’ve unlocked to date, with an asterisk (*) below to indicate those we’ve yet to unlock. Here’s how you unlock the following Verso outfits in Clair Obscur: Expedition 33: Verso — Available from the beginning of the game. Baguette — Defeat the Mime in the Joy sub-section of Visages. Expedition — Unlocks automatically once you reach Act 2. Civilian* — Found in the Manor. Access the Manor through the continent north of Lost Woods once you unlock swimming with Esquie, and it’s behind a secret door you find after checking the upstairs bookcase. Clair* — Complete Stage 11, Trial 3 in Endless Tower. Pelerin* — Purchase from Verogo the Merchant in Frozen Hearts. Pure — Purchase from Granasori the Merchant on the island next to the Monolith. Renoir’s Suit — Defeat Renoir in the Monolith. Sakapatate — Purchase from Delsitra the Merchant in Gestral Village. Simple — Purchase from Rubiju the Merchant on the island next to the Visages on the World Map. Swimsuit I — Reach relationship level 6 with Sciel. Swimsuit II* — Achieve the Gold Medal in the Time Trial at Gestral Beach. All Verso hairstyles in Clair Obscur: Expedition 33 There are 10 hairstyles you can unlock for Verso. Similar to his outfits, we’ve only unlocked five, but through the community, we have confirmed how to unlock the other six. We’ve included screenshots of the Verso hairstyles we’ve unlocked so far, and have added an asterisk (*) below to indicate those we’ve yet to unlock. Here’s how you unlock the following Verso hairstyles in Clair Obscur: Expedition 33: Verso — Available from the beginning of the game. Bald* — Defeat the Mime in Sunless Cliffs with Verso. Curly* — Purchase from Sodasso the Merchant, northwest of Visages. Gustave’s Haircut — Purchase from Papasso the Merchant on the beach next to Monoco’s Station. Baguette — Defeat the Mime in the Joy section of Visages. Bun — Purchase from Blackora the Merchant next to Monoco’s Station. Expedition White* — Complete Stage 9, Trial 3 of Endless Tower. Gestral* — Received from Sastro once you find 5 Lost Gestrals. Samurai — Reach relationship level 3 with Monoco and select “Fine” when you’re able during the dialogue. Renoir Haircut* — Get the Verso ending at the end of the game. You must choose “Fight as Verso” in the final battle. For more Clair Obscur: Expedition 33 guides, here’s our recommendation for how to get all endings.
    0 التعليقات ·0 المشاركات ·0 معاينة
  • AN EXPLOSIVE MIX OF SFX AND VFX IGNITES FINAL DESTINATION BLOODLINES

    By CHRIS McGOWAN

    Images courtesy of Warner Bros. Pictures.

    Final Destination Bloodlines, the sixth installment in the graphic horror series, kicks off with the film’s biggest challenge – deploying an elaborate, large-scale set piece involving the 400-foot-high Skyview Tower restaurant. While there in 1968, young Iris Campbellhas a premonition about the Skyview burning, cracking, crumbling and collapsing. Then, when she sees these events actually starting to happen around her, she intervenes and causes an evacuation of the tower, thus thwarting death’s design and saving many lives. Years later, her granddaughter, Stefani Reyes, inherits the vision of the destruction that could have occurred and realizes death is still coming for the survivors.

    “I knew we couldn’t put the wholeon fire, but Tonytried and put as much fire as he could safely and then we just built off thatand added a lot more. Even when it’s just a little bit of real fire, the lighting and interaction that can’t be simulated, so I think it was a success in terms of blending that practical with the visual.”
    —Nordin Rahhali, VFX Supervisor

    The film opens with an elaborate, large-scale set piece involving the 400-foot-high Skyview Tower restaurant – and its collapse. Drone footage was digitized to create a 3D asset for the LED wall so the time of day could be changed as needed.

    “The set that the directors wanted was very large,” says Nordin Rahhali, VFX Supervisor. “We had limited space options in stages given the scale and the footprint of the actual restaurant that they wanted. It was the first set piece, the first big thing we shot, so we had to get it all ready and going right off the bat. We built a bigger volume for our needs, including an LED wall that we built the assets for.”

    “We were outside Vancouver at Bridge Studios in Burnaby. The custom-built LED volume was a little over 200 feet in length” states Christian Sebaldt, ASC, the movie’s DP. The volume was 98 feet in diameter and 24 feet tall. Rahhali explains, “Pixomondo was the vendor that we contracted to come in and build the volume. They also built the asset that went on the LED wall, so they were part of our filming team and production shoot. Subsequently, they were also the main vendor doing post, which was by design. By having them design and take care of the asset during production, we were able to leverage their assets, tools and builds for some of the post VFX.” Rahhali adds, “It was really important to make sure we had days with the volume team and with Christian and his camera team ahead of the shoot so we could dial it in.”

    Built at Bridge Studios in Burnaby outside Vancouver, the custom-built LED volume for events at the Skyview restaurant was over 200 feet long, 98 feet wide and 24 feet tall. Extensive previs with Digital Domain was done to advance key shots.Zach Lipovsky and Adam Stein directed Final Destination Bloodlines for New Line film, distributed by Warner Bros., in which chain reactions of small and big events lead to bloody catastrophes befalling those who have cheated death at some point. Pixomondo was the lead VFX vendor, followed by FOLKS VFX. Picture Shop also contributed. There were around 800 VFX shots. Tony Lazarowich was the Special Effects Supervisor.

    “The Skyview restaurant involved building a massive setwas fire retardant, which meant the construction took longer than normal because they had to build it with certain materials and coat it with certain things because, obviously, it serves for the set piece. As it’s falling into chaos, a lot of that fire was practical. I really jived with what Christian and directors wanted and how Tony likes to work – to augment as much real practical stuff as possible,” Rahhali remarks. “I knew we couldn’t put the whole thing on fire, but Tony tried and put as much fire as he could safely, and then we just built off thatand added a lot more. Even when it’s just a little bit of real fire, the lighting and interaction can’t be simulated, so I think it was a success in terms of blending that practical with the visual.”

    The Skyview restaurant required building a massive set that was fire retardant. Construction on the set took longer because it had to be built and coated with special materials. As the Skyview restaurant falls into chaos, much of the fire was practical.“We got all the Vancouver skylineso we could rebuild our version of the city, which was based a little on the Vancouver footprint. So, we used all that to build a digital recreation of a city that was in line with what the directors wanted, which was a coastal city somewhere in the States that doesn’t necessarily have to be Vancouver or Seattle, but it looks a little like the Pacific Northwest.”
    —Christian Sebaldt, ASC, Director of Photography

    For drone shots, the team utilized a custom heavy-lift drone with three RED Komodo Digital Cinema cameras “giving us almost 180 degrees with overlap that we would then stitch in post and have a ridiculous amount of resolution off these three cameras,” Sebaldt states. “The other drone we used was a DJI Inspire 3, which was also very good. And we flew these drones up at the height. We flew them at different times of day. We flew full 360s, and we also used them for photogrammetry. We got all the Vancouver skyline so we could rebuild our version of the city, which was based a little on the Vancouver footprint. So, we used all that to build a digital recreation of a city that was in line with what the directors wanted, which was a coastal city somewhere in the States that doesn’t necessarily have to be Vancouver or Seattle, but it looks a little like the Pacific Northwest.” Rahhali adds, “All of this allowed us to figure out what we were going to shoot. We had the stage build, and we had the drone footage that we then digitized and created a 3D asset to go on the wallwe could change the times of day”

    Pixomondo built the volume and the asset that went on the LED wall for the Skyview sequence. They were also the main vendor during post. FOLKS VFX and Picture Shop contributed.“We did extensive previs with Digital Domain,” Rahhali explains. “That was important because we knew the key shots that the directors wanted. With a combination of those key shots, we then kind of reverse-engineeredwhile we did techvis off the previs and worked with Christian and the art department so we would have proper flexibility with the set to be able to pull off some of these shots.some of these shots required the Skyview restaurant ceiling to be lifted and partially removed for us to get a crane to shoot Paulas he’s about to fall and the camera’s going through a roof, that we then digitally had to recreate. Had we not done the previs to know those shots in advance, we would not have been able to build that in time to accomplish the look. We had many other shots that were driven off the previs that allowed the art department, construction and camera teams to work out how they would get those shots.”

    Some shots required the Skyview’s ceiling to be lifted and partially removed to get a crane to shoot Paul Campbellas he’s about to fall.

    The character Iris lived in a fortified house, isolating herself methodically to avoid the Grim Reaper. Rahhali comments, “That was a beautiful locationGVRD, very cold. It was a long, hard shoot, because it was all nights. It was just this beautiful pocket out in the middle of the mountains. We in visual effects didn’t do a ton other than a couple of clean-ups of the big establishing shots when you see them pull up to the compound. We had to clean up small roads we wanted to make look like one road and make the road look like dirt.” There were flames involved. Sebaldt says, “The explosionwas unbelievably big. We had eight cameras on it at night and shot it at high speed, and we’re all going ‘Whoa.’” Rahhali notes, “There was some clean-up, but the explosion was 100% practical. Our Special Effects Supervisor, Tony, went to town on that. He blew up the whole house, and it looked spectacular.”

    The tattoo shop piercing scene is one of the most talked-about sequences in the movie, where a dangling chain from a ceiling fan attaches itself to the septum nose piercing of Erik Campbelland drags him toward a raging fire. Rahhali observes, “That was very Final Destination and a great Rube Goldberg build-up event. Richard was great. He was tied up on a stunt line for most of it, balancing on top of furniture. All of that was him doing it for real with a stunt line.” Some effects solutions can be surprisingly extremely simple. Rahhali continues, “Our producercame up with a great gagseptum ring.” Richard’s nose was connected with just a nose plug that went inside his nostrils. “All that tugging and everything that you’re seeing was real. For weeks and weeks, we were all trying to figure out how to do it without it being a big visual effects thing. ‘How are we gonna pull his nose for real?’ Craig said, ‘I have these things I use to help me open up my nose and you can’t really see them.’ They built it off of that, and it looked great.”

    Filmmakers spent weeks figuring out how to execute the harrowing tattoo shop scene. A dangling chain from a ceiling fan attaches itself to the septum nose ring of Erik Campbell– with the actor’s nose being tugged by the chain connected to a nose plug that went inside his nostrils.

    “ome of these shots required the Skyview restaurant ceiling to be lifted and partially removed for us to get a crane to shoot Paulas he’s about to fall and the camera’s going through a roof, that we then digitally had to recreate. Had we not done the previs to know those shots in advance, we would not have been able to build that in time to accomplish the look. We had many other shots that were driven off the previs that allowed the art department, construction and camera teams to work out how they would get those shots.”
    —Nordin Rahhali, VFX Supervisor

    Most of the fire in the tattoo parlor was practical. “There are some fire bars and stuff that you’re seeing in there from SFX and the big pool of fire on the wide shots.” Sebaldt adds, “That was a lot of fun to shoot because it’s so insane when he’s dancing and balancing on all this stuff – we were laughing and laughing. We were convinced that this was going to be the best scene in the movie up to that moment.” Rahhali says, “They used the scene wholesale for the trailer. It went viral – people were taking out their septum rings.” Erik survives the parlor blaze only to meet his fate in a hospital when he is pulled by a wheelchair into an out-of-control MRI machine at its highest magnetic level. Rahhali comments, “That is a good combination of a bunch of different departments. Our Stunt Coordinator, Simon Burnett, came up with this hard pull-wire linewhen Erik flies and hits the MRI. That’s a real stunt with a double, and he hit hard. All the other shots are all CG wheelchairs because the directors wanted to art-direct how the crumpling metal was snapping and bending to show pressure on him as his body starts going into the MRI.”

    To augment the believability that comes with reality, the directors aimed to capture as much practically as possible, then VFX Supervisor Nordin Rahhali and his team built on that result.A train derailment concludes the film after Stefani and her brother, Charlie, realize they are still on death’s list. A train goes off the tracks, and logs from one of the cars fly though the air and kills them. “That one was special because it’s a hard sequence and was also shot quite late, so we didn’t have a lot of time. We went back to Vancouver and shot the actual street, and we shot our actors performing. They fell onto stunt pads, and the moment they get touched by the logs, it turns into CG as it was the only way to pull that off and the train of course. We had to add all that. The destruction of the houses and everything was done in visual effects.”

    Erik survives the tattoo parlor blaze only to meet his fate in a hospital when he is crushed by a wheelchair while being pulled into an out-of-control MRI machine.

    Erikappears about to be run over by a delivery truck at the corner of 21A Ave. and 132A St., but he’s not – at least not then. The truck is actually on the opposite side of the road, and the person being run over is Howard.

    A rolling penny plays a major part in the catastrophic chain reactions and seems to be a character itself. “The magic penny was a mix from two vendors, Pixomondo and FOLKS; both had penny shots,” Rahhali says. “All the bouncing pennies you see going through the vents and hitting the fan blade are all FOLKS. The bouncing penny at the end as a lady takes it out of her purse, that goes down the ramp and into the rail – that’s FOLKS. The big explosion shots in the Skyview with the penny slowing down after the kid throws itare all Pixomondo shots. It was a mix. We took a little time to find that balance between readability and believability.”

    Approximately 800 VFX shots were required for Final Destination Bloodlines.Chain reactions of small and big events lead to bloody catastrophes befalling those who have cheated Death at some point in the Final Destination films.

    From left: Kaitlyn Santa Juana as Stefani Reyes, director Adam Stein, director Zach Lipovsky and Gabrielle Rose as Iris.Rahhali adds, “The film is a great collaboration of departments. Good visual effects are always a good combination of special effects, makeup effects and cinematography; it’s all the planning of all the pieces coming together. For a film of this size, I’m really proud of the work. I think we punched above our weight class, and it looks quite good.”
    #explosive #mix #sfx #vfx #ignites
    AN EXPLOSIVE MIX OF SFX AND VFX IGNITES FINAL DESTINATION BLOODLINES
    By CHRIS McGOWAN Images courtesy of Warner Bros. Pictures. Final Destination Bloodlines, the sixth installment in the graphic horror series, kicks off with the film’s biggest challenge – deploying an elaborate, large-scale set piece involving the 400-foot-high Skyview Tower restaurant. While there in 1968, young Iris Campbellhas a premonition about the Skyview burning, cracking, crumbling and collapsing. Then, when she sees these events actually starting to happen around her, she intervenes and causes an evacuation of the tower, thus thwarting death’s design and saving many lives. Years later, her granddaughter, Stefani Reyes, inherits the vision of the destruction that could have occurred and realizes death is still coming for the survivors. “I knew we couldn’t put the wholeon fire, but Tonytried and put as much fire as he could safely and then we just built off thatand added a lot more. Even when it’s just a little bit of real fire, the lighting and interaction that can’t be simulated, so I think it was a success in terms of blending that practical with the visual.” —Nordin Rahhali, VFX Supervisor The film opens with an elaborate, large-scale set piece involving the 400-foot-high Skyview Tower restaurant – and its collapse. Drone footage was digitized to create a 3D asset for the LED wall so the time of day could be changed as needed. “The set that the directors wanted was very large,” says Nordin Rahhali, VFX Supervisor. “We had limited space options in stages given the scale and the footprint of the actual restaurant that they wanted. It was the first set piece, the first big thing we shot, so we had to get it all ready and going right off the bat. We built a bigger volume for our needs, including an LED wall that we built the assets for.” “We were outside Vancouver at Bridge Studios in Burnaby. The custom-built LED volume was a little over 200 feet in length” states Christian Sebaldt, ASC, the movie’s DP. The volume was 98 feet in diameter and 24 feet tall. Rahhali explains, “Pixomondo was the vendor that we contracted to come in and build the volume. They also built the asset that went on the LED wall, so they were part of our filming team and production shoot. Subsequently, they were also the main vendor doing post, which was by design. By having them design and take care of the asset during production, we were able to leverage their assets, tools and builds for some of the post VFX.” Rahhali adds, “It was really important to make sure we had days with the volume team and with Christian and his camera team ahead of the shoot so we could dial it in.” Built at Bridge Studios in Burnaby outside Vancouver, the custom-built LED volume for events at the Skyview restaurant was over 200 feet long, 98 feet wide and 24 feet tall. Extensive previs with Digital Domain was done to advance key shots.Zach Lipovsky and Adam Stein directed Final Destination Bloodlines for New Line film, distributed by Warner Bros., in which chain reactions of small and big events lead to bloody catastrophes befalling those who have cheated death at some point. Pixomondo was the lead VFX vendor, followed by FOLKS VFX. Picture Shop also contributed. There were around 800 VFX shots. Tony Lazarowich was the Special Effects Supervisor. “The Skyview restaurant involved building a massive setwas fire retardant, which meant the construction took longer than normal because they had to build it with certain materials and coat it with certain things because, obviously, it serves for the set piece. As it’s falling into chaos, a lot of that fire was practical. I really jived with what Christian and directors wanted and how Tony likes to work – to augment as much real practical stuff as possible,” Rahhali remarks. “I knew we couldn’t put the whole thing on fire, but Tony tried and put as much fire as he could safely, and then we just built off thatand added a lot more. Even when it’s just a little bit of real fire, the lighting and interaction can’t be simulated, so I think it was a success in terms of blending that practical with the visual.” The Skyview restaurant required building a massive set that was fire retardant. Construction on the set took longer because it had to be built and coated with special materials. As the Skyview restaurant falls into chaos, much of the fire was practical.“We got all the Vancouver skylineso we could rebuild our version of the city, which was based a little on the Vancouver footprint. So, we used all that to build a digital recreation of a city that was in line with what the directors wanted, which was a coastal city somewhere in the States that doesn’t necessarily have to be Vancouver or Seattle, but it looks a little like the Pacific Northwest.” —Christian Sebaldt, ASC, Director of Photography For drone shots, the team utilized a custom heavy-lift drone with three RED Komodo Digital Cinema cameras “giving us almost 180 degrees with overlap that we would then stitch in post and have a ridiculous amount of resolution off these three cameras,” Sebaldt states. “The other drone we used was a DJI Inspire 3, which was also very good. And we flew these drones up at the height. We flew them at different times of day. We flew full 360s, and we also used them for photogrammetry. We got all the Vancouver skyline so we could rebuild our version of the city, which was based a little on the Vancouver footprint. So, we used all that to build a digital recreation of a city that was in line with what the directors wanted, which was a coastal city somewhere in the States that doesn’t necessarily have to be Vancouver or Seattle, but it looks a little like the Pacific Northwest.” Rahhali adds, “All of this allowed us to figure out what we were going to shoot. We had the stage build, and we had the drone footage that we then digitized and created a 3D asset to go on the wallwe could change the times of day” Pixomondo built the volume and the asset that went on the LED wall for the Skyview sequence. They were also the main vendor during post. FOLKS VFX and Picture Shop contributed.“We did extensive previs with Digital Domain,” Rahhali explains. “That was important because we knew the key shots that the directors wanted. With a combination of those key shots, we then kind of reverse-engineeredwhile we did techvis off the previs and worked with Christian and the art department so we would have proper flexibility with the set to be able to pull off some of these shots.some of these shots required the Skyview restaurant ceiling to be lifted and partially removed for us to get a crane to shoot Paulas he’s about to fall and the camera’s going through a roof, that we then digitally had to recreate. Had we not done the previs to know those shots in advance, we would not have been able to build that in time to accomplish the look. We had many other shots that were driven off the previs that allowed the art department, construction and camera teams to work out how they would get those shots.” Some shots required the Skyview’s ceiling to be lifted and partially removed to get a crane to shoot Paul Campbellas he’s about to fall. The character Iris lived in a fortified house, isolating herself methodically to avoid the Grim Reaper. Rahhali comments, “That was a beautiful locationGVRD, very cold. It was a long, hard shoot, because it was all nights. It was just this beautiful pocket out in the middle of the mountains. We in visual effects didn’t do a ton other than a couple of clean-ups of the big establishing shots when you see them pull up to the compound. We had to clean up small roads we wanted to make look like one road and make the road look like dirt.” There were flames involved. Sebaldt says, “The explosionwas unbelievably big. We had eight cameras on it at night and shot it at high speed, and we’re all going ‘Whoa.’” Rahhali notes, “There was some clean-up, but the explosion was 100% practical. Our Special Effects Supervisor, Tony, went to town on that. He blew up the whole house, and it looked spectacular.” The tattoo shop piercing scene is one of the most talked-about sequences in the movie, where a dangling chain from a ceiling fan attaches itself to the septum nose piercing of Erik Campbelland drags him toward a raging fire. Rahhali observes, “That was very Final Destination and a great Rube Goldberg build-up event. Richard was great. He was tied up on a stunt line for most of it, balancing on top of furniture. All of that was him doing it for real with a stunt line.” Some effects solutions can be surprisingly extremely simple. Rahhali continues, “Our producercame up with a great gagseptum ring.” Richard’s nose was connected with just a nose plug that went inside his nostrils. “All that tugging and everything that you’re seeing was real. For weeks and weeks, we were all trying to figure out how to do it without it being a big visual effects thing. ‘How are we gonna pull his nose for real?’ Craig said, ‘I have these things I use to help me open up my nose and you can’t really see them.’ They built it off of that, and it looked great.” Filmmakers spent weeks figuring out how to execute the harrowing tattoo shop scene. A dangling chain from a ceiling fan attaches itself to the septum nose ring of Erik Campbell– with the actor’s nose being tugged by the chain connected to a nose plug that went inside his nostrils. “ome of these shots required the Skyview restaurant ceiling to be lifted and partially removed for us to get a crane to shoot Paulas he’s about to fall and the camera’s going through a roof, that we then digitally had to recreate. Had we not done the previs to know those shots in advance, we would not have been able to build that in time to accomplish the look. We had many other shots that were driven off the previs that allowed the art department, construction and camera teams to work out how they would get those shots.” —Nordin Rahhali, VFX Supervisor Most of the fire in the tattoo parlor was practical. “There are some fire bars and stuff that you’re seeing in there from SFX and the big pool of fire on the wide shots.” Sebaldt adds, “That was a lot of fun to shoot because it’s so insane when he’s dancing and balancing on all this stuff – we were laughing and laughing. We were convinced that this was going to be the best scene in the movie up to that moment.” Rahhali says, “They used the scene wholesale for the trailer. It went viral – people were taking out their septum rings.” Erik survives the parlor blaze only to meet his fate in a hospital when he is pulled by a wheelchair into an out-of-control MRI machine at its highest magnetic level. Rahhali comments, “That is a good combination of a bunch of different departments. Our Stunt Coordinator, Simon Burnett, came up with this hard pull-wire linewhen Erik flies and hits the MRI. That’s a real stunt with a double, and he hit hard. All the other shots are all CG wheelchairs because the directors wanted to art-direct how the crumpling metal was snapping and bending to show pressure on him as his body starts going into the MRI.” To augment the believability that comes with reality, the directors aimed to capture as much practically as possible, then VFX Supervisor Nordin Rahhali and his team built on that result.A train derailment concludes the film after Stefani and her brother, Charlie, realize they are still on death’s list. A train goes off the tracks, and logs from one of the cars fly though the air and kills them. “That one was special because it’s a hard sequence and was also shot quite late, so we didn’t have a lot of time. We went back to Vancouver and shot the actual street, and we shot our actors performing. They fell onto stunt pads, and the moment they get touched by the logs, it turns into CG as it was the only way to pull that off and the train of course. We had to add all that. The destruction of the houses and everything was done in visual effects.” Erik survives the tattoo parlor blaze only to meet his fate in a hospital when he is crushed by a wheelchair while being pulled into an out-of-control MRI machine. Erikappears about to be run over by a delivery truck at the corner of 21A Ave. and 132A St., but he’s not – at least not then. The truck is actually on the opposite side of the road, and the person being run over is Howard. A rolling penny plays a major part in the catastrophic chain reactions and seems to be a character itself. “The magic penny was a mix from two vendors, Pixomondo and FOLKS; both had penny shots,” Rahhali says. “All the bouncing pennies you see going through the vents and hitting the fan blade are all FOLKS. The bouncing penny at the end as a lady takes it out of her purse, that goes down the ramp and into the rail – that’s FOLKS. The big explosion shots in the Skyview with the penny slowing down after the kid throws itare all Pixomondo shots. It was a mix. We took a little time to find that balance between readability and believability.” Approximately 800 VFX shots were required for Final Destination Bloodlines.Chain reactions of small and big events lead to bloody catastrophes befalling those who have cheated Death at some point in the Final Destination films. From left: Kaitlyn Santa Juana as Stefani Reyes, director Adam Stein, director Zach Lipovsky and Gabrielle Rose as Iris.Rahhali adds, “The film is a great collaboration of departments. Good visual effects are always a good combination of special effects, makeup effects and cinematography; it’s all the planning of all the pieces coming together. For a film of this size, I’m really proud of the work. I think we punched above our weight class, and it looks quite good.” #explosive #mix #sfx #vfx #ignites
    AN EXPLOSIVE MIX OF SFX AND VFX IGNITES FINAL DESTINATION BLOODLINES
    www.vfxvoice.com
    By CHRIS McGOWAN Images courtesy of Warner Bros. Pictures. Final Destination Bloodlines, the sixth installment in the graphic horror series, kicks off with the film’s biggest challenge – deploying an elaborate, large-scale set piece involving the 400-foot-high Skyview Tower restaurant. While there in 1968, young Iris Campbell (Brec Bassinger) has a premonition about the Skyview burning, cracking, crumbling and collapsing. Then, when she sees these events actually starting to happen around her, she intervenes and causes an evacuation of the tower, thus thwarting death’s design and saving many lives. Years later, her granddaughter, Stefani Reyes (Kaitlyn Santa Juana), inherits the vision of the destruction that could have occurred and realizes death is still coming for the survivors. “I knew we couldn’t put the whole [Skyview restaurant] on fire, but Tony [Lazarowich, Special Effects Supervisor] tried and put as much fire as he could safely and then we just built off that [in VFX] and added a lot more. Even when it’s just a little bit of real fire, the lighting and interaction that can’t be simulated, so I think it was a success in terms of blending that practical with the visual.” —Nordin Rahhali, VFX Supervisor The film opens with an elaborate, large-scale set piece involving the 400-foot-high Skyview Tower restaurant – and its collapse. Drone footage was digitized to create a 3D asset for the LED wall so the time of day could be changed as needed. “The set that the directors wanted was very large,” says Nordin Rahhali, VFX Supervisor. “We had limited space options in stages given the scale and the footprint of the actual restaurant that they wanted. It was the first set piece, the first big thing we shot, so we had to get it all ready and going right off the bat. We built a bigger volume for our needs, including an LED wall that we built the assets for.” “We were outside Vancouver at Bridge Studios in Burnaby. The custom-built LED volume was a little over 200 feet in length” states Christian Sebaldt, ASC, the movie’s DP. The volume was 98 feet in diameter and 24 feet tall. Rahhali explains, “Pixomondo was the vendor that we contracted to come in and build the volume. They also built the asset that went on the LED wall, so they were part of our filming team and production shoot. Subsequently, they were also the main vendor doing post, which was by design. By having them design and take care of the asset during production, we were able to leverage their assets, tools and builds for some of the post VFX.” Rahhali adds, “It was really important to make sure we had days with the volume team and with Christian and his camera team ahead of the shoot so we could dial it in.” Built at Bridge Studios in Burnaby outside Vancouver, the custom-built LED volume for events at the Skyview restaurant was over 200 feet long, 98 feet wide and 24 feet tall. Extensive previs with Digital Domain was done to advance key shots. (Photo: Eric Milner) Zach Lipovsky and Adam Stein directed Final Destination Bloodlines for New Line film, distributed by Warner Bros., in which chain reactions of small and big events lead to bloody catastrophes befalling those who have cheated death at some point. Pixomondo was the lead VFX vendor, followed by FOLKS VFX. Picture Shop also contributed. There were around 800 VFX shots. Tony Lazarowich was the Special Effects Supervisor. “The Skyview restaurant involved building a massive set [that] was fire retardant, which meant the construction took longer than normal because they had to build it with certain materials and coat it with certain things because, obviously, it serves for the set piece. As it’s falling into chaos, a lot of that fire was practical. I really jived with what Christian and directors wanted and how Tony likes to work – to augment as much real practical stuff as possible,” Rahhali remarks. “I knew we couldn’t put the whole thing on fire, but Tony tried and put as much fire as he could safely, and then we just built off that [in VFX] and added a lot more. Even when it’s just a little bit of real fire, the lighting and interaction can’t be simulated, so I think it was a success in terms of blending that practical with the visual.” The Skyview restaurant required building a massive set that was fire retardant. Construction on the set took longer because it had to be built and coated with special materials. As the Skyview restaurant falls into chaos, much of the fire was practical. (Photo: Eric Milner) “We got all the Vancouver skyline [with drones] so we could rebuild our version of the city, which was based a little on the Vancouver footprint. So, we used all that to build a digital recreation of a city that was in line with what the directors wanted, which was a coastal city somewhere in the States that doesn’t necessarily have to be Vancouver or Seattle, but it looks a little like the Pacific Northwest.” —Christian Sebaldt, ASC, Director of Photography For drone shots, the team utilized a custom heavy-lift drone with three RED Komodo Digital Cinema cameras “giving us almost 180 degrees with overlap that we would then stitch in post and have a ridiculous amount of resolution off these three cameras,” Sebaldt states. “The other drone we used was a DJI Inspire 3, which was also very good. And we flew these drones up at the height [we needed]. We flew them at different times of day. We flew full 360s, and we also used them for photogrammetry. We got all the Vancouver skyline so we could rebuild our version of the city, which was based a little on the Vancouver footprint. So, we used all that to build a digital recreation of a city that was in line with what the directors wanted, which was a coastal city somewhere in the States that doesn’t necessarily have to be Vancouver or Seattle, but it looks a little like the Pacific Northwest.” Rahhali adds, “All of this allowed us to figure out what we were going to shoot. We had the stage build, and we had the drone footage that we then digitized and created a 3D asset to go on the wall [so] we could change the times of day” Pixomondo built the volume and the asset that went on the LED wall for the Skyview sequence. They were also the main vendor during post. FOLKS VFX and Picture Shop contributed. (Photo: Eric Milner) “We did extensive previs with Digital Domain,” Rahhali explains. “That was important because we knew the key shots that the directors wanted. With a combination of those key shots, we then kind of reverse-engineered [them] while we did techvis off the previs and worked with Christian and the art department so we would have proper flexibility with the set to be able to pull off some of these shots. [For example,] some of these shots required the Skyview restaurant ceiling to be lifted and partially removed for us to get a crane to shoot Paul [Max Lloyd-Jones] as he’s about to fall and the camera’s going through a roof, that we then digitally had to recreate. Had we not done the previs to know those shots in advance, we would not have been able to build that in time to accomplish the look. We had many other shots that were driven off the previs that allowed the art department, construction and camera teams to work out how they would get those shots.” Some shots required the Skyview’s ceiling to be lifted and partially removed to get a crane to shoot Paul Campbell (Max Lloyd-Jones) as he’s about to fall. The character Iris lived in a fortified house, isolating herself methodically to avoid the Grim Reaper. Rahhali comments, “That was a beautiful location [in] GVRD [Greater Vancouver], very cold. It was a long, hard shoot, because it was all nights. It was just this beautiful pocket out in the middle of the mountains. We in visual effects didn’t do a ton other than a couple of clean-ups of the big establishing shots when you see them pull up to the compound. We had to clean up small roads we wanted to make look like one road and make the road look like dirt.” There were flames involved. Sebaldt says, “The explosion [of Iris’s home] was unbelievably big. We had eight cameras on it at night and shot it at high speed, and we’re all going ‘Whoa.’” Rahhali notes, “There was some clean-up, but the explosion was 100% practical. Our Special Effects Supervisor, Tony, went to town on that. He blew up the whole house, and it looked spectacular.” The tattoo shop piercing scene is one of the most talked-about sequences in the movie, where a dangling chain from a ceiling fan attaches itself to the septum nose piercing of Erik Campbell (Richard Harmon) and drags him toward a raging fire. Rahhali observes, “That was very Final Destination and a great Rube Goldberg build-up event. Richard was great. He was tied up on a stunt line for most of it, balancing on top of furniture. All of that was him doing it for real with a stunt line.” Some effects solutions can be surprisingly extremely simple. Rahhali continues, “Our producer [Craig Perry] came up with a great gag [for the] septum ring.” Richard’s nose was connected with just a nose plug that went inside his nostrils. “All that tugging and everything that you’re seeing was real. For weeks and weeks, we were all trying to figure out how to do it without it being a big visual effects thing. ‘How are we gonna pull his nose for real?’ Craig said, ‘I have these things I use to help me open up my nose and you can’t really see them.’ They built it off of that, and it looked great.” Filmmakers spent weeks figuring out how to execute the harrowing tattoo shop scene. A dangling chain from a ceiling fan attaches itself to the septum nose ring of Erik Campbell (Richard Harmon) – with the actor’s nose being tugged by the chain connected to a nose plug that went inside his nostrils. “[S]ome of these shots required the Skyview restaurant ceiling to be lifted and partially removed for us to get a crane to shoot Paul [Campbell] as he’s about to fall and the camera’s going through a roof, that we then digitally had to recreate. Had we not done the previs to know those shots in advance, we would not have been able to build that in time to accomplish the look. We had many other shots that were driven off the previs that allowed the art department, construction and camera teams to work out how they would get those shots.” —Nordin Rahhali, VFX Supervisor Most of the fire in the tattoo parlor was practical. “There are some fire bars and stuff that you’re seeing in there from SFX and the big pool of fire on the wide shots.” Sebaldt adds, “That was a lot of fun to shoot because it’s so insane when he’s dancing and balancing on all this stuff – we were laughing and laughing. We were convinced that this was going to be the best scene in the movie up to that moment.” Rahhali says, “They used the scene wholesale for the trailer. It went viral – people were taking out their septum rings.” Erik survives the parlor blaze only to meet his fate in a hospital when he is pulled by a wheelchair into an out-of-control MRI machine at its highest magnetic level. Rahhali comments, “That is a good combination of a bunch of different departments. Our Stunt Coordinator, Simon Burnett, came up with this hard pull-wire line [for] when Erik flies and hits the MRI. That’s a real stunt with a double, and he hit hard. All the other shots are all CG wheelchairs because the directors wanted to art-direct how the crumpling metal was snapping and bending to show pressure on him as his body starts going into the MRI.” To augment the believability that comes with reality, the directors aimed to capture as much practically as possible, then VFX Supervisor Nordin Rahhali and his team built on that result. (Photo: Eric Milner) A train derailment concludes the film after Stefani and her brother, Charlie, realize they are still on death’s list. A train goes off the tracks, and logs from one of the cars fly though the air and kills them. “That one was special because it’s a hard sequence and was also shot quite late, so we didn’t have a lot of time. We went back to Vancouver and shot the actual street, and we shot our actors performing. They fell onto stunt pads, and the moment they get touched by the logs, it turns into CG as it was the only way to pull that off and the train of course. We had to add all that. The destruction of the houses and everything was done in visual effects.” Erik survives the tattoo parlor blaze only to meet his fate in a hospital when he is crushed by a wheelchair while being pulled into an out-of-control MRI machine. Erik (Richard Harmon) appears about to be run over by a delivery truck at the corner of 21A Ave. and 132A St., but he’s not – at least not then. The truck is actually on the opposite side of the road, and the person being run over is Howard. A rolling penny plays a major part in the catastrophic chain reactions and seems to be a character itself. “The magic penny was a mix from two vendors, Pixomondo and FOLKS; both had penny shots,” Rahhali says. “All the bouncing pennies you see going through the vents and hitting the fan blade are all FOLKS. The bouncing penny at the end as a lady takes it out of her purse, that goes down the ramp and into the rail – that’s FOLKS. The big explosion shots in the Skyview with the penny slowing down after the kid throws it [off the deck] are all Pixomondo shots. It was a mix. We took a little time to find that balance between readability and believability.” Approximately 800 VFX shots were required for Final Destination Bloodlines. (Photo: Eric Milner) Chain reactions of small and big events lead to bloody catastrophes befalling those who have cheated Death at some point in the Final Destination films. From left: Kaitlyn Santa Juana as Stefani Reyes, director Adam Stein, director Zach Lipovsky and Gabrielle Rose as Iris. (Photo: Eric Milner) Rahhali adds, “The film is a great collaboration of departments. Good visual effects are always a good combination of special effects, makeup effects and cinematography; it’s all the planning of all the pieces coming together. For a film of this size, I’m really proud of the work. I think we punched above our weight class, and it looks quite good.”
    0 التعليقات ·0 المشاركات ·0 معاينة
CGShares https://cgshares.com