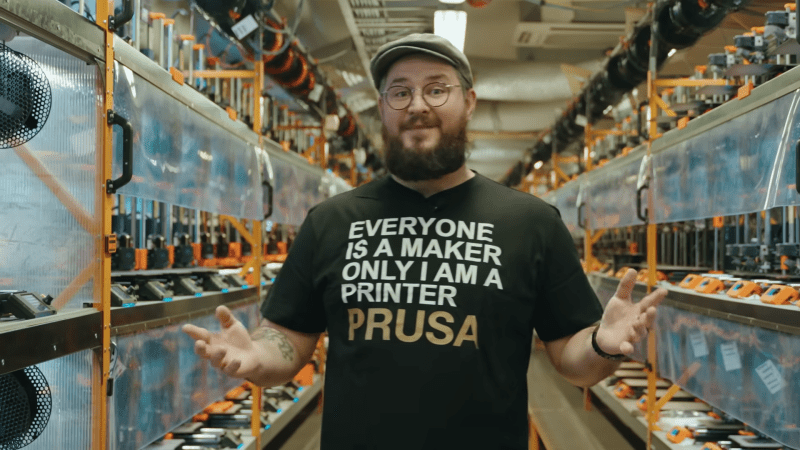
Master the macOS Finder with these 10 essential tips, tricks, and tweaks
Macworld
The Finder is the main user interface for managing files on the Mac. Think of it as the starting point for navigating macOS–it’s like the Home Screen on an iPhone and iPad. You probably don’t give the Finder much thought, but it’s one of the most important places on your Mac.
Because of that, you should make the most of that time. You can tweak the Finder so it better suits the way you do things, and there are a few tasks you can do within the Finder instead of in an app. Here are 10 things you should know so you can get the most out of the Finder.
1.
Finder and Desktop explained
The Quick Take function in the Finder lets you see a preview of a file.
Foundry
This is an explanation of terminology. Before you can master the Finder, it helps to understand the difference when, say, you’re looking up support documents on Apple.com or reading a how-to on Macworld.
You hear people refer to the Desktop on the Mac. The Desktop and the Finder are two parts of a whole. The Finder is actually an app that runs all the time. The Desktop is a component of the Finder; to paraphrase Apple, the Desktop is the space between the menu bar at the top, and the Dock at the bottom. If you click on the Desktop, notice that the app you end up in is the Finder. So, if you’re working with someone on a Mac and you’re told to go to the Desktop or Finder, they’re usually referring to the same thing.
Now, the Finder and Desktop differ in functionality. You can place files on the Desktop, and you can set the Finder to display icons so you can access storage devices, servers, and more. The Finder itself offers other functions, such as windows to navigate and manage files, Quick Look, syncing with an iPhone, and more.
2.
Add multiple Desktops
Navigate between Desktops in Mission Control.
Foundry
Now that you know what the Desktop is, you might now know that you can have multiple versions of it. It’s a great way to organize the window and app clutter that easily builds up. It’s especially useful on single-display Mac setups.
To launch another Desktop, you use an app in macOS called Mission Control, which is opened by:
Pressing the F3 key or pressing Control+Up Arrow
Swiping with three fingers upwards on the Magic Trackpad
Double-tap with two fingers on a Magic Mouse
Dragging a window to the top of the screen
When you enter Mission Control, a bar replaces the menu bar at the top of your screen. It will list the Desktops you currently have, which will be just one to start. Move the cursor over the bar, and it expands to show thumbnails of your Desktops. To add another Desktop, click on the “+” icon on the right side of the bar.Once you’ve created more Desktops, you can move app and Finder windows below the bar to specific Desktops, making your workspace much more organized. For example, I usually have two Desktops, one with the apps for writing Macworld articles, and a second one with just email and Slack. Sometimes I launch a third Desktop for image, video, or audio editing.
To move between Desktops on a Magic Trackpad, swipe with three or four fingers left or right. On a keyboard, press Control+Left or Right Arrow.
3.
Customize what you see
Customize the Finder in Finder > Settings.
Foundry
Because a lot of users don’t think of the Finder as an app, they don’t realize that the Finder has Settings. When in the Finder, click on Finder in the menu bar, and you’ll find Settings. This is where you can make the most adjustments to customize the Finder to your preferences. As you can see above, I very rarely use Tags, Music, or Movies, so I have unchecked them to hide them in the Sidebar section.
4.
Right-click to see more
RIght-click on the FInder icon in the Dock to see more options.
Foundry
Clicking on the Finder icon in the Dock brings the Finder to the forefront and opens the Finder Window. However, if you right-click, you’ll find more options available to help navigate your Mac. It’s a useful tool for those times when the Desktop clutter is a total mess.
5.
Take Action
Finder Quick Actions allows access to Finder extensions that can be installed by the apps you use.
Foundry
When right-clicking a file in the Finder, the contextual menu that appears offers several options for you. One of them is Quick Actions, which are tasks you can do based on the file type. For example, Quick Actions for a graphic file may have options for Rotate Left, Covert Image, Remove Background, and more, without the need of opening an app.
Not every file type has Quick Actions available. There isn’t a place like the App Store where you can get more Quick Actions. These are provided by the apps you install on your Mac. For example, if you install Pixelmator Pro, it offers its own Remove Background Quick Action.
You can turn on/off Quick Action functions in System Settings > General; scroll down to the Extensions section, find the Finder section, and click its “i” icon. A list of Quick Actions will appear with switches to turn them on/off.
6.
Add a widget
Desktop widgets provide instant access to information you constantly want.Foundry
About two years ago, Apple introduced macOS Desktop widgets. This is a feature brought over from iOS and it allows you to put app widgets that stay on your Desktop for quick access. For example, the Calendar widget shows your daily schedule without needing to open the Calendar app, which you can open by clicking the widget.
Widgets that are made for iOS are brought over the macOS, so the available widgets you have are based on what iPhone and iPad apps you have. You can see a list of widgets by right-clicking any space on the Desktop and selecting Edit Widgets in the contextual menu. They can live on your Desktop or in the notification sidebar.
7.
Show the Clipboard
What’s in your Clipboard? Find out through this option.
Foundry
What would happen to our productivity if cut/copy and paste disappeared? It’s a standard function on any computing device, but have you ever wondered what exactly is currently in the clipboard?
You can find out in the Finder. Go to Edit > Show Clipboard, and a window pops up to display the clipboard contents. Most of the time, you can see what’s in there–if it’s text, you’ll see it, if it’s an image, it’s there. Some items don’t appear, for example, when I copy a video clip in iMovie, the Clipboard is blank and the identifier at the bottom says Clipboard contents: unknown. That doesn’t mean there’s nothing in the Clipboard, it just means it’s not being displayed.
This probably isn’t a feature you’ll use often, but it might be a good idea to check your Clipboard to make sure any private information isn’t in there. However, there isn’t an easy way to clear the clipboard. You can copy blank space from a document, and it will look like there’s nothing in your Clipboard, or copy something of no value.
You can erase the Clipboard in the Terminal by entering pbcopy < /dev/null and then pressing Return. Also, when you restart your Mac, the Clipboard gets wiped out every time. Third-party Clipboard utilities allow you to manage Clipboard contents and also have other features like multiple clipboards and the ability to save clipboards after the Mac restarts.
8.
Rearrange the sidebar
Rearrage the Sidebar by clicking and dragging.
Foundry
In Finder Windows, the Sidebar lists areas where you will access files. By default, they’re listed alphabetically within their sections, but you can rearrange them by clicking and dragging. You can even move the sections; if you want to move, say, the iCloud section to the bottom, just click the iCloud header and drag it to the bottom.
You can determine what items appear in the Finder Settings under Sidebar. For example, if you don’t want AirDrop in the list, you can go into Settings and uncheck the AirDrop box.
9.
Supercharge your folders
Set up scripts that can apply automated actions to a folder.
Foundry
There’s a little-used feature in the Finder called Folder Actions Setup and what it does is that it performs actions on files within the folder. For example, you can set up a Folder so that when you place images into it, the images are automatically converted to jpegs.
To use Folder Action Setup, right-click on a folder and select Folder Action Setup from the pop-up menu. macOS includes a few actions you can use, most of them for use with images, such as format conversion, rotation, or flipping. There is one action that makes an alert appear whenever a folder has a new file added to it.
These actions are AppleScripts; a script is a method of automating a set of tasks. You can create your own scripts and use them in Folder Action Setup if the ones in macOS aren’t what you need. Check out our guide to using Folder Action Setup.
10.
Use an iPhone or iPad to take photos, scan, or sketch
Use your iPhone to take a picture that is saved directly to the macOS Desktop.
Macworld
Right-click anywhere on the Desktop, and in the pop-up menu, select Import from iPhone or iPad. A pop-up appears that offers options to Take Photo, Scan Documents, or Add Sketch. Pick one and the Camera app opens for photos or scans, or a sketch app opens. Anything you create with those apps is saved to the Mac’s Desktop.
#master #macos #finder #with #these
·19 Просмотры