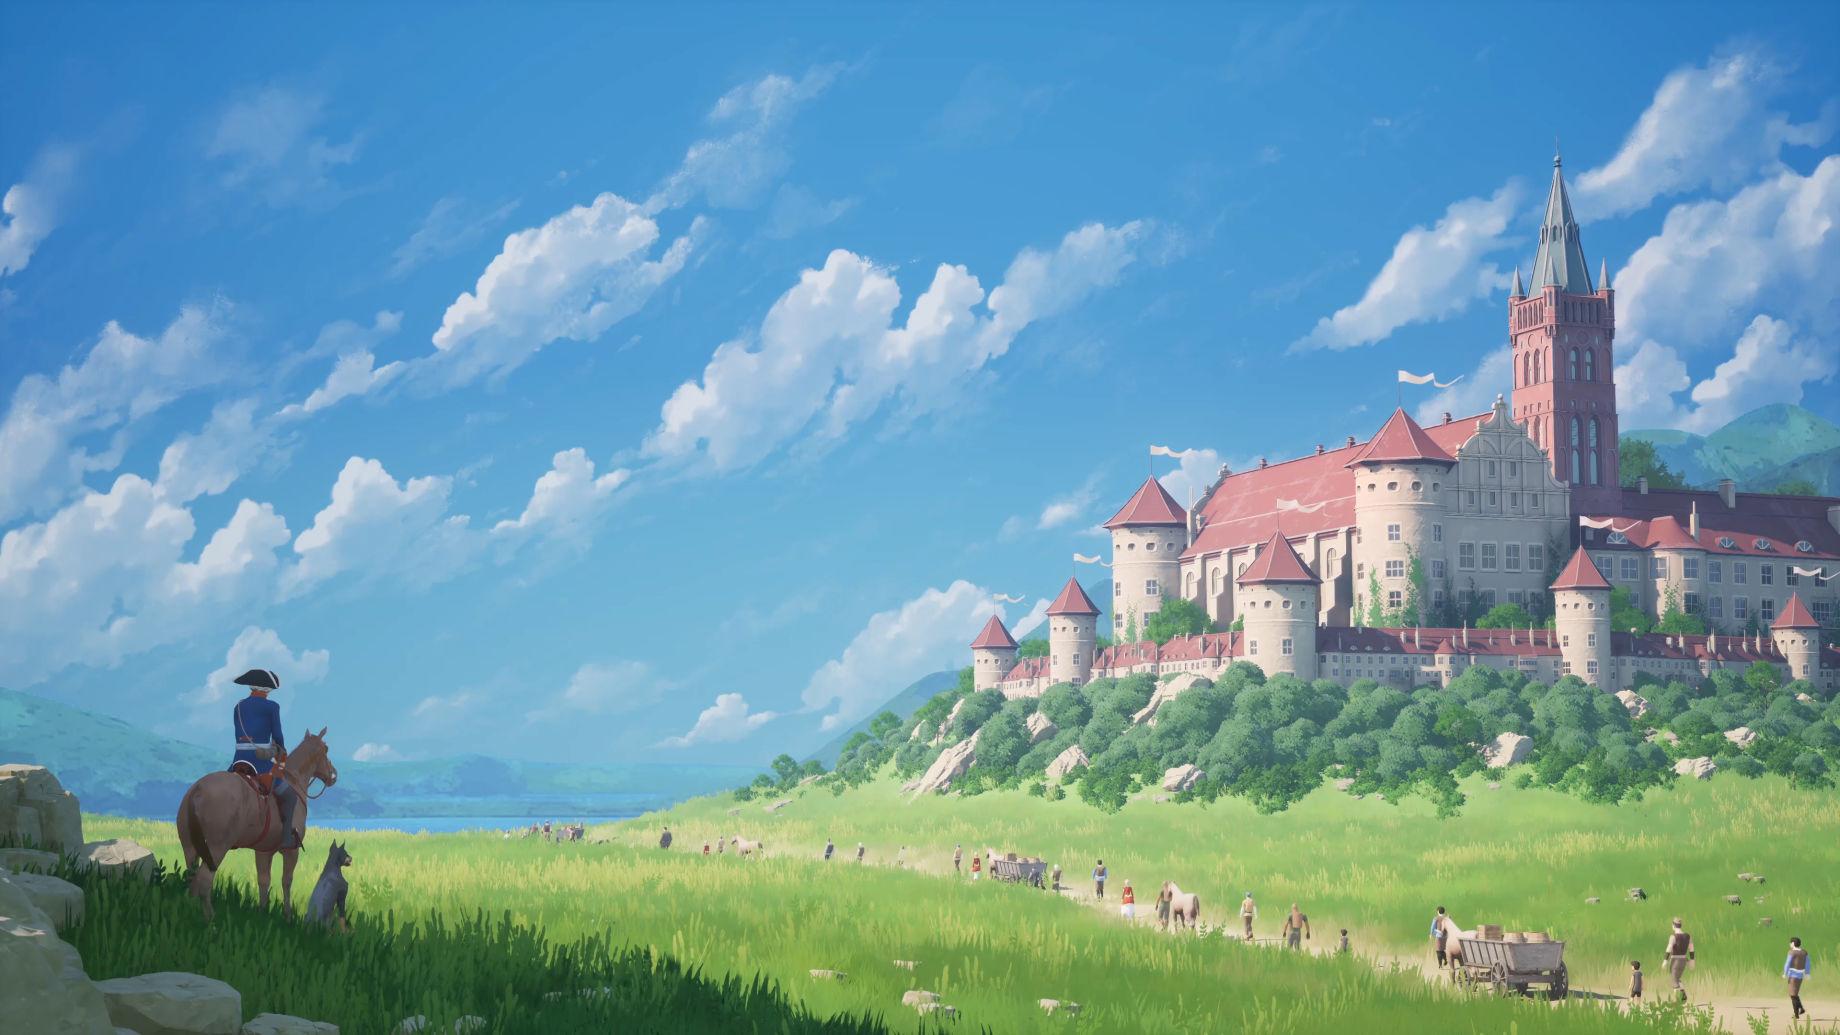
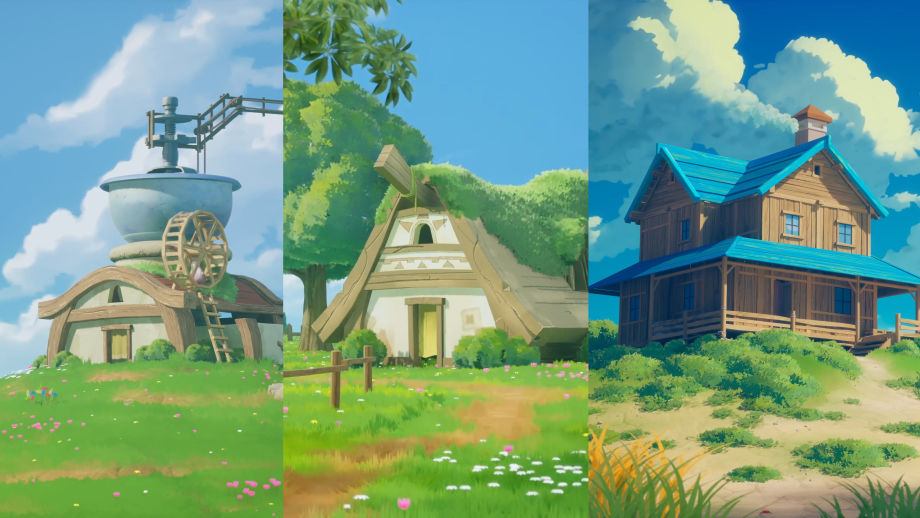
Introduction

Hi there, 80 Level readers. My name is Trung Duy Nguyen. I'm a 3D Artist from Vietnam with over 12 years of experience in the field. I've been based in Saigon throughout my career, and I started my personal 3D art journey in 2020. After a while, I found my niche in creating anime-inspired, cel-shaded art that imitates the look and feel of an animated film. I thought it was a very interesting approach that hasn't really been done by a majority of artists, even though it is quite popular nowadays.

I began my journey as a 3D Artist in 2012. Over the years, I worked as an outsourcing 3D Artist, participating in various games and numerous movie projects. This exposure helped me develop both technical and artistic skills relevant to games and movies. I gained intermediate experience with game engines such as Unreal Engine, Unity, Frostbite, and others. The technical knowledge I gained from this early exposure, although small, has propelled me a long way.

Today, I want to walk you through some of the interesting processes that led me to create this 3D castle scene. I re-imagined the Königsberg Castle in its golden days. I want to show you the steps I took, some of the difficulties I encountered while making this art, and the lessons I learned from them.

The reason behind this art is simple; it's a 3D art contest theme. The contest is organized between myself and my friends, who are also 3D Artists. We want to practice making 3D art, so we hold a contest each month. Last month's theme was, as you might have guessed, castles. Of course, this isn't the first contest we've held; there have been many others with more or less random themes. You can find them on all my social platforms. Unreal Engine isn't the only 3D software I use to create art. I've also used Blender, Unity, Maya, and others. It's always fun to try new things.

The Artwork

The Concept

The reason I chose to create the Königsberg Castle is simple: It's a free-to-download asset on Sketchfab. Initially, I intended to create an ordinary, random castle, as the theme was "castle". However, while gathering references, I stumbled across some Wikipedia articles and became immersed in them. After reading more about the castle's history, I found it so fascinating that I decided to make it authentic. I felt it would be an insult not to do so.

Normally, I would create a concept from scratch, gathering reference images from Pinterest, creating a mockup concept in Photoshop, and then replicating that exactly in 3D software (later, I'll show you a very cool trick to make a 3D scene look exactly like the concept, down to the smallest details). But I saw a cool image on the internet that I quite liked. The composition and layout were simple: a view of a castle in the distance, lying on a field of grass, under a sky full of clouds. It was simple yet conveyed a sense of emptiness, but also full of freedom. I decided to follow that direction. I later developed it more in the 3D scene, so it would be more interesting to look at. This change in process also occurred while I was reading about the castle's history.

The Composition

I wanted the two key focal elements of this artwork to be the castle and the king. All the other elements are minor details that should only be noticed if looked at closely. I believe that the simpler the composition, the easier it is for the viewer to explore. That's why I usually include very few focal elements in my art.

Although this artwork is about the castle, I wanted the starting point to be the main character, Frederick the Great. It is easier to start looking at something small and standout, which is why I put him in the shadow, so his silhouette is the first thing you'll see. Also, people normally start looking at things that are closer first, so placing the king near the camera will help draw attention.

The second focal element is the castle. I like putting large objects that have a lot of details at a far distance, you can cheat your way into making it look good if all the details are far away. If you put objects closer, you will have to create intricate models and textures for them, which is just a lot of work to make something look nice.

The other technique of composition I used in this artwork involves flowing lines. If you notice, you'll see that there are flowing lines leading to the main character. These lines help guide the viewer's gaze in the right direction. They also provide a place for the viewer to "rest" their eyes when they don't know where to look next.

Color-wise, I prefer green and blue for daylight lighting. It's elementary, yet peaceful to look at.

The Initial Set Up

Upon opening Unreal Engine 5, I import the main concept into the scene camera. This is a trick I thought of while working on past projects. Whenever I was trying to match all the details in the scene to the concept, I repeatedly had to render an image and put it into Photoshop along with the concept to compare. After dozens, possibly hundreds, of times doing that, I would become so exhausted. So, I tried to figure out an easier and faster way. This is what I came up with, making it effortless and reducing the amount of work.

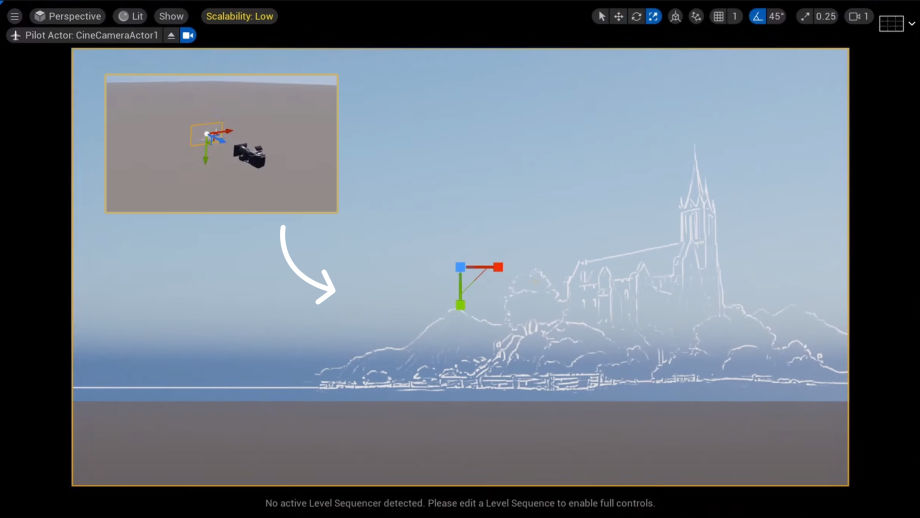
Attaching a sketch of the concept to the camera is a time saver

After deciding the camera angle, which is not permanent by the way, I would lay out some boxes to match the guide image already in the camera. There are two key points that you need to remember to make this work:

  • You need to have a scaleman in the scene. A scaleman is a 3D model of a human/character that you want to use as an initial measurement. All other 3D objects or additional 3D characters will be scaled to match the scaleman. Unreal Engine has a built-in mannequin that is easy to use; you can also play around with your scene using this mannequin system.
  • Make sure you are using correctly scaled objects. For example, the boxes that represent a building should be about 30 meters in height, not 30 cm or 300 m.

Both of these measurements will ensure that you have a good starting point for your 3D scene. Doing this will make other elements that depend on the size and scale of the object/scene run smoothly. Physics, VFX, simulations, lighting, and sometimes even animation are all very dependent on size and scaling. You don't have to be exact, just remember to have it at a reasonable size that could be possible in real life. Back when I first started doing this, I would be so confused as to why some of the characters imported would be the size of a kaiju, it turns out my scene was so tiny to the point that everything could be fitted into your palm.

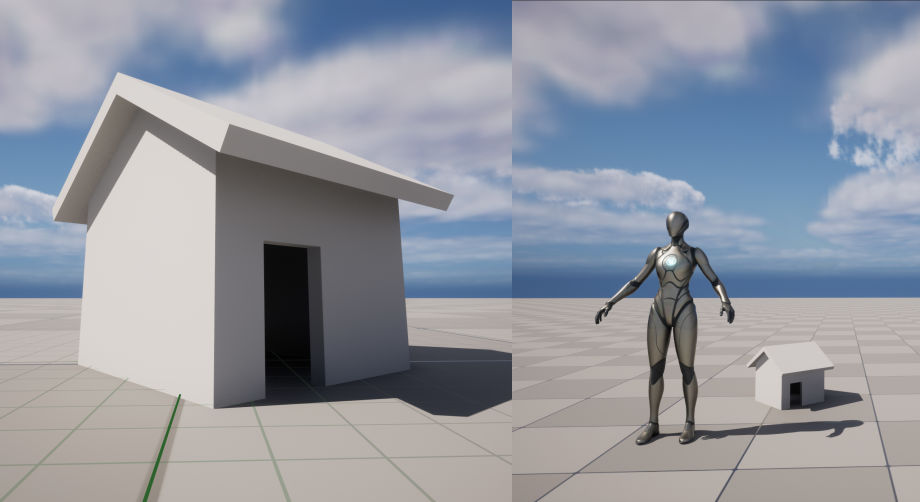
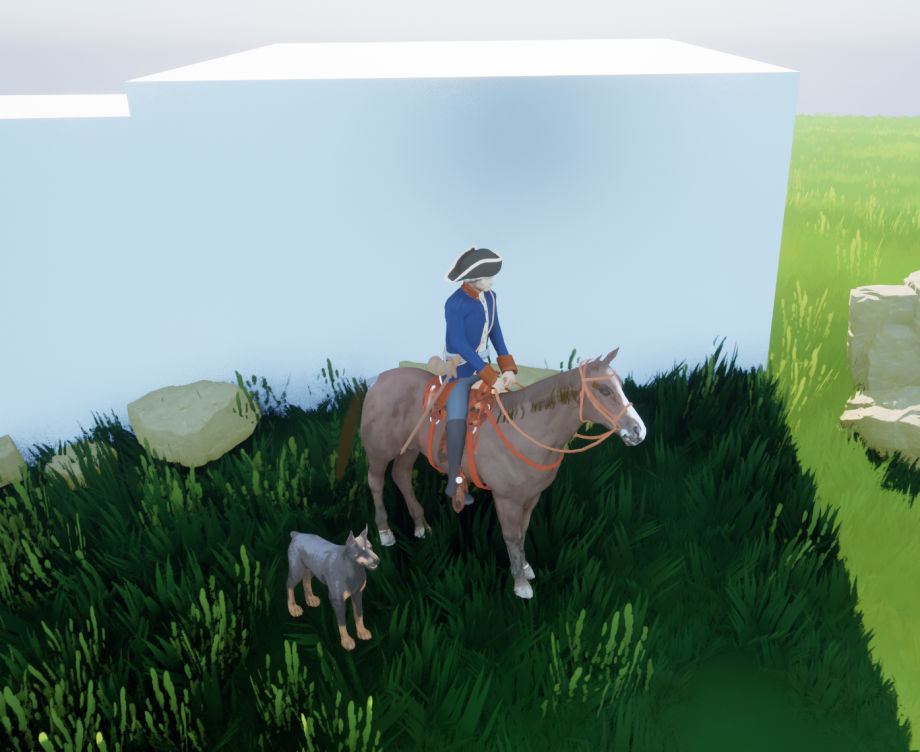
Things might look fine until you compare it with the scaleman

After setting up the camera placement, scene size, and scaling, along with all the placements using boxes and scaleman, I now know exactly where the castle will be placed on the scene, and how large the landscape needs to be. I then imported the 3D model of Königsberg castle, which is already amazingly premade on Sketchfab, and used it as the main piece of art. I scaled it up/down to match the blockouts, then placed it into position. Props to the original creator of the castle for making such an accurate and detailed model.

The Castle

As I mentioned, the castle 3D model is a free-to-download asset on Sketchfab from Kisielev Mikhail. I'm all about speed, so downloading assets is a great solution. Whenever I start an artwork, the first place I go is always Sketchfab. They have a lot of great 3D assets there, and sometimes you can buy them if the price is right. This way, you can save a lot of time and support another fellow 3D Artist.

I then import everything into Substance 3D Painter to create the texture. The texturing process is very straightforward, and Substance 3D Painter has all the handy features that you need. My favorite way of utilizing Substance 3D Painter for creating textures super quickly is using the texture baking feature, or as others refer to it, Bake Mesh Map. This function allows you to transfer geometry information into texture, which will help you save a lot of time instead of painting all the details manually, which would take days.

The Bake Mesh Map function creates many types of results. If you know your way around it, it will help create a lot of amazing detail. For this castle, I only need 2 Maps: Ambient Occlusion and Curvature. With some tinkering, these 2 Maps will allow you to produce dirt and edge wear detail that looks incredibly beautiful. Of course, you will have to do some touch-ups or hand painting, but the Bake Mesh Map will always help you 80% - 90% of the way.

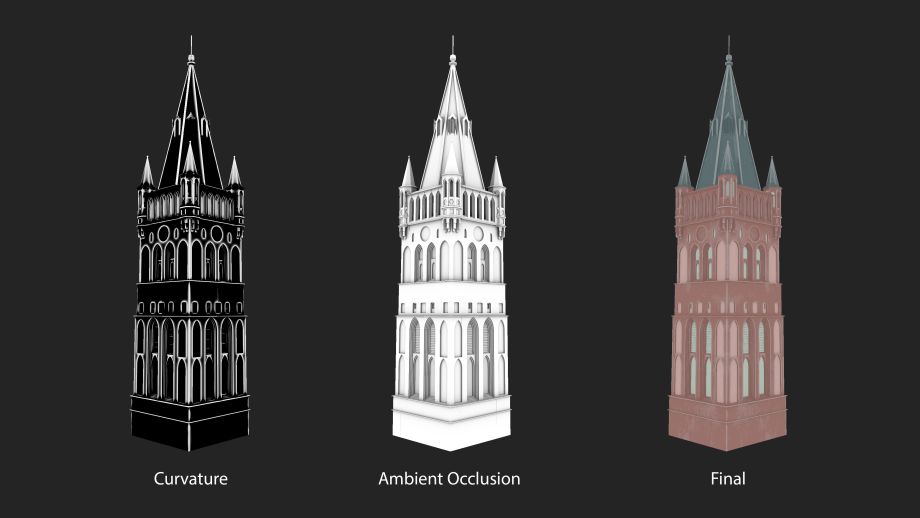
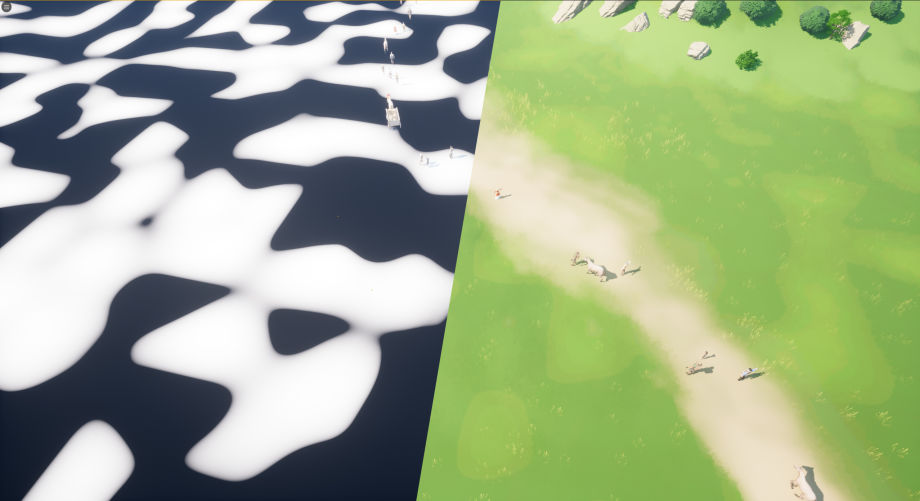
Control vertex displacement using a gradient texture

I also added many other minor details. For the wall, I added a very subtle Normal Map for additional bumpiness. For the ivy vine crawling on the wall, I used an alpha texture of an ivy plant applied on a plane. Flags are also a distinctive visual of castles, so I added some flags and made them wave by manipulating the vertex displacement function in the material. Having more subtle details will always help your art achieve a natural look, so remember to spend time on all the little details. It's worth it.

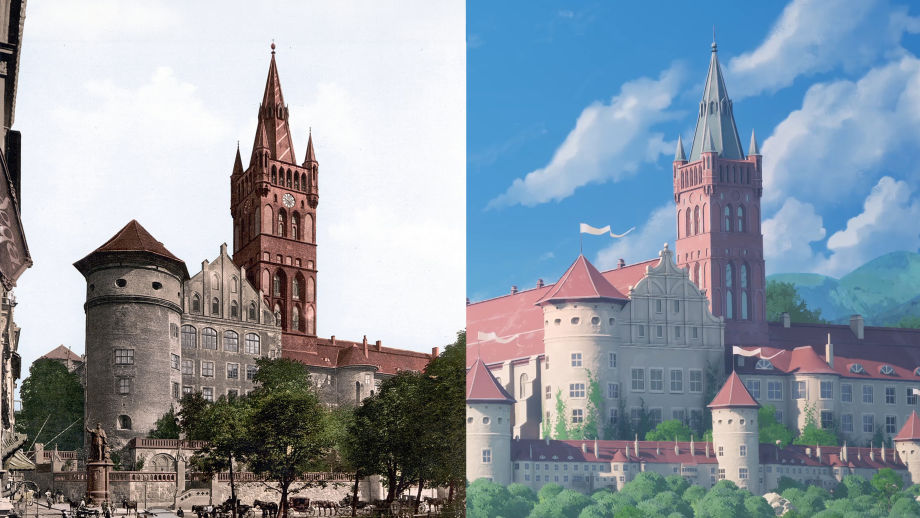
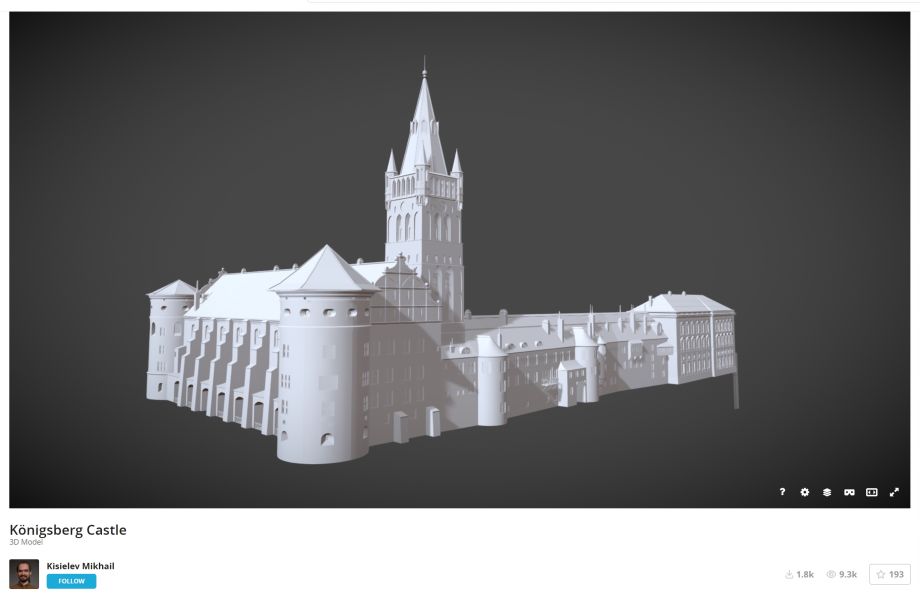
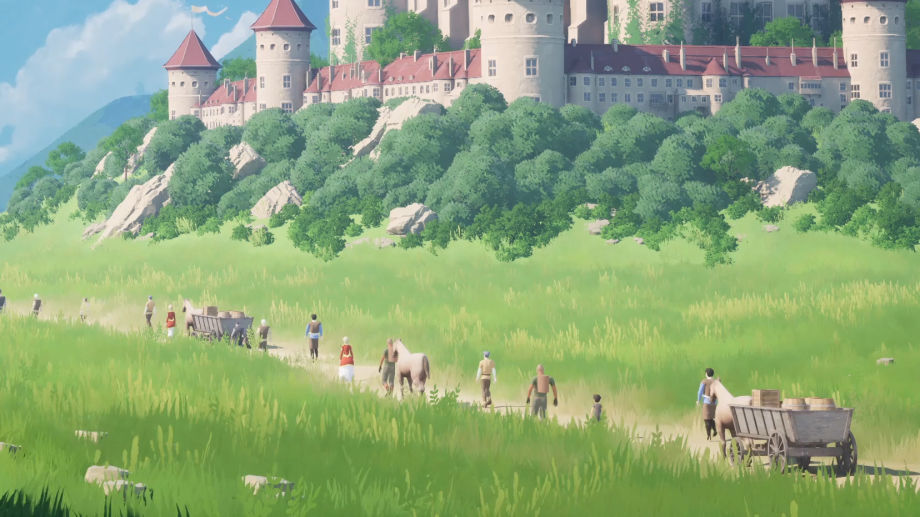
I made sure to arrange the castle direction perfectly so it has the distinctive resemblance of the Königsberg Castle in the reference images

The Characters

Frederick the Great

Frederick the Great is a very important figure in this artwork, in some ways even more so than the castle. There are a lot of reference images of Frederick the Great on the internet; the one I chose depicts him as a friendly soldier.

My first step in making anything is to search for any pre-existing 3D assets. After a brief search, I found a 3D model of a 17th-century British soldier on Sketchfab by Christoffer Eriksson. Using this as a starting point, I can easily create what I need in a fraction of the time. I gave him long, wavy, white hair, a common hairstyle often depicted in 17th-century paintings. For reference, I actually copied Beethoven's hairstyle.

I definitely wanted Frederick to sit on a horse, making him appear more like a leader or a king. After searching Sketchfab, I found a 3D horse asset with an idle animation. This is excellent, as creating animal animation is extremely difficult, so I always appreciate premade 3D assets. The 3D asset didn't include a saddle, so I found a free 3D horse saddle asset and adjusted the model and texture to match the horse.

All that was left to do was combine the three elements. I quickly adjusted the rig so the saddle moved along with the horse animation. After that, I rigged the characters and linked them all together. I also created a simple animation for the King, where he just looks around a bit. Having static elements is a no-no, especially if it's the main feature of an artwork.

Lastly, you'll see a dog standing by the King's side. This detail isn't just for artistic reasons, but also because it's a touching detail I noticed while reading about Frederick's history. In his will, he expressed his wish to be buried next to his greyhounds on the vineyard terrace, a wish that wasn't fulfilled until 1991. I found this information both somewhat sad and heartwarming. That's why I added a dog beside him. Additionally, this is a 3D asset with animation that I purchased.

The Pedestrians

The crowd of pedestrians on the road was something I spent a lot of time on. I always like adding many people to my art; it's an element I use to bring the art to life. However, a crowd of people requires a lot of work, including numerous 3D models, textures, and animations. To optimize speed, I have to employ many tricks.

The first problem of creating numerous 3D models & textures is easily solved by downloading 3D assets. There are many 3D models of medieval characters online, and it's relatively easy to find ones that are free to download. These characters are really far away, so they don't need to be high quality, just a basic human shape with basic color applied.

Animation is a real issue here if you do everything manually. Free characters usually don't come with animation, and if they do, they usually don't match. If you rig, skin, and animate each one, it'll take ages. My solution is to use an auto rig and skin tool. There are a few options out there, but the one I went with is AccuRIG. They do the work very well, especially if your character is humanoid.

I imported each character into AccuRIG and then placed the joint positions on each of them, which is usually quite quick. After that, it'll auto-skin the model for you, the result is quite nice. Lastly, you can apply the pre-made walking animation. Repeat that about 12 times and you have got yourself a set of 12 walking characters for the entire crowd of people. 12 times is still a lot of work and it took me a day to gather all models and finish, but that is still a lot better than the manual method, which could take weeks. And to fill the road, I had to duplicate each of them and spread them out.

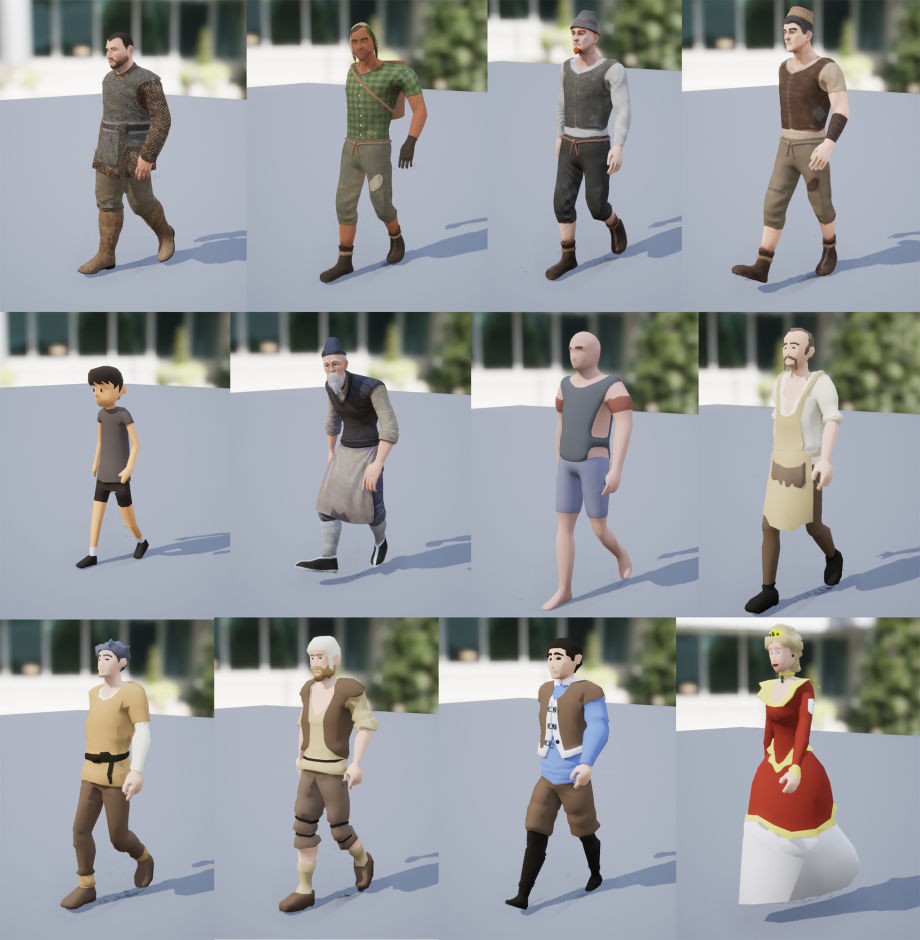
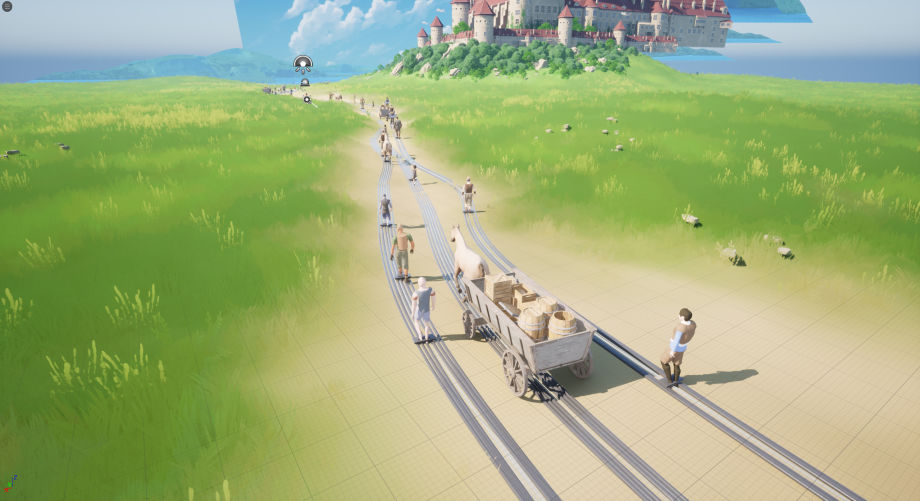
All 12 characters have the same walking animation

I imported everything into Unreal Engine and created a walking path for each character using a feature in UE5 called Camera Rig Rail. This tool is designed to control the camera's moving path, but it also works well for characters. Each character needs their own walking path so I can control the speed and placement of each one. There are 42 characters walking on the road, so I had to do this 42 times.

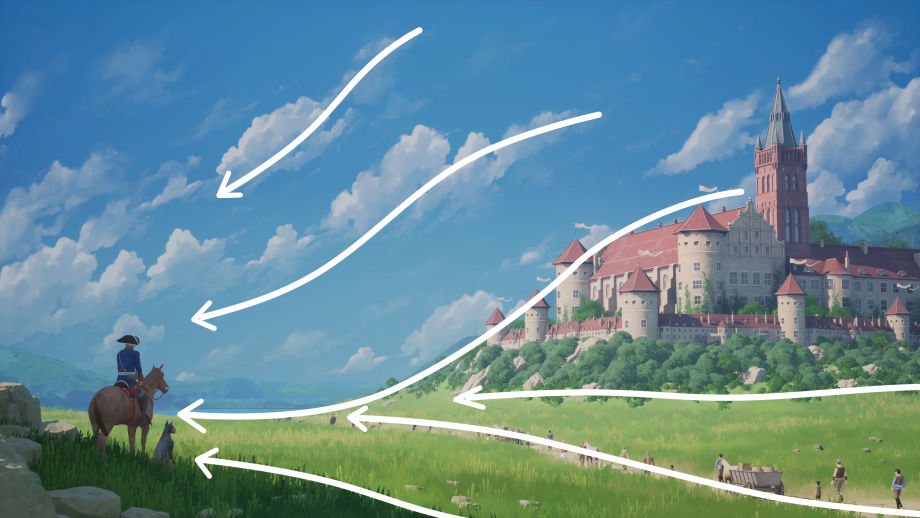
Walking path is controlled by Camera Rail Rig

The Environment

Grass

Grass is my favorite element in all of my art. There's something about grass that draws me in. I believe an endless field of grass represents one thing: true freedom. In many of the Studio Ghibli movies, which I adore, you will see a lot of grass and nature. A few movies that come to mind are The Wind Rises, My Neighbor Totoro, and Kiki's Delivery Service. That's why I incorporate grass into many of my pieces.

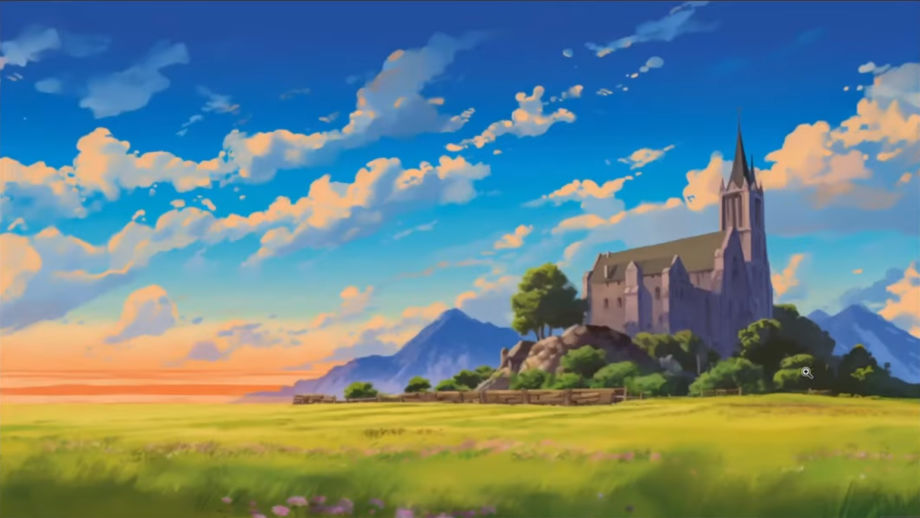
My previous artworks

Having grass in a 3D scene can be somewhat demanding on performance. Fortunately, Unreal Engine 5 has an amazing and powerful landscape system that allows you to add a lot of grass (or any other foliage) to your scene without turning your PC into a room heater. That being said, you are still going to need a somewhat capable system. I use many 3D software programs to create art, but when it comes to grass and foliage, I always opt for Unreal Engine, as it is just easier to work with.

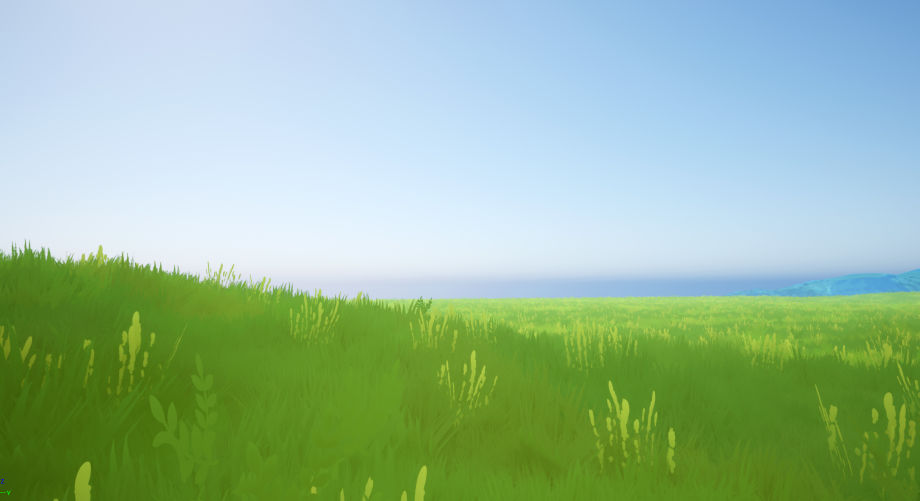
Unreal Engine Landscape system

Setting up grass, beautiful grass, is quite some work. But when you successfully create a grass system along with its material, you will be set for life (actually only for quite some time, but it's cooler saying this). Since this is not a tutorial, I will not bore you with the details, but I will at least point you in the right direction. You will need:

  • To get into the Landscape system in Unreal Engine 5 (or any scattering system if you're on other 3D software). This will be used to place thousands of grass 3D models onto the ground.
  • To learn about using the Runtime Virtual Texture feature in UE5 to control how grass is textured. Basically, it captures an image from your scene (in this case, it is the ground that the grass is grown on), and then projects that as a texture on your grass from the top down. Imagine having a camera point directly at the ground to take a picture, then use a projector to project that exact picture onto the grass.
  • In anime, foliage is painted. Therefore, when dealing with 2D-style foliage in a 3D environment, you'll need to learn how to control the visuals of the foliage model so it appears 2D. You can either bake the vertex normal to make it look flat, or you can apply a shader technique called "quadmesh to billboard". Later, I'll explain what it is.

In this artwork, after I created a landscape system, I sculpted the ground so it has various hills of all sizes and shapes. I then used the landscape system to generate all the grass in the scene. Notice how the grass has some color variation? That was controlled in the grass material by using a Noise Map.

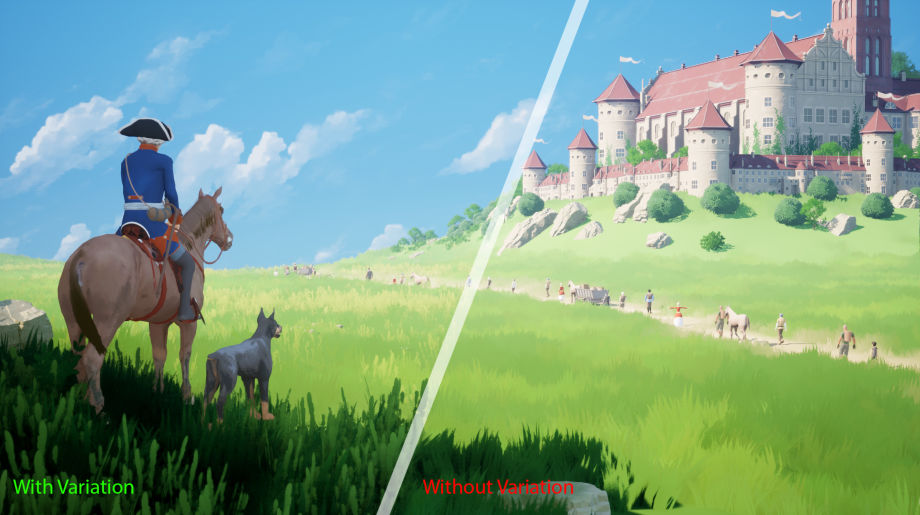
Variation in grass color is controlled using a Noise Map

I also added some wind waves, which is the final detail that will make your grass truly come alive. Again, you will need to know how to do this in the material editor. Essentially, you will "animate" the grass vertex position by controlling the vertex displacement. Unreal Engine 5's material allows you to do this quite easily.

If you look closely, you'll also see that there are flowers and small plants in the grass. The technique to create them is almost the same as you would use with grass; you just use different textures and alphas. Mixing variants of plants and grass is a very easy way to make a scene look natural and rich in detail. The trick is to mix them unevenly; you don't want them to blend too well. They must be distinctive and stand out.

Foliage & Others

Foliage, specifically tree, in my opinion, is the single trickiest element to do in 3D art, that is if you want to create an anime look, I will explain why.

The most common way to create foliage in 3D is using cards with alpha textures, or if you are feeling fancy, having the leaves and branches 3D modeled, as it is in real life. Tree foliage in anime is painted on a canvas, meaning it is 2D, so an ordinary 3D model would not work. If you want your 3D foliage to look 2D, you have to remove all the elements that reveal they are 3D models. There are a lot of ways to make that happen, but the most common solution is called "quadmesh to billboard".

This shader help pointing all the polygon faces toward camera

Essentially, this technique, created using a shader, allows all the cards of the foliage to face the camera. This makes 3D foliage appear 2D. Combined with some good alpha texture, you can create amazing anime foliage.

In this artwork, I applied this knowledge to the shrubs surrounding the castle. To replicate brush strokes, I made the large shrubs big and rounded, while the young ones at the edge appeared distorted and fuzzy as if they were painted on a canvas. It's very important to maintain a density of shrubs that is not too close or packed, as that would make the result noisy. In my experience, you want to make it really defined in shape and contrast in lighting, and the best way to achieve that is through a good layout along with an easy-to-control shader.

The rocks were also a 3D asset package. I wanted the rocks to have as much detail as possible, so I went with a ZBrush 3D sculpted asset. To be used in Unreal Engine, the high-poly rock mesh was decimated in ZBrush so the poly count could be manageable. They were then placed manually in various places in the scene.

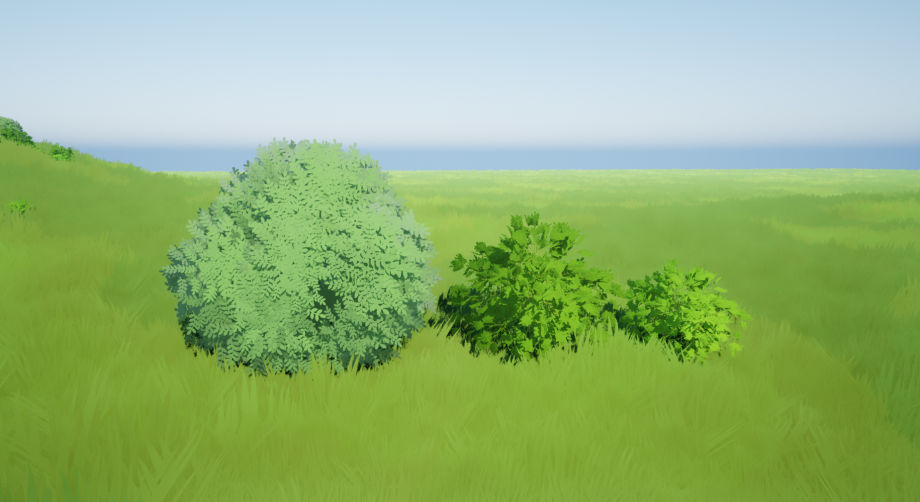
Large round shrubs mix with fuzzy shrubs

Lighting & Rendering

There is a lot of technique involved when it comes to lighting your scene. However, if it's an outdoor setup, it should be very simple - just one directional light and that's it. The rest should be handled by the material. That's why, if you're a beginner and want to learn 3D rendering, I always recommend working on an outdoor scene first, preferably during the daytime.

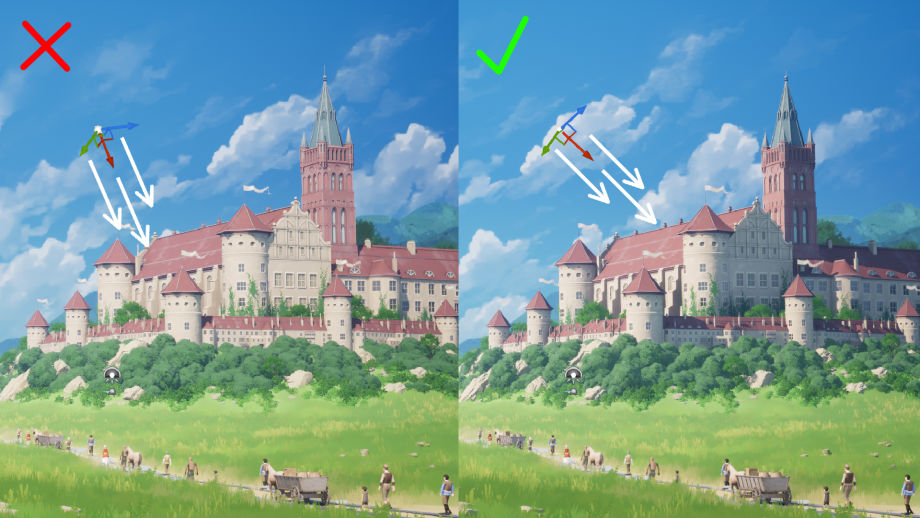
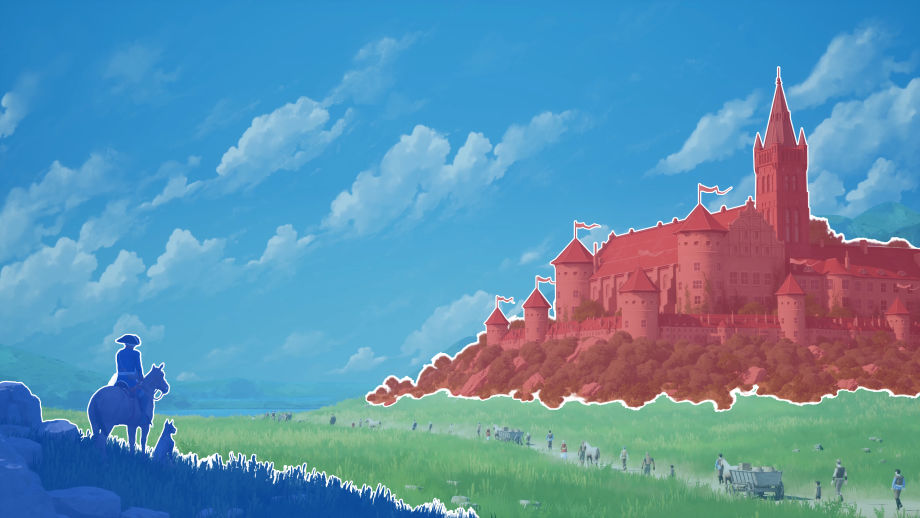
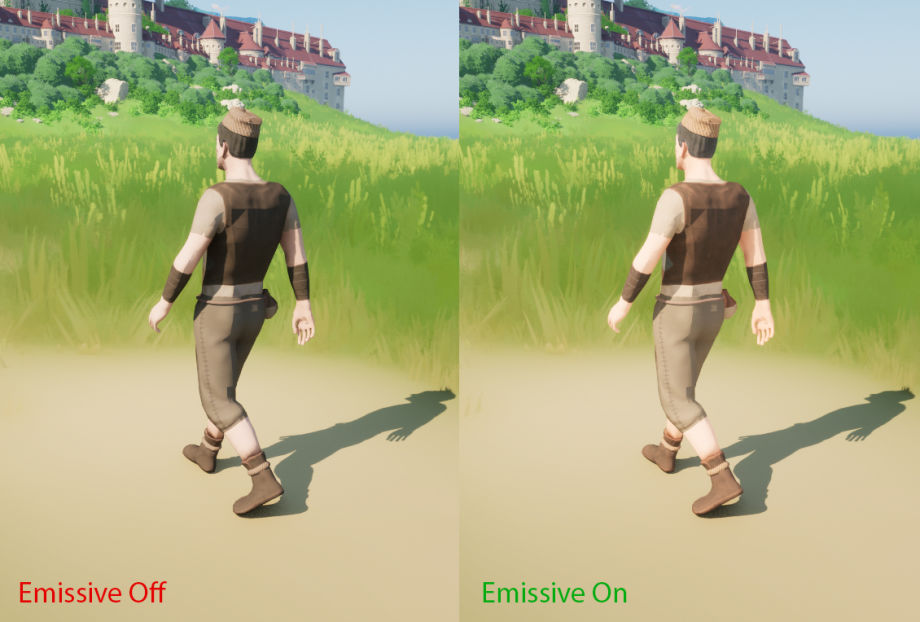
Side to side light direction usually works very well

In this artwork, I also had a directional light coming from the left. Notice that the direction of the light, i.e., the sun, is very important. The sun should shine in a direction that makes it easy to create a cinematic shot. The sun angle I usually go with is from side to side. This angle allows your objects in the scene to have a balanced amount of highlight and shadow. If you notice, there are clouds and mountains in the background. These are hand-painted, as I wanted to imitate a hand-painted look. Also, the shading of the background image must match the sun's direction.

There are tricks to enhance the anime look in a 3D scene. You can create a cel shader and use it to create a stylized look, or you can use a post-process filter. But in this artwork, since everything is so far away, I can just get away with adding a subtle emissive value in the material to imitate the look of old-school anime. In the old days, anime was made by hand-painting pictures on transparent celluloid sheets, which were then scanned to create anime frames. Because of this process, old-school anime seldom achieved a good black color value; they were mostly gray. Adding an emissive value to the material imitates this feature. If you are interested in creating Ghibli-inspired art, then you should definitely study how color and light are used in Ghibli movies.

When it comes to rendering, Unreal Engine 5 does an excellent job of speeding up your process. Rendering this artwork in 4K only took me a few minutes. Anime-type artworks usually don't require extreme fine-tuning render settings, unless they contain a lot of VFX features or complicated animations that require motion blur. You can achieve beautiful results with just the default settings.

Adding post effects is crucial to enhancing the final appearance of your art. Imagine a photographer retouching their photo by adjusting color, lighting, etc. This step is important as it's easy to do and significantly improves the rendering. In Unreal Engine, you can add post effects using a Post Process Volume, in-camera settings, or with a video editor. There are some common techniques that I like to use every time I finalize an artwork.

  • Vignette: Add a dark edge around the frame. This will emphasize the center of the image.
  • Opposite lighting: Add a bright area and a dark area on the opposite side of the frame. This will help indicate the light source better, making the image have better lighting contrast.
  • Fog: Having fog can really help indicate a sense of distance.

Challenges & Lessons

This is the first time I've worked on a large scene, and I had a lot of trouble using objects that are in the far distance. In Unreal Engine, if objects are too far away from the camera, things might not work as you expect them to. For example, shadows might disappear in the far distance to increase performance, objects might start flickering... these are all technical issues that require some tinkering.

The sky texture is also challenging for me. I hand-painted the sky, but that is a skill in which I lack confidence. The result is quite nice, but I think it could be significantly improved with time.


The most challenging aspect of this artwork is the amount of work required for the crowd. The number of character models and textures that need to have matching walking animations is staggering. Also, deciding each character's position to create a good image composition took a lot of time.

Every artwork I create comes with a set of challenges of its own, and this one is no exception. This artwork is far from perfect, and so will be the ones in the future, but I'm eager to make mistakes and learn from them. I believe this is a good mindset to have when creating art.

Lastly, I want to mention that since I started creating art in 2020, I encountered many hiccups along the way, and I expect to face even more in the future. If you want to create art and embark on a journey of your own, don't be afraid to learn and make mistakes. It's a path of knowledge that I think all artists should try. Everyone has their own strengths and weaknesses. Learning how to utilize and improve your abilities is what makes an artist better.

Good luck to you and have a good day