


0 Yorumlar
0 hisse senetleri
52 Views

Rehber
Rehber
-
Please log in to like, share and comment!
-
 SHAIROZSOHAIL.MEDIUM.COMI Can’t Get No (Boolean) SatisfactionI Can’t Get No (Boolean) Satisfaction21 min read·Just now--A deep dive into satisfiability with PythonThese days, there is a lot of interest in math problems that are “easy to state, but hard to solve.” This is natural — such problems can be approached without years of specialized education and gently introduce newcomers to the rich complexity that can arise from very simple structures. However, once the initial curiosity wears off, people usually start with the obvious question — “how is this applicable?”Enter boolean satisfiability (SAT for short, pronounced as one word) — a problem that is simultaneously easy to state, hard to solve, and enormously applicable. In fact, the problem is so applicable that it lies at the heart of some of our biggest questions in mathematics, computer science, and philosophy. A world where someone has come up with a way to (efficiently) solve big SAT problems would be a very different world indeed.Not only do SAT problems encode many difficult problems from seemingly unrelated domains (such as Sudoku, or vehicle routing, or protein folding), but they also seem to demonstrate some of the perceived limitations of computation — specifically in how efficiently a problem can be solved. SAT problems have led many researchers to believe that these limits are somehow fundamental — that certain problems have a lower bound on how difficult they are, no matter how clever we get.In this article, we’re going to demonstrate why SAT matters and provide a (technical) deep dive into the world of SAT generators and solvers using the Python programming language.SAT Problems in DisguiseA number of problems in the real world are, at their core, constraint-satisfaction problems (CSPs). Often there are many possible candidates, and a handful of difficult constraints that narrow down which of these candidates are viable. As this ratio increases (the number of potential candidates vs. the candidates satisfying the constraints), these problems become very difficult.In some situations, we can easily reduce the search space to look through only a small set of candidates. Think of assigning people jobs in a factory — only people with a driver’s license could be transporters. At a football try out, it only makes sense to consider fast runners for the wide receiver position. But without such qualifying information, the assignment task becomes an arduous game of trial and error. This “qualifying information” is usually in the form of some easy-to-compute rules (i.e yes/no has a driver’s license, how fast can you run a quarter mile etc.). Sometimes we find such rules in numerical problems, but often times the problem setting just seems too general for such rules to exist.Most problems of this kind (CSPs) can be encoded into SAT problems. The number of CSPs in the real world is immense, here is a sampling of some personal favorites:Sorting a disordered stack of pancakes so that a spatula can be inserted at any point in the stack and used to flip all pancakes above it (Bill Gates has worked on this problem!)Finding the remaining mines in a game of Minesweeper that is partially (>25%) completeBitcoin miningPlaying a perfect game of Super Mario BrosOf course, these problems have something else in common besides just an ability to be stated in terms of a SAT problem, something we will discuss more in the section on P vs. NP. For now, I hope the title has at least been partially justified.Now let’s lift the veil on what this mysterious, all-encompassing SAT problem actually looks like.Boolean Equations and SatisfiabilityBoolean variablesBefore having a reasonable discussion of Boolean equations, we must first define Boolean variables. Many kinds of variables can exist in mathematics, from those taking fixed (but unknown) values in the real or complex plane, to those taking on values that are themselves functions, or sets, or even probability distributions. However, boolean variables can only take on two values: true, or false. That’s it. Every time a boolean variable is referenced here (with an uppercase letter), think of it taking a fixed, but unknown, value of 1 (true) or 0 (false).Boolean OperatorsOnce we have variables, we need to define a set of operators between those variables and generate a relation table to show what the outcomes of those operators would be. Instead of the usual summation and multiplication operators we have in algebra, we instead consider the “and”, “or”, and “xor” operators. Unlike with real-valued variables (where the possible values they can take on is infinite), we can write out the entire table of outcomes for these operations on boolean variables:Boolean EquationsNow that we have variables and operators, we can move on to some additional terminology. Consider two boolean variables (A,B) , joined by an “or” operator, and the result joined by an “and” operator against a third variable C:(A or B) and CThis entire statement is called a conjunction, since the statements on the left and right are joined by an “and” operator.We can modify the above by switching the “and” to an “or” then adding an “and” statement to the C variable (and taking care to place parenthesis in the right place). Now, the statement on the right is called a “disjunction” since it uses an “or” operator, and the statement on the left is also a “disjunction.” The equation as a whole is considered a “conjunction” since it is joined by an “and”:(A and B) or (C and not B)Just remember, “and” = conjunction and “or” = disjunction.SatisfiabilityThe equation above is satisfied when we pick true/false values for each of the variables (A, B, C) such that the entire statement is true. Let’s take a random guess and see if it works — we will setA = TrueB = FalseC = False.Then we will plug into the above equation and gradually reduce, first taking care of the negation signs, then taking care of the parenthesized statements (using the table above), then dealing with the conjunction.So that assignment doesn’t render the equation True, and doesn’t “satisfy” it. One assignment that does is (A = True, B = False, C = True) — see if you could show (prove) this is the case using the same process as above. An additional bit of definition before we continue, a satisfying assignment of boolean variables is usually called a “model” for the statement.CNF Form and K-SATGiven the wealth of ways to arrange SAT statements, it is useful to consider a standard form to analyze and solve these statements. The CNF (Conjunctive Normal Form) is just the ticket, mostly.In CNF, we have a set of disjunctions (usually on individual lines and with the same number of variables each), all joined as a disjunction. Here’s an example:A set of boolean conjunctions in CNF formThe number of variables that appears in each conjunct is the “K” in K-SAT. So when you see a 3-SAT problem it means that (in CNF form) there is 3 variables that appear in each conjunct.Two things to note before continuing — (1) some authors will use K-SAT to mean that at most K variables that appear in each conjunct and (2) it is important to remember that the “K” refers to the number of variables in each conjunct and NOT the total number of variables, which is often much higher. To specify a full set of boolean equations in CNF form, we can say:“This is a K-SAT instance with N total variables and C conjuncts.”Generating Random K-SAT InstancesThe next step is to get our hands dirty and actually generate some K-SAT problems to solve. For this task, we’re going to be using the Python programming language along with the EasySAT library (written specifically for this article).Once you’re up and running with the library, you can use the following piece of code to generate a random 3-SAT problem with 5 literals/variables and 15 conjuncts:from easysat.generators import KSAT_Generatorksat_generator = KSAT_Generator()ksat_generator.random_kcnf(k = 3, n_literals = 5, n_conjuncts=15)which should return something that looks like the following (your numbers will be different):[[3, -3, -5], [5, 1, 4], [5, -1], [2, -3], [-4, 4], [3, -5], [1, 5, -3], [5, 1], [1, 5, 2], [5, -1], [2, -1], [5, 2], [1, 2, -4], [1, 2], [1, -3, 4]]This is the standard DIMACS form for representing a KSAT problem in CNF form in text format. The format is essentially a list of list, with each integer standing in for a boolean variable and the negative sign used for negation. Notice since we specified a K = 3, there are 3 literals per conjunct (per sublist in DIMACS format). Additionally, there are 5 unique boolean variables and 15 total sublists for the 15 conjuncts we specified.While a 15 conjunct, 5 literal 3SAT problem is not impossible to solve by hand, remember there will be 2⁵ = 32 possibilities to check, and for each check you need to evaluate 15 expressions. This sounds more like a punishment than an exercise in learning. Luckily, we have a computer that excels at brute force tasks like this.Brute Force SolverIn the code below, we generate a 3SAT problem just as above, but then import the brute force solver and use it to quickly solve the instance — the solver provides a True/False response to whether the instance is solvable, a “model” (satisfying assignment of the literals) if it is, and the number of assignments it tried before stopping.from easysat.generators import KSAT_Generatorfrom easysat.solvers import BruteForceksat_generator = KSAT_Generator()sample = ksat_generator.random_kcnf(k = 3, n_literals = 5, n_conjuncts=15)BFS_solver = BruteForce()BFS_solver.append_formula(sample)sat, model, assigns = BFS_solver.solve()print("Satisfiable? ", sat)print("Total assignments tested: ", assigns)print("Satisfying assignment: ", model)Your results may vary, but for this particular run the response was:Satisfiable? TrueTotal assignments tested: 10Satisfying assignment: [-1, 2, 3, -4, 5]Now, try the above code with the following settings for ksat_generator.random_kcnf:k = 3, n_literals = 10, n_conjuncts = 40k = 3, n_literals = 15, n_conjuncts = 60k = 3, n_literals = 20, n_conjuncts = 90You may start to understand that brute force solving doesn’t scale very well (that is, if the last case finishes for you in any reasonable amount of time). We need a more sophisticated solving strategy for even moderatly sized cases.Unit Propagation and Pure LiteralsSuppose that instead of guessing a whole model (that is, a value for each variable), we instead guess the value of a single variable at a time, say A = True.If we do this kind of sequential solving, we need a way to check the guess of our variables one at a time, which we haven’t discussed. However, it’s quite simple. Say we have the following conjunct formula:After setting A = True (the opposite polarity it appears with in the formula), we can eliminate that negative A from the equation since it is no longer an option to satisfy the conjunct with:If we now guess B = False, that also eliminates that from the formula:This leaves us with a single variable to satisfy the formula, C. Since C appears in the negative (and we have already guessed wrong for A and B), we know that the only way to satisfy this conjunct formula would be to set C to False.If we instead set C to True, then we must also eliminate it from this conjunct and this results in an empty clause. An empty clause is bad, because it means either we did something wrong or the formula is unsatisfiable.The technique above is called unit propagation — when there is only one variable left to satisfy a conjunct, we know how we must set it. Thus we usually take care of these first and foremost (of course, if there are two single variable conjuncts with opposite polarity left in a formula, say (NotC) and (C ), we know that the SAT problem is not satisfiable.There is another situation where we essentially get an answer for free. Consider the below formula — what do you notice about the variable D?The variable D only appears with one polarity — negative! This means that we don’t need to think too hard about what polarity D would be in a model, setting it to False eliminates the bottom two clauses with no conflicts. D is known as a pure variable — it’s one that only shows up with one polarity in the whole formula.Using these two concepts, we are now ready to dive into our first “intelligent” algorithm for solving boolean SAT problems: The Davis–Putnam–Logemann–Loveland algorithm.The DPLL SolverWe will start with a pseudo code description of the DPLL solver:For a SAT formula in CNF form:Perform unit propagationPerform pure literal assignmentIf there are no remaining clauses, return SATIf there are empty clauses, return UNSATSelect a variable that remains in the formula, and try setting it to True or False, and repeat if either case allows.From this we can see that the algorithm terminates in one of two cases:(1) There are no remaining clauses (i.e variables have been assigned such that all clauses are satisfied)(2) An empty clause (i.e variables have been assigned that have eliminated all variables from a particular clause) has been created despite trying both True and False for a variable.Furthermore, the last step of our pseudo code algorithm is a little vague. The selection of a variable to try is called a branching variable, and selecting a good one (instead of just a random one from the formula) has been the topic of a substantial body of work in the last three decades.It’s also important to note that in the worst case, DPLL needs the same amount of steps as brute force search (2^n). However, DPLL has the benefit of terminating before BFS on unsatisfiable instances (and often on satisfiable instances as well). We can try pitting them against each other using some random instances:from easysat.solvers import DPLL, BruteForceksat_generator = KSAT_Generator()sample = ksat_generator.random_kcnf(k = 3, n_literals = 5, n_conjuncts=20)print("Brute force---------------------------")bfs = BruteForce()bfs.append_formula(sample)sat,model, assigns = bfs.solve()print("Satisfiable? ", sat)print("Total assignments tested: ", assigns)print("Satisfying assignment: ", model)print()print("DPLL---------------------------")dpll = DPLL()dpll.append_formula(sample)sat,model, assigns = dpll.solve()print("Satisfiable? ", sat)print("Total assignments tested: ", assigns)print("Satisfying assignment: ", model)For my run, this results in the following:Brute force---------------------------Satisfiable? TrueTotal assignments tested: 17Satisfying assignment: {('2', True), ('3', True), ('4', True), ('1', True), ('5', False)}DPLL---------------------------Satisfiable? TrueTotal assignments tested: 7Satisfying assignment: {'1': True, '2': True, '3': True, '5': False, '4': True}While DPLL is often faster than brute force search, this is not always the case, as you can see by re-running the code above several times. To check understanding, it would be useful to think about how DPLL vs BFS behave when you have an unsatisfiable formula with a single conflicting variable.The Annual SAT CompetitionEvery year, a bunch of SAT fanatics get together to host the annual boolean satisfiability competition. Unfortunately named the “SAT competition,” it drives hundreds of submissions from independent researchers and major organizations energized by the prospect of being crowned as having the fastest SAT solver in history. Jokes aside, this title does mean something: SAT solvers are used extensively in industry, and even incremental speed ups can mean millions of dollars.So what kinds of solvers are topping the charts in recent SAT competitions?Here are the all the main track results for 2023:Main track results for SAT Competition 2023Here are the top 3 results for 2024:While most of the solver names might seem like gibberish, you’ll notice two terms that seem to show up pretty regularly — “CaDiCaL” and “Kissat”. Before we go on, it’s important to note that “Kissat” is just a re-implementation of the CaDiCaL solver in the programming language C (with many optimizations). So this really raises the question — what exactly is CaDiCaL? How is it so consistently performing well?Before we dive into CaDiCaL and Conflict Driven Clause Learning, we must first introduce the concept of an implication graph.Implication GraphsConsider a simple SAT instance with 2 literals and one (disjunctive) clause:Now, think about the mental process of solving this SAT instance, variable-by-variable. Assigning either A or B to True obviously satisfies the instance. But if we assign A to False (for some reason), we know that we must then assign B to true to satisfy the instance. Expressed in logical terms (using the “implication” arrow):Now, if we instead set B to False, then we must do the opposite and set A to True.This is simple, but important. While predicting values for the variables, we can track our decisions and their implications through this process. Sometimes our hand will be forced (as in the two variable case above), but often times we’ll find that a decision we made several turns ago turned out to be the wrong one. Ideally, we’d like to reverse that particular decision instead of trying to make it work with more guesses. Let’s work through an example:Consider the following formula with 5 literals and 4 conjuncts:We’ll start by guessing that D = False. This forces the outcome E = False, in order to satisfy the last clause. So far our implication graph looks like the following:From here, we have three variables left to assign — A,B,C. Let’s start with B. Assigning B = False, we notice that this forces C = True to satisfy the second formula (since we already assigned D = False). Now, our implication graph looks like this:Notice our guesses are on the left and any forced decisions on the right, with the right side connecting downward. This is one way to organize an implication graph (though not the only way).Finally, let’s consider A. Because we’ve already assigned B and C in a way that makes the second conjunct true, we only need to consider the first one. The only way to make the first conjunct true is to set A = True, so this is a forced decision, and our final implication graph looks like this:and we’re done! We can easily read off the satisfying formula and see the full behavior of our “solver” from the implication graph.We can also do this with longer SAT formula. An example 2-SAT formula with four conjuncts and four literals is given below, along with all of its implications.Given that some of the literals are shared between implications, we can easily visualize this as a graph:What does this get us beside a pretty picture? Well, consider adding the following conjunct (and associated implications) to our formula:This transforms the implication graph into:Now see what happens when you trace out the path starting at -D:(-D, -A, D, A, B, -C, -A … )(1) The path enters you into an infinite loop(2) The path contains a literal and its negation (actually several instances of this)Because of these conditions in the implication graph, we know that -D was a poor choice. You can verify that this isn’t the case for any of the paths in the original instance.If you’re guessing individual variables and updating the formula (using the DPLL approach above), at some point you may run into a looped implication graph like the one above. This might not happen immediately though, and you might guess several variables before you realize that a guess you made many steps ago doomed you. Finding the root of the problem (the guess that doomed you), is called conflict analysis on implication graphs. Doing this automatically allows your solver to “backtrack” to the root and not make any more guesses down that branch. As you can imagine, this saves quite a bit of time compared to vanilla DPLL.We are now ready to discuss the CDCL (Conflict Driven Clause Learning) algorithm.Conflict Driven Clause LearningWe will start with the pseudo algorithm for CDCL (taken from Wikipedia, because it’s a great description):Select a variable and assign True or False. This is called decision state. Remember the assignment.Apply unit propagationBuild the implication graph.If there is any conflict, find the cut in the implication graph that led to the conflictDerive a new clause which is the negation of the assignments that led to the conflictNon-chronologically backtrack (“back jump”) to the appropriate decision level, where the first-assigned variable involved in the conflict was assignedOtherwise continue from step 1 until all variable values are assigned.There is a step here which may seem a bit confusing, and is different from DPLL:(5): Derive a new clause which is the negation…We haven’t discussed what it means to “derive” a clause. Suppose you have made the following judgements and then reached a conflict: A = True, B = True, C = False.The negation of these assignments is A = False, B = False, C = True.So the new clause derived from this negation is simplyAdding this clause to the original formula will prevent this particular conflict from re-occurring. Often, this is referred to as an example of CDCL “learning” a way to prevent this (and other downstream) conflicts, but it is not learning in the traditional sense. CDCL is analytically backtracking to the earliest incorrect assignment, and modifying the formula to prevent this assignment from re-occurring. The process is entirely deterministic when the variable selection is fixed. Unlike BFS or DPLL, this prunes a whole section of the search space that is guaranteed to not work. The deeper this subspace of conflicting assignments, the more efficiency we gain by using CDCL instead of DPLL or BFS.Benchmarking Different AlgorithmsNow that we have a basic understanding of the satisfiability problem and some solvers, we can start discussing real world solver performance. There is a wealth of literature out there on random SAT problems, what makes them easy/difficult, and how different solvers stack up on different kinds of instances. In the interest of learning from practice, we will formulate an experiment here which will hopefully show the differences in solver performance in real time. To help with this, we will utilize one simple observation from theory:The most difficult random SAT instances occur when the number of caluses is roughly 4.5x the number of variables. Less than this and instances generally have many solutions, while at higher ratios the instances generally have no solutions. One can look at this as the “edge of chaos” for SAT instances, though this is a topic for another time.Now, here’s the experimental setup:1) Iterate through # of variables ranging between 3–202) For each variable count, multiply the number of variables by a random float between 4–5. This gives us a value in the critical region. Round this to get the number of propositions.3) Generate a set of 50 random 3SAT instances with this variable and proposition count.4) Run the set through each of the solvers, while keeping track of the worst clock time for each of the solvers over the set.The code to run this experimental loop is rather long, so here it is as a gist:Note that we truncate the evaluation of BFS and DPLL to 15 and 20, respectively. This is to prevent drastic blowups of the run time for experiments with more literals. Here is the resulting graph, showing performance of some modern solvers against our random 3-SAT instances:Backbones and Instance DifficultyOf course, the graph above makes the story look much simpler than it is. Given the richness of SAT instances, the simple relationship of more variables + critical clause-to-variable ratio = hard instance is less than the full picture.It is true that very difficult SAT instances usually have a large search space. But if the large search space is accompanied by an equally large solution space, then the instance can still be easy to solve. The critical area favors instances with relatively small solution spaces compared to their search space, but there is a more explicit quantification of this fact, the backbone size.The backbone of a SAT instance is the set of variables whose assignments are fixed in all solutions (if the instance is unsatisfiable, the definition of backbone varies). The larger this set, the less the number of solutions. In the extreme case where an instance has only a single solution, the size of the backbone is equal to the number of variables — each of the variables can only be set in one way to solve the instance.Generally, finding large SAT instances with unique or a small number of solutions is itself a difficult problem. Luckily for us, such instances have already been generated and are available openly on the web.We will load these instances in and benchmark the performance of the best solver from above (Glucose) against different backbone sizes.import randomimport timeimport itertoolsimport numpy as npimport osimport numpy as npimport jsonfrom tqdm import tqdmfrom pysat.solvers import Glucose42, Minicard, Lingeling, Cadical153, Minisat22,MapleChrono, Mergesat3import seaborn as snsimport matplotlib.pyplot as pltfrom easysat.generators import KSAT_Generatorfrom easysat.solvers import BruteForce, DPLLksg = KSAT_Generator()folder = r'./Data/CBS'instances = [os.path.join(folder,x) for x in os.listdir(folder) if x.endswith('.cnf')]operations = {"Backbone10":[], "Backbone30":[], "Backbone50":[], "Backbone70":[], "Backbone90":[]}for instance in tqdm(instances, total = len(instances)): cnf = ksg.from_dimacs_file(instance, 0) _, k, literals, clauses, backbone, _, = os.path.split(instance)[-1].split('_') backbone = int(backbone.replace('b', "").replace("_", "")) solver = Glucose42() solver.append_formula(cnf) result = solver.solve() runtime = solver.accum_stats()['propagations'] bkey = "Backbone" + str(backbone) operations[bkey].append(runtime)plt.bar("Backbone10", np.median(operations["Backbone10"]))plt.bar("Backbone30", np.median(operations["Backbone30"]))plt.bar("Backbone50", np.median(operations["Backbone50"]))plt.bar("Backbone70", np.median(operations["Backbone70"]))plt.title("Median # of Variable Propagations \n 1000 Instances per Backbone Size - Glucose Solver")plt.title("Solver Propagations vs. Backbone Size")plt.xlabel("Backbone Size")plt.ylabel("Median # of Variable Propagations \n 1000 Instances per Backbone Size")The results are summarized in the bar graph below.Connections to the P=NP ProblemLook at the second to last graph again. Notice the dashed line that sits underneath all of the solvers. This dashed line indicates the scaling of the function F(x) = 1.15^x. The base 1.15 here is chosen arbitrarily, it can be any rational number > 1. However the presence of the x in the exponent belies a stark reality — this function grows very quickly. It may not seem like it based on the performance plot, but here is the function next to a linear function and polynomial function utilizing the same constant:Wait, this seems to contradict our point. Maybe if we extend the plot a little further…Now things are more obvious. Here are the values at the end of the plot:Exponential(2000) = 1.15^75 ~ 31,019Poly(2000) = 75^1.15 ~ 141Lin(2000) = 75 * 1.15 ~ 85Yeah, that’s a big difference. Recall that many industrial grade instances can have millions of variables (in fact, the biggest application instance solved by at least one solver in the annual SAT competition contained 32 million clauses and 76 million literals).The runtime of all of the algorithms we’ve looked at for SAT (with k ≥ 3) is exponential (in the size of the instance). If an algorithm is found such that its scaling is polynomial for such instances, it would be a world changing discovery. This is for two reasons:1) Many practical problems (of the sort discussed in the first section) result in very large SAT instances that are mostly out of reach of current day solvers.2) SAT is something called an NP-Complete problem. This means that any problem in this complexity class can be translated into SAT, and a fast solver for SAT would result in a fast solver for any of the problems in this class.ConclusionAfter getting through this (admittedly long and exhausting) article, what are we left with? Yet another math problem that captures the real world but is frustratingly difficult to solve? Some interesting algorithms you can play with for an afternoon?On the contrary, I think satisfiability problems are the easiest way to peek under the curtain of why the world may be the way it is. If even such a simple problem yields such immense complexity, it is not hard to imagine that the universe itself may not be as predictable as we believe. There may be some fundamental computational irreducibility, systems may exist whose evolution from one point to another cannot be further simplified.Of course, this is a rabbit hole that goes much, much deeper. Hopefully this was a satisfying read for now.— — — — — — — — — — — — — -References:[1]: Understanding Implication Graphs, Mate Soos (2011)[2]: Single Solution Random 3-SAT Instances, Marko Znidaric (2005)[3]: Where the Really Hard Problems Are Cheeseman, P., Kanefsky, B., Taylor, W.M.(1991)[4]: SAT Solver Etudes I, Philip Zucker (2025)[5]: Backbones and Backdoors in Satisfiability, Kilby et al. (2005)0 Yorumlar 0 hisse senetleri 40 Views
 -
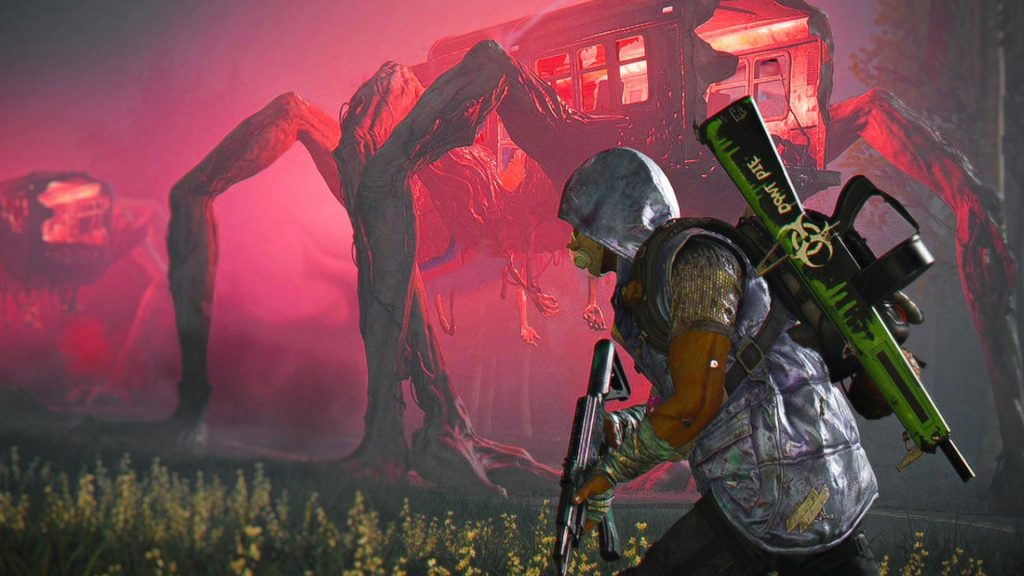 GAMINGBOLT.COMOnce Human Cross-Platform Progression Details Revealed, Out on April 23News Once Human Cross-Platform Progression Details Revealed, Out on April 23 The studio has revealed details surrounding what accounts players will need for Once Human's cross-platform progression features. Posted By Joelle Daniels | On 21st, Apr. 2025 Developer Starry Studio has revealed details about its planned update for Once Human that will bring cross-platform progression to the game. In a post on Steam, the studio has revealed how the game’s account system will work across various versions of the title, as well as potential limitations. For PC players that might want to play on the iOS or Android version of Once Human, they would be perfectly fine if they were to login to the smartphone versions of the game with their Loading Bay account, or linked Steam or Epic Games account. Players for whom the primary platform is iOS and Android, however, will be more restricted in terms of cross-platform progression and the accounts they can use. For players that started the title on smartphones, only the Loading Bay account is seemingly supported for carrying over progression to PC. Steam and Epic Games accounts aren’t yet supported for the feature. Cross-platform progression will be coming to Once Human through a free update slated for April 23. The update will be coming to all versions of the game across PC, Android and iOS. A major update was released for Once Human back in March, which brought with dedicated trading zones to the game. Thanks the update, players now no longer have to worry about other players’ vending machines cluttering the various hub areas in the game. Rather, the update added the Harvesters’ Markets, which acts as the official trading zone for the game. “In Nalcott, trading plays a crucial role in fostering social connections,” wrote the studio when it announced the update. “Not only does it help you acquire new items, but it can also spark friendships with people you might never have encountered otherwise.” The dedicated market zones were added to the game after the addition of permanent scenario servers in March. While the game automatically shut down the scenario servers after players had completed the scenarios in the past, the update brought with it the ability for players to stay in the scenario server longer. March also brought with it another major update that started allowing players to share their various resources between different players. Thanks to this update, players now no longer have to grind up materials for their characters individually. Rather, players can simply share their resources between all of t heir characters. “Aggregating these resources would create a significant and insurmountable gap between players who focus on one character and those who play multiple characters,” explained the studio. “Using the data of the character with the highest Blueprint Collection level ensures that all other characters on your account will enjoy an increase in Blueprint Collection level, allowing you to create and use new characters more freely. If you have invested in multiple characters, we will offer Starchrom compensation based on aggregate Blueprint Collection levels of your other characters.” Once Human is a free-to-play multiplayer game available on PC, Android and iOS. Check out our review from back when the title launched for more details. While you’re at it, also check out our interview with the studio. Tagged With: Atomfall Publisher:Rebellion Developments Developer:Rebellion Developments Platforms:PS5, Xbox Series X, PS4, Xbox One, PCView More Monster Hunter Wilds Publisher:Capcom Developer:Capcom Platforms:PS5, Xbox Series X, PCView More South of Midnight Publisher:Microsoft Developer:Compulsion Games Platforms:Xbox Series X, PCView More Amazing Articles You Might Want To Check Out! PS6 Portable Can Run PS5 Games Without Work by Developers – Rumour Developers might still want to end up releasing an update for their games on the rumoured console to improve p... Bethesda Confirms The Elder Scrolls 4: Oblivion Announcement for April 22nd The Elder Scrolls 4: Oblivion Remastered could finally be announced as Bethesda teases "All will be revealed" ... Once Human Cross-Platform Progression Details Revealed, Out on April 23 The studio has revealed details surrounding what accounts players will need for Once Human's cross-platform pr... The First Berserker: Khazan is Getting Bug Fixes, Balance Changes and UI/UX Improvements on April 22 The latest update the The First Berserker: Khazan focuses on bringing in improvements to the UI/UX as well as ... Atomfall Developer Wants to Make More Games if it Can Find the Resources Studio CEO Jason Kingsley spoke about how the developer behind Sniper Elite and Atomfall manages the scope of ... The Elder Scrolls 4: Oblivion Remastered Includes All DLC – Rumor The infamous horse armor is also allegedly included, which means the rumored remaster/remake could feature all... View More0 Yorumlar 0 hisse senetleri 49 Views
 -
 WWW.POLYGON.COM‘Please don’t punish others for our mistakes’: Concord dev thinks Marathon deserves a chanceBungie’s recent Marathon stream where it showed early footage of the first-person extraction shooter sparked skepticism on social media and Reddit, prompting some people to predict it will suffer the same fate as Concord, the hero shooter that Sony took offline less than a month after its release. In response, a former Concord developer made a post on the Marathon subreddit asking people to give it a chance. “Concord failed to inspire players, and the messages was heard loud and clear,” the developer wrote using a Reddit account under the name MrSpug. “It was gut wrenching to see our project fail, and be the laughing stock of many online.” The developer, who worked at Firewalk Studios before Sony shuttered it a few months after taking the game down, said they sympathize with the Bungie developers who put a lot of effort into making Marathon and that they commend them for taking a chance in what is an extremely competitive genre. “I worked on Concord, and did my best,” they wrote. “We came up short, please don’t punish others for our mistakes.” Although Concord was a different kind of game than Marathon, they’re both still published by Sony. One of the biggest criticisms coming out of the Marathon stream was Bungie’s decision to not go the free-to-play route. Like Concord, Marathon will be cheaper than most new games. Bungie specifically said you can expect to pay less than a “full-priced” title, which might put it somewhere around $40 when it comes out in September. Having a price at all, however, has people wondering if it’ll end up like Concord. “I really didn’t want to be ‘that’ dev, calling attention to myself as if I have a horse in this race,” the former Concord developer said in a reply to their post. “But to call this game a failure before it’s even out, is wild to me.” A closed alpha for Marathon will go live on April 23.0 Yorumlar 0 hisse senetleri 50 Views
 -
 WCCFTECH.COMSouth of Midnight – Where To Find All Notes – Chapter 9South of Midnight features plenty of striking visuals, but its strongest aspect is the game's storytelling. Beyond just the cutscenes, the writing in the more than 100 notes in the game's 14 chapters adds excellent context to the story and enhances the experience. That's why it's worth your time finding every note in each chapter. This guide will show you where to find all the notes in Chapter 9. South of Midnight - Where To Find All Notes - Chapter 9 Chapter 8 was very straightforward, with only four notes to find. Chapter 9 has 12 notes, so you'll have to be a little more diligent. Burrower's - Feline Intuition - When you exit the cave at the beginning of the level, Hazel will point out a house in the distance. Once she does, pay attention to the right side of the path, where you'll find a hollowed-out tree that houses the first note of the level. Cross my heart... - After the cutscene with Itchy, head into the small town across the bridge and go inside the house with red yarn on its roof. You'll find this note on your left when you walk in the door, on the couch. Dear Santa - This note is in the same house as the previous note, on a table to the right side of the door. Please Keep In Mind - After completing the combat encounter to the left of the house with red yarn on its roof, where you found the previous two notes, you can enter a house at the back of the combat arena. This note is right in the doorway, resting on the countertop on the right side of the hallway. You'll be sorry - This note is in the same house as the previous one, on the table at the end of the hall. Molly Gives A Fright - After completing the combat arena where you found the house with the previous two notes, there will be a couple of ways to exit the arena. Take the one that leads you past two large bramble vines, and on your left will be plenty of Stigma besides a house with a sun painted on the outside. Directly across the street from the house with the sun, you'll find this note on a picnic table. Mandatory Overtime - Once you've made it into the Pure Pine Factory, head up the stairs that you'll see directly in front of you and into the office to find this note and a Floof knot. She Did It - You'll be able to grab this note after dealing with the tangle in front of Molly's house. As you walk up to the house, this note will be on the right side of the path on a table. Why not me? - Right as you enter Molly's house, you'll find this note on a table in front of the fireplace. Dear Miss Molly - You'll find this note in Molly's house on a table to the left of the stairs leading to the second floor. Decision of Transfer - This is the final note in Molly's house, and it can be found on the second floor on a desk to the right of the fireplace. Is it True? - The final note of the chapter can be found inside the large house in Molly's cave. You'll enter the house through a narrow entrance, and find this note on a bed immediately to your right once you're inside. And that's where to find all 12 notes in South of Midnight's Chapter 12. If you've followed along with the rest of these guides, you'll have found 69 notes by now. Only 34 more to go. Products mentioned Deal of the Day0 Yorumlar 0 hisse senetleri 59 Views
 -
 WWW.YOUTUBE.COMNavigating the future: Using gaming techniques for automotive maps | Unite 2024Navigating the future: Using gaming techniques for automotive maps | Unite 20240 Yorumlar 0 hisse senetleri 59 Views
 -
 WWW.GAMESPOT.COMAll Heroes And Abilities In Overwatch 2 Stadium ModeOverwatch 2 has introduced a new competitive multiplayer mode, Stadium, where you play a best-of-seven series of matches. This mode is drastically different from other Overwatch 2 game modes for a number of reasons. First, there is a limited pool of heroes, with only 18 to start, though more will be added in the future. Second, it's a third-person game that takes place across several rounds, each consisting of shortened matches similar to Push. Lastly, and most importantly, it has new abilities and perks you buy in between rounds, allowing you to create unique builds of your hero.As a match unfolds, you'll earn currency every round, and in between rounds, you gain access to the shop, where you can buy permanent upgrades for the rest of the match. Because of this new system, you are locked to the character you choose at the start of the match and cannot swap later, making this a massive change from other modes. For example, Soldier 76 has multiple powers he can choose from. One will briefly activate his ultimate after firing a Helix rocket, while a different power will increase his primary fire power by 0.5% for each continuous shot fired. These different powers and abilities can drastically change how a hero plays, creating a dynamic new competitive mode.Over the course of a match, you can get up to six items, which can be sold at any point, and four powers, which you are stuck with once acquired. Below, we have listed every hero currently available in Stadium mode, along with their character-specific abilities and powers, followed by a list of universal items. ReinhardtPowers:Smashing! - When you deal damage with [Rocket Hammer], gain 3% Move Speed and 5% Weapon Lifesteal for 3s, stacking up to 5 times.Feeling The Burn - Every 3rd [Rocket Hammer] swing burns the target, dealing 30% extra damage over 2s.Wilhelmwagen - While [Barrier Field] is deployed, you heal for 5% of the damage it mitigates and gain 30% Move Speed.To Me, My Friends! - While [Barrier Field] is deployed, allies within 5m are healed equal to 3% of your max Life every 1s.Amplification Barrier - Friendly projectiles that pass through your [Barrier Field] deal 15% more damage.Barrier Reconstruction - When you deal damage with [Rocket Hammer] or [Fire Strike], restore health to [Barrier Field] equal to 10% of its max Health.Vanguard - [Charge] grants nearby allies Overhealth equal to 10% of your max Life and 20% Move Speed for 3s.Shield Stampede - +50% [Charge] Knockback Power During [Charge], automatically deploy [Barrier Field].Vroom Boom Boom - During [Charge], colliding with a wall triggers an explosion that deals 30% of [Charge]'s pin damage.Impact Burst - [Fire Strike] triggers an explosion the first time it hits an enemy, dealing 20% of its damage in a 3m radius.Magma Strike - If [Fire Strike] is cast twice within 2s, the second strike leaves a trail of lava that Burns enemies for {0} of its damage.Blazing Blitz - After using [Earthshatter], every [Rocket Hammer] swing launches a [Fire Strike] for 4s.Items:Ironclad Cleats - +25 Armor, +5% Weapon Power, +40% Knockback ResistRocket Boots - +25 Health, holding crouch increases the height of your next jump by up to 200%Dampener Grip - +10% Ability Power, +10% Attack Speed, when you deal damage with [Rocket Hammer], reduce the cooldown of your abilities by 1sPlan Z - +10% Weapon Power, Gain 5% Attack Speed for every 100 missing Life, up to 25%Boost Recycler - +10% Ability Power, if [Charge] is interrupted by stun, sleep, or hinder, refund 50% of [Charge]'s cooldownCrusader's Cure - +25 Health, using [Charge] cleanses all negative effectsGryphon Glider - +25 Health, +10% Ability Lifesteal, you can now fly during [Charge]Overclocked Barrier - +25 Health, +20% Barrier Field Health, +20% [Barrier Field] SizeInfusion Generator - +25 Health, Increase [Barrier Field] Health by 100% of your max LifePhoenix Protocol - +50 Health, [Barrier Field] regenerates 50% faster and begins regenerating 50% sooner after being destroyedChimera's Maw - +10% Ability Power, +35% Fire Strike RadiusRocket Strike - +20% Ability Power, +50% Fire Strike Projectile Speed Reaper Powers:Revolving Ruin - Close-range [Hellfire Shotgun] hits grant {1} Attack Speed for {3}s, stacking up to {2} timesShrouded Shrapnel - Using [Wraith Form] increases the number of pellets per shot in your next magazine and its spreadDeath Step - After using [Shadow Step], cast [Death Blossom] for 1.5s with 50% reduced damageStrangle Step - After using [Shadow Step], double your Lifesteal for 3sSpirited To Slay - Eliminations reset your cooldownsBackstabber - After using an ability, your next shot deals additional damage over {1}s to enemies struck from behindWraith Renewal - While in [Wraith Form], restore your Life every 1sGhosted - While in [Wraith Form], passing through enemies slows their Move Speed and Attack SpeedSilent As The Grave - Your footsteps and [Shadow Step] are significantly quieterShared Siphon - [The Reaping] also heals the nearest ally by a portion of Reaper's damage dealtHarvest Fest - [Hellfire Shotgun] hits have a chance to spawn a Soul Globe. When picked up, restore {1} Life, {2} Ammo, and gain {3} Move Speed for {4}sVampiric Touch - Hits with [Quick Melee] mark enemies for 5s. Allies gain Lifesteal against marked enemiesItems:Neverfrost - +25 Health, +5% Weapon Power, reduce effectiveness of enemy slows by 50%Pocket Mist - +25 Health, while below 50% Life, gain 20% Move SpeedWretched Wings - +25 Health, While in Wraith Form, gain the ability to fly and gain {1} Move SpeedDauntless Draught - +50 Health, +15% Move Speed during Wraith Form, +33% Wraith Form DurationSpectral Slugs - +5% Attack Speed, +25% Magazine Size, using [Shadow Step] restores 100% of your ammoNightcreeper - +10% Move Speed, +30% [Shadow Step] Cast Speed, using [Wraith Form] reduces the cooldown of [Shadow Step] by 2sDevastation - +{1} Ability Lifesteal, each [Death Blossom] elimination increases your Health by 25 until the end of the round, up to 100 HealthCrimson Cloak - +25 Health, +10% Ability Power, gain 15% of max Health as Overhealth while using [Death Blossom]Crowd Control - +15% Ability Power, [Death Blossom] gains 5% Ability Power for each enemy within its rangeWreath Of Ruin - +20% Ability Power, +25% Death Blossom Radius, +20% Move Speed during Death BlossomOnslaught - +25% Max Ammo, every 3rd shot fires both of your [Hellfire Shotguns]. The extra shot does not consume ammo but deals 80% reduced damage Soldier 76Powers: Super Visor - After using [Helix Rocket], activate [Tactical Visor] brieflyChaingun - While continuously shooting [Pulse Rifle], each shot grants 0.5% Weapon Power, stacking up to 100 timesBiotic Bullseye - While in [Biotic Field], critical hits restore 10% Max Ammo and extend the field's duration by 0.5s (up to 5s)Back Off - Enemies within your [Biotic Field] take damage equal to 100% of its healing outputOn Me! - [Biotic Field] moves with you and grants you 20% increased max Health while activeFrontliners - Allies in range of your [Biotic Field] when it spawns gain Overhealth equal to 40% of your max Life for 3sHunker Down - [Helix Rocket] damage creates a [Biotic Field] with shorter duration at your positionCratered - Increase [Helix Rocket] explosion radius and explosion damageDouble Helix - [Helix Rocket] fires a second homing [Helix Rocket] that deals 70% reduced damageMan On The Run - During [Sprint], restore 10% of your Ammo every 1s and increase your Max Ammo by 10% until you reload, stacking up to 10 timesTrack and Field - During [Sprint], [Biotic Field] cooldown refreshes 150% fasterPeripheral Pulse - During [Tactical Visor], [Pulse Rifle] shoots at 1 additional enemy, dealing 50% damageItems:Battery Pack - +10% Ability Power, +30% Biotic Field DurationRapid Response Radius - +10% Ability Power, +30% Biotic Field Radius, [Biotic Field] heals allies below 50% Life for 20% moreBomb Diffusal Boots - +25 Health, +5% Weapon Power, [Helix Rocket] self-knockback is increased by 200% and no longer damages yourselfPulse Converter - +5% Attack Speed, +5% Cooldown Reduction, [Helix Rocket] damage restores 20% of your ammoCompression Fatigues - +25 Health, +5% Attack Speed, +25% [Sprint] Move SpeedIron Lung - +25 Health, while using [Sprint], gain Overhealth equal to 5% of your max Life every 1s, up to 25%, for 5sEndgame Equalizer - +25 Health, +15% Ability Power, when you spend your Ultimate Charge, reset all ability cooldowns. While [Tactical Visor] is active, gain 20% Cooldown Reduction Mercy Powers:Battle Medic - Every 1s your Staff is attached, [Caduceus Blaster] gains +4% Attack Speed (stacks 10 times) until reloading or swap to your StaffFirst Responder - When you Resurrect an ally, grant both of you 250 Overhealth for 6sThe Whambulance - When Guardian Angel ends or is canceled, heal your target for 4 Life for every 1m you traveledRenaissance - After successfully Resurrecting an ally, gain Valkyrie for 5 secondsEquivalent Exchange - You have 3 charges of Resurrect with 33% reduced cast time, but their cooldowns only reset at the start of the roundTriage Unit - When using Guardian Angel on an ally below 50% HP, your Caduceus Staff heals them for 30% more for 3 secThreads of Fate - Caduceus Staff healing chains for 3 sec at 50% effectiveness to the last ally healedProtective Beam - Allies affected by Caduceus Staff above 80% HP gain 10% damage reductionSerenity - Sympathetic Recovery heals for 20% more and heals you even while healing a full health allyDistortion - Allies boosted by your Caduceus Staff gain +20% LifestealCrepuscular Circle - While Valkyrie is active, Healing Beam and Damage Boost effects are automatically applied to nearby alliesGlass Extra Full - Healing from [Caduceus Staff] targeting full health allies is converted to Overhealth, up to 50Items:Mid-Air Mobilizer - +5% Weapon Power, 10% Attack Speed while flyingAerodynamic Feathers - +25 Health, while affected by [Angelic Descent], continuously gain 10% Move Speed every 1sAngeleisure Wear - +25 Health, while affected by [Angelic Descent] or [Guardian Angel], heal 3% of your Life every 1sLong Distance Wings - +10% Ability Power, +33% [Guardian Angel] RangeAngelic Acrobatics - +15% Guardian Angel Move Speed, [Guardian Angel]'s cooldown starts as soon as you jump or crouchBlessed Boosters - +50 Health, launch velocity is increased by 25% when canceling [Guardian Angel] with crouch or jumpChain Evoker - +50 Armor, +5% [Caduceus Staff] damage boost, +15% Ultimate Charge gained from damage boostedCelestial Clip - +10% Weapon Power, +33% Max Ammo, [Caduceus Blaster] has a 10% chance to fire an extra shot that doesn't consume additional ammoCaduceus EX - +25 Health, +10% Weapon Power, +33% [Caduceus Staff] RangeResurrection Rangefinder - +10% Cooldown Reduction, +75% [Resurrection] Range MoiraPowers: Optimal Overflow - After you spend 50 [Biotic Energy], launch the last selected [Biotic Orb] with 75% reduced durationPrecarious Potency - Allies healed by your [Biotic Grasp] are healed for an additional 20% of [Biotic Grasp]'s healing over 5sDeconstruction - After you spend 50 [Biotic Energy], deal 20% increased damage for 6sEthereal Excision - While aiming at an enemy's head with [Biotic Grasp]'s secondary fire, gain 30% Lifesteal, 30% Move Speed, and restore 100% increased Biotic EnergyChain Grasp - After using [Biotic Orb], [Biotic Grasp]'s secondary fire chains to 2 additional targets within 20m for 3sEmpowering You - [Biotic Grasp]'s secondary fire can target allies, increasing their damage by 15%Cross-Orbal - [Biotic Orb] launches an additional [Biotic Orb] of the other type with 50% reduced capacityMultiball - [Biotic Orb] launches 2 additional orbs of the chosen type with 85% reduced effectivenessPhantasm - When you use [Fade], spawn a stationary copy of the last selected [Biotic Orb] with 50% reduced durationScientific Deathod - While using [Fade], passing through enemies grants 5% Ultimate Charge and permanent Overhealth equal to 15% of your max LifeVoidhoppers - [Fade] phases other allies within 8m for 0.25s and grants them Overhealth equal to 20% of your max LifeDestruction's Divide - +25% [Coalescence Duration], [Coalescence] can be toggled between pure healing or pure damage, with 25% greater effectItems:High Capacity Tubing - +10% Weapon Power, Moira can store an additional 50 Biotic Energy, beyond her base maximum of 100Bio-Needles - +10% Attack Speed, [Biotic Grasp]'s secondary fire restores 50% more [Biotic Energy]Subatomic Splitter - +10% Weapon Power, +15% [Biotic Grasp] Secondary Fire RangeSmart Orbs - +5% Ability Power, [Biotic Orb] moves 50% slower while it is healing or dealing damageExtendrils - +10% Ability Power, +30% [Biotic Orb] Tendril RangeAbyss Boots - +25 Health, while using [Fade], you jump 30% higherAlternative Energy - +10% Ability Power, +15% Attack Speed, when you use [Fade], refill your [Biotic Energy]Levitation Shawl - +10% Ability Power, coalescence grants free flight while activeCoalegion - +25 Health, +15% Ability Power, allies healed by [Coalescence] deal 15% increased damage D.Va Powers: Focused Fusion - [Fusion Cannon]'s spread is reduced by 66% and damage falloff range is 20m fartherLegendary Loadout - [Micro Missiles] are replaced with 6 Heavy Rockets, which deal 350% more explosive damage and have 100% increased radiusOverstocked - Gain 1 extra charge of [Micro Missiles]Countermeasures - When you mitigate 150 damage with [Defense Matrix], automatically fire 2 [Micro Missiles]Ignition Burst - [Boosters] leave a trail of lava that deals 30 damage every 1sMEKA Punch - While using [Boosters], [Quick Melee] deals 75% more damage. [Quick Melee] eliminations reset the cooldown of [Boosters]Tokki Slam - During [Boosters], use crouch to slam the ground, dealing damage equal to 20% of your max Armor and knocking up enemies hitFacetanking - [Defense Matrix] heals you for 30% of the damage it blocksUltrawide Matrix - Increase the size of Defense Matrix by 20% and its duration by 20%Stat Boost - During the first 2s of [Boosters], [Defense Matrix] recovers 100% fasterParty Protector - When you use [Self-Destruct], allies within [Self-Destruct] radius gains 250 Overhealth for 8sExpress Detonation - Self-Destruct explosion is triggered 15% fasterItems:Busan Blaster - +20% Ability Power, [Light Gun] gains a secondary fire, which charges up to fire a piercing shot that deals 80 piercing damageNano Cola™ Nitrous - +50 Health, when you eject from your Mech, gain 25% increased max Health and gain [Nano Boost] for 8sChip-Damage Diverter - +50 Health, when you deal damage to Barriers while in your [Mech], gain Shields equal to 10% of the damage dealt, up to 200. Resets when your [Mech] is destroyedMulti-Task Mod - +10% Weapon Power, [Fusion Cannons] can now be fired while using [Defense Matrix]Solo Spec - +25 Health, when you mitigate damage with [Defense Matrix], gain Shields equal to 10% of the damage mitigated, up to 100. Resets when your [Mech] is destroyedPlot Armor - +25 Armor, while [Defense Matrix] is active, gain 30% damage reduction against beamsSingijeon's Pulse Plating - +50 Health, gain 5% of damage mitigated by [Defense Matrix] as Ultimate ChargeGalvanized Core - +25 Health, 25% [Boosters] DurationAPM AMP - +50 Shield, when you use [Boosters], allies within 16m gain 25% Move Speed for 2sMastermind's Mitigator - Every 300 damage you mitigate with [Defense Matrix] reduces [Micro Missiles] cooldown by 1sOnslaught Ordinance - +15% Ability Power, the quantity and duration of [Micro Missiles] is increased by 20%Macro Missiles - [Micro Missiles] deal 25% increased damage and have significantly increased knockbackDae-hyun's Detonator - +15% Ability Lifesteal, if your [Mech] detonates while mid-air, increase [Self-Destruct] explosion damage and range by 200%Vesuvius Protocol - +10% Ability Power, using [Self-Destruct] drops lava nearby that deals 30 damage every 1s Genji Powers: Wyrm's Maw - Targets hit by your [Shurikens] take 10% more damage from [Swift Strike] for 4s, stacking up to 5 timesLaceration - [Swift Strike] deals 25% additional damage over 3s to enemies hitIaido Strike - After [Deflect] ends, you quickly swing your [Dragonblade] onceHidden Blade - Gain 50% Melee Lifesteal and +25 Quick Melee DamageForged Under Fire - While [Deflect] is active, heal for 60% of the damage it preventsDeflect-o-Bot - +50% Deflected Projectile Speed, During the first 1.5s of [Deflect], automatically deflect projectiles towards enemiesSacred Shuriken - [Shuriken]'s primary fire throws 2 additional [Shuriken] that don't consume any extra ammoHanamura Healing - Critical hits and [Swift Strike] grant Overhealth equal to 25% of their damage dealt for 5sSpirit of Sojiro - When [Deflect] stops incoming damage, reduce the cooldown of [Swift Strike] by 1s, up to 5sDragon's Breath - [Dragonblade] swings also fire a large piercing projectile that deals 50% of [Dragonblade]'s damageCybernetic Speed - Dealing damage with [Shuriken] grants 2% [Shuriken] Attack Speed for 3s, stacking up to 15 timesHashimoto's Bane - After using an ability, your next secondary fire throws 2 extra [Shuriken] that seek enemies but deal 50% less damageItems:Spiked Grip - +30% Max Ammo, while climbing restore 20% of your ammo every 1sSwift-Loader - +10% Attack Speed, +30% Max Ammo, damaging an enemy with [Swift Strike] restores 20% of your ammoEnduring Edge - +10% Weapon Power, 4s [Dragonblade] DurationAmbusher Optics - +25% Quick Melee damage, [Quick Melee] can critically hit when hitting enemies from behind, dealing 50% increased damageTraversal Kinetics - [Swift Strike] cooldown is reduced by 50% if it deals no damageNinja Soles - +5% Cooldown Reduction, +15% Move Speed during [Deflect]Clean Sweep - +10% Ability Power, +15% Ability Lifesteal, +50% [Swift Strike] WidthDeflecting Dash - +15% Ability Power, during [Swift Strike], deflect incoming projectiles toward your reticleEquilibrium Gear - +25 Health, while climbing, heal 5% of your Life every 1sAnti-Beam Coating - +25 Armor, +5% Attack Speed, Deflect blocks Beam attacksSparrowhawk Feather - +25 Health, Gain an additional jumpTransference Delta - 15% Ultimate Cost Reduction, convert 100 Health to Armor, when you use Dragonblade, heal your Armor fullySlicy Coolant - +50 Armor, +5% Cooldown Reduction, +1s Deflect Duration Orisa Powers: Scorched Earth - When you [Overheat], apply Burning to enemies within 6m, dealing damage equal to 10% of your max Life over 5sShield Divergence - When you [Overheat], deploy a Barrier with 600 Health in frontAdvanced Throwbotics - When you use [Javelin Spin], launch an [Energy Javelin] with 50% less damageSpynstem Update - [Javelin Spin] now deflects projectiles and grants 20% of damage dealt from deflecting as Ultimate ChargeHot Rotate-O - [Javelin Spin] gains 35% Cooldown Reduction but now generates [Heat]Factory Reset - While [Fortify] is active, [Javelin Spin] and [Energy Javelin] gain 25% Cooldown ReductionLassoed - On impact, [Energy Javelin] will pull enemies within 4m towards itselfRide With Me - While [Fortify] is active, grant allies in line of sight 30% Move Speed and Overhealth equal to 10% of your max LifeHooves of Steel - After [Fortify] ends, gain Shields equal to 50% of the damage received during [Fortify]. Resets when you next use [Fortify]Restortify - While [Fortify] is active, heal for 10% of your max Life every 1sCentripetal Charge - 25% Ultimate Cost Reduction. After using [Terra Surge], reset your ability cooldownsSupercharger - When you use [Terra Surge], drop a [Supercharger] that increases the damage of nearby allies by 25% for 15sItems: Solar Regenergy - +25 Health, after using an ability, restore your Armor equal to 5% of your Max LifeEnhanced Target Sensors - Deal 25% more damage to enemies farther than 12m awayOptimized Energy - +10% Weapon Power, Critical Hits reduce your [Heat] by 5%Electro Lights - +10% Attack Speed, recover from being [Overheated] 25% fasterElite Rotator Cuff - +10% Ability Power, 35% [Javelin Spin] DurationRefraction Tiles - +25 Armor, while [Javelin Spin] is active, gain 30% damage reduction to beamsOladele-copter Blades - +15% Ability Power, while using [Javelin Spin], gain free flight and 20% Move SpeedSiphonic Spear - When you deal damage with [Energy Javelin], heal {0} of your max Life over 3sArcfinder - [Energy Javelin] deals 25% increased damage to enemies farther than 12m away3D-Printed Lance - +15% Ability Power, [Energy Javelin] cooldown is reduced by 15, but each use generates 25 [Heat]Charged Chassis - +25 Health, [Fortify] grants additional Overhealth equal to 10% of your Max LifeHollaGram Helmet - +50 Armor, when you use [Fortify], all allies within line of sight gains unstoppable for 2sEfi's Theorem - +20% Ability Lifesteal, +50% Fortify Duration Kiriko Powers: Foxy Fireworks - After reloading, your next 3 [Kunai] explode on contact, dealing 20 damage to nearby enemiesKeen Kunai - Kunai critical hits decreases active ability cooldowns by 25% and refund 3 ammoTriple Threat - After using [Swift Step], for 4s, your secondary fire throws 2 additional [Kunai] in a spread that deal 50% less damageLeaf On The Wind - [Healing Ofuda] bounces to another ally up to 2 times, healing for 30% of the normal amountSelf-Care - When you use [Healing Ofuda], heal yourself for 5% of your max LifeSupported Shooting - When [Healing Ofuda] heals allies, grant them 25% increased Attack Speed for 3sFleet Foot - [Swift Step] can be used directionally without a targetClone Conjuration - After using [Swift Step], create a clone of yourself that lasts for 5sTwo-Zu - [Protection Suzu] gains an additional chargeCleansing Charge - When you cleanse negative effects with [Protection Suzu], gain 5% Ultimate Charge for each hero cleansedCrossing Guard - [Kitsune Rush] now also reduces enemies Move Speed by 50% for 2sSpirit Veil - [Kitsune Rush] cast makes Kiriko invulnerable for 4s and cleansed of negative effectsItems: Kitsune Kicks - +10% Move Speed, gain the ability to [Double Jump]Cyclist Gloves - When you use an ability gain 20% Attack Speed for 3sAsa's Armaments - +10% Attack Speed, [Kunai] bounce off surfaces 1 timeRyōta's Reloader - +35% Reload Speed, after casting an ability, restore 100% of your ammoTeamwork Toolkit - +10% Weapon Power, when you heal an ally, grant them 10% increased Move Speed for 3sFarsight Focus Sash - +10% Weapon Power, when you deal damage, gain 200% [Healing Ofuda] Projectile Speed for 5sSpirits' Guidance - +15% Weapon Power, 100% [Healing Ofuda] Projectile SpeedDonut Delivery - +20% Ability Power, [Swift Step] heals nearby allies by 80 Life over 2sGoddess's Aura - +25 Health, after using [Swift Step], you gain 100 Overhealth for 4sTalisman of Velocity - +15% Ability Power, [Protection Suzu] grants 25% Attack Speed and 25% Move Speed for 4sTalisman of Life - +20% Ability Power, [Protection Suzu] grants 100 Overhealth for 5sEye Of The Yokai - +10% Ability Power, 35% [Kitsune Rush] DurationOur Bikes - +25 Health, +15% Ability Power, allies affected by [Kitsune Rush] are healed for 80 every 1s Ana Powers: No Scope Needed - Landing unscoped shots with [Biotic Rifle] grants 10% Attack Speed for 2s, stacking up to 3 timesTactical Rifle - While scoped, [Biotic Rifle] will lock-on to allies for guaranteed hitsPinpoint Prescription - [Biotic Rifle] can now critically hit both allies and enemiesDreamy - [Sleep Dart] can hit allies, healing 100% of their max Life over 4s instead of putting them to sleepComfy Cloud - [Sleep Dart] explodes on contact, hitting targets within 3m, but Sleep has a 50% reduced durationSleep Regimen - Gain 50 Health. When you apply Sleep to an enemy, gain 10 Health, up to 150Home Remedy - [Biotic Grenade] applies Overhealth equal to 100% of its healingVenomous - [Biotic Grenade] deals an additional 30 damage over its duration to enemies affected by itTime Out - [Biotic Grenade] now knocks enemies back and reduces their Move Speed by 50% for 1.5sYour Full Potential - [Nano Boost] also grants the target 20% Ultimate Charge and 200 OverhealthMy Turn - [Nano Boost] also applies to yourself for 50% of its durationOur Turn - [Nano Boost] also affects other visible allies, but it has a 50% reduced durationItems: Dash Boots - +5% Movement Speed, jumping in mid-air will dash you a short distancePotent Projectiles - +10% Weapon Power, Unscoped [Biotic Rifle] projectiles are 100% largerQuick Scope - +5% Weapon Power, +200% Faster Scope Speed, Deal 20% more damage to airborne enemiesUnscoped Resources - +4 Max Ammo, Unscoped shots have a 50% chance not to consume AmmoDouble Dosage - +25 Health, landing a [Sleep Dart] on target affected by [Biotic Grenade] reduces its cooldown by 25%Tranquilizer - [Sleep Dart] gains: 500% Collision Size, 100% Projectile Speed, 20% Sleep DurationLethal Dose - +50% Ability Lifesteal, Sleep Dart damage is increased by 100I.V. Drip - +25 Health, while affected by [Biotic Grenade], Ana gains 100 OverhealthGrenadius Pin - +30% Biotic Grenade Radius, +20% Ability PowerTarget Tracker - +15% Biotic Grenade Duration, for each enemy or ally affected by [Biotic Grenade], gain 5% Attack Speed, up to 25%Cluster Core - +25% Ability Lifesteal, [Biotic Grenade] cooldown is reduced by 1s for each target it hitsEye of Horus - +50 Shields, [Nano Boost] can target allies through walls and its range is increased to 60mPerfected Formula - +25 Shields, +15% Nano Boost Duration Cassidy Powers: Quick Draw - After using [Combat Roll], [Peacekeeper]'s next primary fire can auto-aim within 9m while under cooldownDead Man Walking - Eliminating an enemy you've recently critically hit grants 1 Max Ammo for the roundFull House - For each Ammo available, [Peacekeeper]'s primary fire gains 1% increased damage, up to 25%Just Roll With It - During [Combat Roll], prevent all incoming damage, after [Combat Roll] ends, heal 30% of your Life over 3sBullseye - Critical hit reduces [Combat Roll]'s cooldown by 2sBarrel Roll - [Combat Roll] takes you 50% further and deals 65 damage to enemiesFlash In The Pan - Eliminating an enemy recently damaged by [Flashbang] grants 15% Ultimate ChargeThink Flasht - When you start a [Combat Roll], leave a [Flashbang] behindHot Potato - [Flashbang] adds 3 extra Ammo on hit until [Peacekeeper] is reloadedEasy Rider - While using [Deadeye], gain 100 Overhealth and 25% Movement SpeedSunrise - Using [Deadeye] slows all visible enemies by 35% for 1.5sSunset - [Deadeye] eliminations grant 15% Ultimate Charge eachItems: Eagle Eye - +50 Health, Receives 25% less damage from enemy farther than 12mCompetitive Analysis - +20% Weapon Lifesteal, deal 15% increased primary fire damage to enemies in the Damage roleQuickload Chamber - +20% Reload Speed, reloading within 6mof an enemy adds 20% of Max Ammo as extra AmmoFrankie's Fixer - +50 Health, Heal 10 Life for each Ammo loaded using [Combat Roll]Streamlined Poncho - +10% Cooldown Reduction, [Combat Roll] reduces [Flashbang] cooldownImprovised Dynamite - +20% Ability Power, +10% Cooldown Reduction, [Flashbang] explosion radius is increased by 50%Wanted Poster - +25 Health, [Deadeye] eliminations reward extra 500 Stadium Cash eachBlackwatch Tech - +10% Ability Power, [Deadeye] eliminations reduce [Flashbang] max cooldown by 10%, up to 40% for the round Ashe Powers:Reload Therapy - When you reload a shot, heal 3% of your LifeHead Honcho - Each unscoped shot you land increases the damage of the next scoped shot you land by 3%, up to 30%. Resets on reloadMy Business, My Rules - When you deal damage to a Burning enemy with [The Viper], reduce the cooldown of your abilities by 10%Incendiary Rounds - While scoped, hitting the same target without missing deals 30 extra damageIncendiary Blast - [Coach Gun] applies Burning, dealing 100 damage over 5s. If target was burning, deal extra 75 Ability Damage instantlyCalamity - Using [Coach Gun] reloads 2 Ammo. [The Viper]'s next 2 hits deal 40 additional damage over 3sDouble Barreled - [Coach Gun] gains an additional chargeEarly Detonation - Shooting [Dynamite] reloads 5 Ammo and reduces the cooldown of [Dynamite] by 3sMolten Munitions - When [Dynamite] explodes on the ground, it leaves lava that Burns enemies for 50 every 1sOut with a Bang - When [Dynamite] explodes, it spawns 3 sticky explosives that deal 66% reduced damagePartners in Crime - You are healed for 100% of [B.O.B.]'s damage dealt and [B.O.B.] is healed for 100% of your damage dealtB.O.B. Jr. - [B.O.B.] costs 50% less Ultimate Charge but has reduced Life, 50% reduced Attack Speed, and is significantly smallerItems: Tripod - +5% Weapon Power, [The Viper], [Coach Gun], and [Dynamite] deal 10% more damage to enemies that are below youSilver Lighter - +10% Ability Power, Damage dealt to Burning targets grants 20% more Ultimate ChargeGreased Loader - 25% Max Ammo, +15% Reload SpeedMaxed Mag - +5% Attack Speed, Gain 3% Attack Speed for each remaining Ammo above 50% of your Max AmmoIronsights - +10% Attack Speed, when the target is further than 10m, scoped shot gains 1% damage for each meterSidewinder - +10% Attack Speed, when the target is within 10m, unscoped shot gains 15% increased damageFurnace Fuel - +25 Health, +5% Ability Power, When Burn gets removed instead of expiring, gain 3% Ultimate ChargeStacked Sticks - +15% Ability Power, 40% [Dynamite] Explosion RadiusFirestarter - +50 Health, Your Burning effects gain 35% LifestealSilver Spurs - +25 Health, after using [Coach Gun], gain 20% Move Speed for 3sBuild-A-Blast Buckshot - +10% Cooldown Reduction, [Coach Gun] has 50% increased self-knockbackInfrared Lenses - +20% Ability Power, deal 25% increased damage to Burning targetsB.O.B. Wire Defense - +50 Health, +25 Armor, when [B.O.B.] finishes charging, [B.O.B.] gains 300 Armor Juno Powers:MediMaster - [Mediblaster] can now critically hit both allies and enemiesStinger - [Mediblaster] deals an additional 10 damage to enemies over 1s. (Does not stack)Cosmic Coolant - [Pulsar Torpedoes] cooldown is reduced by 1s for each target it hitsMedicinal Missiles - [Pulsar Torpedoes] heal for an extra 30 life and causes allies hit to receive 50% more healing for 3sPulsar Plus - [Pulsar Torpedoes] gains 1 additional chargeTorpedo Glide - During [Glide Boost], every 50 damage you deal reduces the cooldown of [Pulsar Torpedoes] by 1sBlink Boosts - [Glide Boost] gains 2 additional charges and has a 65% reduced cooldown, but has 75% reduced durationRally Ring - Reduce [Hyper Ring]'s cooldown by 1s when an ally passes through itBlack Hole - [Hyper Ring] slows the Move Speed of enemies who pass through it by 35% for 1sHyper Healer - Allies affected by [Hyper Ring] gain 50 OverhealthStellar Focus - [Orbital Ray] now follows you and its duration is increased by 35%Orbital Alignment - Enemies inside of [Orbital Ray] lose 35% Move Speed. Allies inside of it gain 25% Move SpeedItems:Vantage Shot - +5% Weapon Power, while airborne, [Mediblaster] deals 15% more damageLong Range Blaster - +15% Weapon Power, [Mediblaster] deals 15% increased damage and healing to targets farther than 12m awayLock-On Shield - +10% Ability Power, while aiming [Pulsar Torpedoes], gain Overhealth equal to 50% of your max ShieldsPulStar Destroyers - +15% Ability Power, [Pulsar Torpedoes] explode on hit, deal 20 damage to nearby enemiesPulse Spike - +10% Attack Speed, +35% [Pulsar Torpedoes] Projectile Speed, after using [Pulsar Torpedoes], gain 25% Attack Speed for 4sBoosted Rockets - +25 Shield, +25% [Glide Boost] DurationForti-Glide - +75 Shield, during [Glide Boost], gain 10% Damage ReductionGravitational Push - +15% Weapon Power, during [Glide Boost], gain 20% Attack Speed and your [Quick Melee] knocks enemies backLux Loop - +10% Ability Power, +25% Hyper Ring DurationSolar Shielding - +25% Ability Power, allies affected by [Hyper Ring] restore Shields every 1sSunburst Serum - +75 Shield, [Orbital Ray] gains 25% increased healingRed Promise Regulator - +50 Shield, +15% Ability Power, when you use [Orbital Ray], reset your cooldowns Zarya Powers:Pre-Workout - Gain Lifesteal equal to 20% of [Energy]No Limits - Maximum [Energy] increased to 150. [Energy] always decays above 100 [Energy] at a 150% faster ratePiercing Beam - Above 80 [Energy], [Particle Cannon]'s primary fire will pierce enemiesParticle Accelerator - Gain 15% Attack Speed for [Particle Cannon]'s secondary fire. After using an ability, quadruple this bonus for 5sVolskaya Vortex - After using a [Barrier], [Particle Cannon]'s next secondary fire spawns a slowing vortex that deals 80 damage over 2sLifelift - +50% [Particle Barrier] Size, Increase [Barrier] Health by 100% of Bonus Max LifeBarrier Benefits - When a [Barrier] expires, grant Overhealth equal to 50% of remaining [Barrier] health to the target for 3sMajor Flex - [Barrier] knocks back and deals 25 damage, increased by [Energy], to enemies within 5m every 1sContainment Shield - [Barrier] heals 20 Life, increased by [Energy], and grants 20% Move Speed while activeHere To Spot You - [Projected Barrier] pulls you to the targeted ally and heals you for 15% of Max Life over 3sFission Field - [Projected Barrier] applies to 1 additional ally within 10m, but has 20% reduced durationGraviton Anomaly - 25% Ultimate Cost Reduction, [Graviton Surge] base damage is increased to 30 and increased by [Energy], but has 50% reduced durationItems:Hybrid Battery - +5% Weapon Power, [Energy] cannot be reduced below 20Bigger Beam - +10% Weapon Power, [Particle Cannon]'s primary fire range is increased by 20%Blastproof Boots - +25 Health, +5% Movement Speed, [Particle Cannon]'s secondary fire self-knockback is increased by 100% and no longer damages yourselfLight Launcher - +15% Weapon Power, Consecutive [Particle Cannon] Secondary Fire shots consume 20% less Ammo, up to 60%, for your current magazineJumper Cables - +25 Shield, +5% Ability Power, after using a [Barrier], instantly start regenerating ShieldsProtein Shake - +25 Health, +15% Quick Melee Damage, while [Particle Barrier] is active, become Unstoppable and [Quick Melee] knocks back enemiesBeyond Barrier - +10% Ability Power, +20% [Projected Barrier] RangeLynx's Datadrive - +25 Health, +10% Ability Power, Using [Projected Barrier] on an ally refunds 25% of cooldownSuperconductor - +25 Health, +15% Ability Power, +40% [Barrier] Duration Junker Queen Powers: Thrill of Battle - [Adrenaline Rush] also heals allies within 12m for 50% of the amount it heals youRoyal Bullets - [Scattergun] critical hits against targets within 12m applies [Wound] for 30 damage over 3sTwist The Knife - [Scattergun] critical hits extend the duration of all [Wounds] on the target by 0.5sBlade Parade - Holding [Jagged Blade] charges it, increasing its damage by up to 35% and causing it to knockbackCut 'Em, Gracie! - Each enemy hit by [Jagged Blade] while it returns to you reduces its cooldown by 1sMerciless Magnetism - Using [Commanding Shout] causes your [Jagged Blade] to home to a targetSoaring Stone - [Carnage] becomes a leaping strike if you jump during its cast timeChop Chop - [Carnage] gains an additional charge but its cooldown reduction per hit is reduced to 1sReckoner's Roar - Using [Commanding Shout] [Wounds] enemies within 10m for 30 damage over 3sLet's Go Win - Eliminations reset the cooldown of [Commanding Shout]Bloodcrazed - [Rampage] and [Carnage] gives 15% of Max Life as Overhealth per hitBow Down - [Rampage] now also knocks down enemies hit for 1.5sItemsDez's Damage Dampeners - +25 Health, +50% Knockback Resist, when knocked back, gain 25% increased Move Speed for 3sRebellious Spirit - +25 Health, when [Wound] gets removed instead of expiring, gain 10% of Max Life as Overhealth, up to 150Shred and Lead - +33% Max Ammo, +10% Weapon Lifesteal, when you [Wound] an enemy, gain 10% Attack Speed for 5s, stacking up to 3 timesBloodhound Mask - +15% Weapon Power, Gain 5% Weapon Power for each enemy with a [Wound] within 12mSlicing Spree - +10% Move Speed, while within 12m of an enemy with a [Wound], gain 10% Move Speed and 5% Attack SpeedGutpunch Gauntlet - +10% Weapon Power, while not holding [Jagged Blade], [Quick Melee] deals 75% more damage and knocks backBigger Magnet - +10% Ability Power, [Jagged Blade]'s pull strength is increased by 35%Scav Scraps - +50 Health, +5% Cooldown Reduction, [Carnage] and [Jagged Blade] impact damage grants Overhealth equal to 40% of damage dealtThick Skull - +50 Armor, while casting [Rampage] or [Carnage], gain 50% Damage ReductionMonarch's Decree - +5% Weapon Power, [Commanding Shout] grants you 15% Attack SpeedUndying Loyalty - +50 Health, +30% Commanding Shout Overhealth, Allies affected by [Commanding Shout] are healed for 5% of Junker Queen's life every secondBooming Voice - +25% Ability Power, [Commanding Shout] radius is increased by 100% and now ignores line of sightTinker Tracksuit - +5% Cooldown Reduction, +10% Ability Lifesteal, [Rampage] and [Carnage] hits grant 10% Attack Speed for 4s Lucio Powers: Mixtape - When switching to [Healing Boost], [Crossfade] heals for 10% of [Crossfade] healing for every 1s [Speed Boost] was activeFast Forward - While above 50% Move Speed, increase damage by 25%Wallvibing - While [Wallriding], gain Overhealth equal to 3% of your life every 1s, up to 30% Max LifeVivace - While you are [Wallriding], [Soundwave] cooldown refreshes 25% faster and adds 1 Max Ammo every 1s until you reloadSonic Boom - [Sonic Amplifier] damage heal allies affected by [Crossfade] equal to 20% of damage dealtSignature Shift - After using an ability, your next [Sonic Amplifier] shot shoots a volley of 6 ammo with 20% increased projectile sizeRadio Edit - After using [Amp It Up] in [Speed Boost], trigger a [Sound Barrier] with 85% reduced OverhealthMegaphone - +20% [Amp It Up] Duration, while [Amp It Up] is active, [Crossfade] radius is increased by 100%Crowd Pleaser - After using [Soundwave], heal all allies affected by [Crossfade] for 200% of [Crossfade] healingLet's Bounce - [Soundwave] has 30% increased knockback and deals 40 bonus damage if the target hits a wallReverb - Gain 1 extra charge of [Soundwave]Beat Drop - Landing on an enemy with [Sound Barrier] deals up to 100 damage. If you spent your Ultimate Charge, your next [Sound Barrier] deals double damageItems: #1 Single - +10% Ability Power, when allies leave your [Crossfade] area, the effect lingers for 2sNano Boop - +5% Cooldown Reduction, Environmental Kills grant [Nano Boost] for 5sSpeed Skates - +25 Health, after [Wallriding], gain 30% Move Speed for 2sHip Hop - +25 Health, after [Wallriding], gain an additional jump while airborneAll-Out Auditiva - +20% Ability Power, +33% [Amp It Up] DurationLoFly Beats - +5% Ability Power, +5% Weapon Power, while in [Speed Boost], [Soundwave] also knocks you backB-Side Bop - +25 Health, +25% Melee Damage, after using [Soundwave], your next [Quick Melee] grants decaying Overhealth equal to 100% of damage dealtRiff Repeater - +15% Attack Speed, [Sonic Amplifier] projectiles ricochet off walls 3 timesAirwaves - +25 Health, +15% Ability Power, [Sound Barrier] effectiveness is increased by 5% for every 1s [Sound Barrier] is channeled, up to 50% Mei Powers: Permafrost - Increase your Max Health by 50% of your Ability PowerSlowball - [Endothermic Blaster]'s secondary fire now shoots a snowball that applies 30% slow for 1s on critical hitExtendothermics - [Endothermic Blaster]'s primary fire range is increased by 6mFrost Armor - Gain Armor equal to 5% of the primary fire damage you deal, up to 100, until the end of the roundSnowball Flight - Jumping while mid-air creates a large [Ice Wall] pillar under you. (12s Cooldown)Twice As Ice - When you use [Cryo-Freeze], reset the next cooldown of [Ice Wall]Iceberg - [Ice Wall] spawns a mini [Blizzard] that slows enemiesCryclone - [Cryo-Freeze] spawns a mini [Blizzard] that slows enemiesCoulder - [Cryo-Freeze] now encases you in a rolling iceball that can knock back enemies and deal 10 damageFrost Nova - When [Cryo-Freeze] ends, knock back nearby enemies, dealing 60 damageBlizznado - While within [Blizzard], heal 5% of your Life every 1sAvalanche - Visible enemies within 20m of the Blizzard are slowed by 25%Winter's Protection - Allies within [Blizzard] gains 10 temporary Overhealth per secondItems:Snowboot - +15% Attack Speed, Frozen ground increases Mei's Movement Speed by 35%Coldspot - +25 Health, Primary Fire and [Blizzard] can remove burnFocused Flurries - +15% Attack Speed, Max Ammo is increased by 75% but reloading takes 50% longerSturdy Snowfort - +15% Ability Power, Ability Power is increased by 5% per each spawned Ice PillarsIce Sheet - +50 Health, [Ice Wall] Duration is increased by 3 seconds and health is increased by 100%Meicicle - +25 Health, [Cryo-Freeze] duration is increased by 25%Ecopoint Cryobed - +20% Ability Power, on near Death, go into [Cryo-Freeze] and gain 15% Ultimate Charge. Can happen once every roundIcy Veins - +10% Ability Power, [Blizzard] deals 100% increased damageHimalayan Hat - +10% Attack Speed, while within [Blizzard], gain 10% Attack Speed General ItemsThese are items that can be used by any hero.Normal:Compensator - +5% Weapon PowerAmmo Reserves - +20% Max AmmoWeapon Grease - +5% Attack SpeedPlasma Converter - +5% Weapon LifestealFrenzy Amplifier - Eliminations grant 10% Attack Speed and 15% Move Speed for 3sPower Playbook - +10% Ability PowerShady Spectacles - +10% Ability LifestealCharged Plating - After you spend your Ultimate Charge, gain 25 Armor and 10% Ability Power for the rest of the roundWinning Attitude - +25 Health, when you die, gain 15% Ultimate ChargeElectrolytes - At the start of the round, gain 100 unrecoverable OverhealthField Rations - While on the Objective, restore 8 Life every 1sAdrenaline Shot - +10 Health, Health Packs grant 20% Move Speed for 3s and 50 OverhealthRunning Shoes - +10 Health, at the start of the round and when you first respawn, gain 20% Move Speed for 10s while out of combatHeartbeat Sensor - +5% Movespeed, Enemies below 30% Life are revealed to youSiphon Gloves - +25 Health, [Quick Melee] damage heals for 25 LifeFirst Aid Kit - +25 Shields, Reduce the time before your Life begins regenerating by 33%Armored Vest - +25 ArmorRareStockpile - +5% Attack Speed, +25% Magazine SizeAftermarket Firing Pin - +10% Attack Speed, +5% Move SpeedAdvanced Nanobiotics - +5% Weapon Power, after healing an ally, gain 10% Attack Speed for 3sShieldbuster - +5% Weapon Power, after dealing damage to Shields or Armor grants 15% Attack Speed for 1sTechnoleech - +5% Weapon Power, +10% Weapon LifestealIcy Coolant - +10% Weapon Power, +5% Cooldown ReductionTalon Modification Module - +15% Weapon PowerWrist Wraps - +5% Ability Power, +10% Attack SpeedCustom Stock - +5% Weapon Power, +10% Ability PowerJunker Whatchamajig - +25% Starting Ult ChargeEnergized Bracers - +10% Ability Power, +10% Ability LifestealBiolight Overflow - +25 Health, +5% Ability Power, when you spend your Ultimate Charge, grant nearby allies 50 Overhealth for 3sMulti-tool - +5% Ability Power, +10% Cooldown ReductionNano Cola - +20% Ability PowerReinforced Titanium - +25 Shields, while you have Shields, take 10% reduced Ability DamageIron Eyes - +25 Shields, you take 15% reduced damage from Critical HitsCushioned Padding - +25 Shields, -40% Incoming Negative Effect Duration, when affected by Stun, Sleep, or Hinder, regenerate 10% of your Max Life over 3sIronclad Exhaust Ports - +5% Cooldown Reduction, when you use an ability, gain 25 Overhealth for 3sCrusader Hydraulics - +25 Armor, while you have Armor, take 10% less Weapon DamageVishkar Converter - +25 Shields, convert 100 Health into ShieldsVital-E-Tee - +10 Armor, Convert 100 Health into ArmorMEKA Z-Series - +8% Health, Armor, and ShieldsEpicCodebreaker - +15% Weapon Power, Ignore 50% of Armor's damage reductionSalvaged Slugs - +10% Attack Speed, +25% Damage to Barriers, Weapon Damage to Barriers has a 40% chance to restore 1 ammoVolskaya Ordnance - +10% Attack Speed, deal 5% increased Weapon Damage for every 100 Max Life the target has more than you, up to 25%Commander's Clip - +10% Attack Speed, +40% Magazine Size, when you use an ability, restore 10% of your Max AmmoWeapon Jammer - +25 Armor, +10% Weapon Power, Dealing Weapon Damage steals 10% of target's bonus Attack Speed for 2sAmari's Antidote - +25 Health, +15% Weapon Power, while healing an ally below 50% Life with your Weapon, deal 15% increased Weapon HealingBooster Jets - +20% Attack Speed, when you use an ability, gain 20% Move Speed for 2sEl-Sa'ka Suppressor - +10% Weapon Power, Critical Hits apply 30% Healing Reduction for 2sHardlight Accelerator - +10% Weapon Power, +10% Cooldown Reduction, when you use an ability, gain 5% Weapon Power for 3s, stacking up to 3 times Eye of the Spider - +25% Weapon Power, deal 10% increased damage to enemies under 30% LifeThe Closer - +20% Weapon Power, +10% Critical Damage, Critical Hits reveal the target for 3sThree-Tap Tommygun - +10% Ability Power, +10% Attack Speed, after using an ability, your next 3 instances of Weapon Damage deal additional damage equal to 3% of the target's LifeBiotech Maximizer - +25 Health. +10% Ability Power, when you use an ability that heals, reduce its cooldown by 5% for each unique ally it healsCatalytic Crystal - +15% Ability Power, ability Damage and Healing grants 20% more Ultimate ChargeSuperflexor - +25 Health, +10% Weapon Power, when you deal Weapon Damage or Healing, gain 5% Ability Power for 3s, stacking up to 5 timesLumériCo Fusion Drive - +50 Armor, +15% Ability Power, when you use an ability, restore 50 Armor or Shields over 2sCybervenom - +10% Ability Power, +5% Cooldown Reduction, Dealing Ability Damage applies 30% Healing Reduction for 2sIridescent Iris - +20% Ability Power, +10% Cooldown Reduction, when you spend your Ultimate Charge, gain 100 Overhealth for 3sLiquid Nitrogen - +25 Health, +10% Ability Power, Dealing Ability Damage slows the target's Move Speed by 20% for 3sMark of the Kitsune - +10% Ability Power, after casting an ability, your next instance of Weapon Damage or Healing deals 25 bonus damage or healingChampion's Kit - +40% Ability PowerGeneticist's Vial - +25 HP, the first time you die each round, revive at 200 Life after 3sBloodbound - +50 Health, the last enemy to deal a final blow to you is Revealed when nearby, deal 10% more damage to them and take 10% reduced damage from themDivine Intervention - +50 Shield, when you take more than 100 damage at once, restore 15% of damage taken and start regenerating your ShieldsGloomgauntlet - +50 Armor, +15% Melee Damage, [Melee] damage grants 10% Move Speed and restores 5% of max Life over 2sPhantasmic Flux - +10% Weapon Power, +10% Ability Power, +15% Weapon Lifesteal, +15% Ability Lifesteal, while at full Life, Lifesteal grants up to 100 OverhealthRüstung von Wilhelm - +15% Health, Shields, and Armor, while below 30% Life, gain 10% Damage ReductionVanadium Injection - +50 Shield, while at 100% Ultimate Charge, gain 50 Health, 10% Weapon Power, 10% Ability Power, 10% Weapon Speed, 10% Cooldown Reduction, and 10% Move SpeedMartian Mender - +25 Health, +10% Cooldown Reduction, Restore 3% of your Life every 1sNebula Conduit - +50 Health, +10% Weapon Power, prevent 15% of incoming damage and instead take that prevented damage over 3sOgundimu Reduction Field - +50 Armor, when you take damage, gain 0.5% Damage Reduction for 1s, stacking up to 20 times0 Yorumlar 0 hisse senetleri 31 Views
 -
 GAMERANT.COMBest Anime Like Sword Of The Demon HunterSet in Japan's Edo period, Sword Of The Demon Huntertells the story of Jinta, a zealous young man with a sense of duty and the appointed guardian of the Kadono clan’s shrine maiden, who sets out to find his purpose and identity after a pivotal encounter with a demon and a painful past.0 Yorumlar 0 hisse senetleri 30 Views
 -
 WWW.POLYGON.COMAll ‘A New Clue’ book puzzles in Blue Prince and how to solve them“A New Clue” is a book that can be purchased from the Bookshop in Blue Prince. Written by Mary Marigold, “A New Clue” is full of riddles and hints in which you constantly hit wall after wall. To make things worse, there are clues relating to major keys, other books, and hidden signs — as long as you can find them. Here’s how to solve all of the puzzles in “A New Clue” in Blue Prince and find all of its hidden secrets. All ‘A New Clue’ book puzzles in Blue Prince There are four puzzles inside the book “A New Clue” in Blue Prince: “Low case clue” puzzle — Hidden on page six in tiny font. Signs puzzle — Combine all of the signs hidden inside “A New Clue.” Book anagram puzzle — Decipher the book anagrams and uncover the hidden message inside. Suspect puzzle — Find the secret Admin Key hidden inside “A New Clue.” Prior to starting, we’ll be referencing page numbers a lot throughout the guide, and it’s important to know that the title page will always be page one. How to solve the ‘low case clue’ puzzle in ‘A New Clue’ On page six of “A New Clue” in Blue Prince, you’ll find tiny opaque font beside some of the words. The font is slightly visible if you really squint at it, but it’s best to use a magnifying glass. The magnifying glass will reveal that some of the words on the page are numbered, and when the words are put in numerical order, you’ll find the hidden phrase, “All checked corner case rooms had a low case clue found in the rooms.” The message might mean nothing to you now, but, if you look at the image on page five, you’ll see that clipboard with a list of “Corner Cases.” Four of the rooms on the list have a check mark beside them: Patio, Nook, Office, and Pantry. Unfortunately, this means that you’ll need to draft each of these rooms and search for a “low case clue” inside each of the rooms. Inside each room, you’ll find a note that has one word in all lower case letters, and, when put in the same order as the “Corner Cases” list, you find the message, “Buried beside west bridge.” Head back outside to the bridge on the West Path with a shovel, and dig on the the grass beside the bridge. It will take a little bit of time for the shovel icon to appear, so you might need to hover your cursor over the area for a short period of time. After you successfully dig beside the bridge, you’ll find a Microchip, which is one of three microchips needed to open the door in the Blackbridge Grotto. How to solve the signs puzzle in ‘A New Clue’ On pages 18 and 19 in “A New Clue”, you’re asked, “Have you seen all the signs?”, which may sound a little belittling, but it’s actually a clue for a puzzle hidden inside the book. Starting from the beginning of the book, take note of each sign in every image — Route 8, Depart, Keep Left, To Tanner Fork, “Right Turn”, Dead End, Record, Each, Stop, On The Way. This may seem like gibberish for now, but that’s because you’re missing a bit of information. On page 19, you may have noticed a metro map partly covered by an open book. The metro map can be found in the train station in the Safehouse, which can only be reached through the boat in the Reservoir when the water level is set to six in the Pump Room. In the Safehouse, turn right to enter the train station and find the metro map on the wall. Using the message from the signs found in “A New Clue”, start at station 8 and reach the dead end station while recording each stop along the way. When the route is completed, you’ll have passed through stations 8, 7, 3, 10, 1, and 13. For now, you won’t be able to use this information, but it’ll be used in the next puzzle found in “A New Clue.” How to solve the book anagram puzzle in ‘A New Clue’ In the image on page 19 in “A New Clue”, you’ll find an annotated version of “A New Clue” that features an order of colors, page numbers, word numbers, and the sequence of letters X, Y, Z, A, B, C. These notes might be a bit incomprehensible at first, but it might seem a little familiar if you’ve taken a close look at the images inside the book. On page 11, you’ll find a stack of four colored books that matches the Red, Green, Violet, Blue note in the page 19 image. Additionally, on page 13, you’ll find the investigator rearranging the title of the blue book, “Draft the Sixes”, to “The Fixed Stars”, which is the same title as the book found in the Library and the Observatory. This does mean that you’ll need to rearrange the titles of the four books on page 11 to books found around the Mt. Holly estate: Red: Tender Cipher → The Red Prince Green: Lunar Renamed → Realm and Rune Violet: Uncle Awe → A New Clue Blue: Draft the Sixes → The Fixed Stars Looking back at the notes found on page 19, you’ll need to find a specific word inside each book using the sequence X, Y, Z, A, B, C, but what exactly does that mean? If you look at paper beside the book on page 19, it’ll tell you that “Dead End” is “C”. Taking the message found in the signs puzzle, we can substitute the station numbers (8, 7, 3, 10, 1, 13) with the letter sequence (X, Y, Z, A, B, C). As a result, you’ll need to find the following information: The eighth word on page 10 in The Red Prince The thirteenth word on page eight in Realm and Rune The seventh word on page one in A New Clue The eighth word on page three in The Fixed Stars For ease, the words reveal the hidden message, “turn scorched sundial base.” The only sundial on the estate can be found in the Apple Orchard, but first you’ll need to get a Burning Glass (Magnifying Glass + Metal Detector). Use the Burning Glass on the sundial’s base, and then rotate the base so that the lines align with one another. Once the base is aligned, the sundial’s face will rise — revealing three microchip slots. Grab all three microchips from the Blackbridge Grotto or their original locations, and place them inside the slots to raise the Satellite Dish from behind the hills. The Satellite Dish is a permanent addition that unblocks inbound e-mail and communications on terminals and uploads new experimental data packets to the Laboratory terminal. How to solve the suspect puzzle in ‘A New Clue’ The suspect puzzle can be found in the image on the last page in “A New Clue.” The pages in the image note the presence of a suspect along with details such as the suspect being a minor and “A. key.” Using a magnifying glass on the image on page five will reveal a list of suspects along with their ages. After eliminating everyone who isn’t a minor, you’ll narrow the suspect list down to four: Richard Scott, age 12 Sandra Dillon, age 14 Bo Lee, age 16 Charles Riscal, age 12 Now, what can you do with this information? Looking back at the notes in the image, the suspect is also an “A. key” which is short for admin key and the only location where you can enter an admin key is on the terminal in the Blackbridge Grotto. Head to the Blackbridge Grotto and type in the suspects following the admin key format, which can be found in the trash can in the Servant’s Quarters. The admin key is always the first four letters of the last name followed by the name’s first initial, and the initials should be capitalized. As you attempt each admin key, only one out of the four will give you access — LeeB. This admin key will allow you to access the following: Network Settings — Control terminal timeout and email settings User Database — See a list of admin keys Admin Logs — See communication between admins Data Files — Control your Blue Prince save data Save data controls are currently disabled due to a bug that can potentially wipe your save data, but we’ll update this guide once it’s been reinstated!0 Yorumlar 0 hisse senetleri 39 Views
 -
 LIFEHACKER.COMGoogle Still Hasn't Fixed This Dark Mode Bug on PixelDark mode has saved many of us from eye pain when using our smartphones at night. The difference between a black display with white text and a blinding white screen with black text is immeasurable when your phone is the only light source in the room—especially when you're opening your eyes for the first time in a while.While many Android users prefer to use dark mode all the time, others prefer it exclusively in the evening and night. That's where the "sunset to sunrise" schedule comes into play: On many devices, such as Google's Pixel phones, you can choose to schedule dark mode from sunset to sunrise. After the sun rises, your phone stays in light mode, so your content is bright alongside the light outside. But after sunset, when the light starts to dim, your phone conveniently switches dark mode. It's the best of both worlds—when it works.As reported by 9to5Google, users are experiencing issues with scheduled themes on Pixel devices. The problems seem to have begun with the March 2025 Pixel update, and remains unpatched following the April update. It can be frustrating, especially when you're expecting your phone to look a certain way at a certain time of day. There are a few workarounds, but they're not a permanent solution. Workarounds for the dark mode bug on PixelBack in March, when the issue first popped up on Pixel devices, users discovered a quirk that appears to trigger the glitch: manually enabling dark mode. Typically, when you have this schedule enabled, you're still free to toggle between themes whenever you want. Android would simply override that decision during the next schedule change. For example, if light mode kicks in after sunrise, but you still want dark mode, you can manually enable it, and Android will preserve that setting until the following day's sunrise. Then, it switches back to light mode.It appears that part of the bug has to do with this practice. If you manually toggle dark mode on in this situation, Android won't switch to light mode during the following sunrise. The same goes the opposite way: If you enable light mode after sunset, dark mode won't kick in the following sunset. For now, one of the best workarounds is to simply not touch the toggle if you want to keep your theme schedule active and automatic. That's not a great workaround, by any means, but it seems to be the one with the most success. Some users saw success in setting up a custom time for dark mode (Settings > Display > Dark theme > Schedule) then switching back to the "sunset to sunrise" option after the fact. However, others say the bug returns in time—indicating there is something broken in this particular schedule function. You could also try setting up a Bedtime mode rather than relying on this schedule, though that would affect more of your phone's function than usual.0 Yorumlar 0 hisse senetleri 30 Views