• A software engineer shares the rsum that got him onsite interviews at Meta, Amazon, and Dropbox — and hired at Microsoft
    www.businessinsider.com
    Akshay Phadk has spent the past decade in tech, from Big Tech to startups.He faced countless rejections before four rsum strategies helped him land a job at Microsoft.He focused on technical strengths, concise content, visual appeal, and clear communication to stand out.Akshay Phadk, 32, has spent the last decade climbing the ranks in both Big Tech and startups."I aspired to work at such places alongside people who were curious to learn new things, looked at the way things were and thought they could be made better, and wanted to make a difference in people's lives with their work," Phadk told Business Insider.The Seattle-based senior software engineer at Webflow started his career in tech by landing two consecutive internships at Ericsson while pursuing his master's degree in electrical and computer engineering at the Georgia Institute of Technology.After graduating from his master's program in 2016, Phadk was hired full-time at Ericsson before working at Microsoft, B2B SAAS fintech startup Vareto, and Webflow.In addition to landing his offer from Microsoft, Phadk also secured final onsite interview rounds at Meta, Amazon, Dropbox, and Yelp, as well as job offers from 23andMe and Wayfair.The offers didn't come easily, though.He said he had "countless interviews" where the outcome wasn't in his favor, and each rejection stung, especially in cases where he'd reached the final stage of the interview loop. When Phadk got the good news of his job offers, he felt "shock mixed with half-disbelief and relief, like I'd just run a marathon."Four ways to make your rsum stand outHere's the exact rsum that helped Phadk score these victories, and the four choices he made that he feels helped him stand out from other candidates. Courtesy of Akshay Phadk 1. Keep a narrow focus on technical strengths"Listing a lot of technologies even if someone has used all of them can hurt more than help," he said, as it could be perceived by hiring teams as inflating your capabilities."New grads or early-in-career candidates may feel tempted to include more technologies to make their rsum more competitive, but it only opens them up to more scrutiny," he said. "Tech companies are looking for engineers who've solved meaningful problems at scale. These opportunities require time and effort to build, so for someone with five to seven years of experience, the number of such projects will usually be in the single digits."Listing too many technologies can also backfire when interviewers probe the candidate's capabilities, Phadk explained."A less-than-satisfactory response to a question about a technology one hasn't used recently even if they're familiar with it may mean a rejection, especially if a lot of candidates are competing for the same role," he said.On his rsum, Phadk mentioned only the top technologies the ones he'd used the most and had the most technical knowledge of with each role, and rated his own expertise with each technology with a graphic showing his self-assessed skill level between one and five."This was an attempt to show my confidence in certain skills rated higher by me, and acknowledge that I had more learning left in other skills rated lower," he said. "I wanted to make it clear that I wasn't claiming expert-level competence in all the skills listed on my resume."Phadk highlighted his Apache Spark expertise prominently in the description of his last role, which he feels helped him stand out in his Microsoft application, as it was one of the technologies the team was investing in.When the hiring team asked him deep probing questions about technologies that he had less experience with, Phadk was upfront and honest if he didn't know the answer. "It isn't possible to be an expert in everything, and being honest about not knowing the answer is better, in my opinion, than guesswork," he said.2. Be concise in all rsum elementsThis same "less is more" strategy served Phadk in his overall rsum, which he kept to a lean one-pager."Hiring managers dedicate 30 seconds to a minute to review each rsum," Phadk said. "I wanted to ensure that my rsum communicated the most important pieces of information in that timeframe, while also creating a strong hook."To achieve these goals, in addition to ensuring he didn't add too many technical details, he served up a hook by dedicating two to three lines to describe each of his key projects."Because of this, I was able to create a sense of curiosity, and I was consistently able to secure a hiring manager technical screening interview in which the hiring manager wanted to know more about my work," Phadk said.3. Stand out visuallyEven for people without graphic design skills, you can still take steps to make your rsum visually pleasing.Phadk included company and university logos from his past roles and schools on his rsum to create a strong brand association. He also used a custom sans-serif font over a serif font to create a polished and professional feel and adopted a grayscale color palette instead of a black one for a softer reading experience."I've never used Microsoft Word or text editing software to create my rsums," Phadk said. "I feel rsums created this way end up looking generic especially if you use templates, which almost everyone else does too."Instead, he's experimented with a few software programs, such as Adobe Photoshop, LaTeX, and Figma to create his rsum.4. Clearly communicate responsibilities and outcomesCandidates sometimes blend their own achievements with team achievements on their rsums, which can make it harder for recruiters and hiring teams to determine what work they really did.To avoid this, Phadk listed only the work he did as an individual not what his team did collectively and did so in simple terms without jargon."Hiring managers are looking for engineers who can communicate their achievements objectively and clearly understand how their work adds value," he said.To reveal the full scope of his project areas, Phadk ensured that his rsum emphasized projects in different areas of software engineering, spanning systems engineering, backend web development, and data engineering.Phadk stressed that demonstrating the ability to adapt to new paradigms and technologies gives hiring managers confidence that they can trust you with projects that are out of your comfort zone."The takeaway for the hiring manager was my ability to pick up new technologies and be successful with them," Phadk said.If you landed a job in Big Tech and would like to share your story, email Jane Zhang at janezhang@businessinsider.com.
    0 Commenti ·0 condivisioni ·58 Views
  • The Rise of Co-Living Spaces for Young Professionals in East Asia: 5 Projects Redefining Flexible Living
    www.archdaily.com
    The Rise of Co-Living Spaces for Young Professionals in East Asia: 5 Projects Redefining Flexible LivingSave this picture!Episode Suyu 838 Co-Living Complex / Collective B. Image Yongjoon ChoiCo-living in East Asia has been rising since 2020, rapidly expanding while remaining in its early stages. At the same time, it continues to fulfill a significant demand from young professionals working in major cities. A 2020 study by real estate services firm JLL highlighted the growing demand for co-living in China and Singapore, citing key advantages such as affordability compared to private studio apartments and a contemporary urban lifestyle that fosters openness and shared experiences. Much like other industries where ownership is becoming less relevantsuch as streaming services for music, films, and television, or mobility solutions like car- and bike-sharingco-living appeals to a similar demographic that values flexibility and access over long-term commitments.Unlike co-living initiatives in Spain, which often focus on multigenerational shared spaces, East Asian co-living primarily targets young professionals with dynamic career paths. Often required to relocate every few years, these individuals prioritize convenience and adaptability over investing in a permanent home. For them, committing to a long-term residence may not be practical, making fully furnished, professionally managed co-living spaces with built-in amenities and hygiene services an attractive option. These environments cater to fast-paced urban lifestyles, where networking at professional events often precedes solitary downtime at home.Save this picture!Additionally, well-curated co-living spaces offer valuable social opportunities, making it easier for newcomers to a city to build connectionsan often challenging task when moving to an unfamiliar place. Co-living provides a smooth transition by reducing the stress of finding accommodation, purchasing furniture, and navigating local services, all while ensuring a sense of community. As young professionals establish themselves in a city, they may eventually transition to more permanent housingor, in many cases, relocate again to develop and pursue new career opportunities in another city. Related Article The Impact of Co-Living in Spain: 5 Projects with Multigenerational Shared Spaces As economies become more dynamic, the concept of locality is shifting from a fixed notion of "home" to one shaped by evolving market demands. Many industries now encourage or require young professionals to gain international experience, preparing them for future leadership roles with global responsibilities. Against this backdrop, co-living may become an essential housing solution for a generation that prioritizes mobility, professional growth, and urban connectivity.Mangrove Dongdaemun Co-living / COMSave this picture!Save this picture!Opened in August 2022, Mangrove Dongdaemun Co-living is an ambitious collaboration between the MGRV team and COM, offering over 170 living solutions. The project highlights the benefits of co-living in East Asia by striking a delicate balance between individual and shared livingprioritizing privacy while fostering a sense of community. The design incorporates lobby lounges, community desks, and communal spaces to achieve this, enhancing the co-living experience and compensating for the relatively compact private units.Located in the heart of Seoul, Mangrove Dongdaemun attracts shortto medium-term young city dwellers who want to experience city life while immersing themselves in a vibrant, co-living community of over 300 people. Originally a business hotel, the building naturally lent its layout to the co-living model, efficiently optimizing minimal private living spaces while providing expansive communal amenities such as a lobby, caf, rooftop spaces, and shared kitchens.Co-Living Home / Yuan ArchitectsSave this picture!Save this picture!Co-Living Home by Yuan Architects redefines urban living by seamlessly integrating indoor and outdoor spaces. Staircases serve not only as circulation elements but also as transitional spaces that bridge different spatial experiences. Instead of rigidly dividing public and private areas through walls, the design establishes a natural spatial hierarchy through elevation changes, incorporating a split-floor or loft-style plan.Situated in a historic neighborhood at the city's heart, the project revitalizes the aging urban fabric while introducing a contemporary co-living model. By fostering flexibility and community, the design encourages indirect yet meaningful interactions among residents, mirroring the organic social exchanges found within the city's dense city of narrow alleyways.Rather than relying on expansive living areas, the building takes inspiration from the intimate scale of its surroundings. Individual rooms and shared spaces are interwoven along dynamic, meandering circulation paths, cultivating spontaneous interactions and redefining co-living as a sequence of shared moments rather than a singular, centralized gathering space. The result is an engaging, vibrant living environment that appeals to young professionals, offering a fresh perspective on co-living within a culturally rich, historic setting.Taihang Village Co-living Space / f.i.t.Save this picture!Save this picture!Driven by the region's growth, this co-living development offers a unique approach to integrating visitors and locals in the remote Taihang Village in the Qinba Mountains. Drawing from the area's rich vernacular architectural language, the design embraces and revitalizes existing structures, introducing the co-living concept while preserving the village's architectural heritage. The project ensures the longevity of traditional typologies while adapting them for contemporary communal living through careful refurbishment, structural reinforcements, and thermal improvements.The design creates a striking contrast between old and new, with rugged stone exterior walls juxtaposed against pristine white interiorsvisually distinguishing private spaces from shared communal areas. Additionally, the project reactivates unique access points by utilizing rooftops and connecting structures with bridges, further strengthening the village's sense of community. This innovative adaptation of courtyard living enhances the co-habitation model, reinforcing the cultural and social fabric of the town while offering a fresh perspective on communal rural living. Also particularly helpful for young professionals seeking a retreat, an escape, or even an opportunity to develop new businesses in more remote areas of the country, this co-living model encourages a fresh engagement with rural life while maintaining strong connections to tradition and modernity.Canvas House for co-living / Ministry of DesignSave this picture!Save this picture!Integrating co-living concepts into an architectural rehabilitation project is the core principle behind Canvas House by the Ministry of Design. Targeted at expats and young professionals, the project reimagines a heritage shophouse along Blair Road in Singapore for contemporary communal living. The design prioritizes shared spaces by dedicating much of the ground floor, vertical circulation areas, and intermediary spaces to co-living functions. Private rooms are strategically positioned along the front and back of the rectilinear shophouse to maximize natural daylight.The design utilizes vertical continuity to enhance the shared living experience further, allowing light to filter through skylights into communal areas while creating dynamic spatial interactions. The staircases and split levels serve a dual purpose: They facilitate movement and subtly delineate different communal programs, ensuring connectivity while maintaining privacy and avoiding confrontation among residents.The interior is blanketed in white, intentionally blurring distinctions between private and public spaces, old and new, to create a unified aesthetic that reinforces the co-living ethos. This design approach fosters an organic flow of movement and interaction, transforming the shophouse into a seamlessly integrated environment that encourages shared experiences while respecting individual needs.Episode Suyu 838 Co-Living Complex / Collective BSave this picture!Save this picture!Episode Suyu 838 Co-Living Complex leverages its prime location near Seoul's essential transportation hubs, attracting a diverse and dynamic community. Designed by Collective B, the visionary project has over 838 residential units. It is conceptualized as a "vertical village" that evolves into a "sustainable village" as its community grows, adapts, and responds to changing lifestyles.Beyond spatial planning, the design prioritizes communal spaces that foster sustainability and social interaction, serving as meeting points for residents to connect and engage. The long-term success of this co-living model also relies on active community and building management. Residents are encouraged to participate in gardening workshops, book concerts, and other community-led initiatives, fostering a sense of belonging and contribution. Even furniture subscription services are available, ensuring adaptability to residents' evolving needs.More than just a collection of living spaces, Episode Suyu 838 has transformed into a fully integrated vertical village. It offers a diverse range of amenities, including cafs, conference rooms, libraries, reading lounges, shared kitchens, parcel delivery rooms, co-working spaces, and private call booths. This curated, well-managed co-living ecosystem provides everything residents need to live, work, and connect within a single, thriving community.Save this picture!This article is part of an ArchDaily curated series that focuses on built projects from our own database grouped under specific themes related to cities, typologies, materials, or programs. Every month, we will highlight a collection of structures that find a common thread between previously uncommon contexts, unpacking the depths of influence on our built environments. As always, at ArchDaily, we highly appreciate the input of our readers. If you think we should mention specific ideas, please submit your suggestions.Image gallerySee allShow lessAbout this authorJonathan YeungAuthorCite: Jonathan Yeung. "The Rise of Co-Living Spaces for Young Professionals in East Asia: 5 Projects Redefining Flexible Living " 10 Feb 2025. ArchDaily. Accessed . <https://www.archdaily.com/1026694/the-rise-of-co-living-spaces-for-young-professionals-in-east-asia-5-projects-redefining-flexible-living&gt ISSN 0719-8884Save!ArchDaily?You've started following your first account!Did you know?You'll now receive updates based on what you follow! Personalize your stream and start following your favorite authors, offices and users.Go to my stream
    0 Commenti ·0 condivisioni ·71 Views
  • Daily briefing: People in dense crowds move in swirls
    www.nature.com
    Nature, Published online: 07 February 2025; doi:10.1038/d41586-025-00422-7People begin to move in vortices in densely-packed crowds. Plus, the scientists who kept research alive in Gaza during the Israel-Hamas conflict.
    0 Commenti ·0 condivisioni ·63 Views
  • My first 3D print via blender project using the sculpt tool!
    www.reddit.com
    Using blender, I designed and printed this fantasy style stone henge kinda table ornament for a friend, because he wanted one of those 3D dragon toys. I figured Lets take it to the next level, shall we? So I went into blender, designed this model and then painted it using the technique I learned in Procreate. Im so excited!! What do you think? Definitely opening new doors for me. submitted by /u/AdZealousideal8375 [link] [comments]
    0 Commenti ·0 condivisioni ·61 Views
  • Tom Henderson: The Next God of War Game Will Be Set in Greece
    cgshares.com
    The mystery surrounding Sony Santa Monicas upcoming game has taken a new twist, with industry insider Tom Henderson challenging a previous report by Daniel DanielRPK Richtman that the next God of War title would be set in Egypt, claiming that instead of the land of the pharaohs, the game will take us back to Ancient Greece, the setting of the original GoW trilogy.As Henderson mentioned in a recent podcast (timestamp 51:00), following Insider Gamings coverage of DanielRPKs report, he was contacted by someone from Santa Monica who told him that the game will be set in Greece instead of Egypt and will feature a younger version of Kratos, rather than the older, bearded father figure fans of the series have come to know over the past seven years.Based on this, it can be assumed that the upcoming God of War title could either be a prequel to the Greece trilogy or a reboot/remaster, with both possibilities seeming equally plausible to the insider. If true, this would confirm that SSMs next project is indeed part of the God of War franchise, rather than an entirely new IP as earlier rumors had suggested.Due to the anonymous nature of both reports, its impossible to say with certainty which one will ultimately prove accurate, however, with Sonys first State of Play conference of 2025 rumored to take place later this month, we may not have to wait long to find out.Interestingly, the first mention of Sony returning to the Greek setting and remastering the original trilogy didnt come from Henderson, but rather from a lesser-known insider, Lunatic Ignus, more than four months ago over on Reddit. Back then, the rumor was labeled as misleading, and Lunatic was heavily criticized by redditors, however, with Insider Gaming now echoing the claims about the setting and the possibility of a remaster, it seems Lunatics report wasnt as looney as many thought.SSMDont forget to join our80 Level Talent platformand ournew Discord server, follow us onInstagram,Twitter,LinkedIn,Telegram,TikTok, andThreads,where we share breakdowns, the latest news, awesome artworks, and more.Source link The post Tom Henderson: The Next God of War Game Will Be Set in Greece appeared first on CG SHARES.
    0 Commenti ·0 condivisioni ·69 Views
  • How to Get Scholarship XP in Kingdom Come: Deliverance 2
    gamerant.com
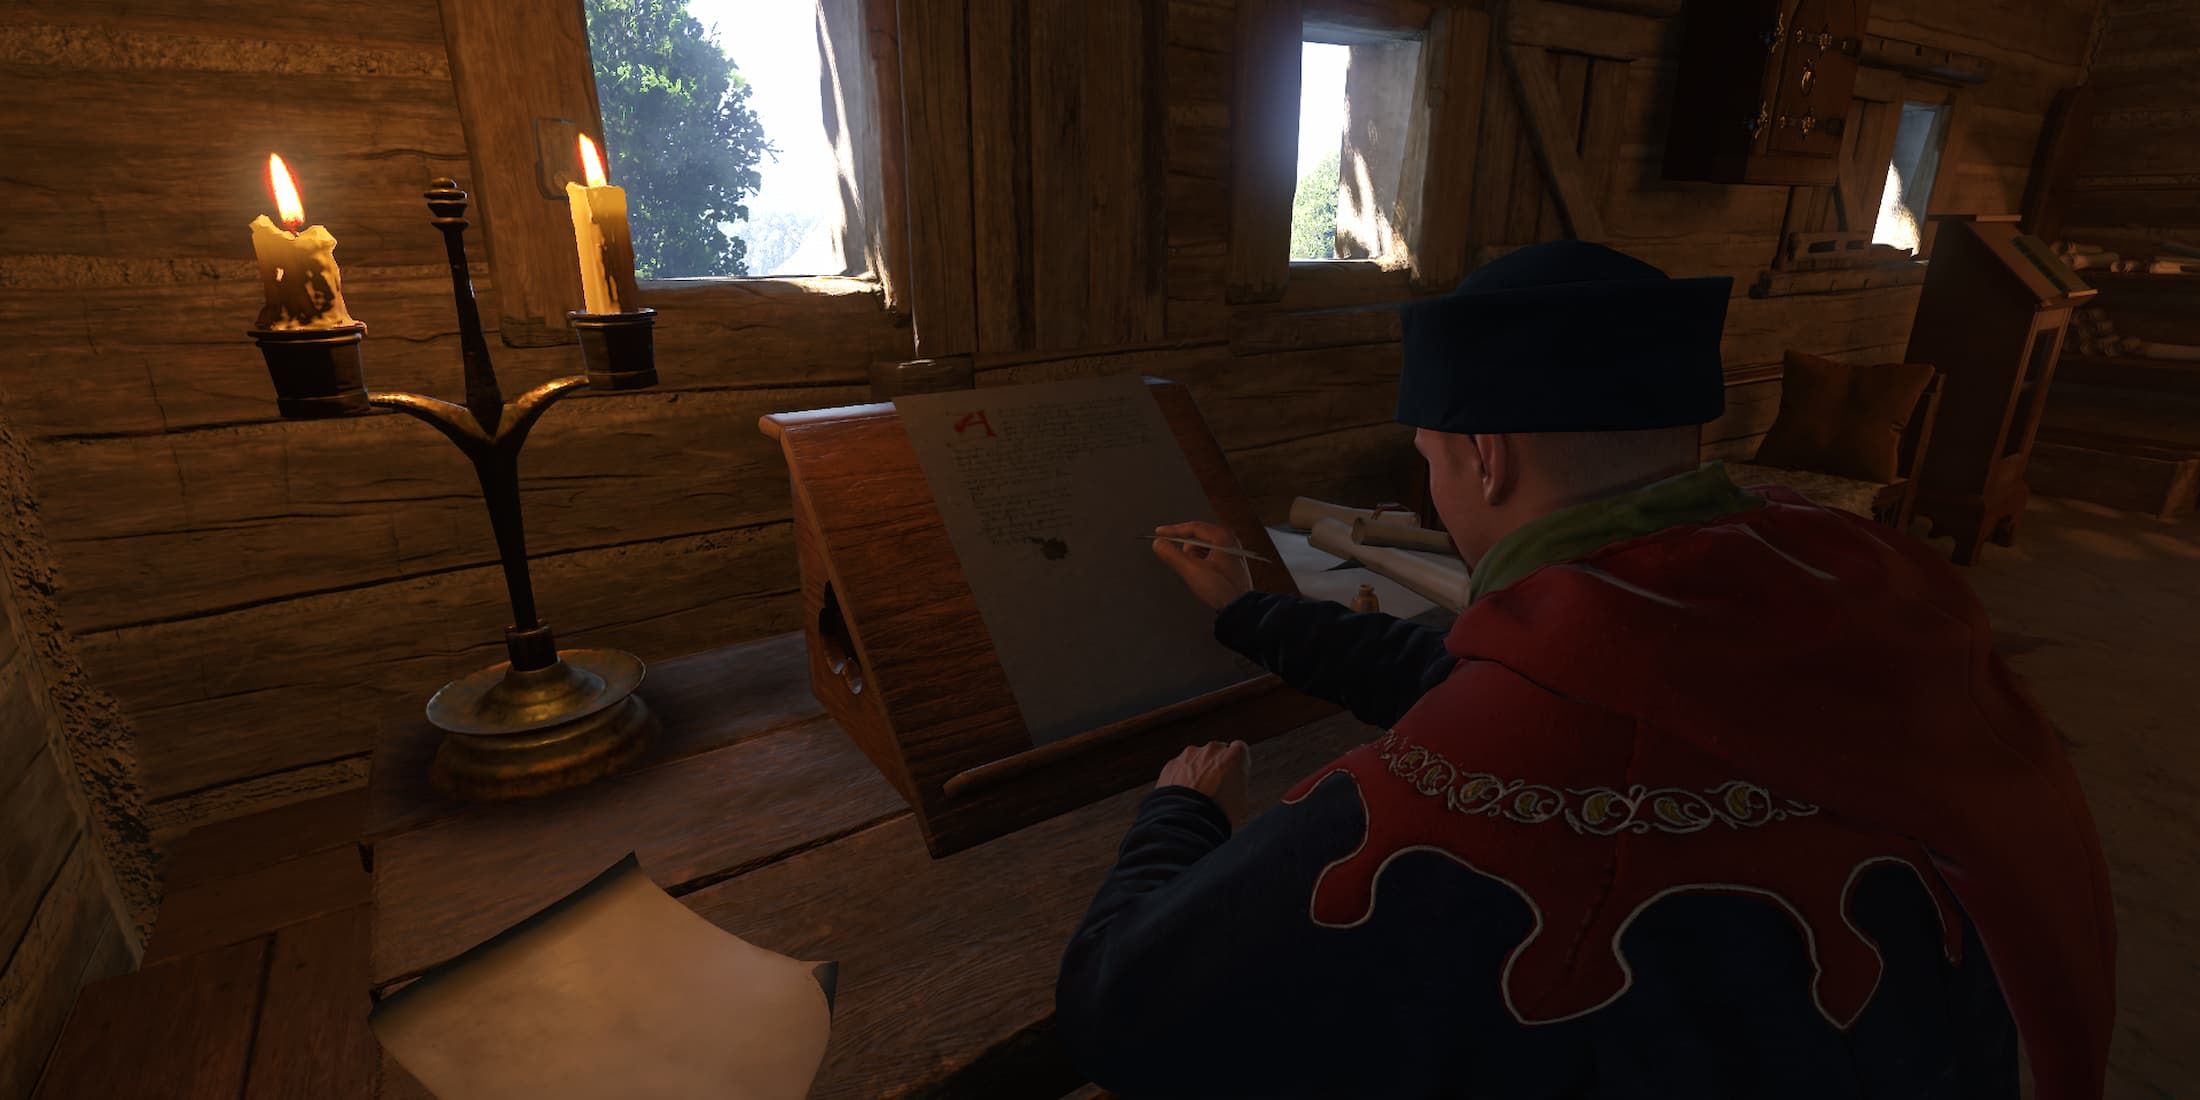
    Players have a lot of freedom when it comes to building Henry up in Kingdom Come: Deliverance 2. The skills you choose to improve can drastically affect how Henry interacts with the world, and one such skill involves Scholarship, which influences your character's worldly and academic knowledge.
    0 Commenti ·0 condivisioni ·22 Views
  • Paradox Interactive Acquires Haemimont Games
    gamerant.com
    Swedish publisher Paradox Interactive has acquired developer Haemimont Games. Originally the video game division of Target Games, the Stockholm-based studio later became part of Paradox Entertainment before spinning off as an independent company in 2004. From its inception, one of Paradox Interactives key objectives was to establish itself as an AAA game studio, a feat it has since achieved with many of its game titles.
    0 Commenti ·0 condivisioni ·16 Views
  • How To Get Started As A Complete Beginner In Game Development
    gamedev.net
    Summary:This article gives two avenues to get started as a game developer; 1) as a complete beginner that has never tried to do anything creative before.2) as a mature visionary who knows what they want but has never built a game before.I show my own journey of how I started and got into it through modding, giving clear advice on what you should look for and how to approach getting a good start in your game development hobby/career/passion, as well as highlighting some
    0 Commenti ·0 condivisioni ·13 Views
  • How to get Finalitys Auger in Destiny 2
    www.polygon.com
    Finalitys Auger is an exotic weapon in Destiny 2, and is a possible reward from completing the Sundered Doctrine dungeon.This Linear Fusion Rifle is a powerhouse in the power slot, with some interesting tricks up its frilly sleeves, and pairs up nicely with perks and features of the the Episode is debuts in Feb. 2025s Episode: Heresy.Heres how to get Finalitys Auger, and ways to increase the drop rate.How to get Finalitys Auger in Destiny 2The one and only source for Finalitys Auger is completing the Sundered Doctrine dungeon, which was released as part of 2025s Episode: Heresy.Grab two friends and delve back into Rhulks Pyramid to find out what the Dread are doing there, and upon completion there is a chance Finalitys Auger will drop.The only guaranteed way to get the weapon is if you completed the dungeon during the Contest Mode period. At the time of writing this has expired, though Bungie has said there are plans for another following a PlayStation Network outage over its launch.But once that ends, the weapon works much the same way all other raid / dungeon exotics do: as a random reward that can drop upon finishing.There are, thankfully, ways to increase your chances of getting the weapon if you are unlucky.How to increase Finalitys Auger drop rateThere are ways to improve the drop rate and eventually all but guarantee a drop:Every time you complete the dungeon and dont receive the weapon, your chance of getting it the next time goes up. This stacks, meaning the more times you do the dungeon and get nothing, the more your chance will increase.There are a handful of Triumphs in the Sundered Doctrine seal that, when completed, will increase your drop rate for Finalitys Auger. Those Triumphs are:Lonely Travels Complete all encounters in the Sundered Doctrine dungeon solo and without leaving the activity.Military Doctrine Complete the Sundered Doctrine dungeon on Master difficulty.Laboratory Inspector Find all collectibles within the Sundered Doctrine dungeon.If you really want this weapon and luck is not on your side, you should try to tackle these challenges to improve your odds. Regardless, youre likely to need several completed runs through the dungeon to get Finalitys Auger for yourself so prepare yourself for a few playthroughs.Is the Finalitys Auger any good?This Linear Fusion Rifle is one of the most interesting weapons Bungie has added in a long time. Its unique ability allows you create a floating Ruinscribe Turret which rains down fiery pain on your enemies. The turret costs three ammo to create, but once it is out it is completely autonomous, you dont need to spend any more ammo to use it.While the turret is active, you can paint targets for it, which will not only direct your turret at a target of your choosing, but also cause it to fire more powerful projectiles. You can swap between turret mode and regular fire mode, spreading your damage output over the two modes.Finalitys Auger is really out there as far as Destiny weapons go, with functionality that you cannot get anywhere else. Furthermore, the damage potential is up there with the highest in the game, so expect players to pull off incredible things with this weapon. In other words its worth tackling the Sundered Doctrine dungeon to get one of these guns for yourself.
    0 Commenti ·0 condivisioni ·14 Views
  • Destiny 2 Sundered Doctrine dungeon guide and walkthrough
    www.polygon.com
    The Sundered Doctrine dungeon takes Destiny 2 players back to Rhulks Pyramid for more monsters, more riddles, and most importantly, more loot.Veterans of the Vow of the Disciple raid will recognise the mechanics here, albeit with some new twists.Sundered Doctrine is on the shorter side as far as dungeons go, with just three encounters and two not-so-tough boss fights. Provided you can get your head around memorising all those symbols, you should have no problem completing Sundered Doctrine and if youre lucky, receive the Finalitys Auger exotic fusion rifle while youre at it.How to start Sundered DoctrineBefore we begin, theres a bit of admin to take care of first. To start Sundered Doctrine, youll first need to chat to Ikora in the Tower. She will give you a quest, The Drowning Labyrinth which unlocks access to the dungeon. Now, you just need to head to the Savathuns Throne World section of the map, and find the Sundered Doctrine node in the top left, beside the Vow of the Disciple raid.Once you load in, youll have a bit of a trek to get to the first encounter. Proceed forward and youll come to a large gap, with a bridge crossing it to your left. Take the bridge across, then jump up to the ledge on the left. Take the first right and drop down; youll enter a series of rooms with enemies to deal with.Take out the Attendants and the Subjugators, then proceed forward. In the back-left corner of the second corridor, youll spot a large rectangle jutting out from the wall at a strange angle. Jump on it, and it will lower down, allowing you to pass through.Youll now be in a tight space with several ways to drop down. Theres nothing untoward here you simply need to make your way down to the bottom. Youll then emerge into a large, cross-shaped room with enemies to take out. Once you clear the way, look for a small waterfall. From where you enter, go straight ahead and youll find it on the right side.Go under the waterfall, and follow the path down to the first proper encounter of the dungeon.First Encounter, Flooded InspectionThis first encounter primarily consists of two things: memorising symbols and directing light beams. Youll begin by entering the central chamber, with three lenses in the centre and a symbol wheel above the back of the room. There are three symbol slots on the wheel, but one is empty. The objective is to find the missing symbol and connect a light beam to it.The layout and how it worksLets start breaking this down. There are four rooms around the central chamber. Two on the left, and two on the right. Each room has its own symbol wheel, and each wheel has just one symbol on it. To determine which symbol you need, youll need to locate the Truthspeaker.In just one of the four rooms, a Grim labelled the Truthspeaker will spawn. When you kill it, it will drop a symbol, that is the symbol you need to link the light beam to.Your next step is to locate the correct symbol. It will be on one of the wheels in one of the four rooms. Once you find it, youll need to link the light from the central room to the wheel. To do so, youll first need to shoot the shard above one of the three lenses in the central room to make it produce a beam of light.You then need to create a chain of light through various lenses from here to the correct symbol wheel. The three in the central room are ready to go, but many of the other lenses are missing.Each of the four rooms will spawn a Lens Bearer Subjugator. Kill one, and it will drop a lens that you can pick up. Bring the lens to one of the empty slots around the encounter area and you can place it there. Once placed, a lens can be rotated to one of a few predetermined angles. You can look at the base of the lens to see which directions the light can go.The important stepsThis may seem like a lot in writing, but it is pretty simple in practice. The order of operations goes like this:Search each room for a Truthspeaker to find your missing symbolLocate the symbol on one of the four wheelsFollow the path from that wheel back to the central room, noting which lenses are missing along the wayActivate the closest light in the central room, then grab lenses from the Lens Bearers as neededCreate a chain of light that links the central room to the correct wheelOnce you create the correct chain, youll get a notification that says The Pyramid accepts a truth, meaning you have completed the objective. After you complete the first chain, return to the central room and youll see that two symbols are now missing from the wheel. For the second round, youll need to link two symbols.The method is identical; find the Truthspeaker to get your symbol, grab lenses from Lens Bearers, and make the chain. Once you complete the first one, a second Truthspeaker will spawn to give you your second symbol. Repeat the process, and once you have the two symbols linked, the second round is complete.This may come as a shock, but for the third round, youll need to link three symbols. No changes here, just repeat the steps you have been following so far. In total, youll have to make six links to complete this encounter.Sundered Doctrine maze routeWith the first encounter completed, a door will open in the central room, leading to the next encounter. Unfortunately, there is a bit of a maze and some traps ahead that would give Indiana Jones a run for his money. While it can be easy to get turned around in the maze, thankfully you cant get too lost.When you go through the door, youll immediately come to some stairs leading to a locked door. Drop off either side of the stairs, and make your way down to the bottom. Continue forward, and youll come to a hole, and drop down again. This brings you into the small maze.At the first junction, turn right and go straight to the end. Drop down, then look to your right. Take the first left down this corridor, go up the stairs and follow this path to exit the maze.The next part is a massive open area with some enemies to deal with. No tricks here, just make your way past the enemies and cross the bridge to the right. Through here, youll find a long and dark hallway. Go down it, but stop at the second exit on the left, youll find another hole to drop down through.This will bring you to a long room with a pit running through the middle. Stay on the side you enter on, walk to the far end, and look across and down. Youll see a small opening below the opposite ledge. Walk through this small passageway and emerge into what seems to be an ancient Peruvian temple, with fewer golden idols and more boulders.The boulder section is fairly simple, you simply need to use the safe spaces on either side to avoid the giant ball of spikes rolling towards you. You dont need to go all the way up the hill either there is a hole about halfway up it, and that is your way forward. Through here, you just need to avoid some crisscrossing boulders and make your way down to the door to the second encounter.Second Encounter, Altered Convolution and Zoetic LocksetThe second encounter has two parts opening the door, and the Zoetic Lockset.Opening the doorThe door into the second encounter of Sundered Doctrine is a small test, set to teach you the mechanics you need to know. Youll enter a room with symbol wheels on either side, enemies throughout, and a door ahead with a symbol on either side of it. You need to highlight those symbols on each of the wheels in order to open the door.To do this, take down one of the Perceptor Wizards and grab the item it drops. This will give you Heightened Knowledge, which you can use to move the highlight on the symbol wheel one space. You can move it clockwise or counterclockwise, depending on which way the inner wheel is spinning. To change the rotation, simply shoot the shard above the wheel.You can gather more knowledge from the Perceptors, up to three at once. This is all very relevant for the encounter ahead, so make sure you get to grips with this system.As mentioned, a single stack gives you Heightened Knowledge, which moves the symbol one space.Two stacks gives you Brimming Knowledge, which will move the symbol two spaces.Finally, Overflowing Knowledge will move it three spaces.Once you highlight the correct symbols, the door ahead will open. Go through it to enter the second encounter room. Here youll find the Zoetic Lockset, a group of four Hive Shriekers along the back of the room. There are four blank signs in front of them, and four symbol wheels throughout the room.Defeating the Zoetic LocksetThis encounter is more art than science, as there is no rigid method for completing it. Put simply, the highlighted symbols on each of the wheels cause different, specific effects. The Zoetic Lockset will cycle through those effects throughout the fight, and you need to use this to your advantage. From our testing and research, the symbols appear to have the following effects:Hive Spawns OgresKnowledge Spawns KnightsCommune Shriekers launch Darkness seekersStop Temporarily prevents enemies from spawningKill Begin the damage phaseIt goes without saying, Kill is the symbol we want to focus on. However, there is an order to this, and jumping the queue can have unpleasant consequences. The Shriekers cycle their attention from right to left, which is why you will hear many Guardians referring to the boss, the signs, and the wheels as one to four, and from right to left.There are various strategies you can employ here, but generally, the easiest path forward is to set the symbols in the following order:StopStopStopKillDoing this will give you as much breathing room as possible, and having Kill in the final slot (the one on the far left) seems to grant the most time for the damage phase. Doing damage is quite simple, you can attack any of the four Shriekers and they cannot be killed individually, so pick a target and focus all your fire there. A good strategy for avoiding damage is to hang back near the stairs at the centre of the room, which you can use for cover.As the Zoetic Lockset are a group of Shriekers, precision damage is your best friend. Sleeper Simulant, Queenbreakers Bow, or your other favourite Linear Fusion Rifle will chew this boss up in short order. Gather your team together, focus your shots on the critical spot of one of the bosses, and chip away at it until it dies.Reaching the final encounterOnce the Zoetic Lockset is defeated, youll need to open the exit door. Just in front of the loot chest, youll notice a concave bowl in the floor. As you likely know, when Shriekers die, the spherical core drops to the ground and makes for a pretty decent football.Youll need to go the long way as there are barriers on either side of the hole, so bring one of the balls to the back of the room, then coax it across the bridge. It should fall nicely into the dish, which will open the door to the next encounter.The journey here is less complicated, you should have little issue finding your way forward. Before long, youll come to the skeletal remains of a giant Hive worm. Go through the ribcage tunnel to enter a room with another light puzzle. If you made it through the first encounter, this part isnt going to stop you.Youll find the sources of both lights on one side of the room, beside the symbols for Enter and Worm. Simply bounce the beams to the matching symbols on the other side of the room to lower the barrier and proceed to the final encounter.There is one last hurdle, as you find yourself in a room with a sealed door. There is no mechanism to open it, you simply have to shoot the door. How much it opens is directly relevant to how much damage you do, so hit it with something reasonably powerful to open it fully and walk through to the boss room.Final encounter, Isolate Preservation and Kerrev, The ErasedOur last task in the Sundered Doctrine dungeon is to take down Kerrev, The Erased. The final boss room consists of a large central room, with side rooms on the left and right. Kerrev has an invincible shield, which we will need to use the mechanics to bring down. Were back to using light beams to illuminate specific symbols like the first encounter, but there is a bit more brainwork involved this time.At the back of the central room, youll find a symbol wheel. There are six symbols on it, three on the left and three on the right. The first thing you should do is take note of these symbols. Take a screenshot, take a picture with your phone, whichever is the most convenient for you to reference back to.Search the roomsNext, you need to find the Truthspeaker. They can spawn in either of the two side rooms, so do a quick search of both. To enter the room on the right, jump onto the rectangular structure that sticks out of the wall at an angle (much like the one at the very start of the dungeon). Standing on it will lower it, and you can walk through. You cannot use this to return to the central room, you need to go through the small tunnel further along the connecting wall.The left room is less convoluted, but the door has to be damaged to open, like the door that got you into this encounter. Check both rooms and defeat the Truthspeaker to get a symbol. It will match one of the symbols on the wheel.Light up the correct symbolsThis is the crucial thing to remember, whichever side of the wheel the Truthspeaker symbol is on, you must darken the symbols on that side, and illuminate the symbols on the opposite side. If the symbol is on the right side, you need to switch off any lights on the right side, and turn on any lights that arent lit up on the left.How you do this is quite straightforward each of the symbols can be found in one of the three rooms, with a lens nearby that you can use. Here is where you can find each of the symbols, relative to where you start:Left RoomWitness Far-left cornerHive Far-right cornerGuardian Directly right as you enter the roomPyramid Ahead and to the left as you enterTraveller Back-right cornerCentral RoomWorship Back-left cornerKill Back-right cornerStop Downstairs, under where the boss standsGive DownstairsDrink Far-right cornerRight RoomLight Back of the roomDarkness Centre of the roomWorm Far-left cornerSavathn Far-right cornerTake note of which symbols you need to turn on, and which ones you need to turn off. Then, go to those symbols and interact with the corresponding lens as needed. Many of the lenses will be locked down with Strand energy, for those you need to take out Unwritten Attendants to gain the Unwritten Empowerment buff, which allows you to destroy the Strand locks. Be careful, as each one you destroy will spawn a particularly nasty Threadling.Damage phaseOnce you have the correct symbols switched on or off, interact with the main symbol wheel in the central room to input your answer. As soon as you do, run for cover. This triggers a massive burning effect which will quickly kill you if you are out in the open. Use the shadows of the structures in the room to find a safe space, and wait until the burning dissipates.If your symbols are lit up correctly, the boss shield will have burned away, and you can start dealing damage. Kerrev is a squirrelly customer, so youll need to keep up as he moves around the room. A great way to maximise your damage here is to use Divinity with a couple of Linear Fusion Rifles or Machine Guns for massive critical damage.Youll only have a short while to deal damage before Kerrevs shield regenerates. When that happens, repeat the steps exactly as you did before to trigger another damage phase. Repeat the process until Kerrev is dead, and the Sundered Doctrine dungeon is complete.Fingers crossed you were rewarded the dungeons exotic, Finalitys Auger but if not, the previous link delves into ways you can improve your drop rate.

    0 Commenti ·0 condivisioni ·20 Views