


This article describes how to implement a system to adjust texture sizes in Unreal based on the sharpness of the source texture file. Blurry textures without much detail are reduced in size by this system.
The Problem
Very often when working on games you'll come across something like this:

A simple gradient texture using a resolution of 1024px * 1024px. While this texture contains more than a million pixels, the information stored in it is negligible. A 2x2 image could carry the same information with much less data.
Let's consider a less extreme case: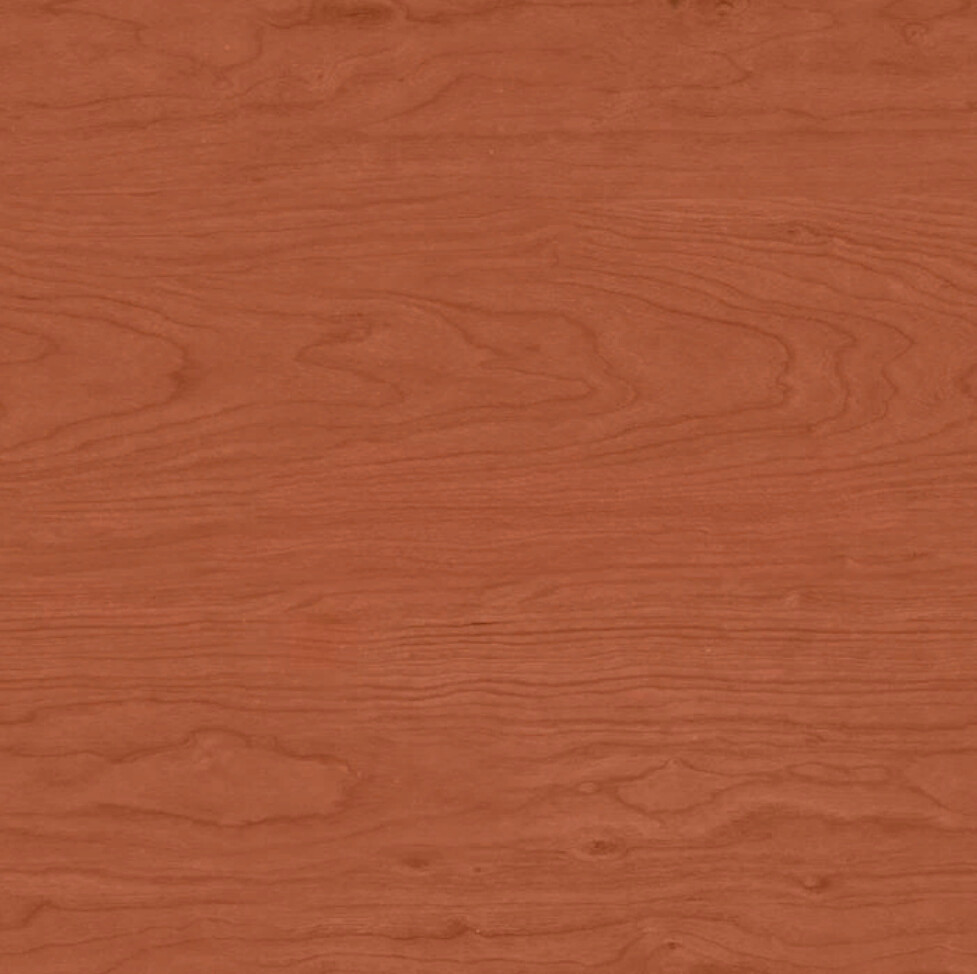
This wood texture contains more information, but if you look closely, you can see that the texture doesn't have fine-grain details. The large patterns are there, but the contrast between different pixels isn't that great. This texture can be scaled down without noticeable loss of detail to reduce the memory usage and build size of your game.
On the other side of the spectrum, you have a texture like this:
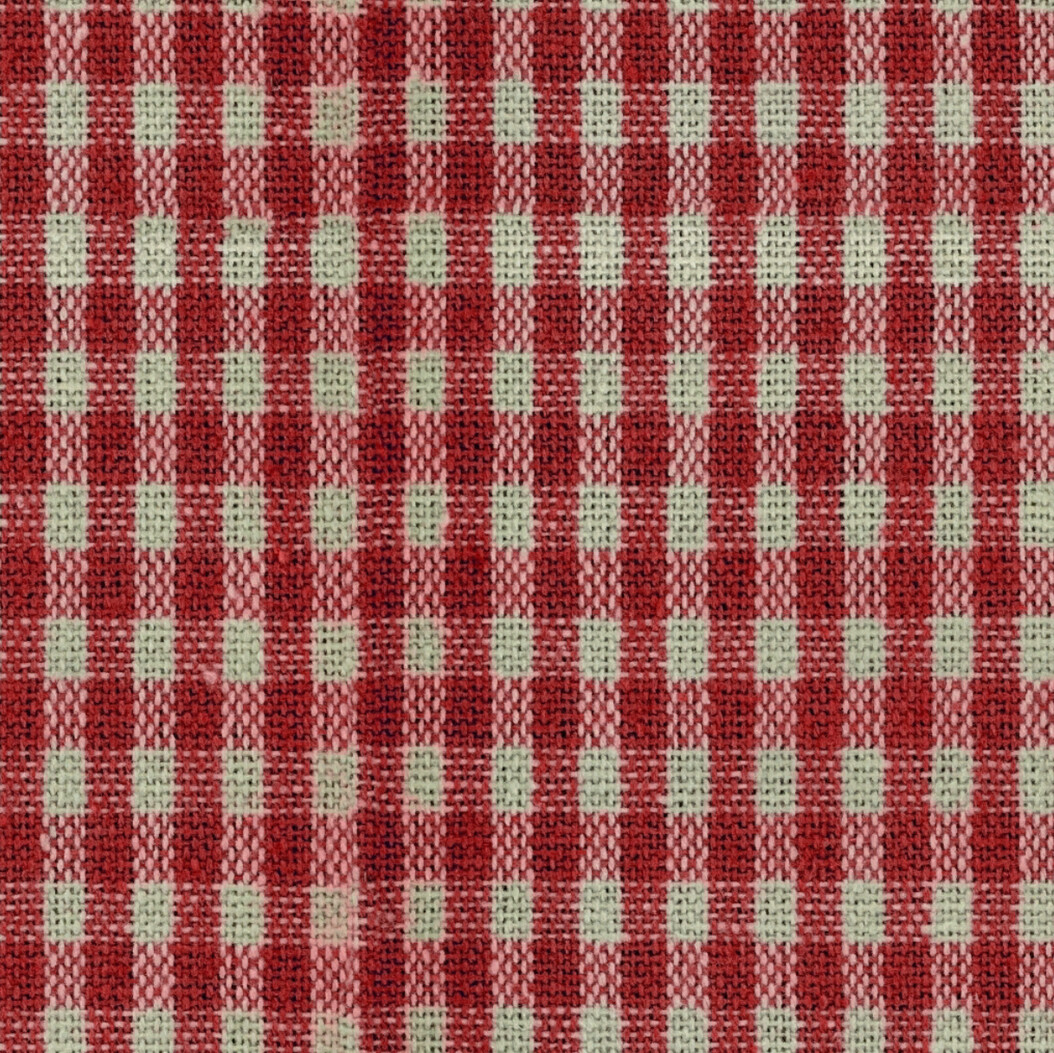
The detailed fabric structure and shadows in the crevices are easily lost once the texture is scaled down, so if you're under pressure to reduce texture sizes in your game, this is probably one of the last textures you'd want to touch.
Now, you could go through your entire project and manually adjust the texture sizes to make sure that each texture is only as big as it needs to be for its content, but in a large project that would take forever, and the results are likely to be inconsistent as you have to judge for each texture what texture size is still acceptable without compromising the visuals too much.
So let's see if there's a way to automate this.
Disclaimer
The implementation described below is the result of me trying out some ideas I have had for a while. However, I haven't used it in an actual professional production context, so please take my advice with a grain of salt. If you're implementing your own solution, be sure to tailor it to your project- and team-specific needs, and make sure the results are what you expect. That said, I think the basic principles of this implementation are sound, and some of the techniques used can be helpful in other contexts.
Step 1: Measuring Image Sharpness
The first step is to find a way to measure the amount of information. This is a huge topic in itself. First I found this article on calculating the entropy of images.
At first the results of this technique were quite promising, since the entropy gives you a good measure of the overall contrast in an image. But it quickly turned out that the entropy doesn't care about the frequencies present in an image, so even the gradient above had a rather high entropy, due to the presence of many completely black or white pixels.
Still, the fact that there are so many publicly available image processing libraries for Python was nice to see, so while I had to find another metric, I knew that I wanted to implement the measurement in Python. And very quickly I found another approach to evaluate image quality, by estimating the sharpness of the image.
The Python code used to measure image sharpness looks like this:
from PIL import Image
import numpy as np
import sys

def calculate_sharpness(image):
    array = np.asarray(image, dtype=np.int32)
    gy, gx = np.gradient(array)
    gnorm = np.sqrt(gx**2 + gy**2)
    sharpness = np.average(gnorm)
    return sharpness

if __name__ == "__main__":
    image = Image.open(input).convert('L') # to grayscale
    sharpness = calculate_sharpness(image)
    size = image.size[0]
Step 2: Installing the Libraries to Unreal's Python Environment
Now that the sharpness of an image can be calculated using Python, the next step is to actually use this logic in Unreal. But first we need to install some prerequisites. Since both the pillow library and the numpy library are used by the Python code, both are needed in the Python environment.
Unreal uses its own Python environment, not the one you have installed on your PC. So if you’re not used to working with Python in Unreal, here is how to install any additional libraries for Unreal's Python environment:
- Go to your engine folder and there into .../Engine/Binaries/ThirdParty/Python3/Win64
- Open the command line by typing cmd in the explorer's address bar and pressing enter
- The command python.exe -m pip install ModuleName starts the installation of the module
For the code above, both pillow and numpy are needed.
Step 3: The Asset Action
Now that the detail estimation has been figured out, let's start at the other end of the process, the user in the editor who wants to automatically adjust texture sizes.
To expose options like this to the user, I'm a big fan of Unreal's Asset Action Utilities. Functions in these blueprints can be exposed to the asset context menu and called on multiple assets at once. You can find an introduction to them here.
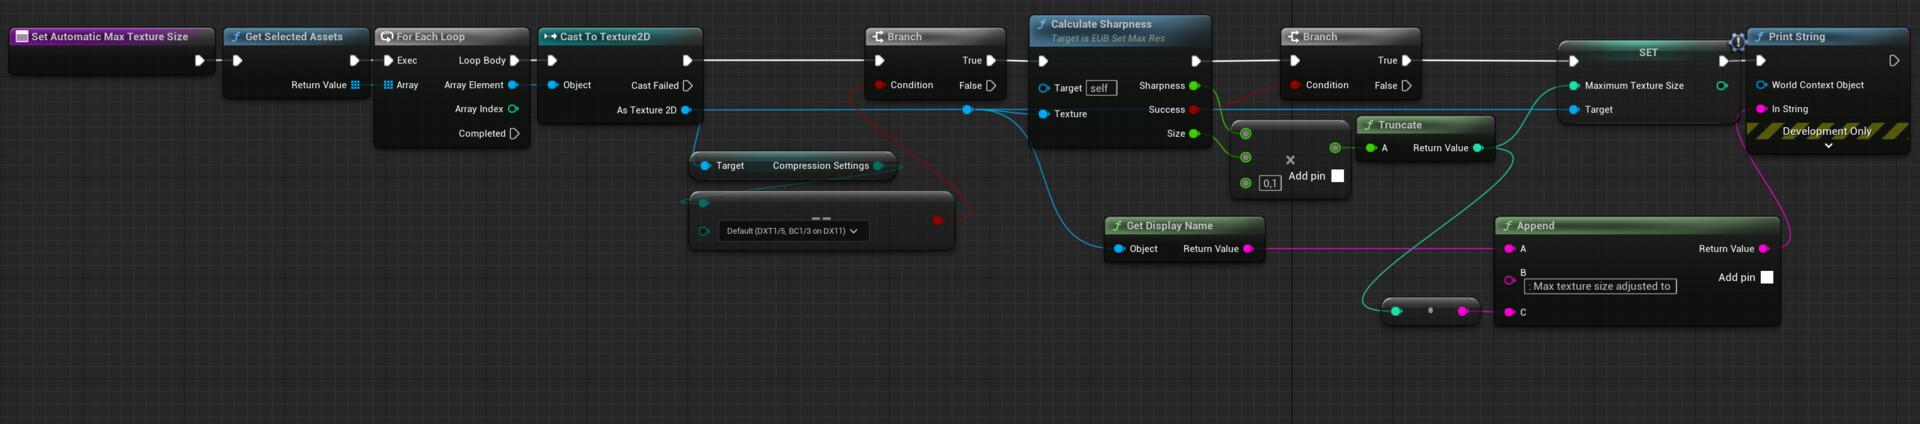
The function that gets called by the user looks like this: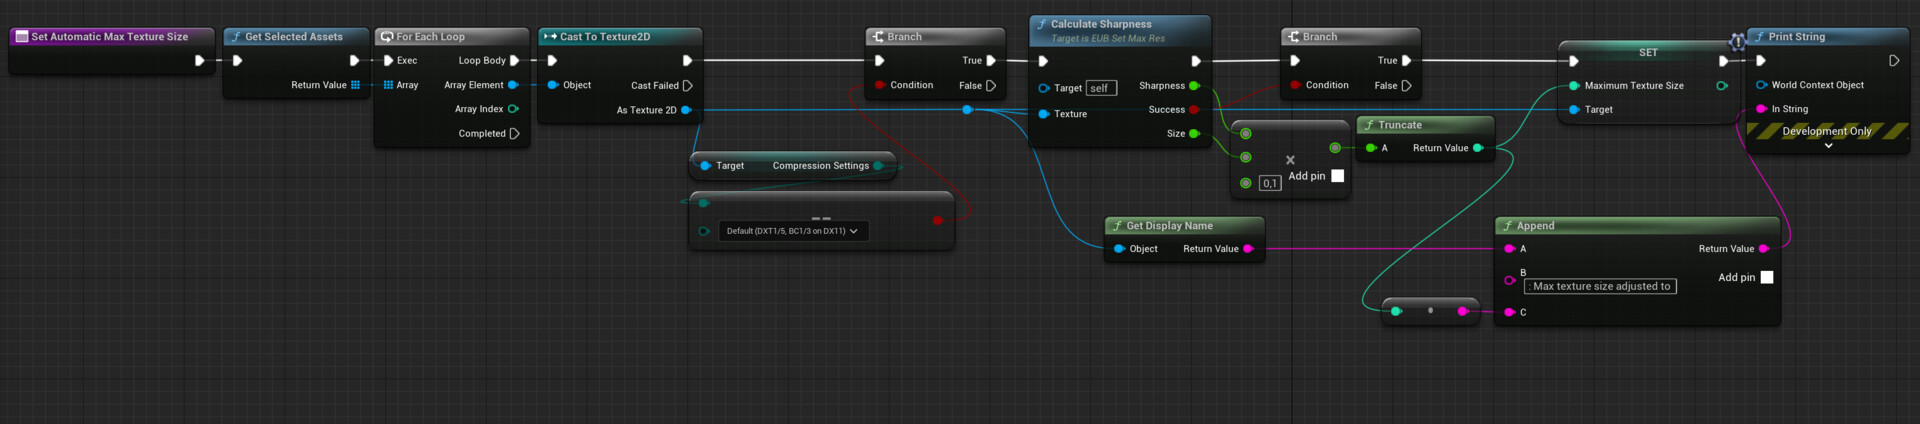
As you can see, the action only processes textures with the default compression settings. For now, I only want to use this tool on base color textures (see possible future works at the end of this article for why).
A texture with a sharpness of 5 and below will be halved in size, a texture with a sharpness of 2.5 will be quartered, and so on. The 10 is just a magic number, but can be adjusted depending on the desired quality.
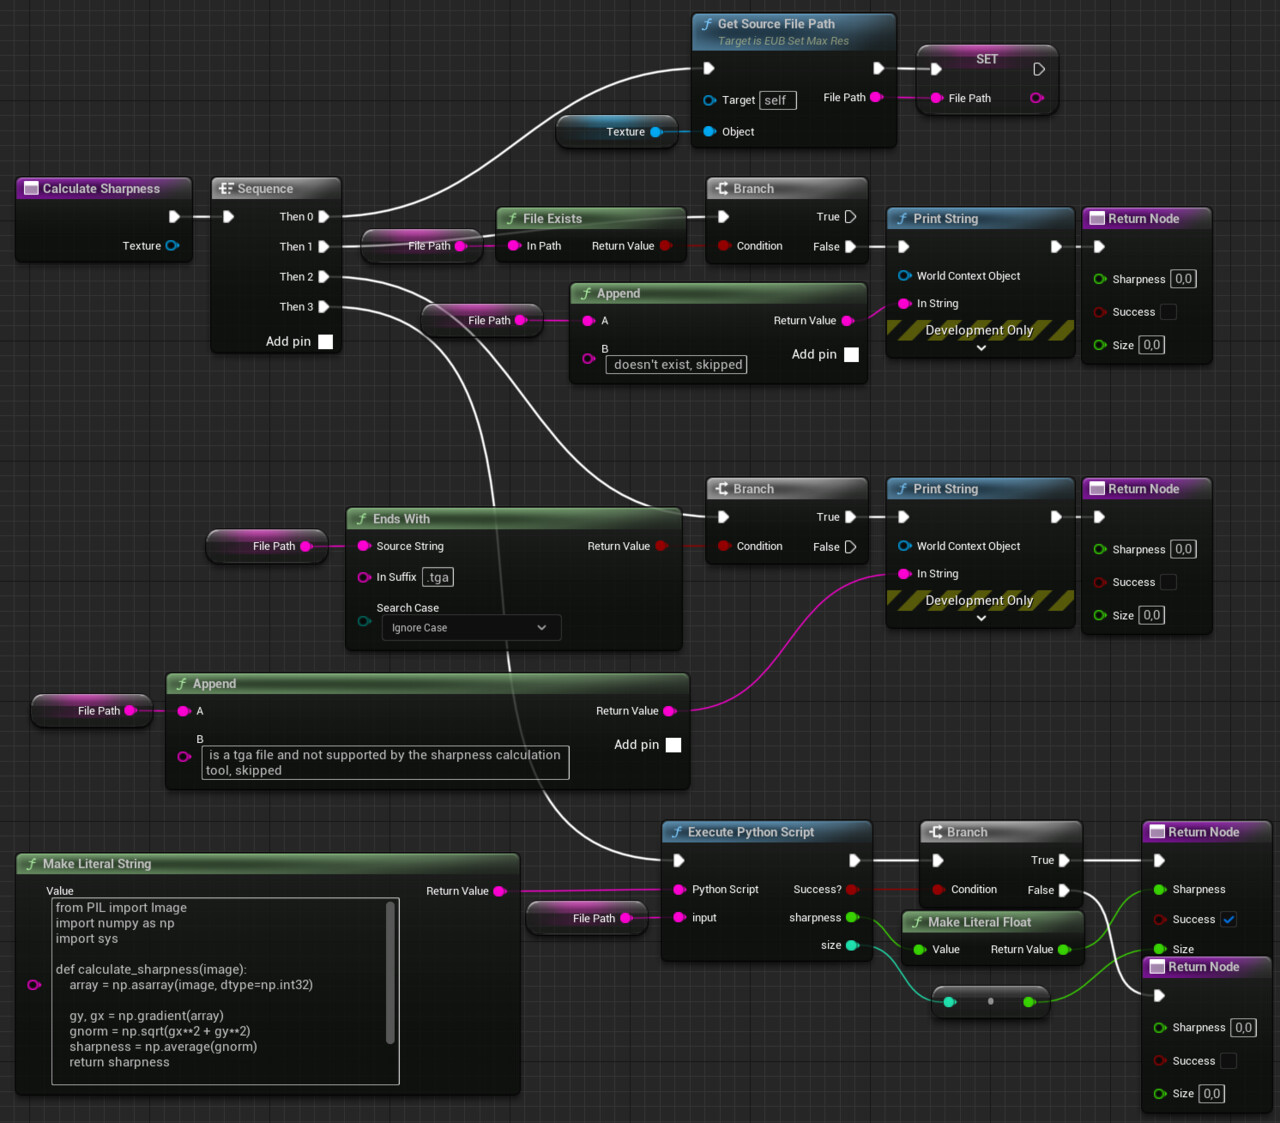
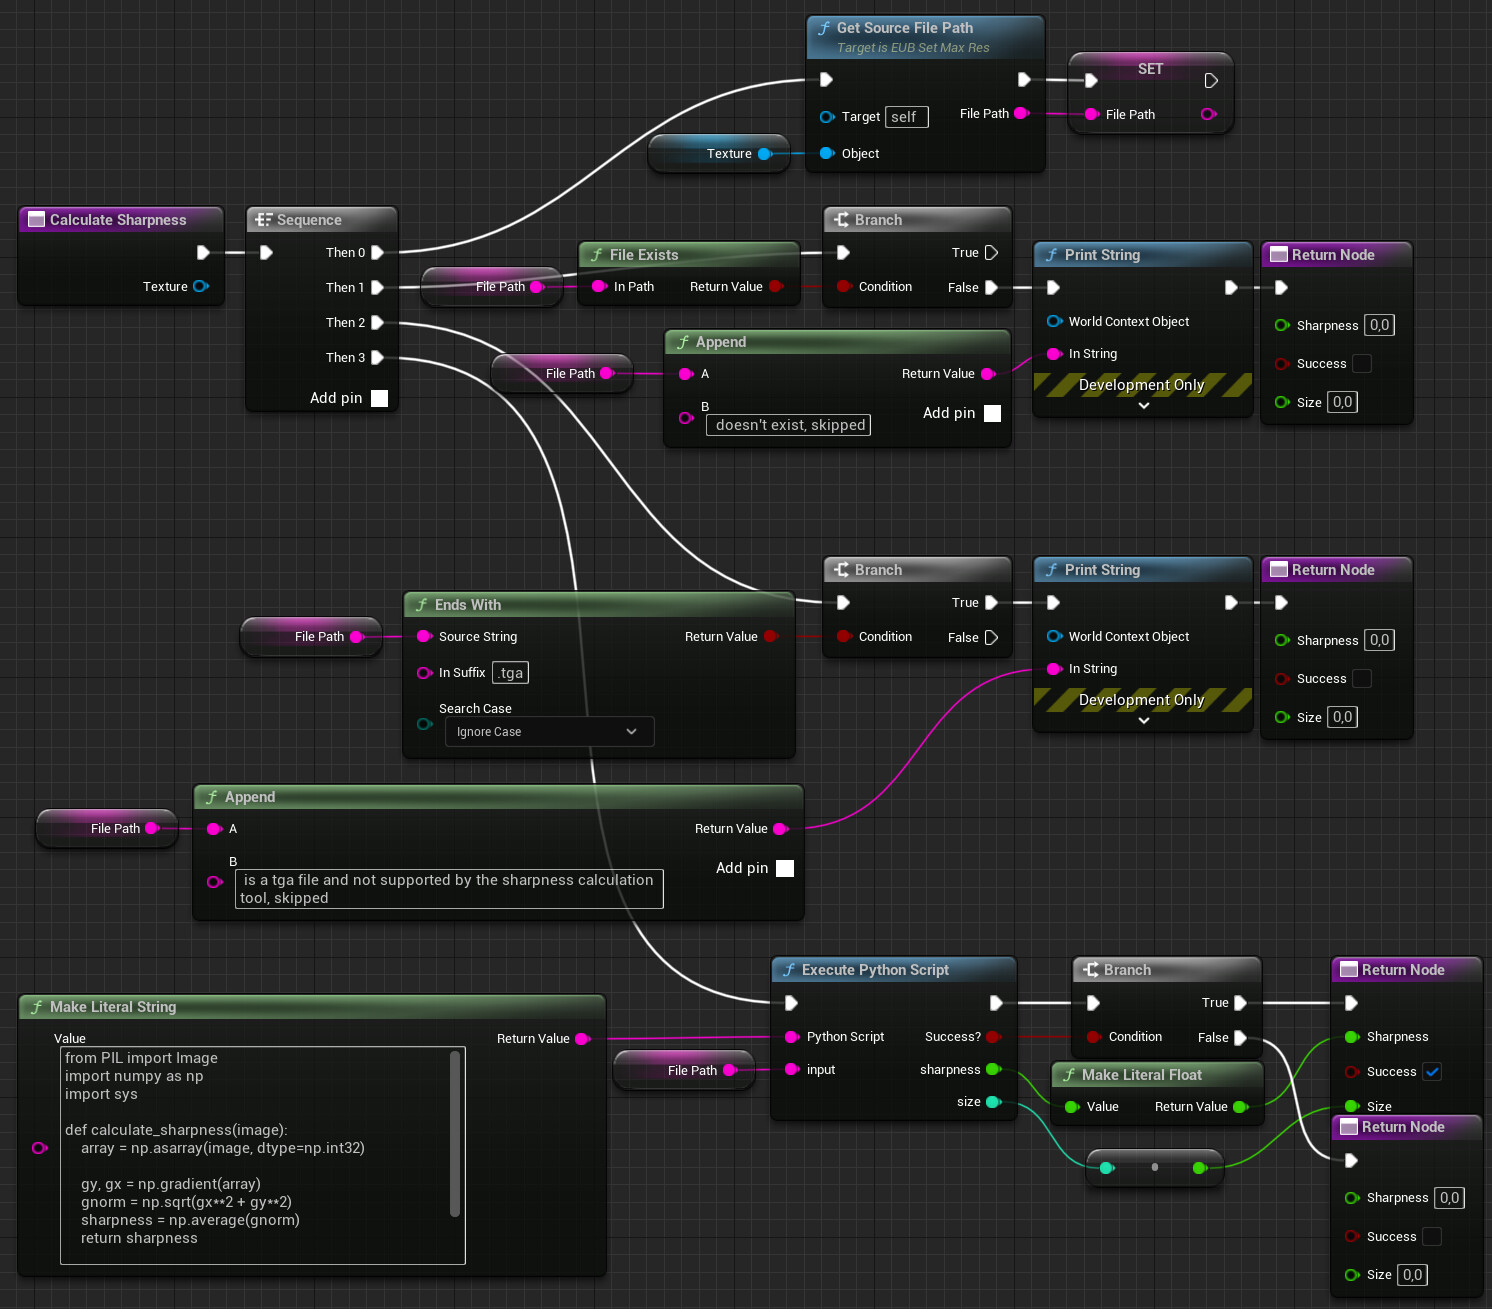
Step 4: Calling the Python Code
The next missing piece is the CalculateSharpness function. This function calls the Python code to get the sharpness. The Python code needs the file path of the texture's source file, which is provided by another function that will be covered in the next step. If the specified file path doesn't exist or the file is a .tga file, the function returns early without a result. I added the second check because pillow can't handle .tga files, but there are probably other file formats that aren't supported as well, so you may want to add additional checks if you're using other exotic formats.
To execute the Python code, the 'Execute Python Script' node is used. This node is the only Python execution node in Unreal that allows the use of input and output variables, so it was the logical choice. The only downside is that this node can't be used to execute .py files, therefore the code has to be stored in a literal string.
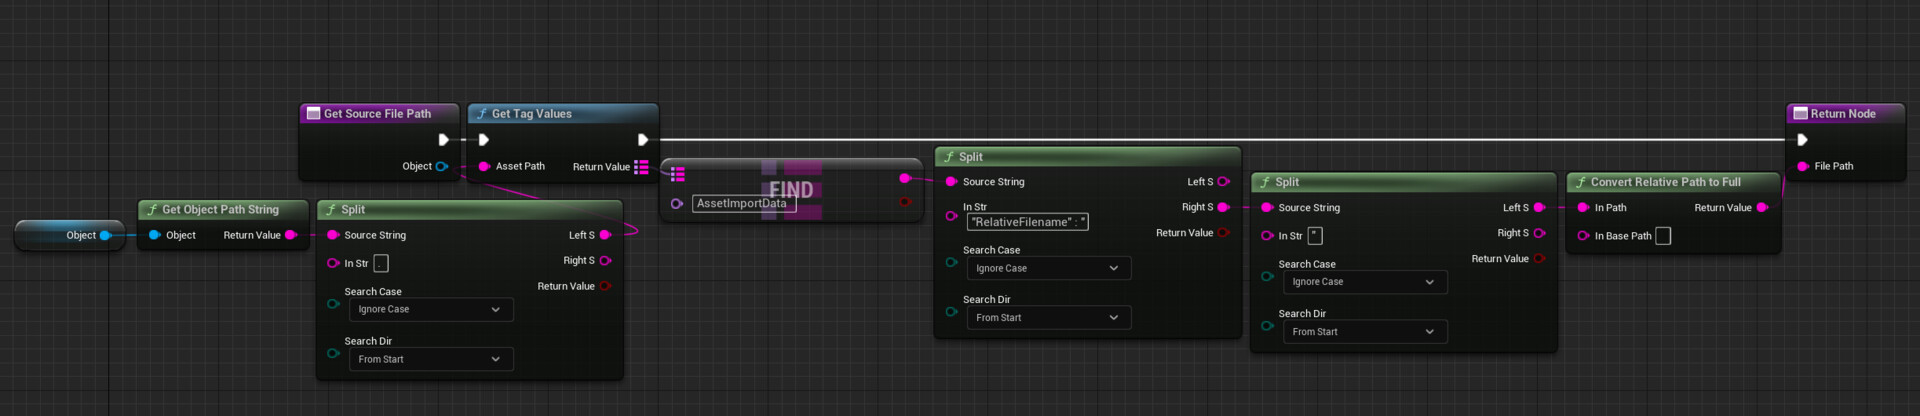
 Step 5: Getting the File Path
The GetSourceFilePath function returns the path to a texture's source file. This is a bit more complicated than you'd expect in Unreal. It can't be queried directly, but is stored in an asset registry tag, along with some other information. Therefore, some string processing is needed to extract just the path, which then needs to be converted to an absolute path:
Using the Action
The action can now be called on any number of selected assets in the Content Browser, allowing you to adjust texture sizes for the entire project with just a few clicks: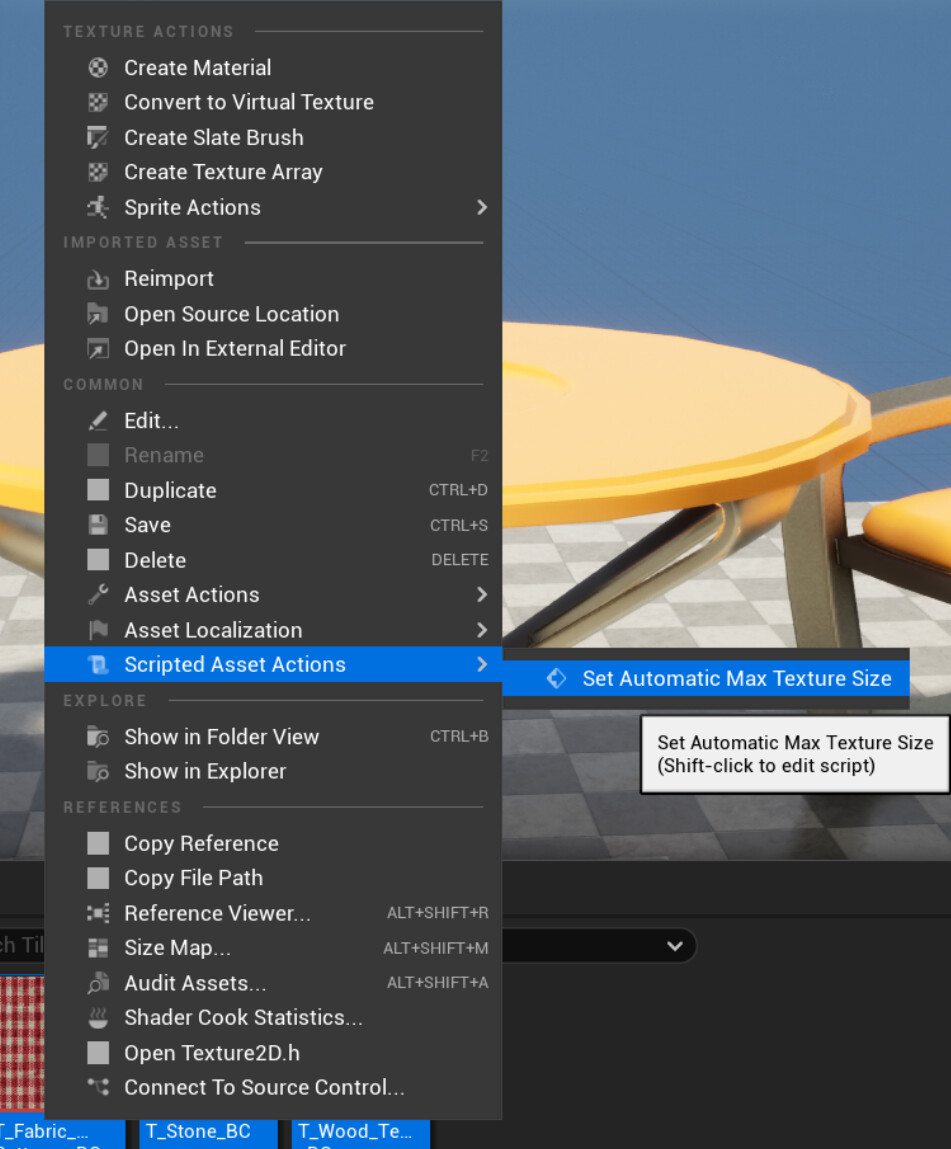
Known Issues and Future Work
While the estimated sharpness is a better metric than the entropy, it's far from perfect: Because it’s measured on a grayscale version of the image, it doesn't account for changes in hue or saturation, and human perception has its own quirks: The human eye is much better at detecting contrast differences in dark areas than in bright areas. It's also very good at recognizing patterns, so lines and repeating elements should actually be considered more important than random noise.
And while I'm focusing on base color textures for this article, normal maps and MRA maps do deserve their own customized algorithms: For normal maps, you should measure the angles between vectors instead of luminance differences. For MRA maps, you'd usually prioritize the quality of the roughness channel over the quality of the other two.
Depending on your pipeline, the need to have the source image file to be available may also be an issue, for example if you’re using textures from the Unreal Marketplace or if you're working in a team using version control and the art source files are not part of the workspace you're working in.


