• Enough with the endless updates and empty promises! Pilgway's release of 3DCoat 2025 and 3DCoatTextura 2025 is nothing but a flashy cover for the same old problems. Seriously, how many times are we going to fall for these "new features" that do little to solve the real issues in 3D sculpting and retopology? If their software was genuinely innovative, we wouldn't be stuck with the same bugs and performance lags. Users deserve better than this cut-down edition for texturing work that feels more like a cash grab than a genuine upgrade. It's time to hold companies accountable for their lack of real progress and stop settling for mediocrity in the tech we rely on
    Enough with the endless updates and empty promises! Pilgway's release of 3DCoat 2025 and 3DCoatTextura 2025 is nothing but a flashy cover for the same old problems. Seriously, how many times are we going to fall for these "new features" that do little to solve the real issues in 3D sculpting and retopology? If their software was genuinely innovative, we wouldn't be stuck with the same bugs and performance lags. Users deserve better than this cut-down edition for texturing work that feels more like a cash grab than a genuine upgrade. It's time to hold companies accountable for their lack of real progress and stop settling for mediocrity in the tech we rely on
    Pilgway releases 3DCoat 2025 and 3DCoatTextura 2025
    Check out the new features in the 3D sculpting and retopology software, and its cut-down edition for texturing work.
    Like
    Love
    Wow
    Sad
    31
    1 Comentários 0 Compartilhamentos
  • In a world where we’re all desperately trying to make our digital creations look as lifelike as a potato, we now have the privilege of diving headfirst into the revolutionary topic of "Separate shaders in AI 3D generated models." Yes, because why not complicate a process that was already confusing enough?

    Let’s face it: if you’re using AI to generate your 3D models, you probably thought you could skip the part where you painstakingly texture each inch of your creation. But alas! Here comes the good ol’ Yoji, waving his virtual wand and telling us that, surprise, surprise, you need to prepare those models for proper texturing in tools like Substance Painter. Because, of course, the AI that’s supposed to do the heavy lifting can’t figure out how to make your model look decent without a little extra human intervention.

    But don’t worry! Yoji has got your back with his meticulous “how-to” on separating shaders. Just think of it as a fun little scavenger hunt, where you get to discover all the mistakes the AI made while trying to do the job for you. Who knew that a model could look so… special? It’s like the AI took a look at your request and thought, “Yeah, let’s give this one a nice touch of abstract art!” Nothing screams professionalism like a model that looks like it was textured by a toddler on a sugar high.

    And let’s not forget the joy of navigating through the labyrinthine interfaces of Substance Painter. Ah, yes! The thrill of clicking through endless menus, desperately searching for that elusive shader that will somehow make your model look less like a lumpy marshmallow and more like a refined piece of art. It’s a bit like being in a relationship, really. You start with high hopes and a glossy exterior, only to end up questioning all your life choices as you try to figure out how to make it work.

    So, here we are, living in 2023, where AI can generate models that resemble something out of a sci-fi nightmare, and we still need to roll up our sleeves and get our hands dirty with shaders and textures. Who knew that the future would come with so many manual adjustments? Isn’t technology just delightful?

    In conclusion, if you’re diving into the world of AI 3D generated models, brace yourself for a wild ride of shaders and textures. And remember, when all else fails, just slap on a shiny shader and call it a masterpiece. After all, art is subjective, right?

    #3DModels #AIGenerated #SubstancePainter #Shaders #DigitalArt
    In a world where we’re all desperately trying to make our digital creations look as lifelike as a potato, we now have the privilege of diving headfirst into the revolutionary topic of "Separate shaders in AI 3D generated models." Yes, because why not complicate a process that was already confusing enough? Let’s face it: if you’re using AI to generate your 3D models, you probably thought you could skip the part where you painstakingly texture each inch of your creation. But alas! Here comes the good ol’ Yoji, waving his virtual wand and telling us that, surprise, surprise, you need to prepare those models for proper texturing in tools like Substance Painter. Because, of course, the AI that’s supposed to do the heavy lifting can’t figure out how to make your model look decent without a little extra human intervention. But don’t worry! Yoji has got your back with his meticulous “how-to” on separating shaders. Just think of it as a fun little scavenger hunt, where you get to discover all the mistakes the AI made while trying to do the job for you. Who knew that a model could look so… special? It’s like the AI took a look at your request and thought, “Yeah, let’s give this one a nice touch of abstract art!” Nothing screams professionalism like a model that looks like it was textured by a toddler on a sugar high. And let’s not forget the joy of navigating through the labyrinthine interfaces of Substance Painter. Ah, yes! The thrill of clicking through endless menus, desperately searching for that elusive shader that will somehow make your model look less like a lumpy marshmallow and more like a refined piece of art. It’s a bit like being in a relationship, really. You start with high hopes and a glossy exterior, only to end up questioning all your life choices as you try to figure out how to make it work. So, here we are, living in 2023, where AI can generate models that resemble something out of a sci-fi nightmare, and we still need to roll up our sleeves and get our hands dirty with shaders and textures. Who knew that the future would come with so many manual adjustments? Isn’t technology just delightful? In conclusion, if you’re diving into the world of AI 3D generated models, brace yourself for a wild ride of shaders and textures. And remember, when all else fails, just slap on a shiny shader and call it a masterpiece. After all, art is subjective, right? #3DModels #AIGenerated #SubstancePainter #Shaders #DigitalArt
    Separate shaders in AI 3d generated models
    Yoji shows how to prepare generated models for proper texturing in tools like Substance Painter. Source
    Like
    Love
    Wow
    Sad
    Angry
    192
    1 Comentários 0 Compartilhamentos
  • Creating a Highly Detailed Tech-Inspired Scene with Blender

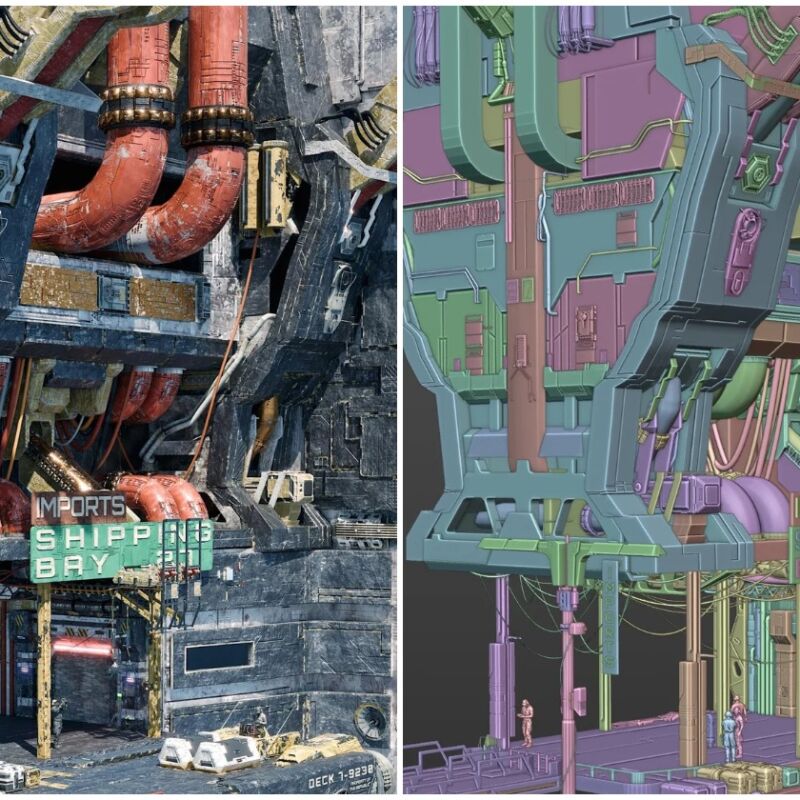
    IntroductionHello! My name is Denys. I was born and raised in Nigeria, where I'm currently based. I began my journey into 3D art in March 2022, teaching myself through online resources, starting, of course, with the iconic donut tutorial on YouTube. Since then, I've continued to grow my skills independently, and now I'm working toward a career in 3D generalism, with a particular interest in environment art.I originally got into Blender because SketchUp wasn't free, and I could not keep up with the subscriptions. While searching for alternatives, I came across Blender. That's when I realized I had installed it once years ago, but back then, the interface completely intimidated me, and I gave up on it. This time, though, I decided to stick with it – and I'm glad I did.I started out creating simple models. One of my first big projects was modeling the entire SpongeBob crew. That led to my first animation, and eventually, the first four episodes of a short animated series. As I grew more confident, I began participating in online 3D competitions, like cgandwe, where I focused on designing realistic environments. Those experiences have played a huge role in getting me to where I am today.Getting Started Before starting any scene, I always look for references. It might not be the most original approach, but it's what works best for me. One piece that inspired me was a beautiful artwork by Calder Moore. I bookmarked it as soon as I saw it back in 2023, and luckily, I finally found the time to bring it to life last month.BlockoutThe goal was to match the original camera angle and roughly model the main frame of the structures. It wasn't perfect, but modeling and placing the lower docks helped me get the perspective right. Then I moved on to modeling and positioning the major structures in the scene.I gave myself two weeks to complete this project. And as much as I enjoy modeling, I also enjoy not modeling, so I turned to asset kits and free models to help speed things up. I came across an awesome paid kit by Bigmediumsmall and instantly knew it would fit perfectly into my scene.I also downloaded a few models from Sketchfab, including a lamp, desk console, freighter controls, and a robotic arm, which I later took apart to add extra detail. Another incredibly helpful tool was the Random Flow add-on by BlenderGuppy, which made adding sci-fi elements much easier. Lastly, I pulled in some models from my older sci-fi and cyberpunk projects to round things out.Kitbashing Once I had the overall shape I was aiming for, I moved on to kitbashing to pack in as much detail as possible. There wasn't any strict method to the madness; I simply picked assets I liked, whether it was a set of pipes, vents, or even a random shape that just worked in the sci-fi context. I focused first on kitbashing the front structure, and used the Random Flow add-on to fill in areas where I didn't kitbash manually. Then I moved on to the other collections, following the same process.The freighter was the final piece of the puzzle, and I knew it was going to be a challenge. Part of me wanted to model it entirely from scratch, but the more practical side knew I could save a lot of time by sticking with my usual method. So I modeled the main shapes myself, then kitbashed the details to bring it to life. I also grabbed some crates from Sketchfab to fill out the scene.Texturing This part was easily my favorite, and there was no shortcut here. I had to meticulously create each material myself. Well, I did use PBR materials downloaded from CGAmbient as a base, but I spent a lot of time tweaking and editing them to get everything just right.Texturing has always been my favorite stage when building scenes like this. Many artists prefer external tools like Substance 3D Painter, but I've learned so much about procedural texturing, especially from RyanKingArt, that I couldn't let it go. It's such a flexible and rewarding approach, and I love pushing it as far as I can.I wanted most of the colors in the scene to be dark, but I did keep the original color of the pipes and the pillars, just to add a little bit of vibrance to the scene. I also wanted the overall texture to be very rough and grungy. One of the biggest helps in achieving this was using the Grunge Maps from Substance 3D Painter. I found a way to extract them into Blender, and it helped.A major tool during the texturing phase was Jsplacement, which I used to procedurally generate sci-fi grids and plates. This was the icing on the cake for adding intricate details. Whenever an area felt too flat, I applied bump maps with these grids and panels to bring the materials to life. For example, both the lamp pole and the entire black metal material feature these Jsplacement Maps.Lighting For this, I didn't do anything fancy. I knew the scene was in a high altitude, so I looked for HDRI with a cloudless sky, and I boosted the saturation up a little to give it that high altitude look.Post-Production The rendering phase was challenging since I was working on a low-end laptop. I couldn't render the entire scene all at once, so I broke it down by collections and rendered them as separate layers. Then, I composited the layers together in post-production. I'm not big on heavy post-work, so I kept it simple, mostly tweaking brightness and saturation on my phone. That's about it for the post-production process.Conclusion The entire project took me 10 days to complete, working at least four hours each day. Although I've expressed my love for texturing, my favorite part of this project was the detailing and kitbashing. I really enjoyed piecing all the small details together. The most challenging part was deciding which assets to use and where to place them. I had a lot of greebles to choose from, but I'm happy with the ones I selected; they felt like a perfect fit for the scene.I know kitbashing sometimes gets a negative reputation in the 3D community, but I found it incredibly relieving. Honestly, this project wouldn't have come together without it, so I fully embraced the process.I'm excited to keep making projects like this. The world of 3D art is truly an endless and vast realm, and I encourage every artist like me to keep exploring it, one project at a time.Denys Molokwu, 3D Artist
    #creating #highly #detailed #techinspired #scene
    Creating a Highly Detailed Tech-Inspired Scene with Blender
    IntroductionHello! My name is Denys. I was born and raised in Nigeria, where I'm currently based. I began my journey into 3D art in March 2022, teaching myself through online resources, starting, of course, with the iconic donut tutorial on YouTube. Since then, I've continued to grow my skills independently, and now I'm working toward a career in 3D generalism, with a particular interest in environment art.I originally got into Blender because SketchUp wasn't free, and I could not keep up with the subscriptions. While searching for alternatives, I came across Blender. That's when I realized I had installed it once years ago, but back then, the interface completely intimidated me, and I gave up on it. This time, though, I decided to stick with it – and I'm glad I did.I started out creating simple models. One of my first big projects was modeling the entire SpongeBob crew. That led to my first animation, and eventually, the first four episodes of a short animated series. As I grew more confident, I began participating in online 3D competitions, like cgandwe, where I focused on designing realistic environments. Those experiences have played a huge role in getting me to where I am today.Getting Started Before starting any scene, I always look for references. It might not be the most original approach, but it's what works best for me. One piece that inspired me was a beautiful artwork by Calder Moore. I bookmarked it as soon as I saw it back in 2023, and luckily, I finally found the time to bring it to life last month.BlockoutThe goal was to match the original camera angle and roughly model the main frame of the structures. It wasn't perfect, but modeling and placing the lower docks helped me get the perspective right. Then I moved on to modeling and positioning the major structures in the scene.I gave myself two weeks to complete this project. And as much as I enjoy modeling, I also enjoy not modeling, so I turned to asset kits and free models to help speed things up. I came across an awesome paid kit by Bigmediumsmall and instantly knew it would fit perfectly into my scene.I also downloaded a few models from Sketchfab, including a lamp, desk console, freighter controls, and a robotic arm, which I later took apart to add extra detail. Another incredibly helpful tool was the Random Flow add-on by BlenderGuppy, which made adding sci-fi elements much easier. Lastly, I pulled in some models from my older sci-fi and cyberpunk projects to round things out.Kitbashing Once I had the overall shape I was aiming for, I moved on to kitbashing to pack in as much detail as possible. There wasn't any strict method to the madness; I simply picked assets I liked, whether it was a set of pipes, vents, or even a random shape that just worked in the sci-fi context. I focused first on kitbashing the front structure, and used the Random Flow add-on to fill in areas where I didn't kitbash manually. Then I moved on to the other collections, following the same process.The freighter was the final piece of the puzzle, and I knew it was going to be a challenge. Part of me wanted to model it entirely from scratch, but the more practical side knew I could save a lot of time by sticking with my usual method. So I modeled the main shapes myself, then kitbashed the details to bring it to life. I also grabbed some crates from Sketchfab to fill out the scene.Texturing This part was easily my favorite, and there was no shortcut here. I had to meticulously create each material myself. Well, I did use PBR materials downloaded from CGAmbient as a base, but I spent a lot of time tweaking and editing them to get everything just right.Texturing has always been my favorite stage when building scenes like this. Many artists prefer external tools like Substance 3D Painter, but I've learned so much about procedural texturing, especially from RyanKingArt, that I couldn't let it go. It's such a flexible and rewarding approach, and I love pushing it as far as I can.I wanted most of the colors in the scene to be dark, but I did keep the original color of the pipes and the pillars, just to add a little bit of vibrance to the scene. I also wanted the overall texture to be very rough and grungy. One of the biggest helps in achieving this was using the Grunge Maps from Substance 3D Painter. I found a way to extract them into Blender, and it helped.A major tool during the texturing phase was Jsplacement, which I used to procedurally generate sci-fi grids and plates. This was the icing on the cake for adding intricate details. Whenever an area felt too flat, I applied bump maps with these grids and panels to bring the materials to life. For example, both the lamp pole and the entire black metal material feature these Jsplacement Maps.Lighting For this, I didn't do anything fancy. I knew the scene was in a high altitude, so I looked for HDRI with a cloudless sky, and I boosted the saturation up a little to give it that high altitude look.Post-Production The rendering phase was challenging since I was working on a low-end laptop. I couldn't render the entire scene all at once, so I broke it down by collections and rendered them as separate layers. Then, I composited the layers together in post-production. I'm not big on heavy post-work, so I kept it simple, mostly tweaking brightness and saturation on my phone. That's about it for the post-production process.Conclusion The entire project took me 10 days to complete, working at least four hours each day. Although I've expressed my love for texturing, my favorite part of this project was the detailing and kitbashing. I really enjoyed piecing all the small details together. The most challenging part was deciding which assets to use and where to place them. I had a lot of greebles to choose from, but I'm happy with the ones I selected; they felt like a perfect fit for the scene.I know kitbashing sometimes gets a negative reputation in the 3D community, but I found it incredibly relieving. Honestly, this project wouldn't have come together without it, so I fully embraced the process.I'm excited to keep making projects like this. The world of 3D art is truly an endless and vast realm, and I encourage every artist like me to keep exploring it, one project at a time.Denys Molokwu, 3D Artist #creating #highly #detailed #techinspired #scene
    80.LV
    Creating a Highly Detailed Tech-Inspired Scene with Blender
    IntroductionHello! My name is Denys. I was born and raised in Nigeria, where I'm currently based. I began my journey into 3D art in March 2022, teaching myself through online resources, starting, of course, with the iconic donut tutorial on YouTube. Since then, I've continued to grow my skills independently, and now I'm working toward a career in 3D generalism, with a particular interest in environment art.I originally got into Blender because SketchUp wasn't free, and I could not keep up with the subscriptions. While searching for alternatives, I came across Blender. That's when I realized I had installed it once years ago, but back then, the interface completely intimidated me, and I gave up on it. This time, though, I decided to stick with it – and I'm glad I did.I started out creating simple models. One of my first big projects was modeling the entire SpongeBob crew. That led to my first animation, and eventually, the first four episodes of a short animated series (though it's still incomplete). As I grew more confident, I began participating in online 3D competitions, like cgandwe, where I focused on designing realistic environments. Those experiences have played a huge role in getting me to where I am today.Getting Started Before starting any scene, I always look for references. It might not be the most original approach, but it's what works best for me. One piece that inspired me was a beautiful artwork by Calder Moore. I bookmarked it as soon as I saw it back in 2023, and luckily, I finally found the time to bring it to life last month.BlockoutThe goal was to match the original camera angle and roughly model the main frame of the structures. It wasn't perfect, but modeling and placing the lower docks helped me get the perspective right. Then I moved on to modeling and positioning the major structures in the scene.I gave myself two weeks to complete this project. And as much as I enjoy modeling, I also enjoy not modeling, so I turned to asset kits and free models to help speed things up. I came across an awesome paid kit by Bigmediumsmall and instantly knew it would fit perfectly into my scene.I also downloaded a few models from Sketchfab, including a lamp, desk console, freighter controls, and a robotic arm, which I later took apart to add extra detail. Another incredibly helpful tool was the Random Flow add-on by BlenderGuppy, which made adding sci-fi elements much easier. Lastly, I pulled in some models from my older sci-fi and cyberpunk projects to round things out.Kitbashing Once I had the overall shape I was aiming for, I moved on to kitbashing to pack in as much detail as possible. There wasn't any strict method to the madness; I simply picked assets I liked, whether it was a set of pipes, vents, or even a random shape that just worked in the sci-fi context. I focused first on kitbashing the front structure, and used the Random Flow add-on to fill in areas where I didn't kitbash manually. Then I moved on to the other collections, following the same process.The freighter was the final piece of the puzzle, and I knew it was going to be a challenge. Part of me wanted to model it entirely from scratch, but the more practical side knew I could save a lot of time by sticking with my usual method. So I modeled the main shapes myself, then kitbashed the details to bring it to life. I also grabbed some crates from Sketchfab to fill out the scene.Texturing This part was easily my favorite, and there was no shortcut here. I had to meticulously create each material myself. Well, I did use PBR materials downloaded from CGAmbient as a base, but I spent a lot of time tweaking and editing them to get everything just right.Texturing has always been my favorite stage when building scenes like this. Many artists prefer external tools like Substance 3D Painter (which I did use for some of the models), but I've learned so much about procedural texturing, especially from RyanKingArt, that I couldn't let it go. It's such a flexible and rewarding approach, and I love pushing it as far as I can.I wanted most of the colors in the scene to be dark, but I did keep the original color of the pipes and the pillars, just to add a little bit of vibrance to the scene. I also wanted the overall texture to be very rough and grungy. One of the biggest helps in achieving this was using the Grunge Maps from Substance 3D Painter. I found a way to extract them into Blender, and it helped.A major tool during the texturing phase was Jsplacement, which I used to procedurally generate sci-fi grids and plates. This was the icing on the cake for adding intricate details. Whenever an area felt too flat, I applied bump maps with these grids and panels to bring the materials to life. For example, both the lamp pole and the entire black metal material feature these Jsplacement Maps.Lighting For this, I didn't do anything fancy. I knew the scene was in a high altitude, so I looked for HDRI with a cloudless sky, and I boosted the saturation up a little to give it that high altitude look.Post-Production The rendering phase was challenging since I was working on a low-end laptop. I couldn't render the entire scene all at once, so I broke it down by collections and rendered them as separate layers. Then, I composited the layers together in post-production. I'm not big on heavy post-work, so I kept it simple, mostly tweaking brightness and saturation on my phone. That's about it for the post-production process.Conclusion The entire project took me 10 days to complete, working at least four hours each day. Although I've expressed my love for texturing, my favorite part of this project was the detailing and kitbashing. I really enjoyed piecing all the small details together. The most challenging part was deciding which assets to use and where to place them. I had a lot of greebles to choose from, but I'm happy with the ones I selected; they felt like a perfect fit for the scene.I know kitbashing sometimes gets a negative reputation in the 3D community, but I found it incredibly relieving. Honestly, this project wouldn't have come together without it, so I fully embraced the process.I'm excited to keep making projects like this. The world of 3D art is truly an endless and vast realm, and I encourage every artist like me to keep exploring it, one project at a time.Denys Molokwu, 3D Artist
    0 Comentários 0 Compartilhamentos
  • Download Unreal Engine 2D animation plugin Odyssey for free

    html PUBLIC "-//W3C//DTD HTML 4.0 Transitional//EN" ";

    Epic Games has made Odyssey, Praxinos’s 2D animation plugin for Unreal Engine, available for free through Fab, its online marketplace.The software – which can be used for storyboarding or texturing 3D models as well as creating 2D animation – is available for free indefinitely, and will continue to be updated.
    A serious professional 2D animation tool created by former TVPaint staff

    Created by a team that includes former developers of standalone 2D animation software TVPaint, Odyssey has been in development since 2019.Part of that work was also funded by Epic Games, with Praxinos receiving an Epic MegaGrant for two of Odyssey’s precursors: painting plugin Iliad and storyboard and layout plugin Epos.
    Odyssey itself was released last year after beta testing at French animation studios including Ellipse Animation, and originally cost €1,200 for a perpetual license.

    Create 2D animation, storyboards, or textures for 3D models

    Although Odyssey’s main function is to create 2D animation – for movie and broadcast projects, motion graphics, or even games – the plugin adds a wider 2D toolset to Unreal Engine.Other use cases include storyboarding – you can import image sequences and turn them into storyboards – and texturing, either by painting 2D texture maps, or painting onto 3D meshes.
    It supports both 2D and 3D workflows, with the 2D editors – which include a flipbook editor as well as the 2D texture and animation editors – complemented by a 3D viewport.
    The bitmap painting toolset makes use of Unreal Engine’s Blueprint system, making it possible for users to create new painting brushes using a node-based workflow, and supports pressure sensitivity on graphics tablets.
    There is also a vector toolset for creating hard-edged shapes.
    Animation features include onion skinning, Toon Boom-style shift and trace, and automatic inbetweening.
    The plugin supports standard 2D and 3D file formats, including PSD, FBX and USD.
    Available for free indefinitely, but future updates planned

    Epic Games regularly makes Unreal Engine assets available for free through Fab, but usually only for a limited period of time.Odyssey is different, in that it is available for free indefinitely.
    However, it will continue to get updates: according to Epic Games’ blog post, Praxinos “plans to work in close collaboration with Epic Games and continue to enhance Odyssey”.
    As well as Odyssey itself, Praxinos offers custom tools development and training, which will hopefully also help to support future development.
    System requirements and availability

    Odyssey is compatible with Unreal Engine 5.6 on Windows and macOS. It is available for free under a Fab Standard License, including for commercial use. about Odyssey on Praxinos’s website
    Find more detailed information in Odyssey’s online manual
    Download Unreal Engine 2D animation plugin Odyssey for free

    Have your say on this story by following CG Channel on Facebook, Instagram and X. As well as being able to comment on stories, followers of our social media accounts can see videos we don’t post on the site itself, including making-ofs for the latest VFX movies, animations, games cinematics and motion graphics projects.
    #download #unreal #engine #animation #plugin
    Download Unreal Engine 2D animation plugin Odyssey for free
    html PUBLIC "-//W3C//DTD HTML 4.0 Transitional//EN" "; Epic Games has made Odyssey, Praxinos’s 2D animation plugin for Unreal Engine, available for free through Fab, its online marketplace.The software – which can be used for storyboarding or texturing 3D models as well as creating 2D animation – is available for free indefinitely, and will continue to be updated. A serious professional 2D animation tool created by former TVPaint staff Created by a team that includes former developers of standalone 2D animation software TVPaint, Odyssey has been in development since 2019.Part of that work was also funded by Epic Games, with Praxinos receiving an Epic MegaGrant for two of Odyssey’s precursors: painting plugin Iliad and storyboard and layout plugin Epos. Odyssey itself was released last year after beta testing at French animation studios including Ellipse Animation, and originally cost €1,200 for a perpetual license. Create 2D animation, storyboards, or textures for 3D models Although Odyssey’s main function is to create 2D animation – for movie and broadcast projects, motion graphics, or even games – the plugin adds a wider 2D toolset to Unreal Engine.Other use cases include storyboarding – you can import image sequences and turn them into storyboards – and texturing, either by painting 2D texture maps, or painting onto 3D meshes. It supports both 2D and 3D workflows, with the 2D editors – which include a flipbook editor as well as the 2D texture and animation editors – complemented by a 3D viewport. The bitmap painting toolset makes use of Unreal Engine’s Blueprint system, making it possible for users to create new painting brushes using a node-based workflow, and supports pressure sensitivity on graphics tablets. There is also a vector toolset for creating hard-edged shapes. Animation features include onion skinning, Toon Boom-style shift and trace, and automatic inbetweening. The plugin supports standard 2D and 3D file formats, including PSD, FBX and USD. Available for free indefinitely, but future updates planned Epic Games regularly makes Unreal Engine assets available for free through Fab, but usually only for a limited period of time.Odyssey is different, in that it is available for free indefinitely. However, it will continue to get updates: according to Epic Games’ blog post, Praxinos “plans to work in close collaboration with Epic Games and continue to enhance Odyssey”. As well as Odyssey itself, Praxinos offers custom tools development and training, which will hopefully also help to support future development. System requirements and availability Odyssey is compatible with Unreal Engine 5.6 on Windows and macOS. It is available for free under a Fab Standard License, including for commercial use. about Odyssey on Praxinos’s website Find more detailed information in Odyssey’s online manual Download Unreal Engine 2D animation plugin Odyssey for free Have your say on this story by following CG Channel on Facebook, Instagram and X. As well as being able to comment on stories, followers of our social media accounts can see videos we don’t post on the site itself, including making-ofs for the latest VFX movies, animations, games cinematics and motion graphics projects. #download #unreal #engine #animation #plugin
    Download Unreal Engine 2D animation plugin Odyssey for free
    html PUBLIC "-//W3C//DTD HTML 4.0 Transitional//EN" "http://www.w3.org/TR/REC-html40/loose.dtd" Epic Games has made Odyssey, Praxinos’s 2D animation plugin for Unreal Engine, available for free through Fab, its online marketplace.The software – which can be used for storyboarding or texturing 3D models as well as creating 2D animation – is available for free indefinitely, and will continue to be updated. A serious professional 2D animation tool created by former TVPaint staff Created by a team that includes former developers of standalone 2D animation software TVPaint, Odyssey has been in development since 2019.Part of that work was also funded by Epic Games, with Praxinos receiving an Epic MegaGrant for two of Odyssey’s precursors: painting plugin Iliad and storyboard and layout plugin Epos. Odyssey itself was released last year after beta testing at French animation studios including Ellipse Animation, and originally cost €1,200 for a perpetual license. Create 2D animation, storyboards, or textures for 3D models Although Odyssey’s main function is to create 2D animation – for movie and broadcast projects, motion graphics, or even games – the plugin adds a wider 2D toolset to Unreal Engine.Other use cases include storyboarding – you can import image sequences and turn them into storyboards – and texturing, either by painting 2D texture maps, or painting onto 3D meshes. It supports both 2D and 3D workflows, with the 2D editors – which include a flipbook editor as well as the 2D texture and animation editors – complemented by a 3D viewport. The bitmap painting toolset makes use of Unreal Engine’s Blueprint system, making it possible for users to create new painting brushes using a node-based workflow, and supports pressure sensitivity on graphics tablets. There is also a vector toolset for creating hard-edged shapes. Animation features include onion skinning, Toon Boom-style shift and trace, and automatic inbetweening. The plugin supports standard 2D and 3D file formats, including PSD, FBX and USD. Available for free indefinitely, but future updates planned Epic Games regularly makes Unreal Engine assets available for free through Fab, but usually only for a limited period of time.Odyssey is different, in that it is available for free indefinitely. However, it will continue to get updates: according to Epic Games’ blog post, Praxinos “plans to work in close collaboration with Epic Games and continue to enhance Odyssey”. As well as Odyssey itself, Praxinos offers custom tools development and training, which will hopefully also help to support future development. System requirements and availability Odyssey is compatible with Unreal Engine 5.6 on Windows and macOS. It is available for free under a Fab Standard License, including for commercial use.Read more about Odyssey on Praxinos’s website Find more detailed information in Odyssey’s online manual Download Unreal Engine 2D animation plugin Odyssey for free Have your say on this story by following CG Channel on Facebook, Instagram and X (formerly Twitter). As well as being able to comment on stories, followers of our social media accounts can see videos we don’t post on the site itself, including making-ofs for the latest VFX movies, animations, games cinematics and motion graphics projects.
    0 Comentários 0 Compartilhamentos
  • Hard-Surface 3D/VR Mech Design

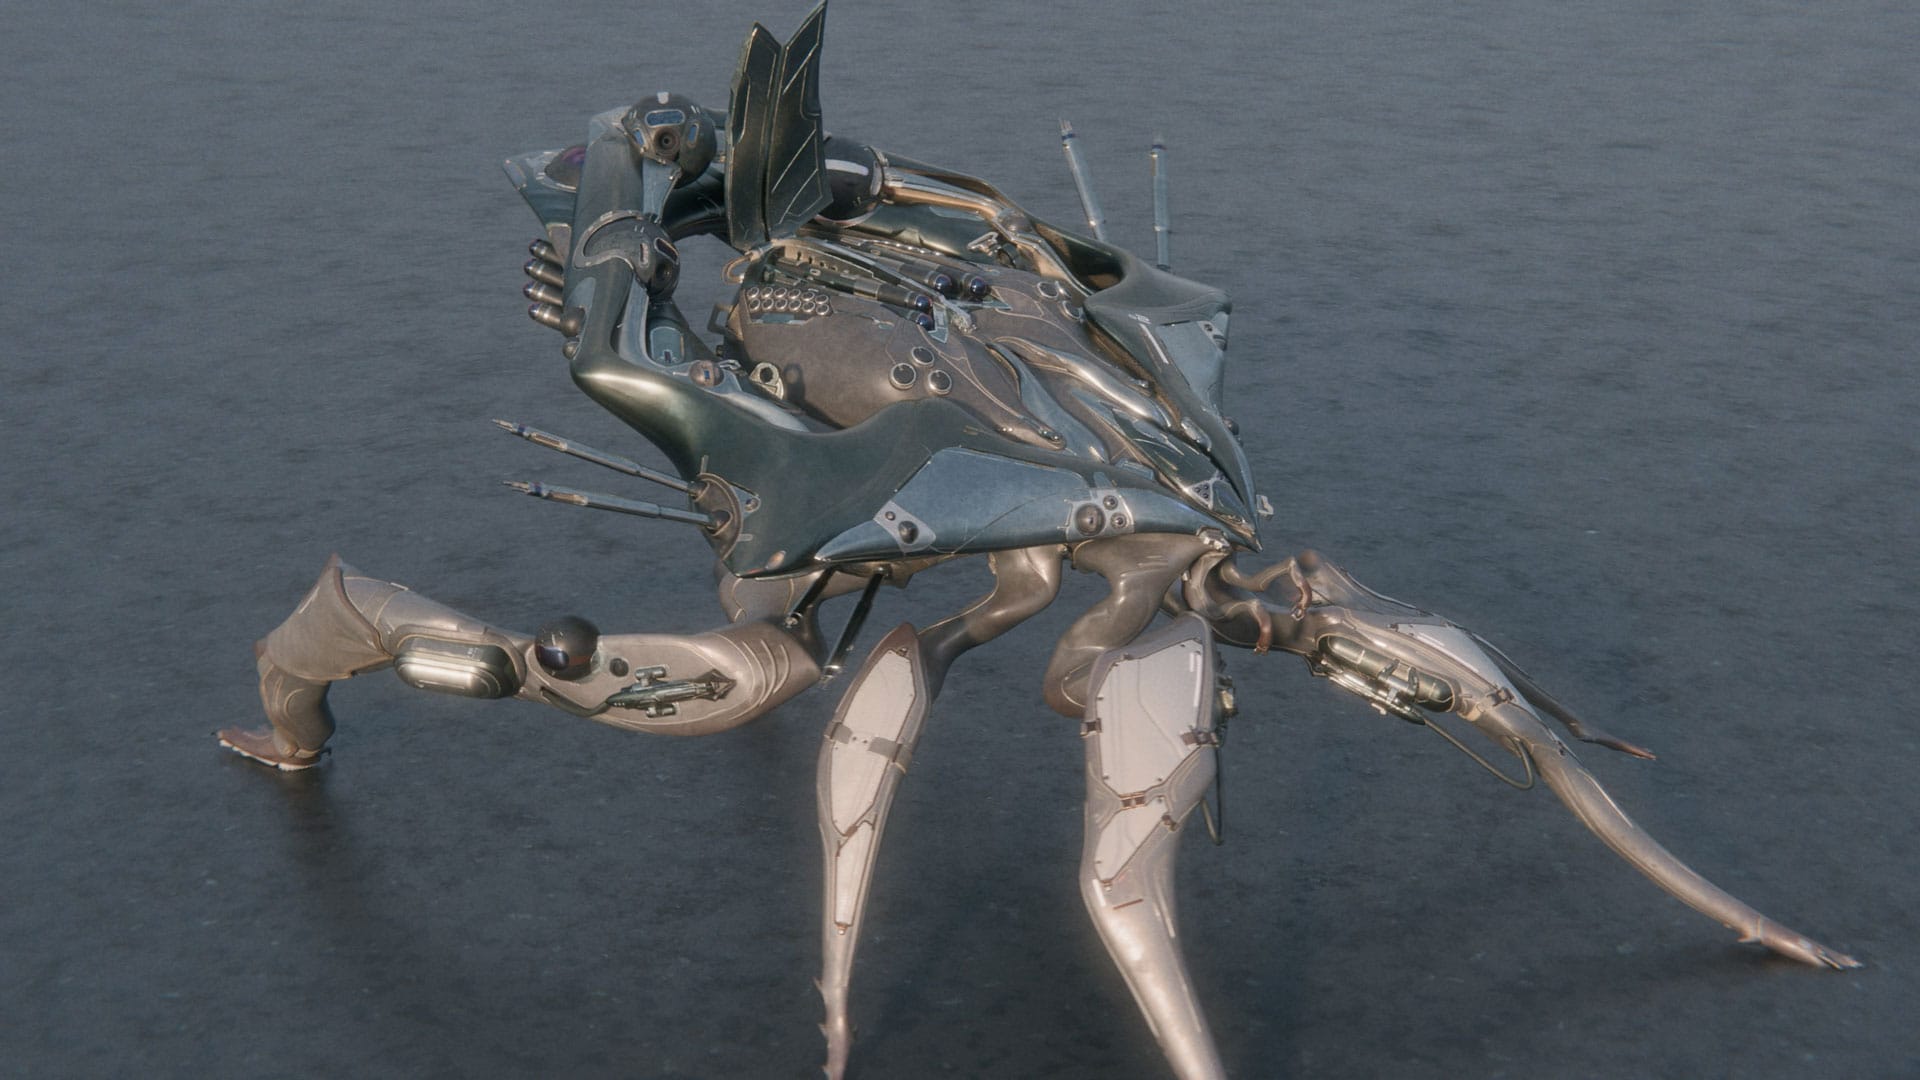
    Substance 3D Modeler, ZBrush & Blender Workflow with Corey GoochThis workshop guides artists through the process of designing and sculpting a conceptual mech in VR using Adobe Substance 3D Modeler. ZBrush is used to fine-tune the model’s details, and the final presentation is taken care of in Blender. Over the course of 7 hours, Corey Gooch, Visual Development Artist and 3D Specialist at Studio ARTILUS, discusses the fundamentals of sculpting in Substance 3D Modeler and walks through a series of videos detailing the creation of a carefully crafted autonomous mech. Beginner and intermediate-level artists will have the opportunity to learn Corey’s professional approach to reference collection and integration into Substance 3D Modeler. They will also explore all of the basics of its VR sculpting tools and discover detailed explanations of tools and techniques for achieving organic and mechanical forms. Corey also offers strategies for placing key design features and balancing functionality with form.Moving into ZBrush, Corey demonstrates how to optimize the deforming components for rigging and texturing, and achieve the finer details that cannotbe achieved in VR alone. Techniques for preparing your mech for animation, posing, and 3D printing considerations are also covered. In the final portion of the workshop, Corey jumps into Blender to provide a cursory and high-level overview of rigging, texturing, animating, and how to prepare models for 3D printing. Throughout the workshop, Corey shares the thought processes behind why he designs the way he does and how his chosen tools work together to achieve his vision. Artists will gain helpful insight into Corey’s decision-making process, which focuses on functionality and effective problem-solving during a creative workflow. By completing this workshop, artists will have a solid grasp of at least 80 percent of the tools in Substance 3D Modeler and have sound insights into how to sculpt, refine, and bring their concepts to life using ZBrush and Blender. Corey has provided his .smod raw sculpt file and ZBrush .cfg file as a downloadable resource with this workshop.WATCH NOW
    #hardsurface #3dvr #mech #design
    Hard-Surface 3D/VR Mech Design
    Substance 3D Modeler, ZBrush & Blender Workflow with Corey GoochThis workshop guides artists through the process of designing and sculpting a conceptual mech in VR using Adobe Substance 3D Modeler. ZBrush is used to fine-tune the model’s details, and the final presentation is taken care of in Blender. Over the course of 7 hours, Corey Gooch, Visual Development Artist and 3D Specialist at Studio ARTILUS, discusses the fundamentals of sculpting in Substance 3D Modeler and walks through a series of videos detailing the creation of a carefully crafted autonomous mech. Beginner and intermediate-level artists will have the opportunity to learn Corey’s professional approach to reference collection and integration into Substance 3D Modeler. They will also explore all of the basics of its VR sculpting tools and discover detailed explanations of tools and techniques for achieving organic and mechanical forms. Corey also offers strategies for placing key design features and balancing functionality with form.Moving into ZBrush, Corey demonstrates how to optimize the deforming components for rigging and texturing, and achieve the finer details that cannotbe achieved in VR alone. Techniques for preparing your mech for animation, posing, and 3D printing considerations are also covered. In the final portion of the workshop, Corey jumps into Blender to provide a cursory and high-level overview of rigging, texturing, animating, and how to prepare models for 3D printing. Throughout the workshop, Corey shares the thought processes behind why he designs the way he does and how his chosen tools work together to achieve his vision. Artists will gain helpful insight into Corey’s decision-making process, which focuses on functionality and effective problem-solving during a creative workflow. By completing this workshop, artists will have a solid grasp of at least 80 percent of the tools in Substance 3D Modeler and have sound insights into how to sculpt, refine, and bring their concepts to life using ZBrush and Blender. Corey has provided his .smod raw sculpt file and ZBrush .cfg file as a downloadable resource with this workshop.WATCH NOW #hardsurface #3dvr #mech #design
    THEGNOMONWORKSHOP.COM
    Hard-Surface 3D/VR Mech Design
    Substance 3D Modeler, ZBrush & Blender Workflow with Corey GoochThis workshop guides artists through the process of designing and sculpting a conceptual mech in VR using Adobe Substance 3D Modeler. ZBrush is used to fine-tune the model’s details, and the final presentation is taken care of in Blender. Over the course of 7 hours, Corey Gooch, Visual Development Artist and 3D Specialist at Studio ARTILUS, discusses the fundamentals of sculpting in Substance 3D Modeler and walks through a series of videos detailing the creation of a carefully crafted autonomous mech. Beginner and intermediate-level artists will have the opportunity to learn Corey’s professional approach to reference collection and integration into Substance 3D Modeler. They will also explore all of the basics of its VR sculpting tools and discover detailed explanations of tools and techniques for achieving organic and mechanical forms. Corey also offers strategies for placing key design features and balancing functionality with form.Moving into ZBrush, Corey demonstrates how to optimize the deforming components for rigging and texturing, and achieve the finer details that cannot (yet) be achieved in VR alone. Techniques for preparing your mech for animation, posing, and 3D printing considerations are also covered. In the final portion of the workshop, Corey jumps into Blender to provide a cursory and high-level overview of rigging, texturing, animating, and how to prepare models for 3D printing. Throughout the workshop, Corey shares the thought processes behind why he designs the way he does and how his chosen tools work together to achieve his vision. Artists will gain helpful insight into Corey’s decision-making process, which focuses on functionality and effective problem-solving during a creative workflow. By completing this workshop, artists will have a solid grasp of at least 80 percent of the tools in Substance 3D Modeler and have sound insights into how to sculpt, refine, and bring their concepts to life using ZBrush and Blender. Corey has provided his .smod raw sculpt file and ZBrush .cfg file as a downloadable resource with this workshop.WATCH NOW
    Like
    Love
    Wow
    Sad
    Angry
    672
    0 Comentários 0 Compartilhamentos